
Buttermilk Fried Chicken

I get asked to do this for people quite often, especially my parents and good friends. So when my buddy Phil asked me to do this I said “Sure, but you are taking the photos.” He agreed and off we went. I think everytime I do this recipe, I come up with something I would change to make it even better. So after ten times of doing this recipe, I have changed it once again to make my final recipe and post it for you all. My test kitchen, to your table.
The first thing you need to know is the importance to brining chicken. It is the single most important step of having awesome, moist, and juicy chicken. Trust me, if you skip this step do not even bother continuing on with the recipe. I have changed my brine time to 3-6 hours, no more than 6 hours or you will have salty chicken. I have done this 100 times and the end result is too salty.
Brine Ingredients:
- 8 cups of water, 4 cups to boil, 4 ice cold to add later
- 1 cup of salt
- 1/4 cup sugar
- 1/4 cup honey
- 5 garlic gloves smashed
- 4 bay leaves
- 1 orange cut into quarters
- 1 tablespoon of peppercorns
- 1 small bunch of thyme, tied.
Boil the water then add all the ingredients and boil for 10 minutes, then let cool. Add the 4 cups of ice cold water and pour over chicken. Make sure to have the chicken container in plastic or zip locks because metal can give off a metallic taste.

Phil was not here when I did the brine, so he does not get credit for this awesome brine picture. Brine for 3-6 hours. 6 HOURS MAXIMUM.
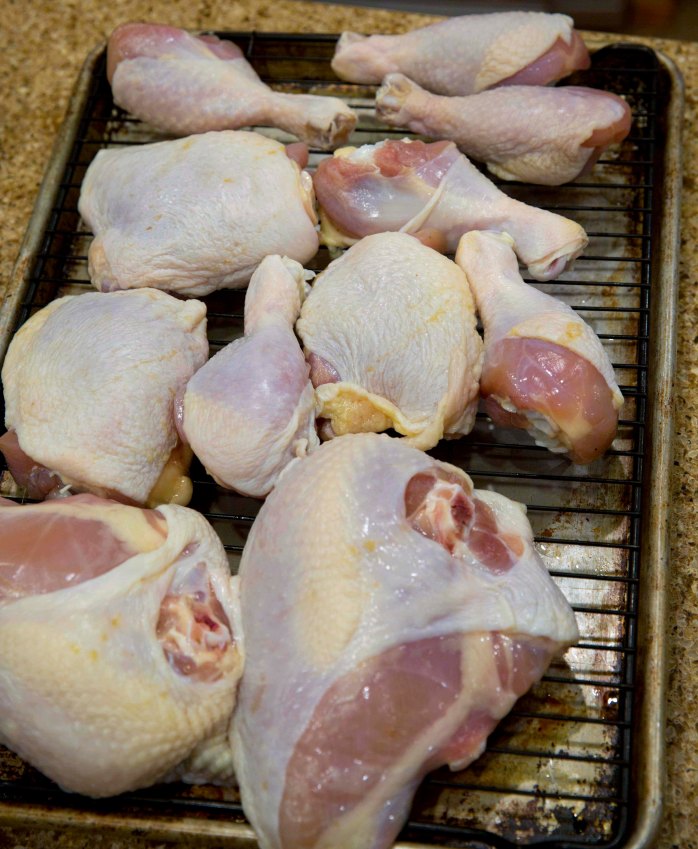
Rinse brine off, and let dry for 2 hours at room temperature. I have read this several places and it helps when it comes to keeping the oil temp perfect. One of my inside peeps at the Screen door in Portland gave me this tip…he wouldnt give me anymore than that but I will take ’em where I get ’em. After rinsing, put on a rack and let dry for two hours.
Things you shall need:
Coating
- 4 cups of all purpose flour
- 1/4 cup garlic powder
- 1/4 cup onion powder
- 3 teaspoon of cayenne pepper
- 3 teaspoon of ancho seasoning
- 2 teaspoon of ground black pepper
2 cups of buttermilk
1 quart peanut oil
So I like to use a food processor and process all my coating ingredients, then separate into two bowls.

I use the third bowl for buttermilk, and I put them in sequential order. Flour, buttermilk, then flour again, then onto parchment paper. That is exactly how I am going to do each piece. Dunking them in that exact order.

One piece in flour mix, then buttermilk, then flour mix again.


I use peanut oil for frying. I don’t know why, perhaps it makes me feel better eating fried things. I use a nice size pot because I dont like oil splatter. I pour enough oil to submerge my chicken. Some like to do it old school in a cast iron pan like grandma but that makes a huge mess. So I go with enough oil to submerse my chicken, about a quart. Bring the oil to exactly 320 degrees and do this slowly. Do not swing past it going high heat and go to 360 and start throwing chicken in. You will burn your coating and undercook the chicken. Everything is slow and easy here partner.
Once the oil is stabilized at 320 degrees on your thermometer that I know you are using because it is important.

Add a few pieces of the chicken. They will want to go to the bottom so its important as it cooks to move them around so they don’t get burned on one side.

Put a few pieces and in nice and easy, and start the timer. 13 minutes is what you are looking for adjusting the heat as if it gets lower. If the timer is getting close make sure that the chicken isn’t getting to dark. If it is lower the temp. and keep moving the chicken in the pot if needed.

I line a plate with paper towels. Then lay the pieces on them and sprinkle immediately with sea salt. This is a slow process so have your oven at 225 degrees and put the plate into the oven to keep chicken warm until you finish all the pieces.

This is where it gets dangerous. Once the chicken is done, watch your fingers because as the old Colonel used to say….finger licking good.

I use Jacobsen flake salt to sprinkle on the chicken. This photo is shown with hickory smoked Pork Shank beans (My fathers Missouri recipe).
I hope you enjoy.
The Hunting Chef
Phil Ottum Photo Credit (with the exception of the artistic brine photo off my i phone).

Recent Comments