When I get on a scent….I usually stay on it until I find what I am hunting for. I had some beef ribs down in Dallas, Texas a few years ago. A little bbq joint called The Pecan lodge, and I was on a brisket research project so I went to several of the best rated bbq places in the state that was within a 300 mile radius. While I was in line, there was a local guy, that told me “you better order the ribs, they sell out in 20 minutes”. So I did…along with the brisket. I was telling myself as I ate one, this is it…..this is what I have to master.
That was nearly three years ago.
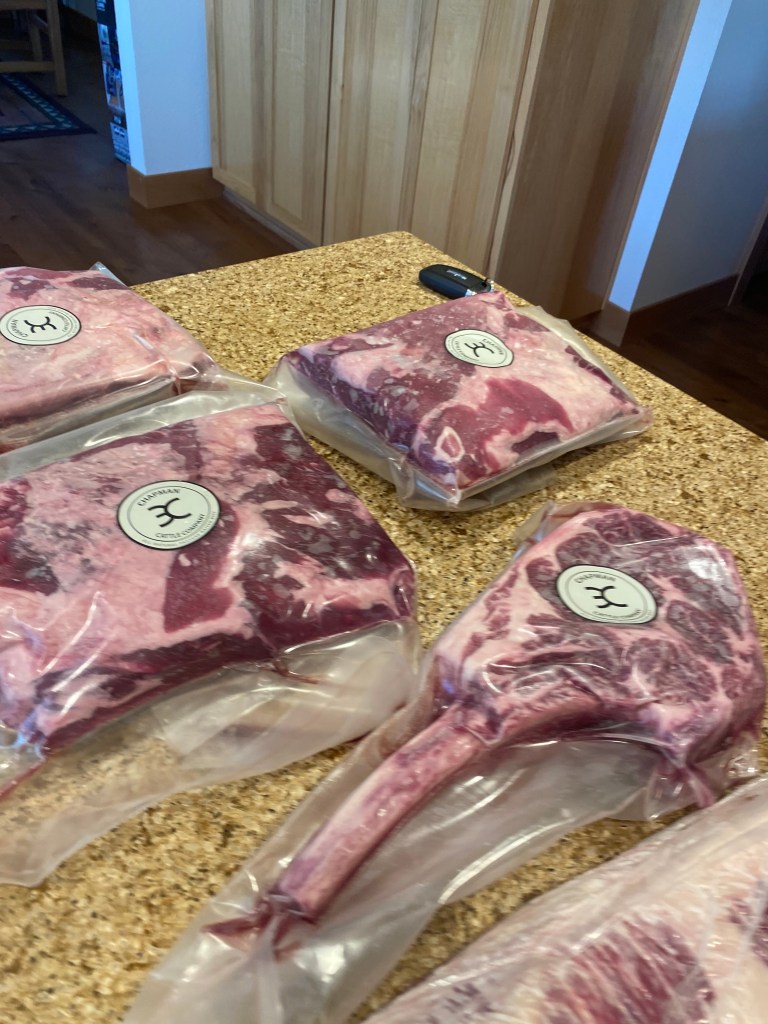
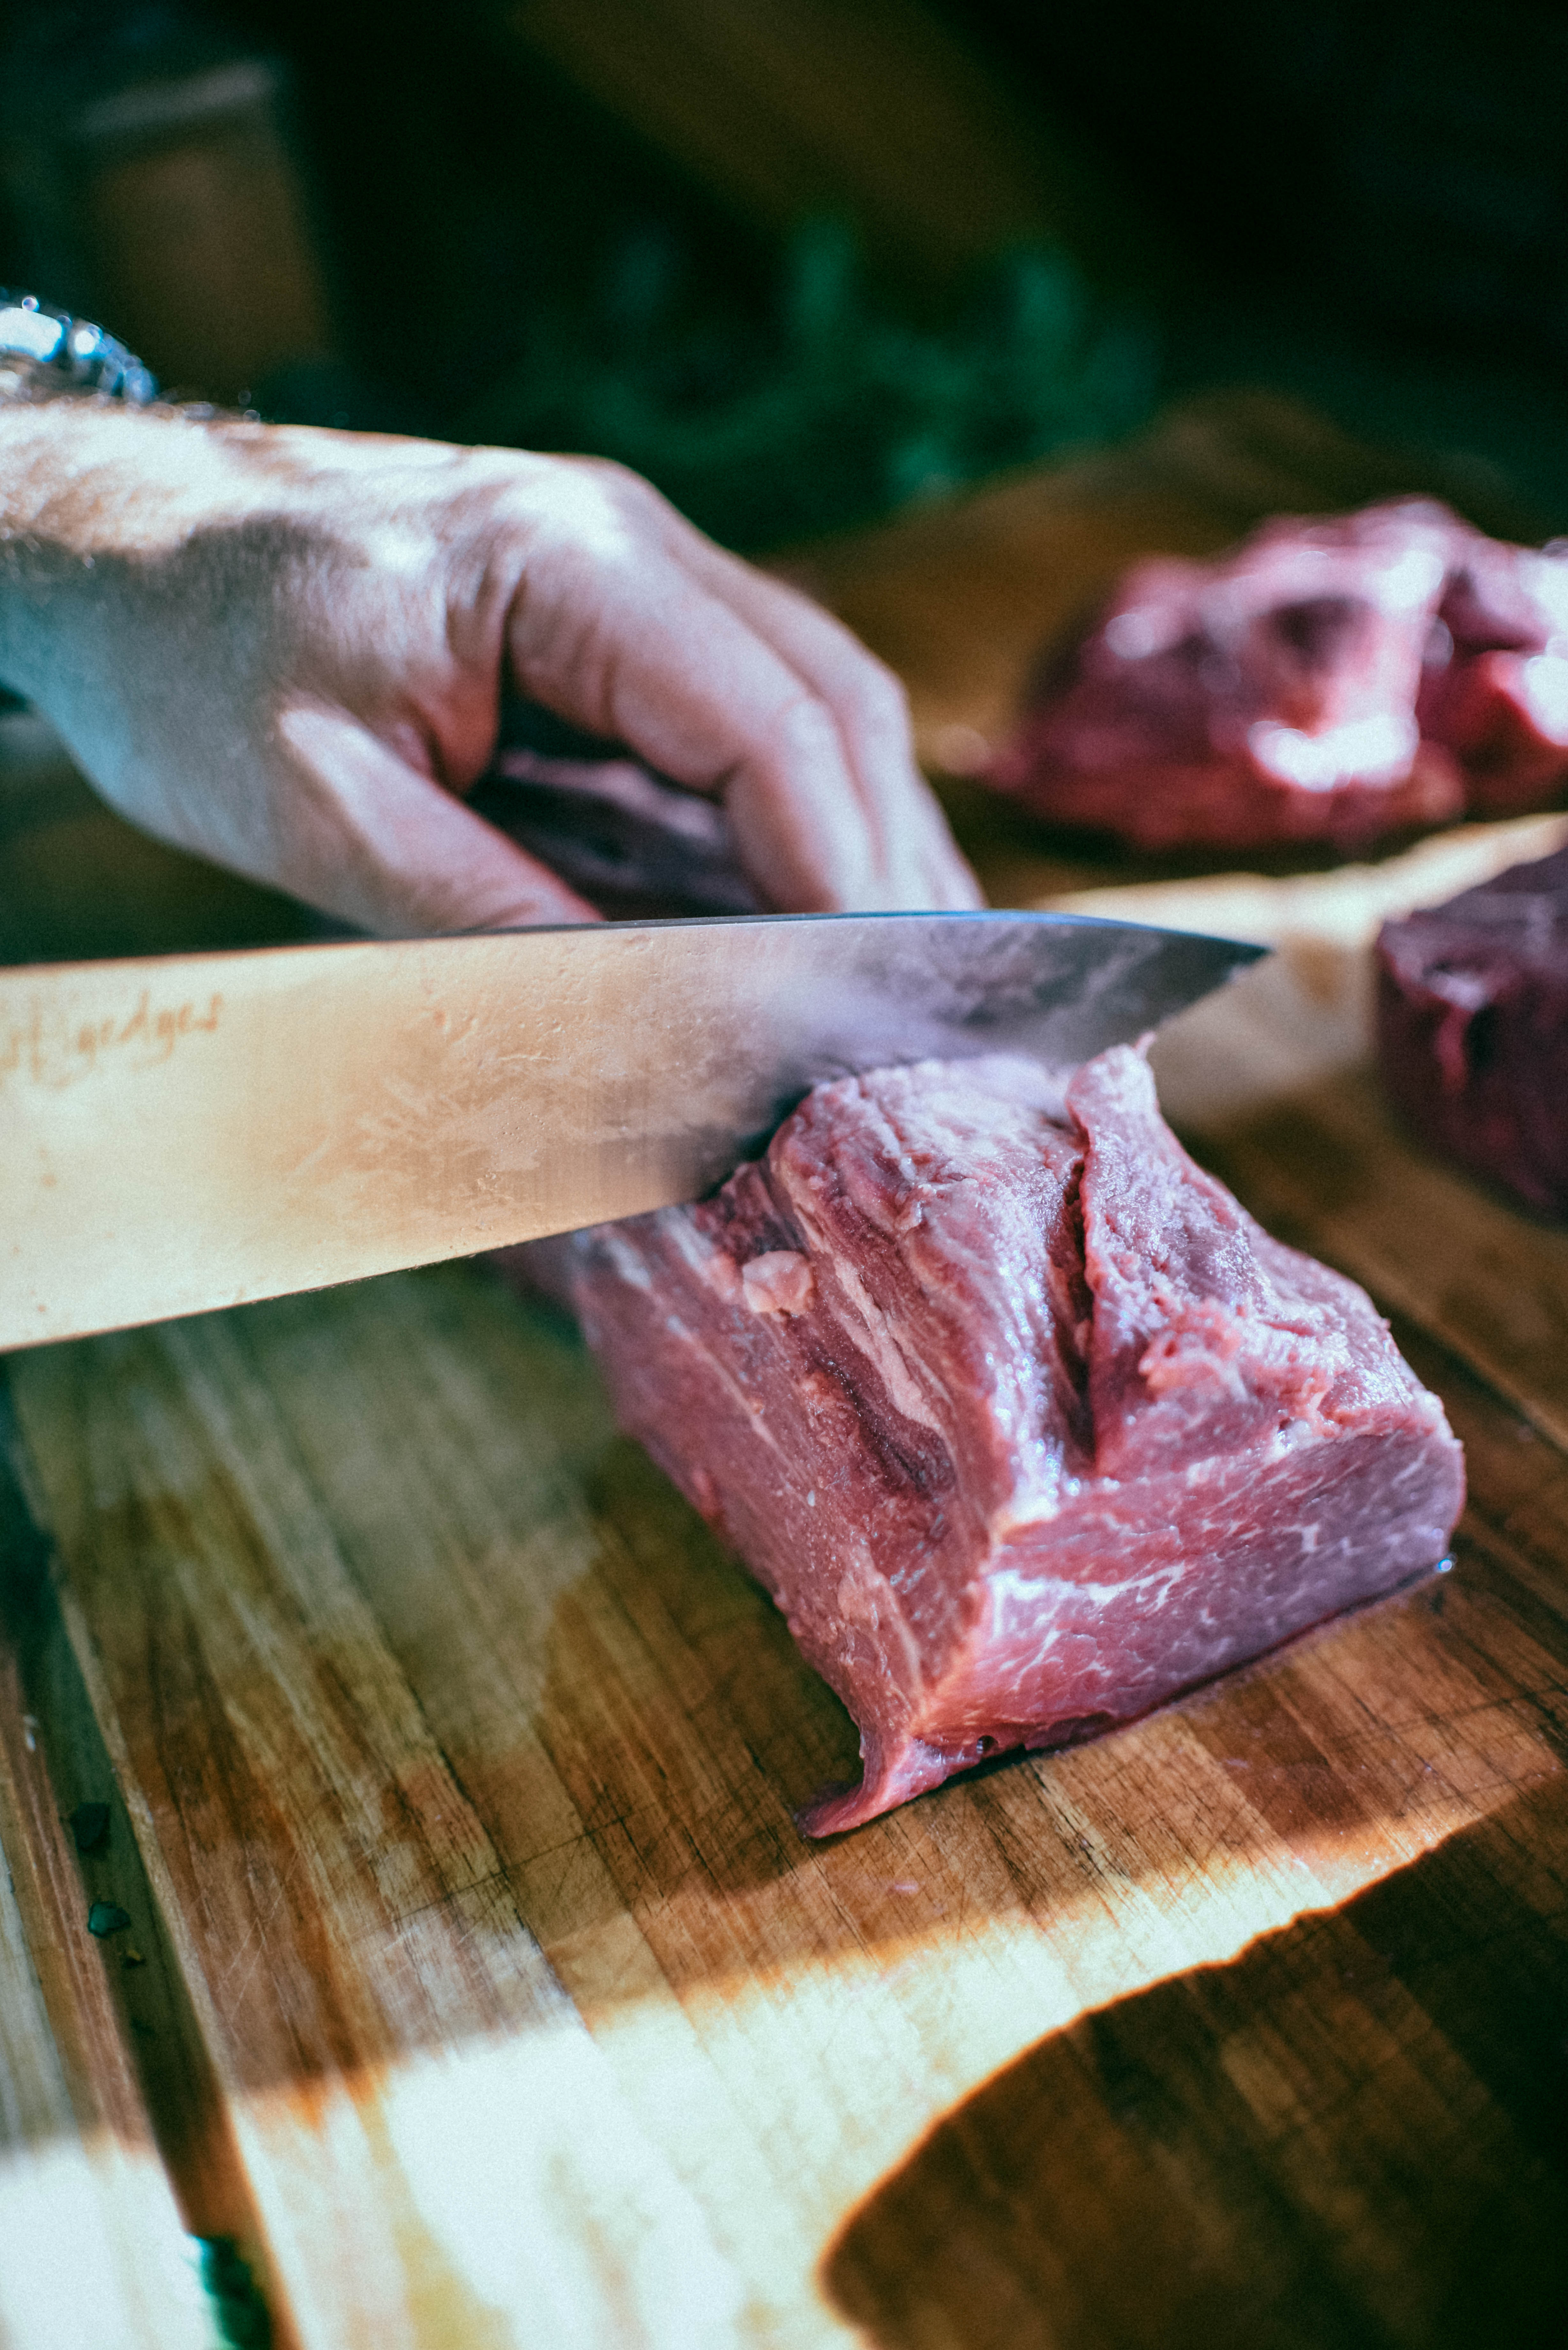
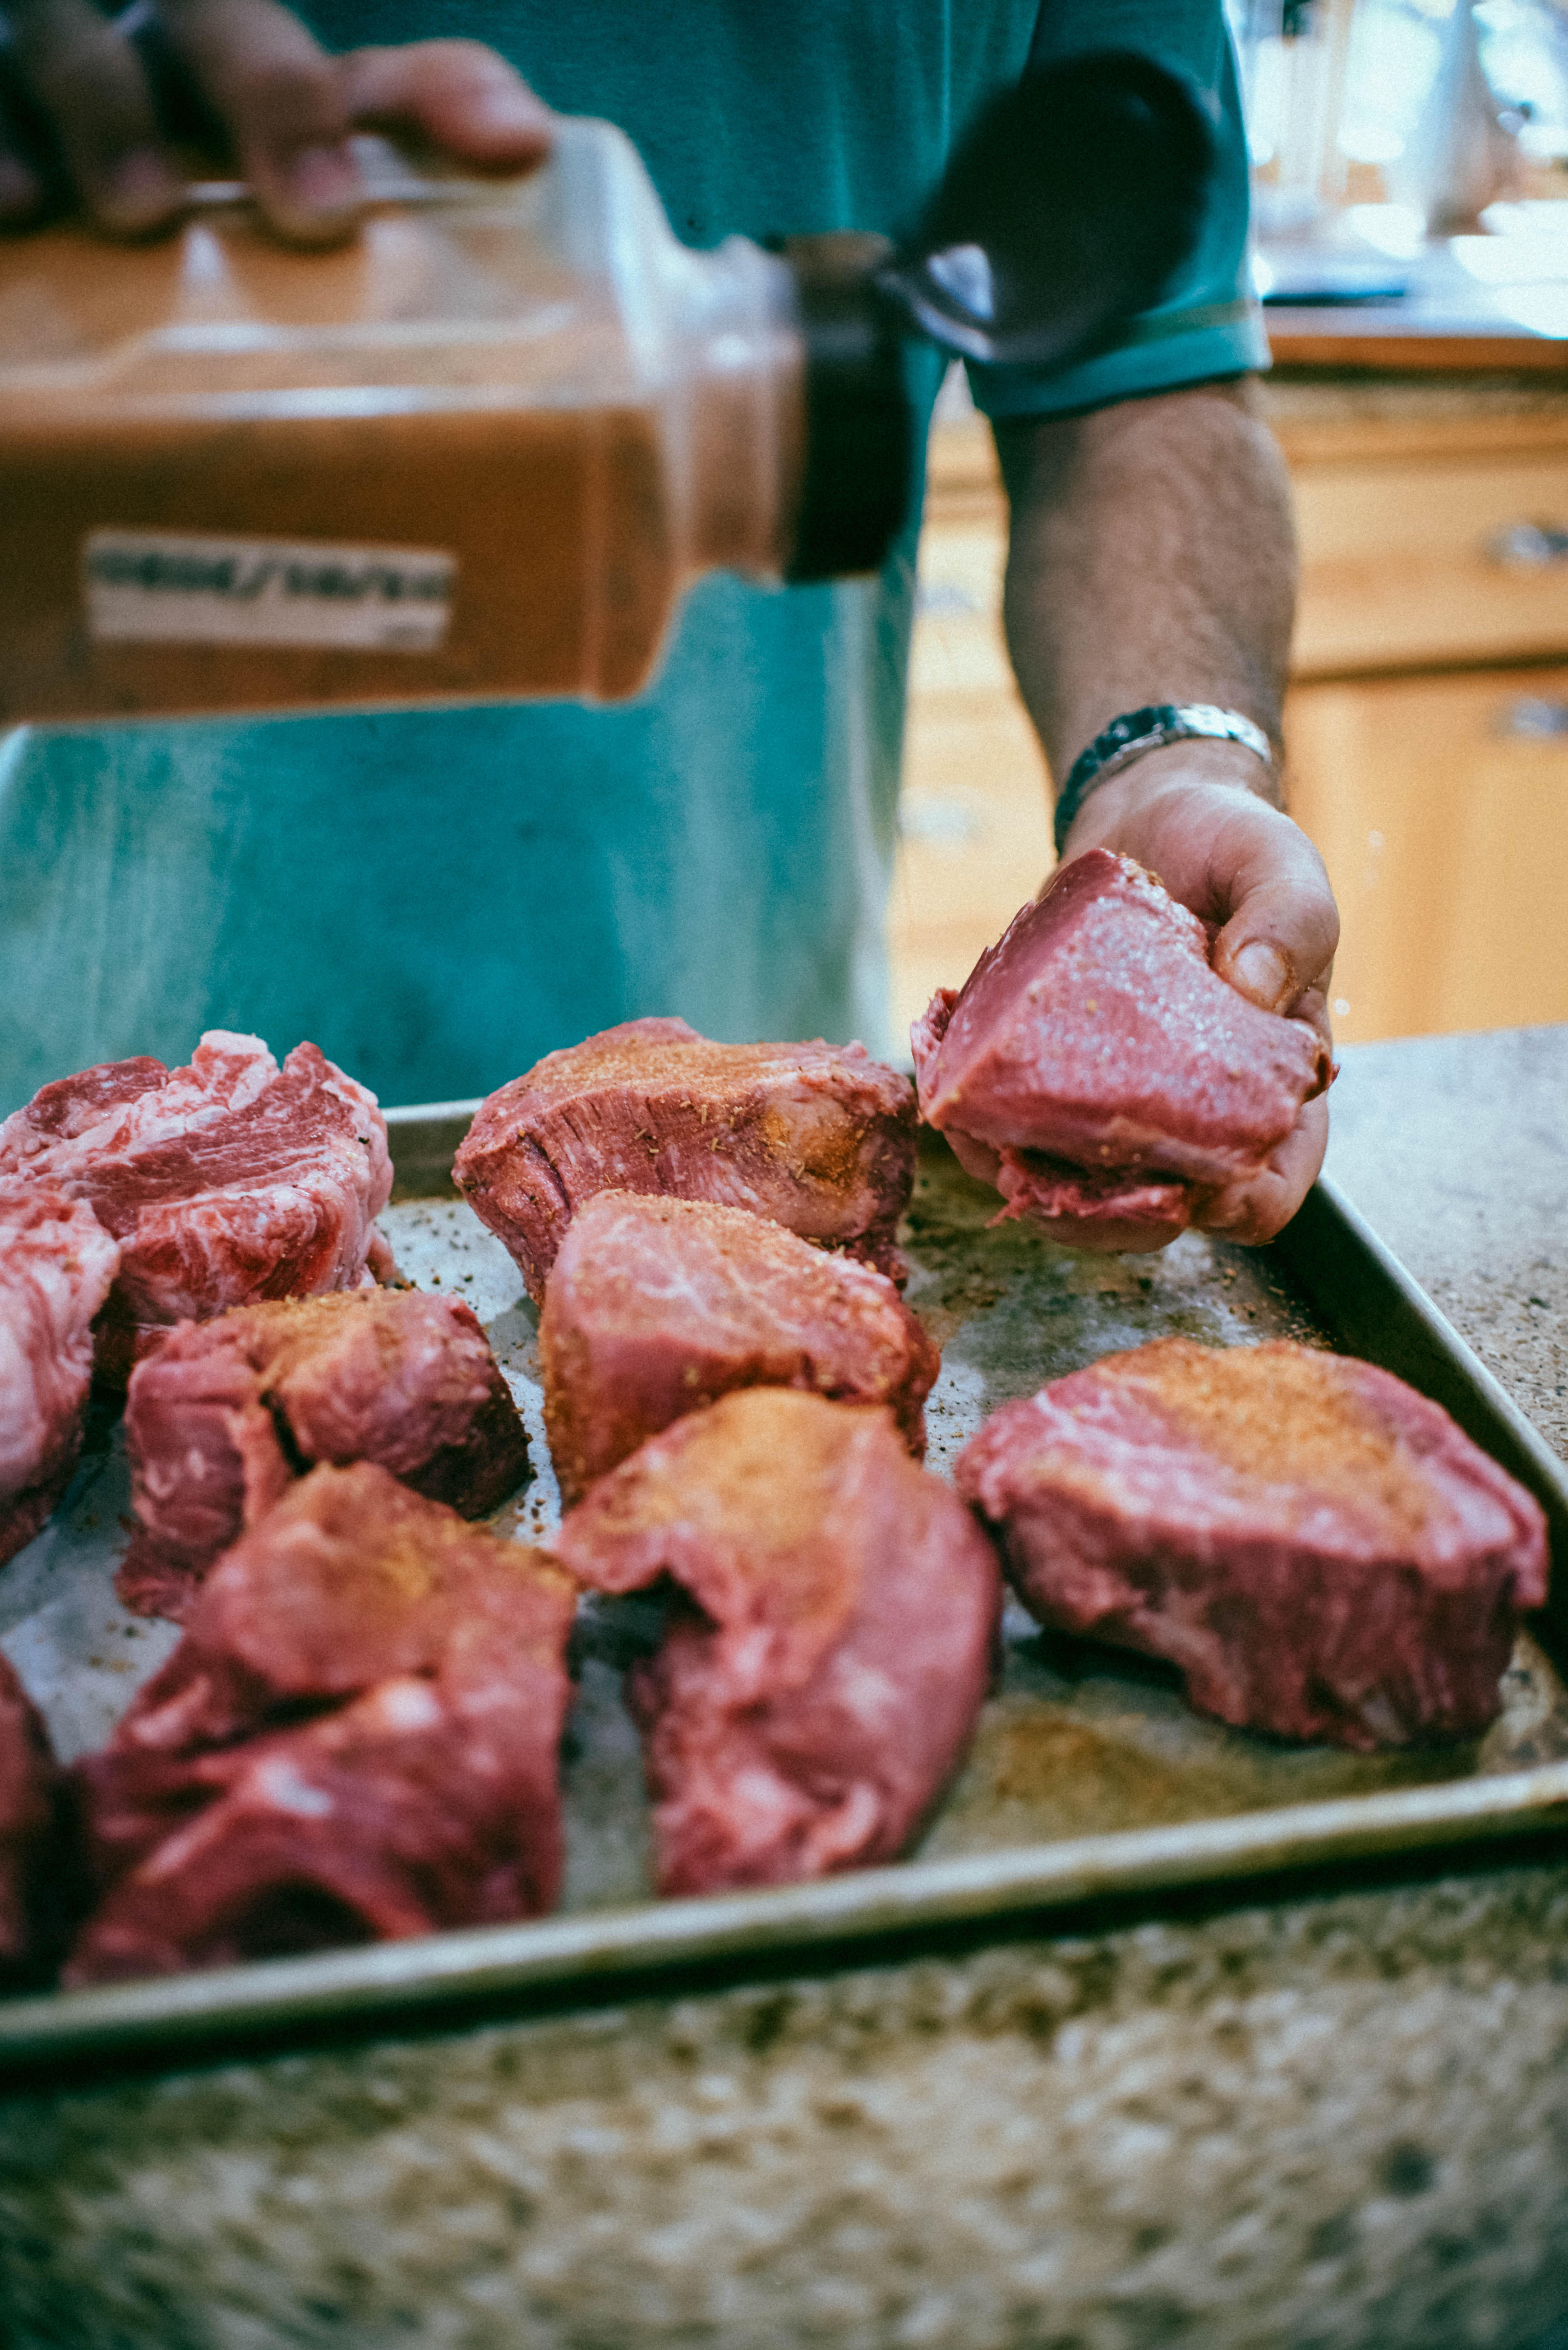
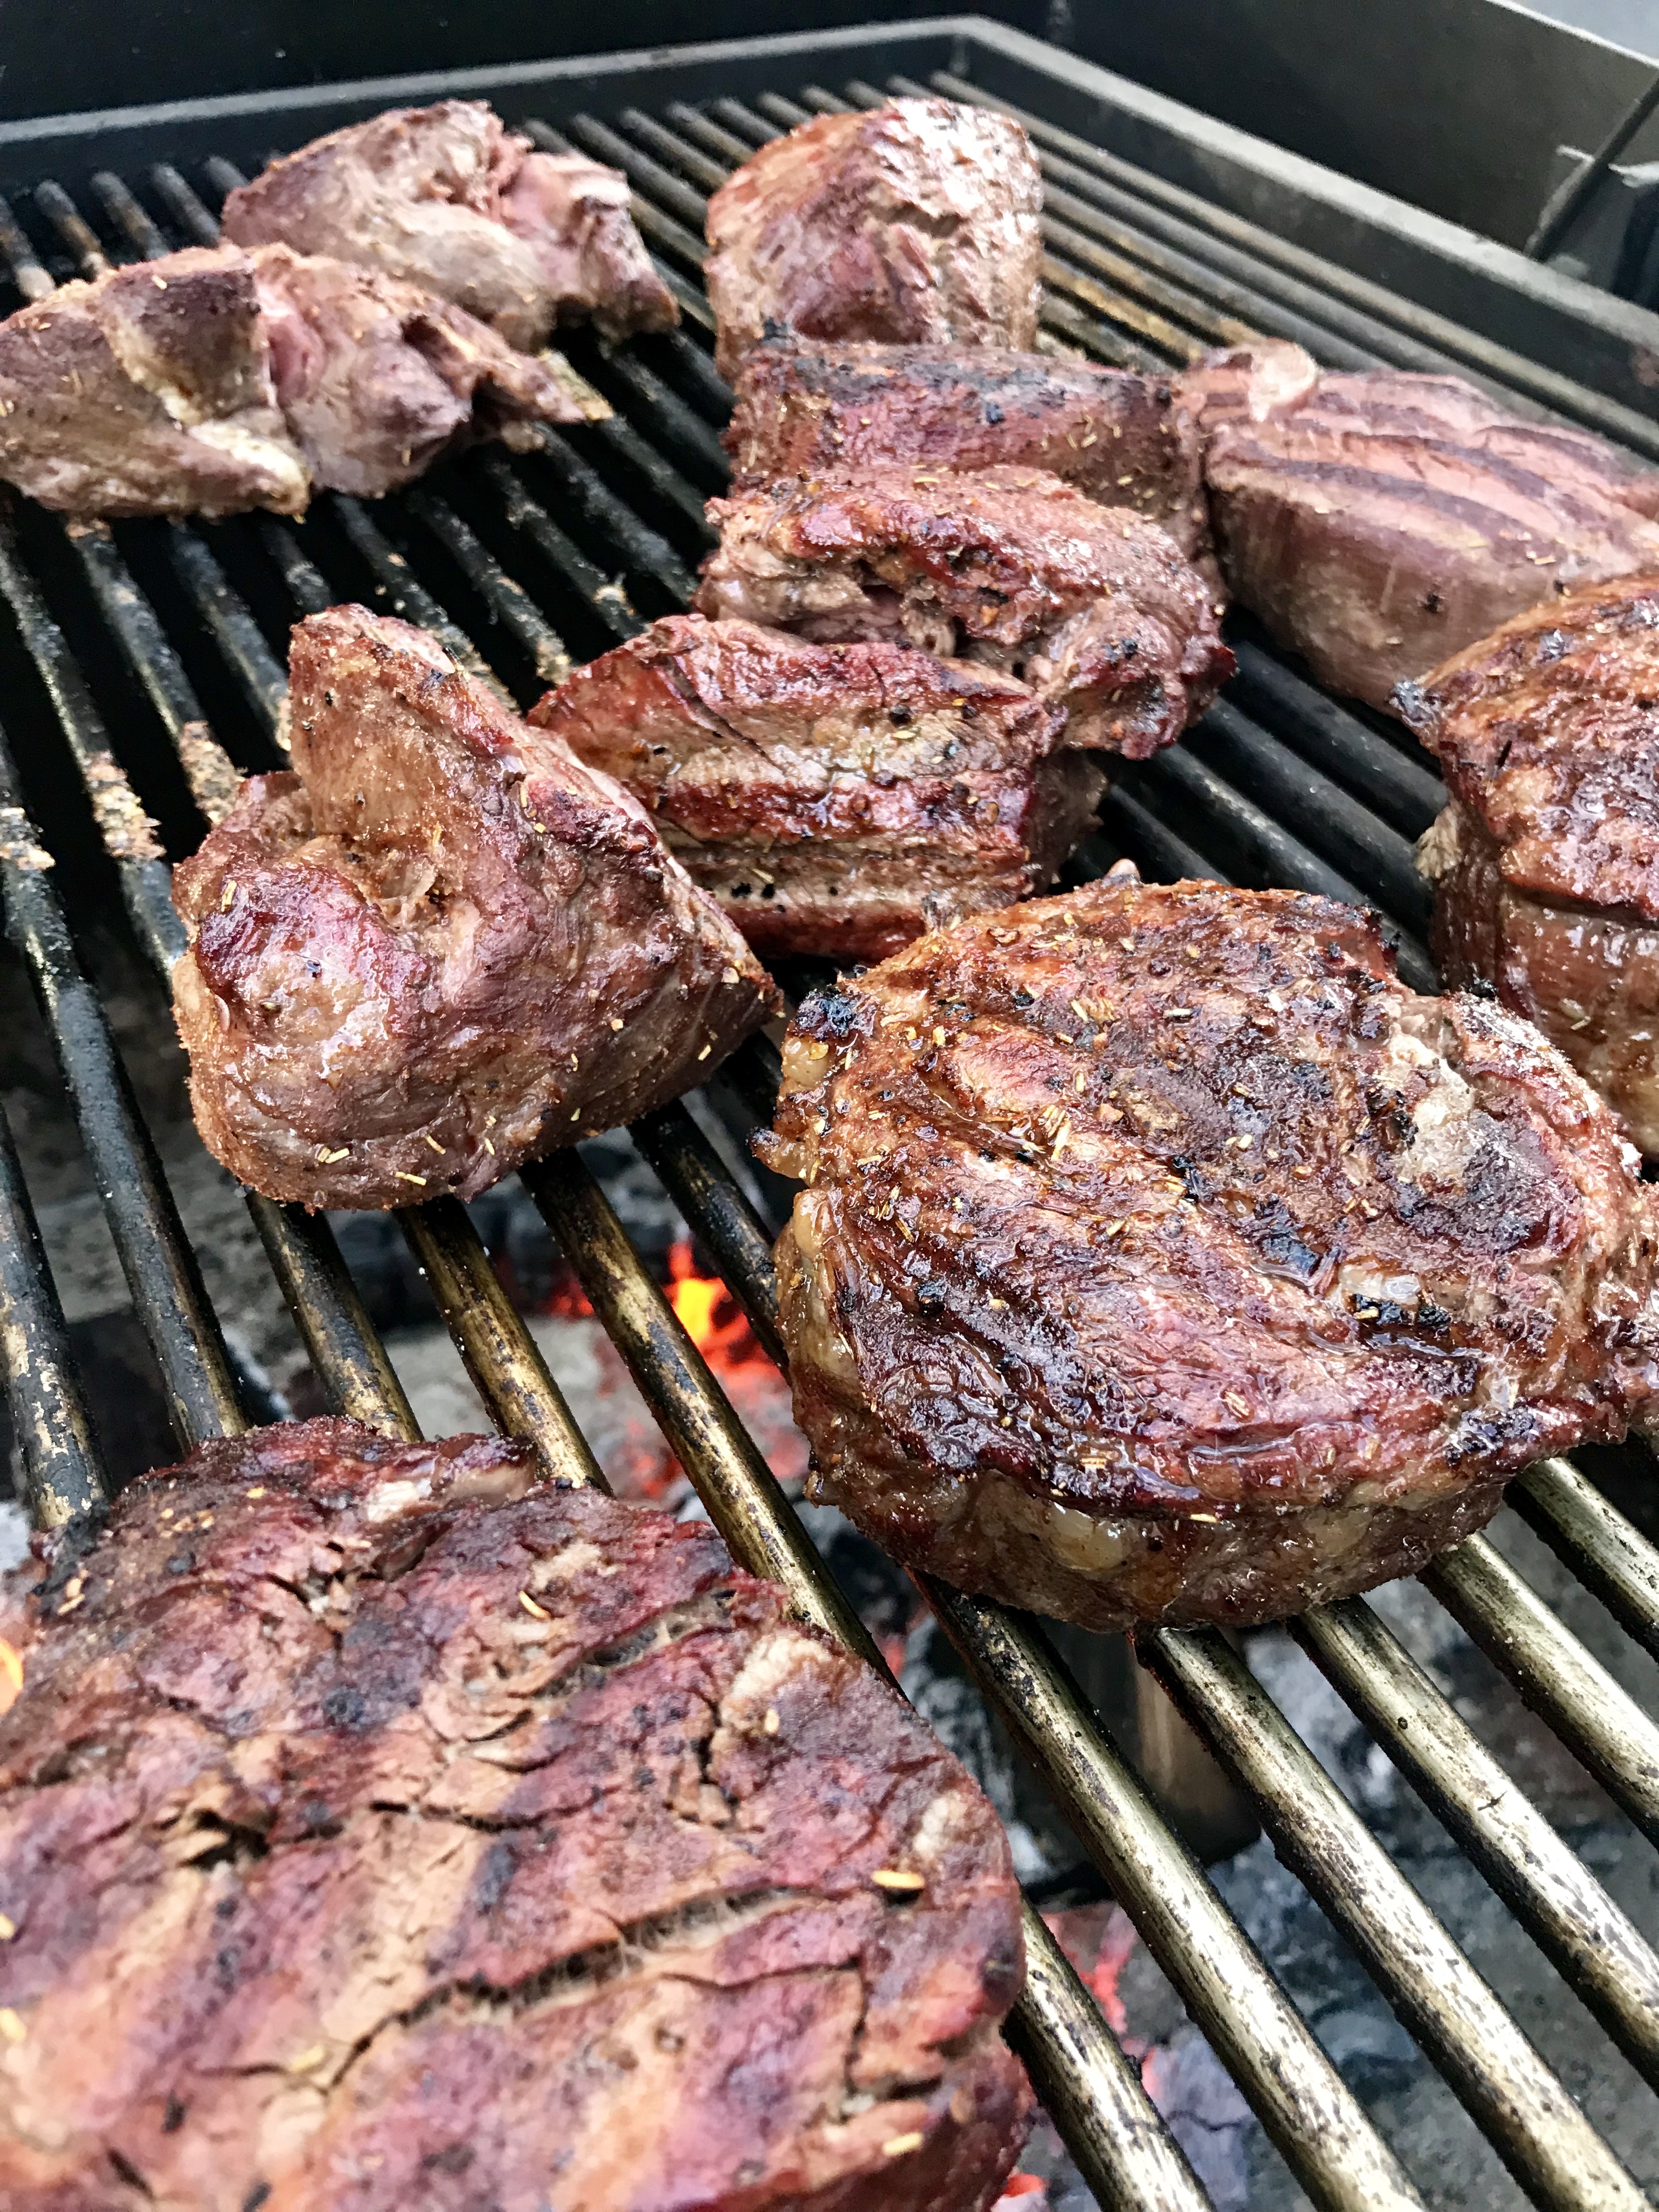
One of the key and most important elements in bbq technique is the product. I do not care what people say, if they have a poor product I will know the difference. It is the different of being good, and being great. That is one of the important factors I learned from the bbq owners that had long deep lines waiting for hours for brisket, it was not just their bbq technique, but their meat product that separated them from the rest. So that put me on a quest to find the best beef ribs I could find. That was a harder task than I suspected. I found great beef ribs from local butchers, but the beef on the slabs were too thin and never produced the gigantic ribs from Texas that I as looking for. They also lacked serious flavor I craved due to the genetic flaw. It was not the butcher, it was the type of cattle in Oregon. My butcher said “son, you need to find what your looking for in Texas, different cattle down there.” He could have been telling me that so I would leave him alone but nonetheless I marched to my new orders all the way to my lap top and started googling. I ordered from four vendors, and I found one that was superior to the others. The meat was shipped to my house, packed perfectly and still frozen. The meat was individually vacuum packed with no condensation or frost. The meat was delicately trimmed, and the thickness was accurately cut to what they advertised. I was impressed to say the least. I am going to give you my source, only because I think they do a great job and I because I had several of my friends place orders the past three weeks and they performed flawlessly. I also had their logos on all the meat and did not try to hide it in the photos. 3C Chapman Ranch, you buy direct. No mark ups, no BS, just pure tasty Texas beef.
Oh yeah….I could not help ordering the 2 inch thick Rib Eye
I use a coffee blend for my rub. I love the way it brings out the flavor, some would not prefer it. I know if I was in Texas it salt and pepper baby, and I love it. It is simple and it lets your barbeque stand alone. However, we were screwing around and it turned out pretty damn good.
4 TBS espresso coffee
2 TBS salt
1 TBS garlic powder
1 TBS onion powder
1/4 TBS cayenne powder
1 TBS sugar
1/2 TBS paprika
Rub in and let sit for a few hours. I usually do it the night before.
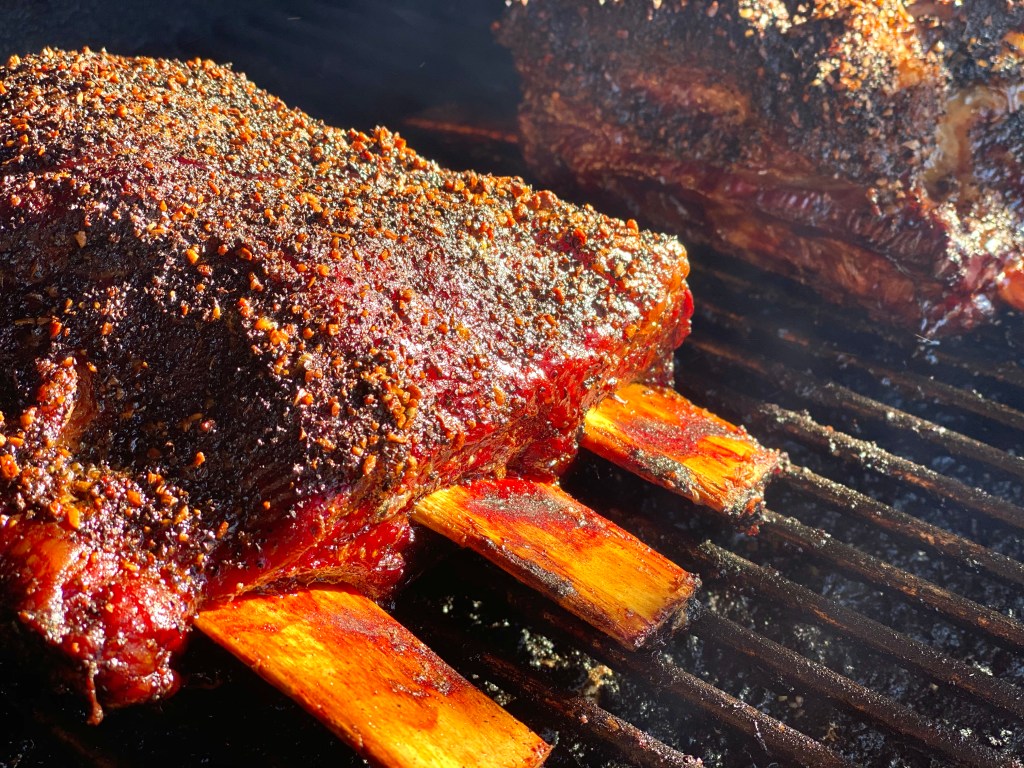
I get my smoker (REC TEC) at 225 degrees. I put a pan of water on the left side, which is away from the smoke stack so it draws across the meat to help with moisture. I also had a buddy tell me to mix 1 cup of beef broth, one cup of red wine, 1 tablespoon of olive oil into my sprayer. We tried with and without spray and we liked the spray the best. I also used jalepenos into my broth when I made it just for added flavor. I sprayed every hour for the first four hours.
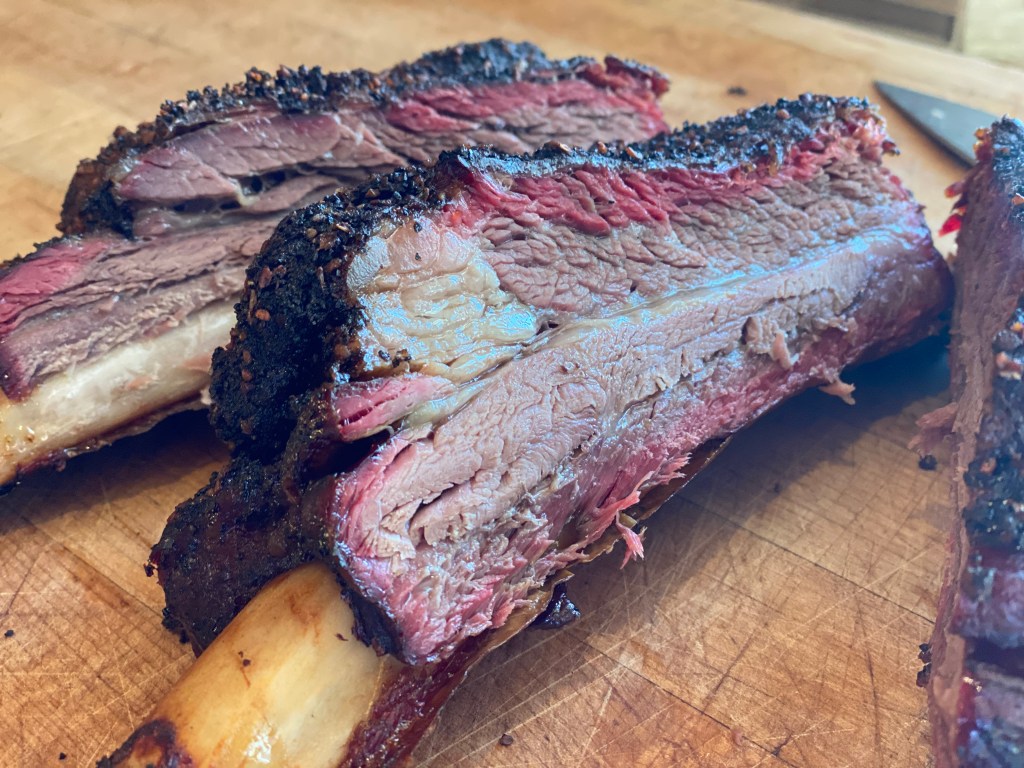
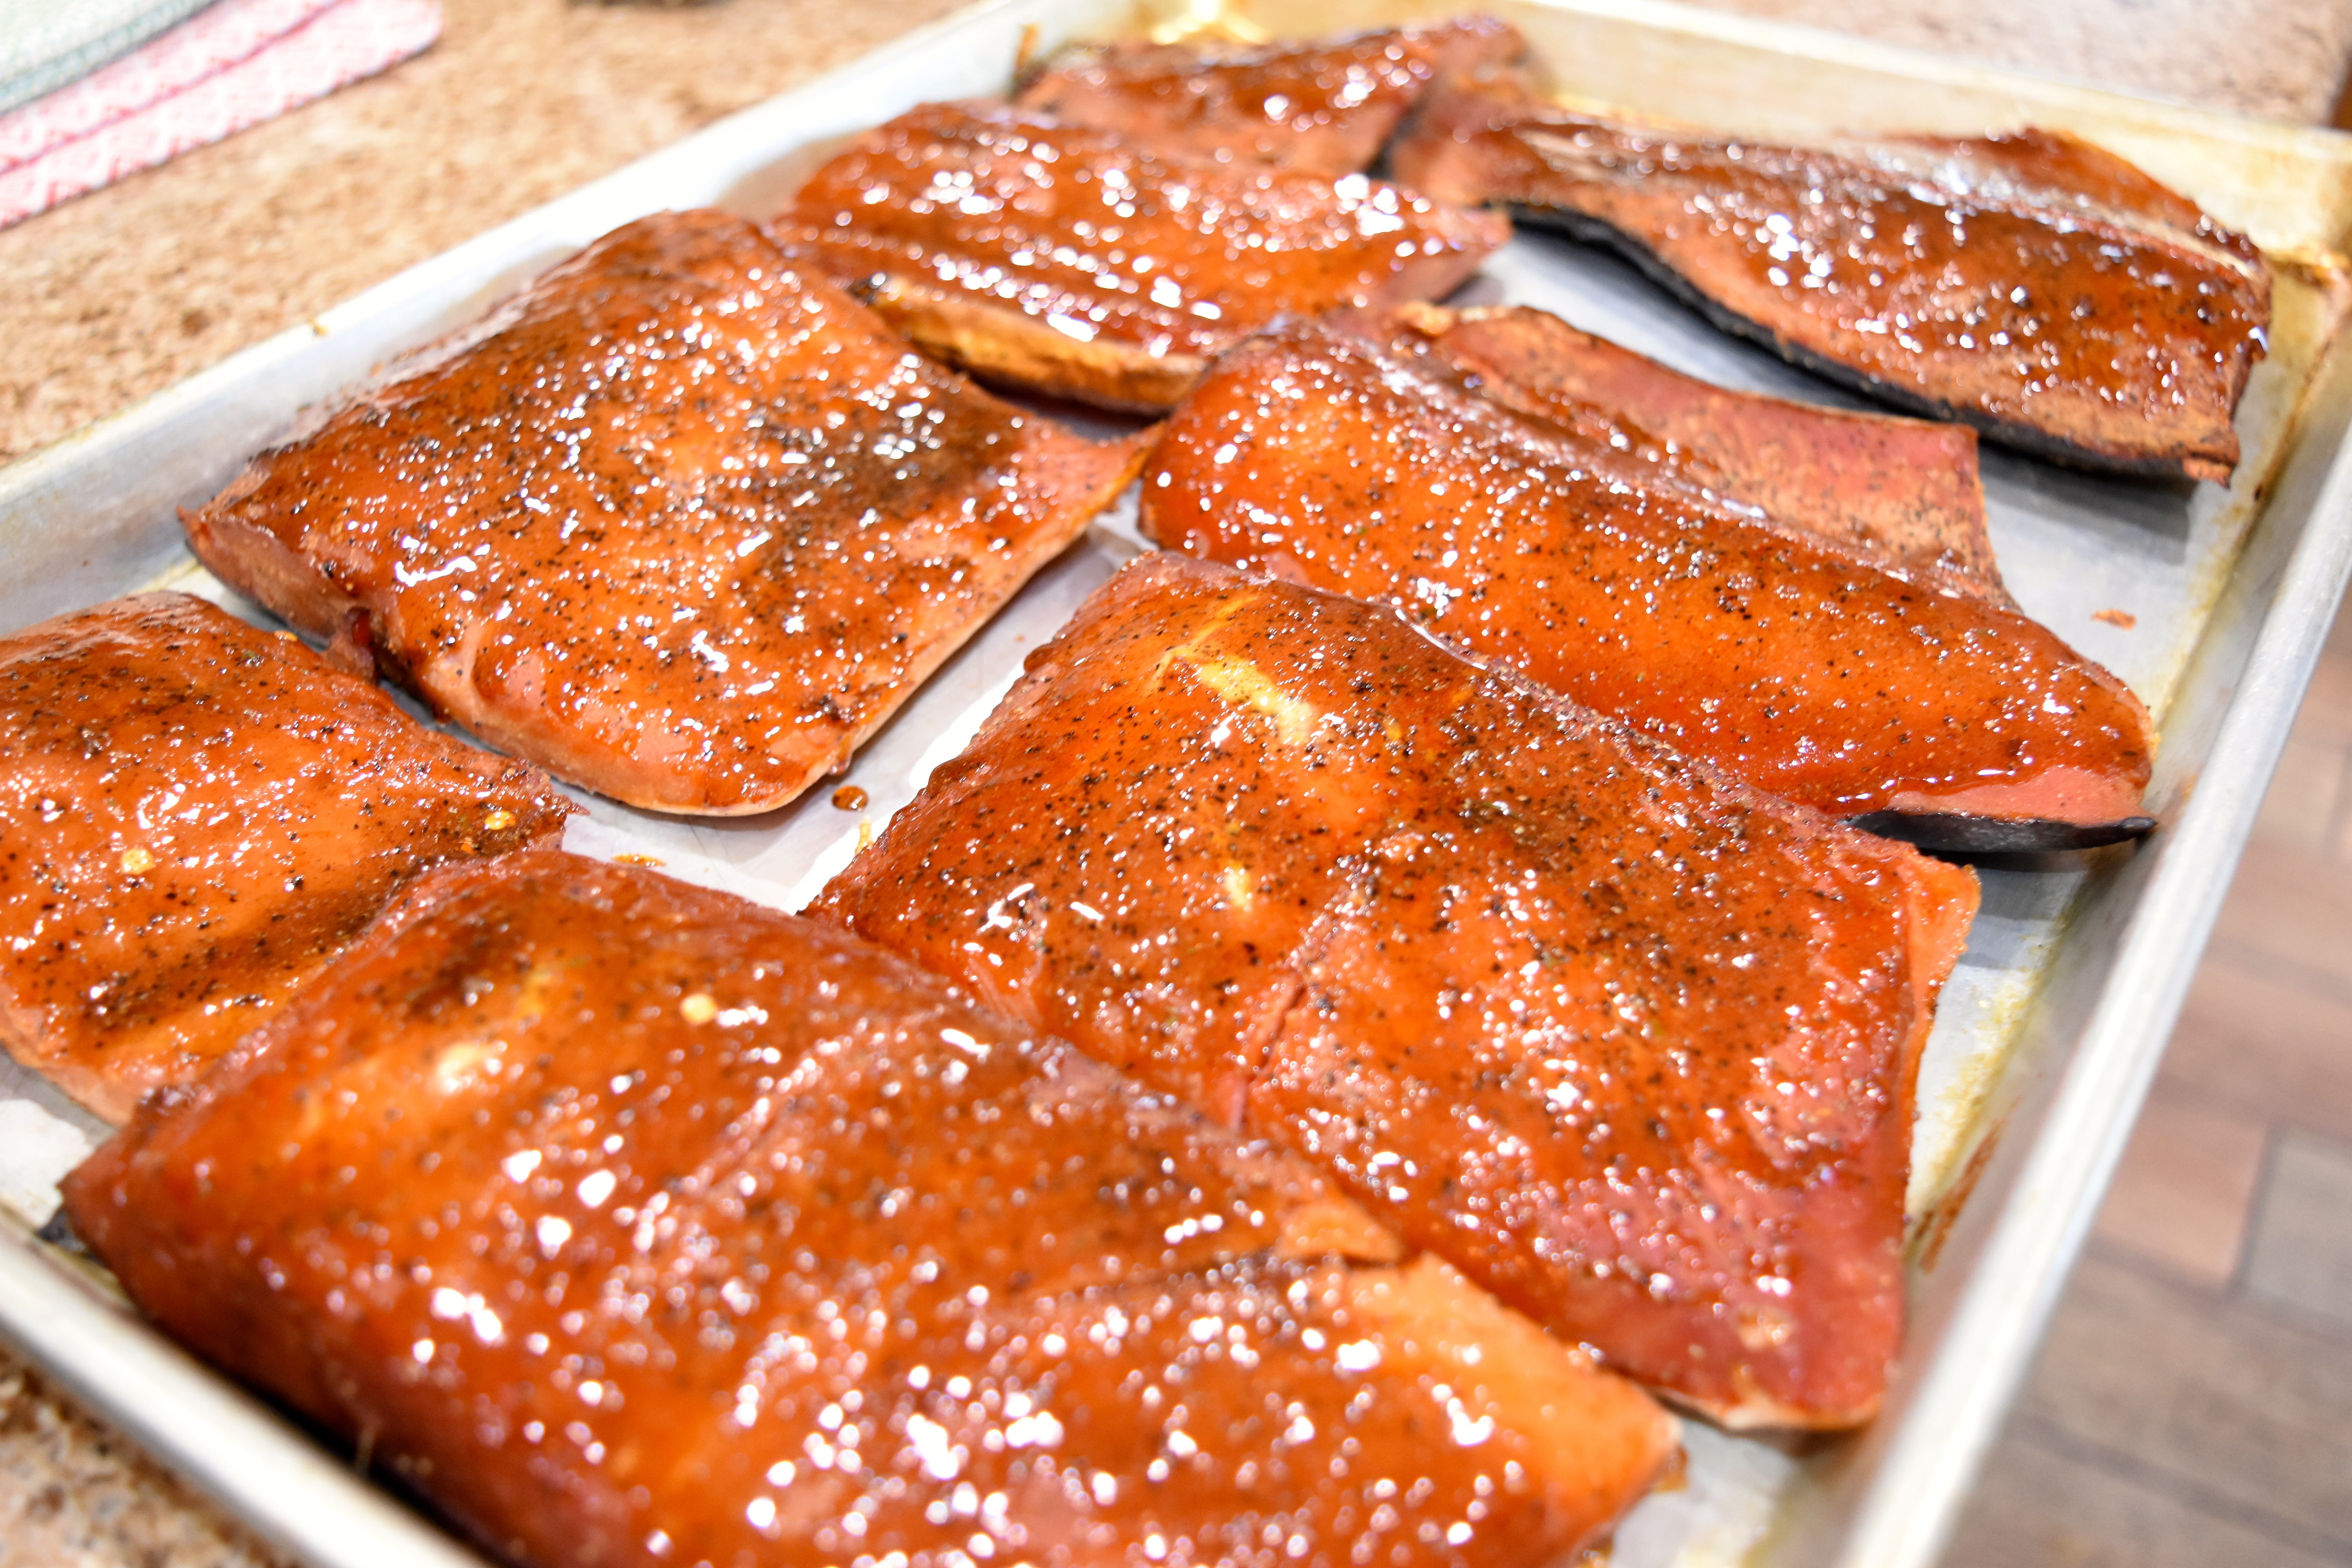
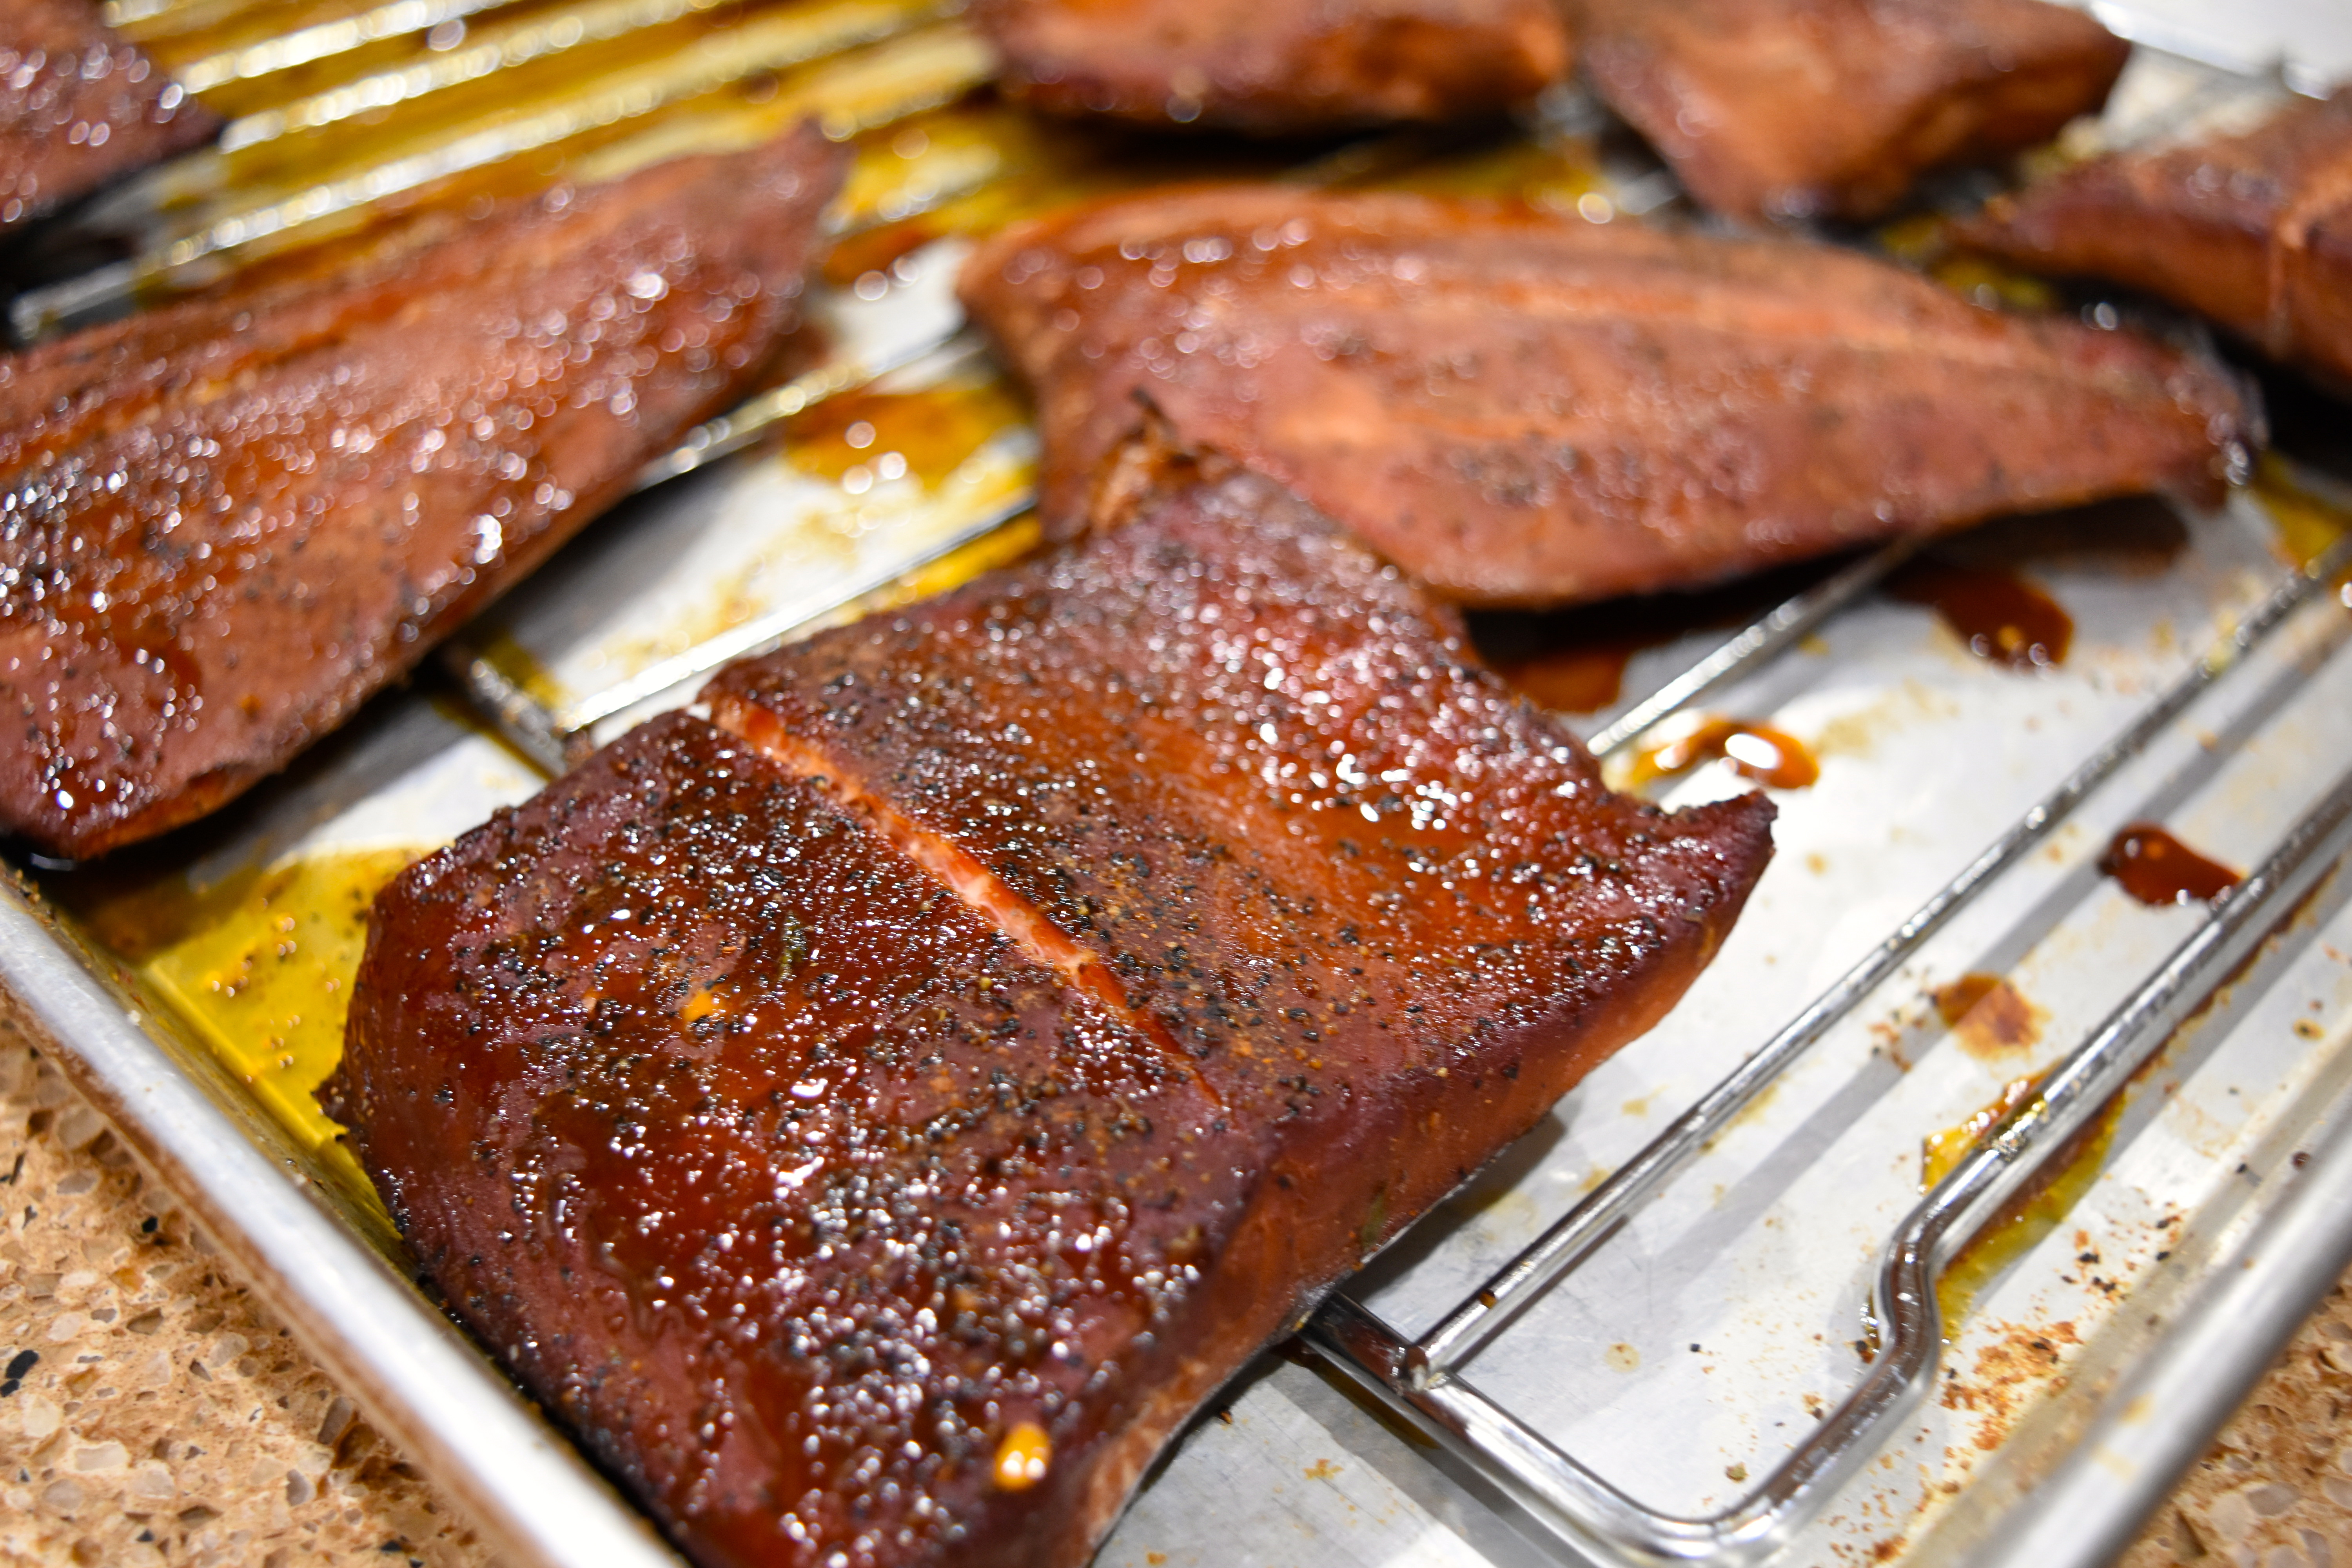
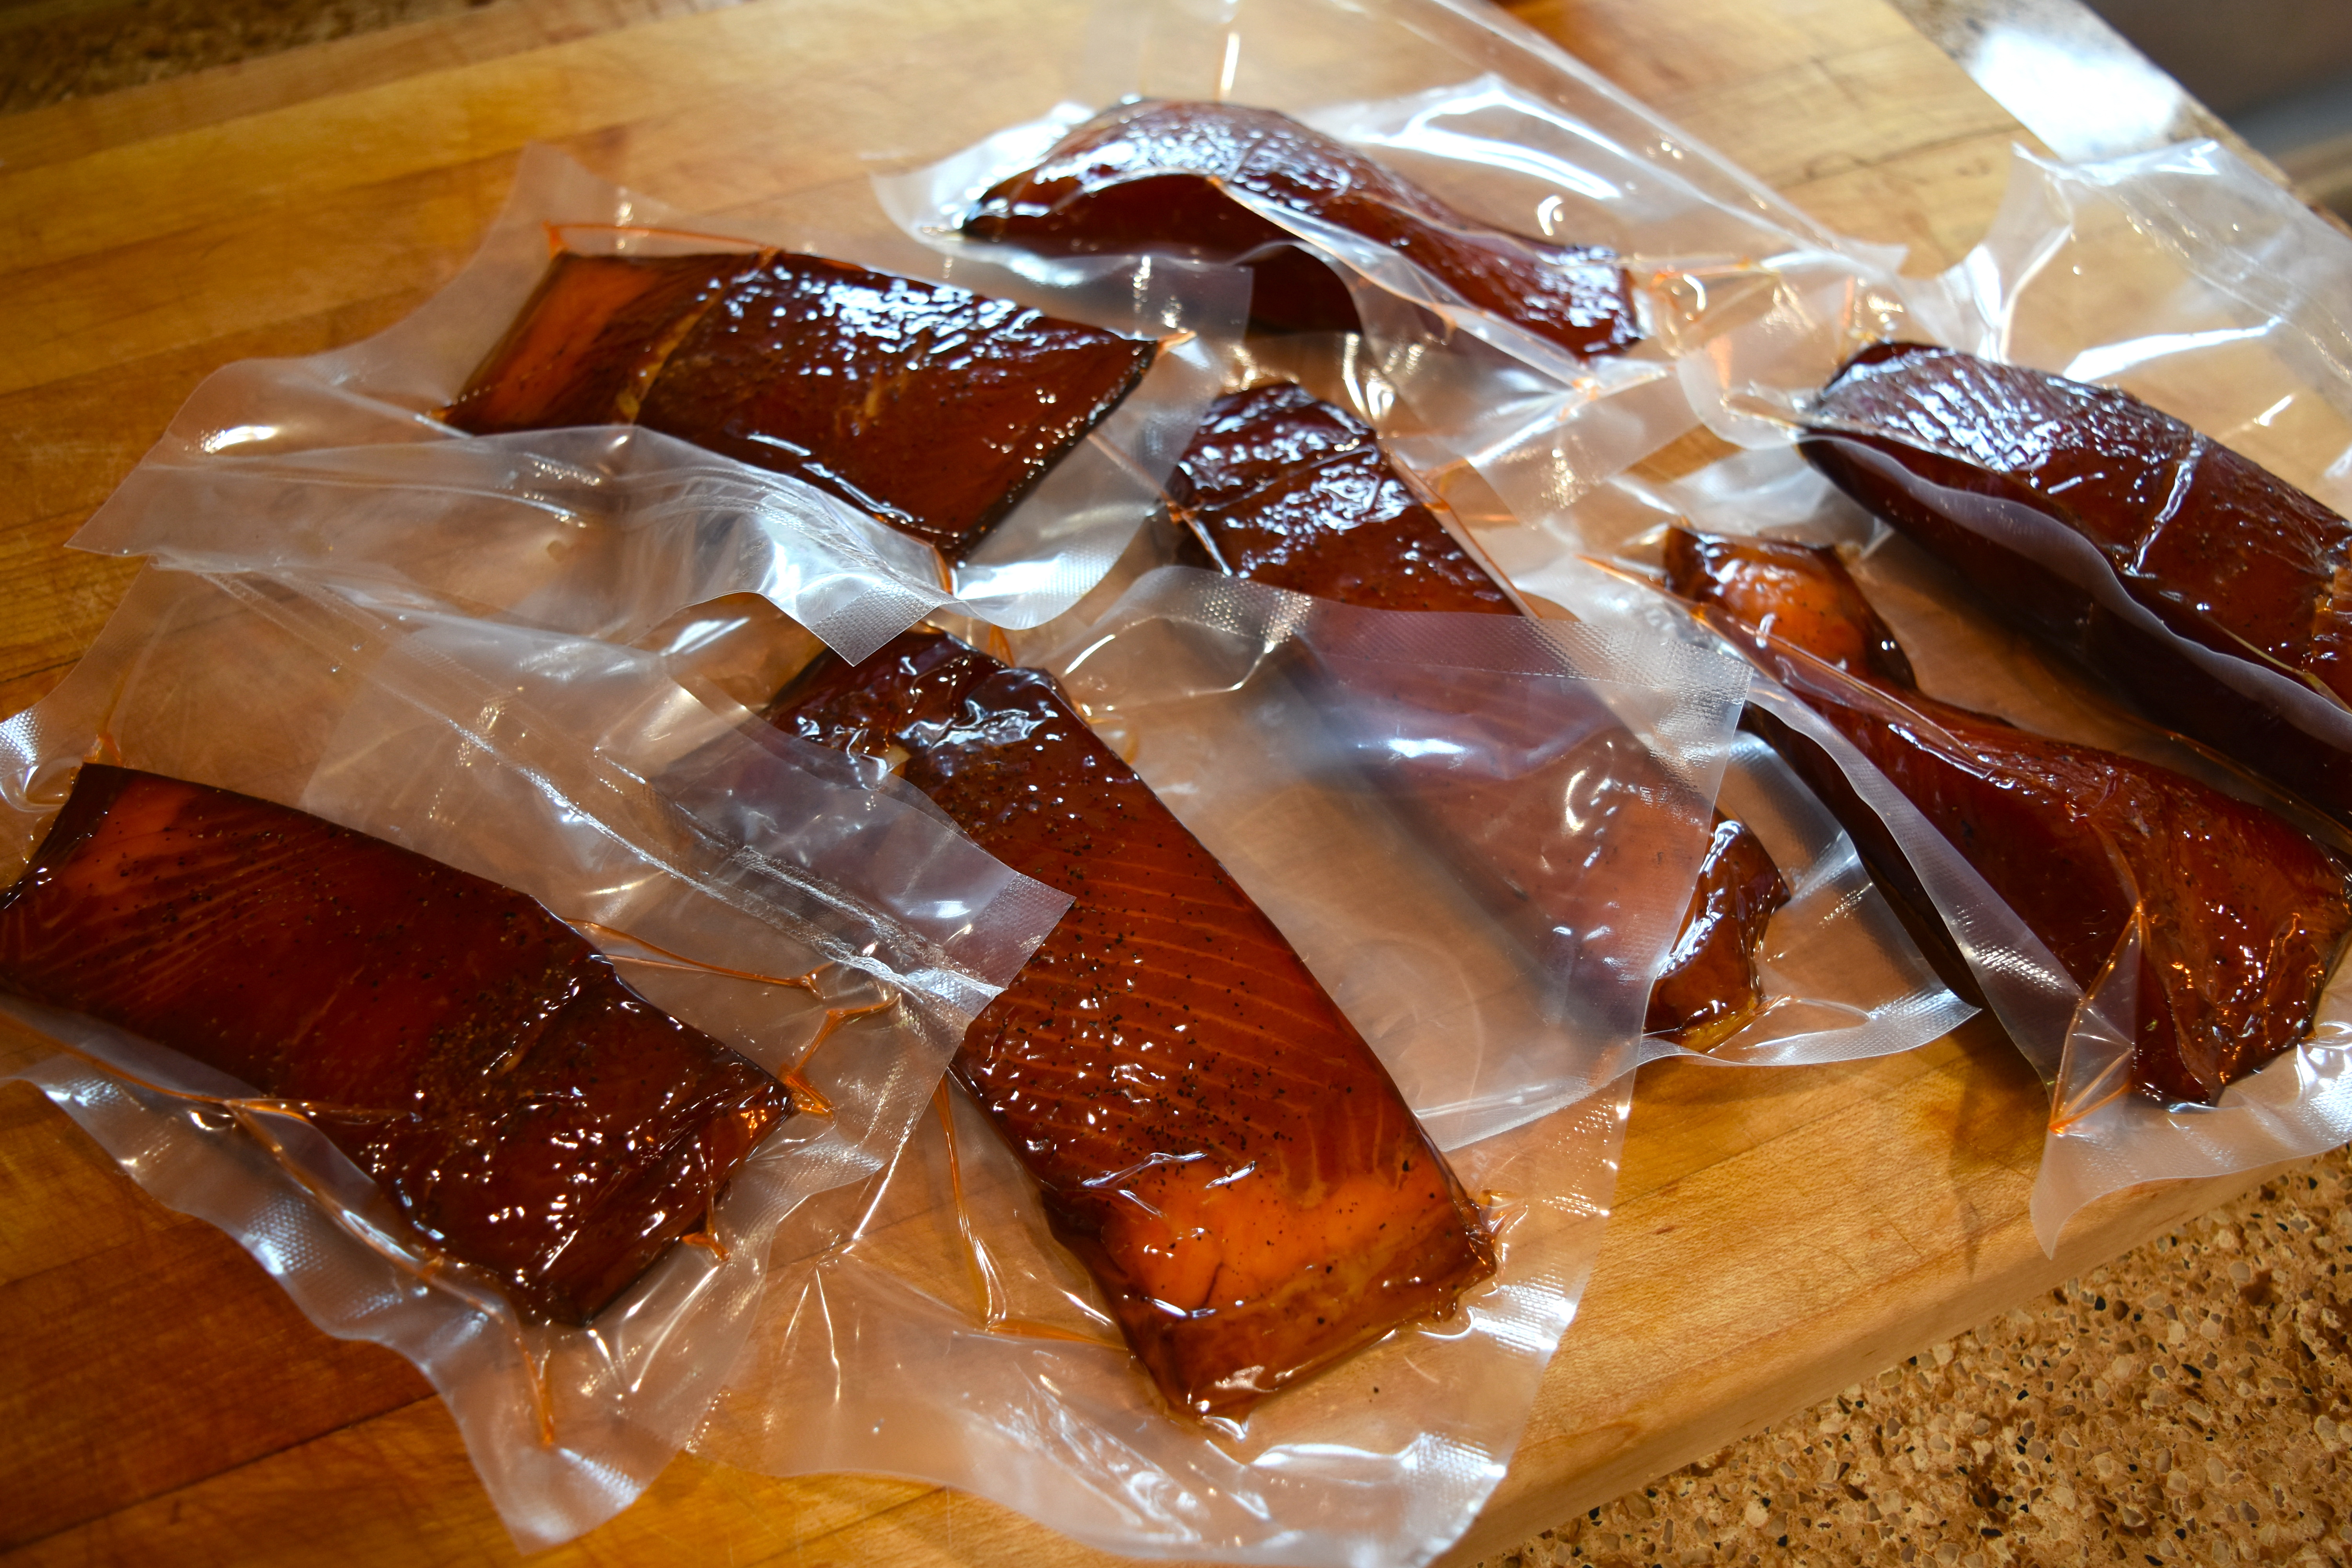
I took my ribs off at 205 internal temp which was about 8 hours, wrapped in pecan paper and put in a cooler for an hour while I finished my sides.
It has good bark, which is important in Texas
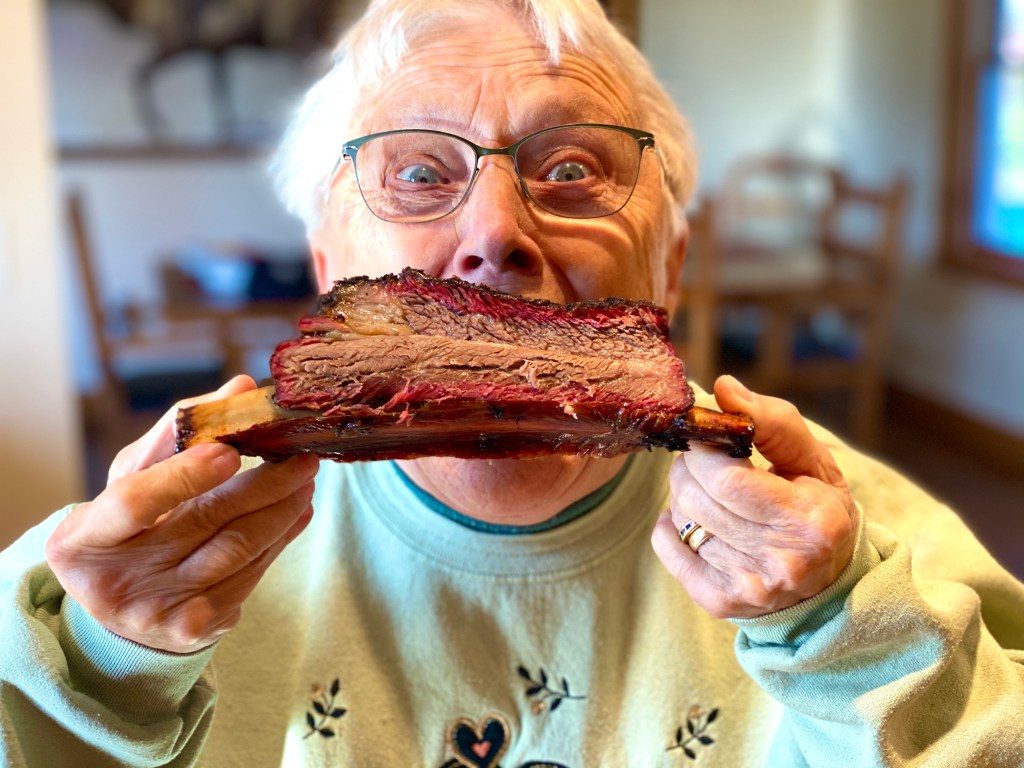
I am going to tell you something. There is nothing better than a good Seahawk game and your 80 year old mother WHO LOVES BEEF RIBS. I love my mom, and I think she loves me very, very much when she eats my Beef Ribs.
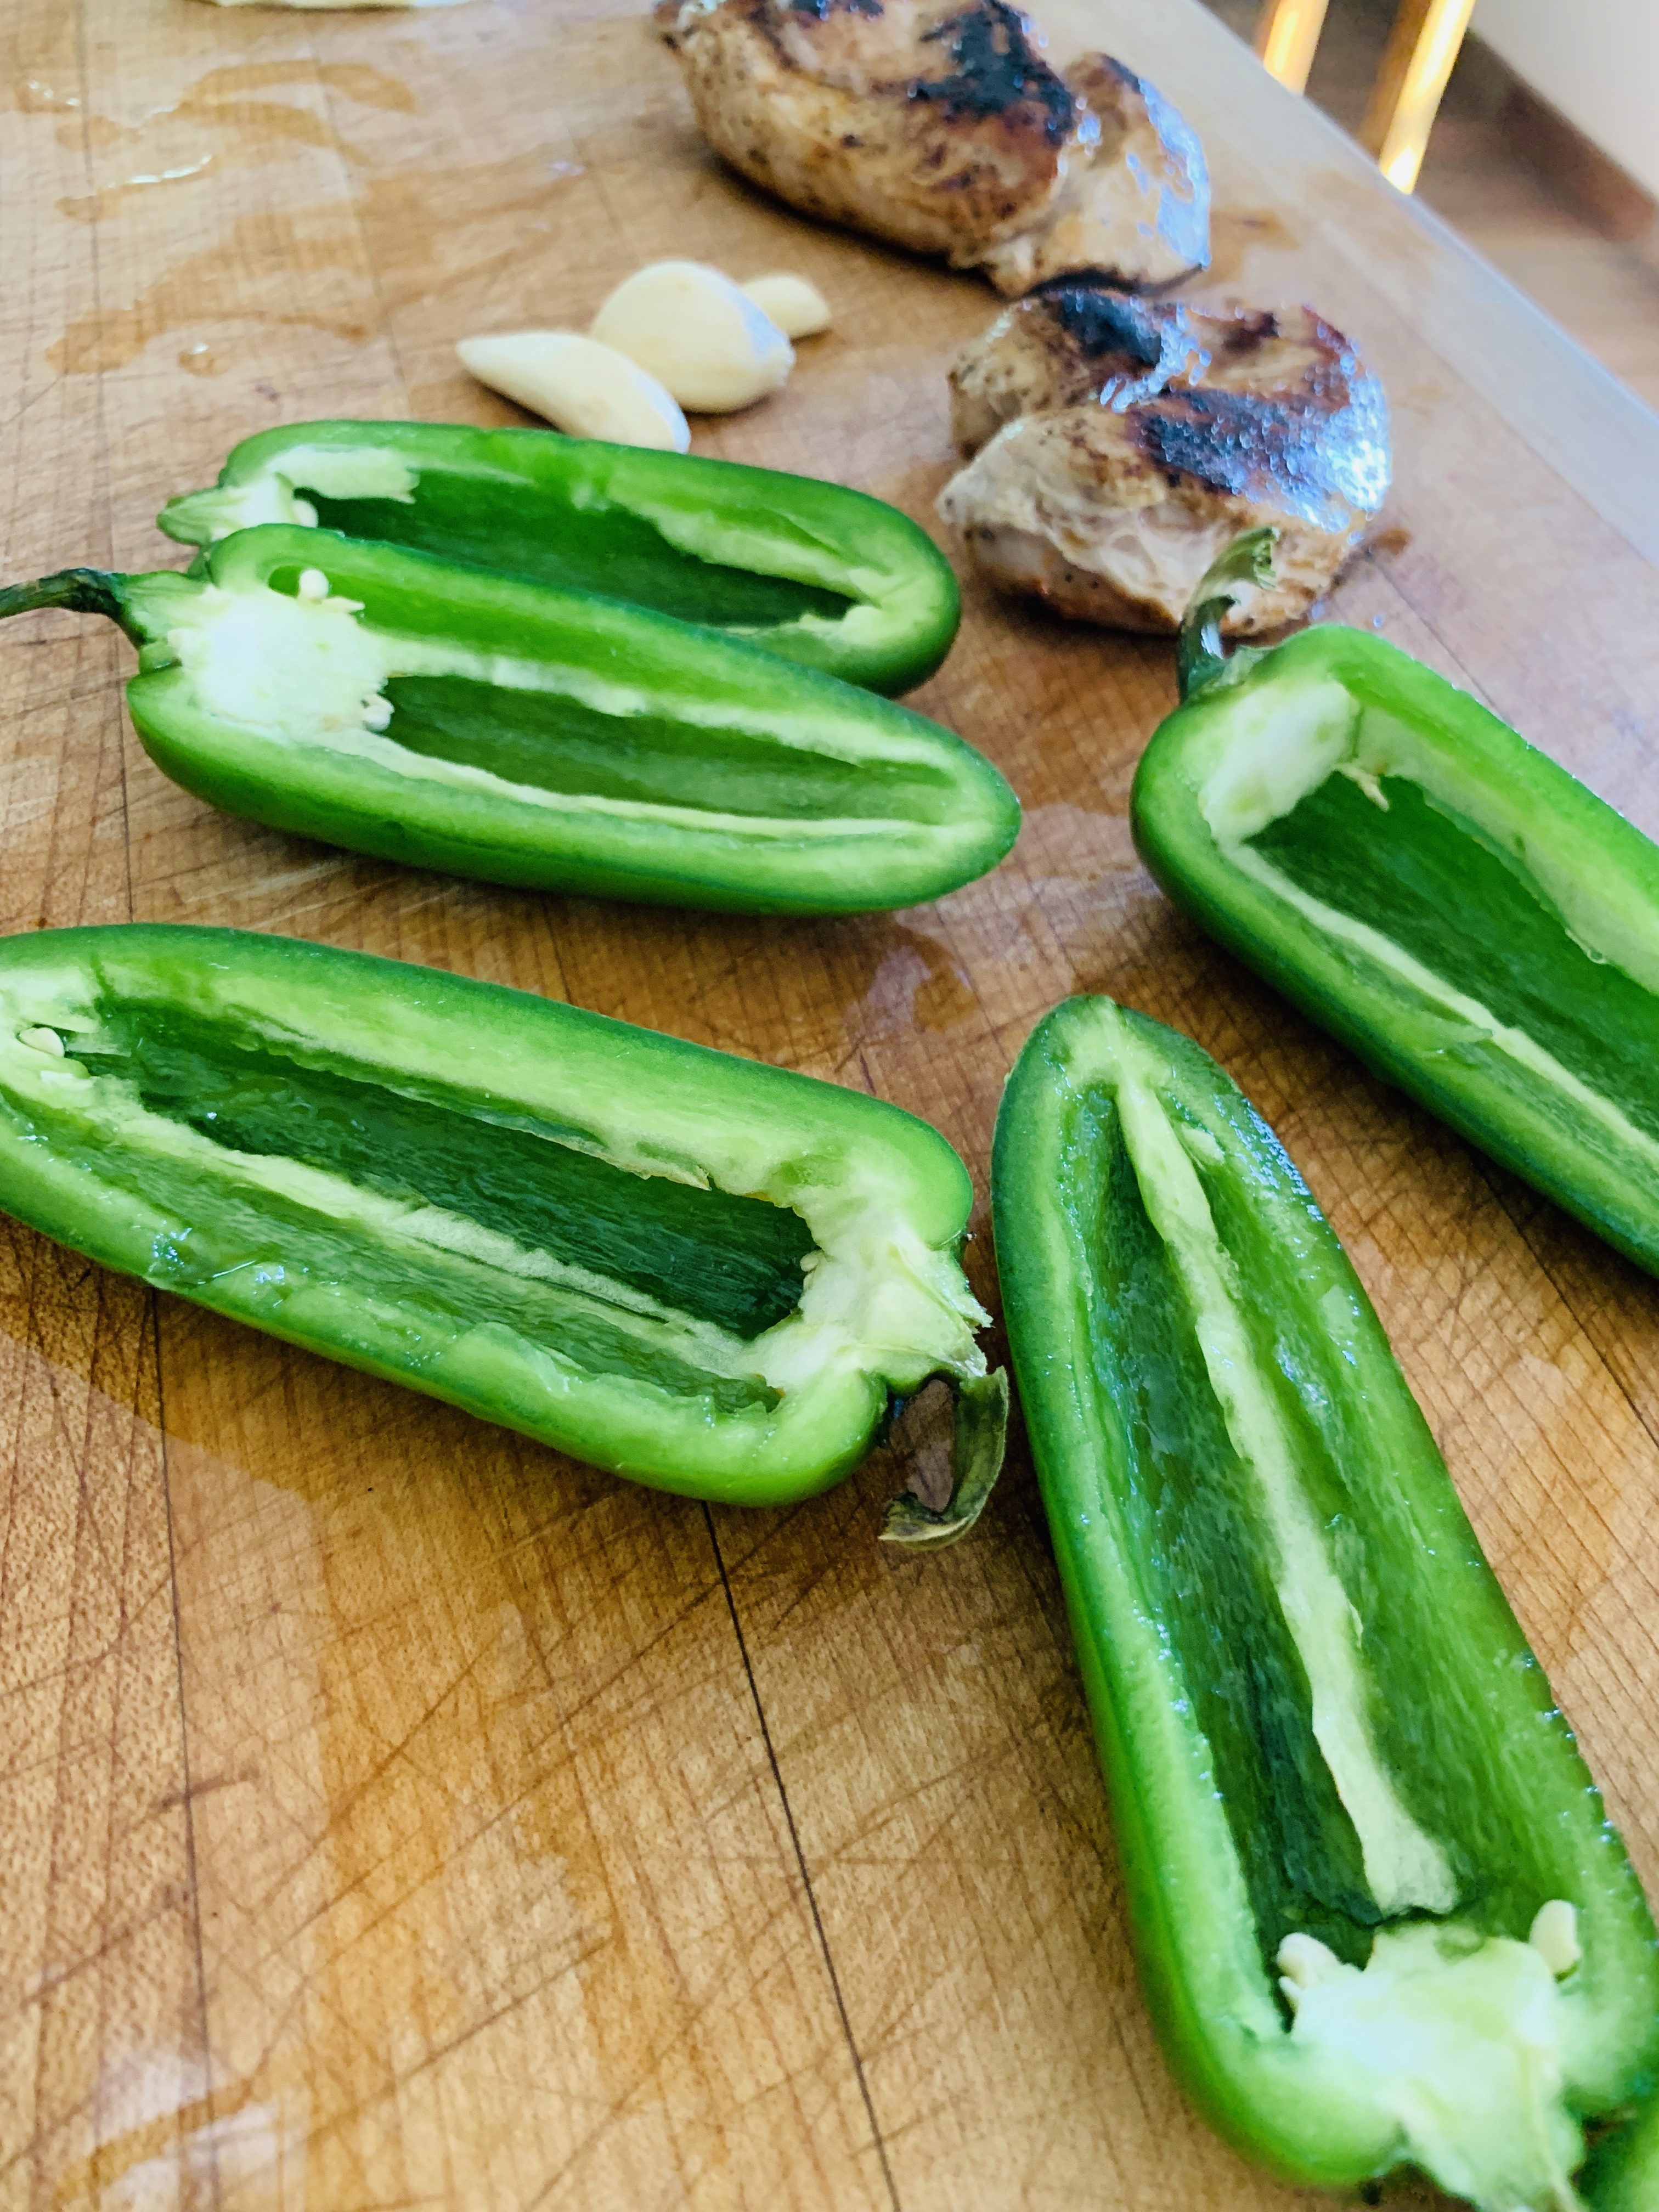
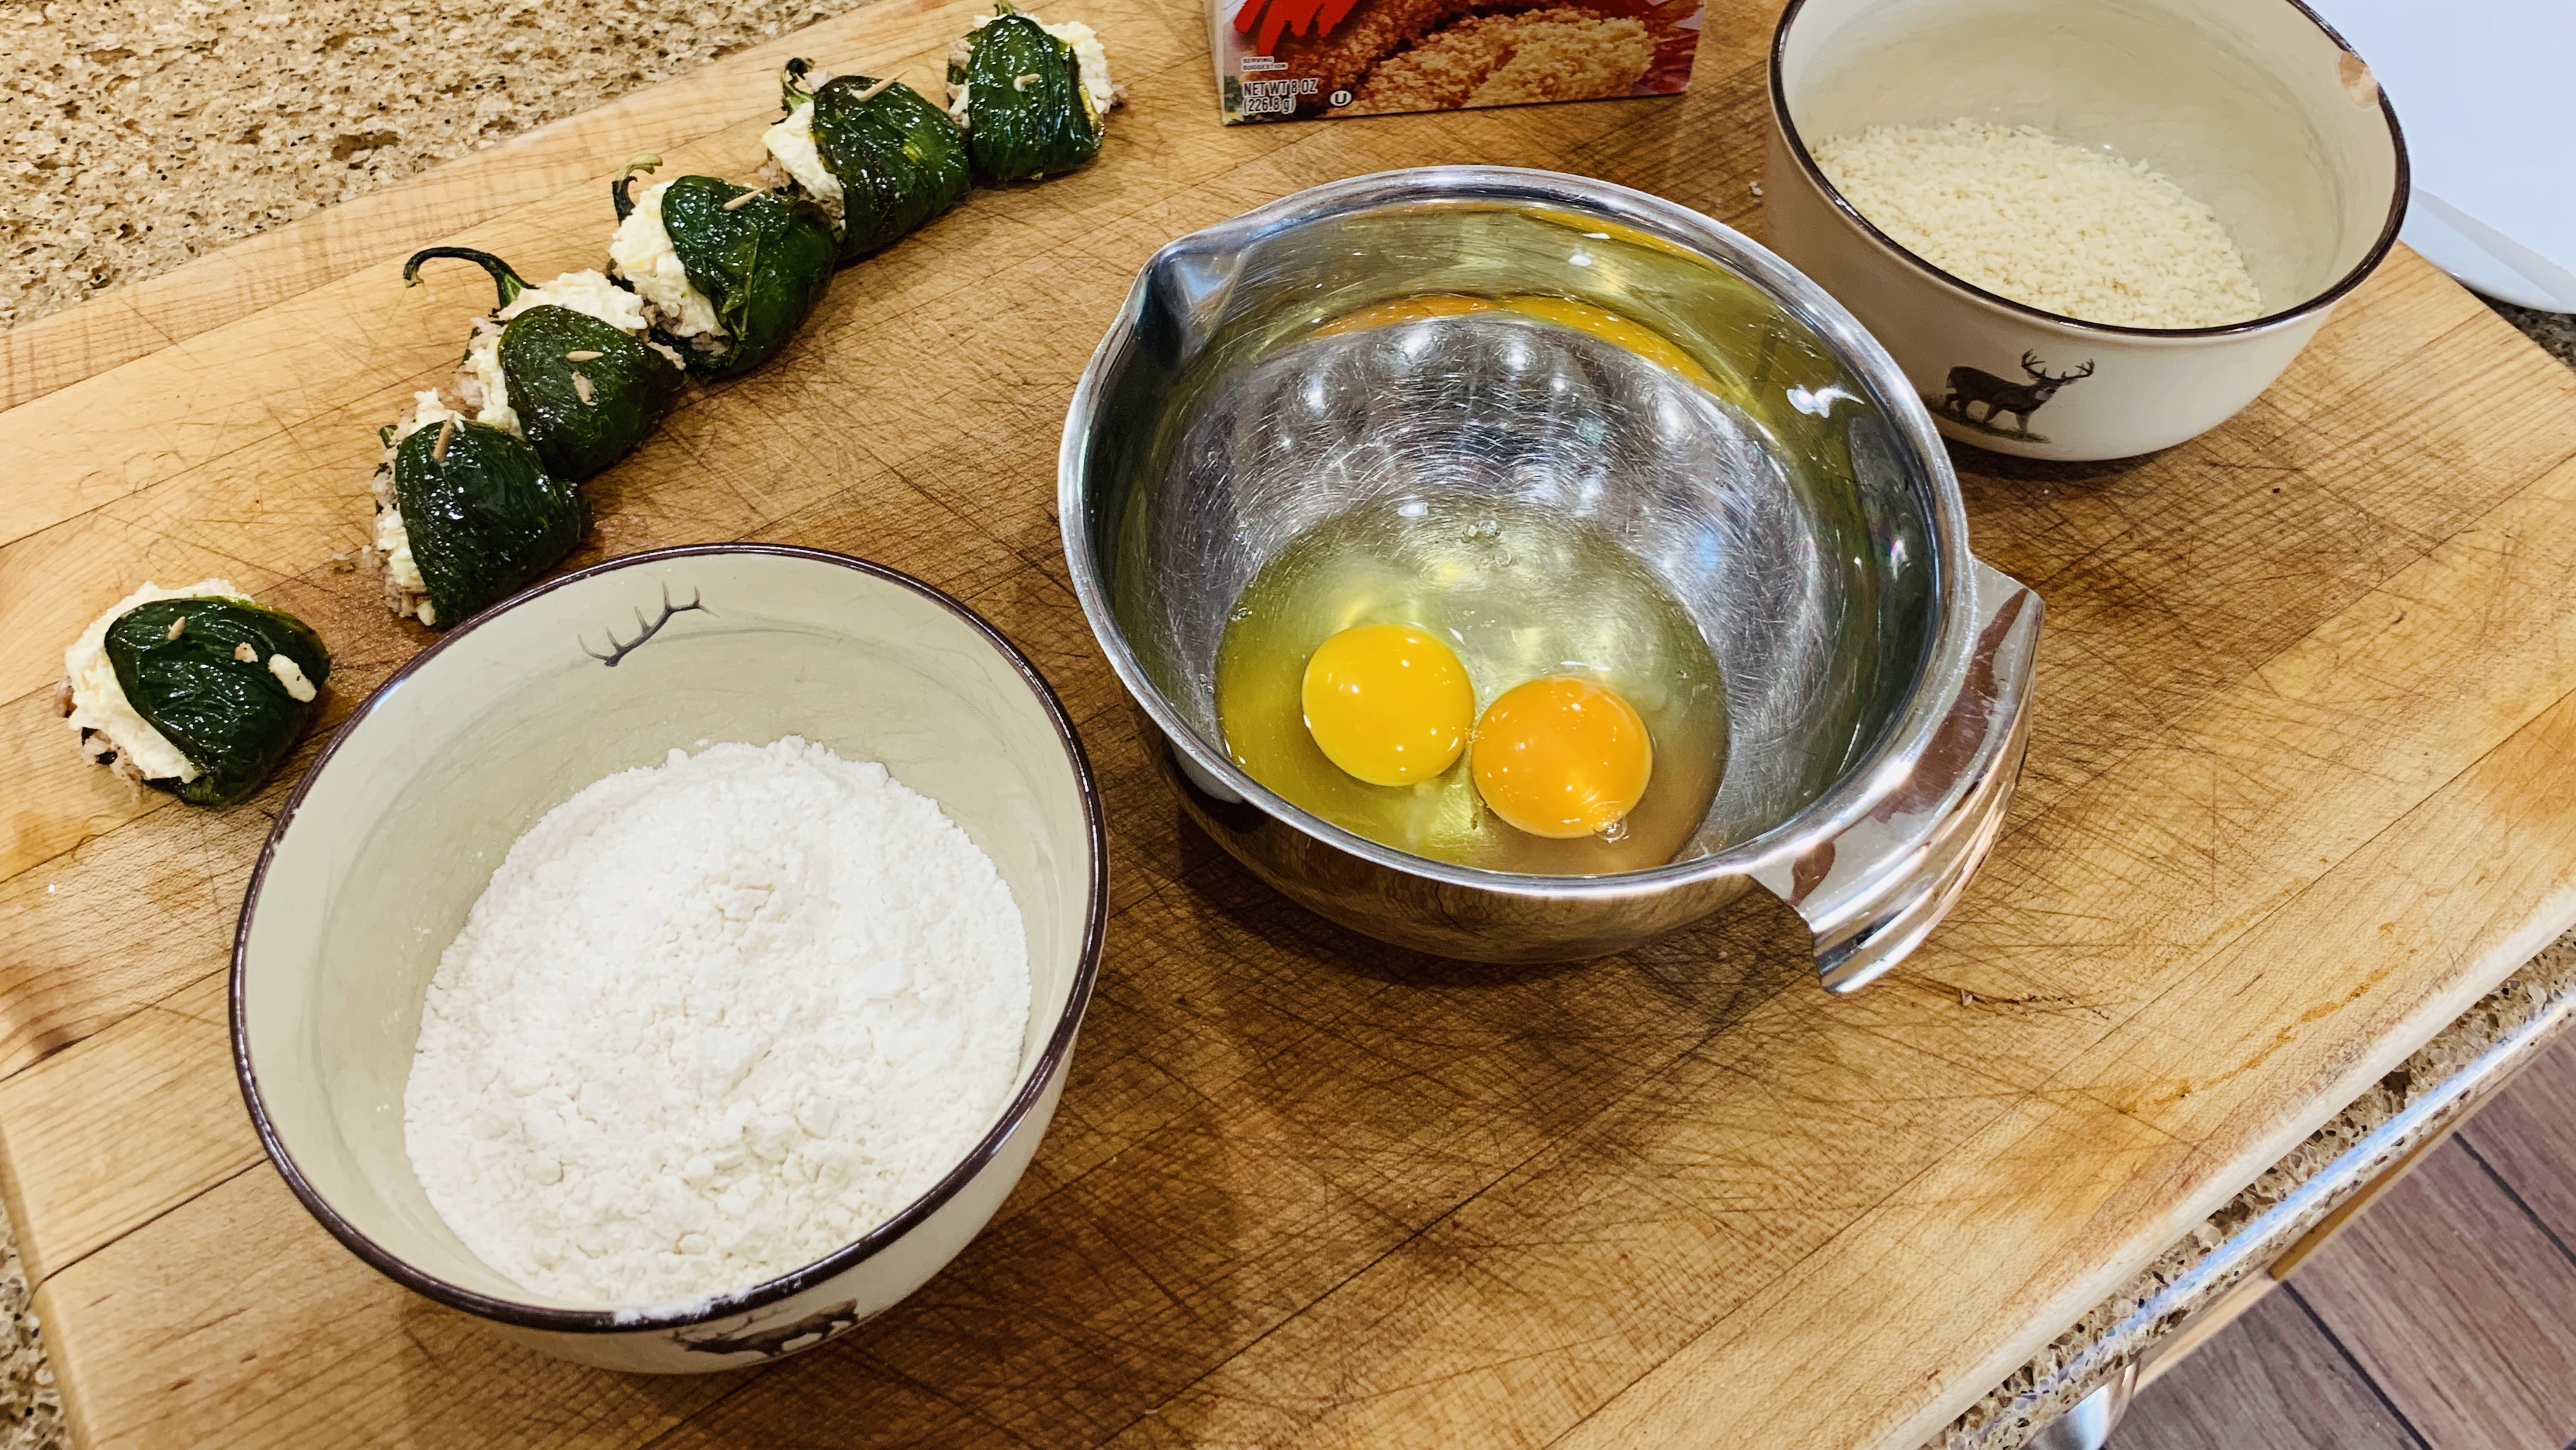
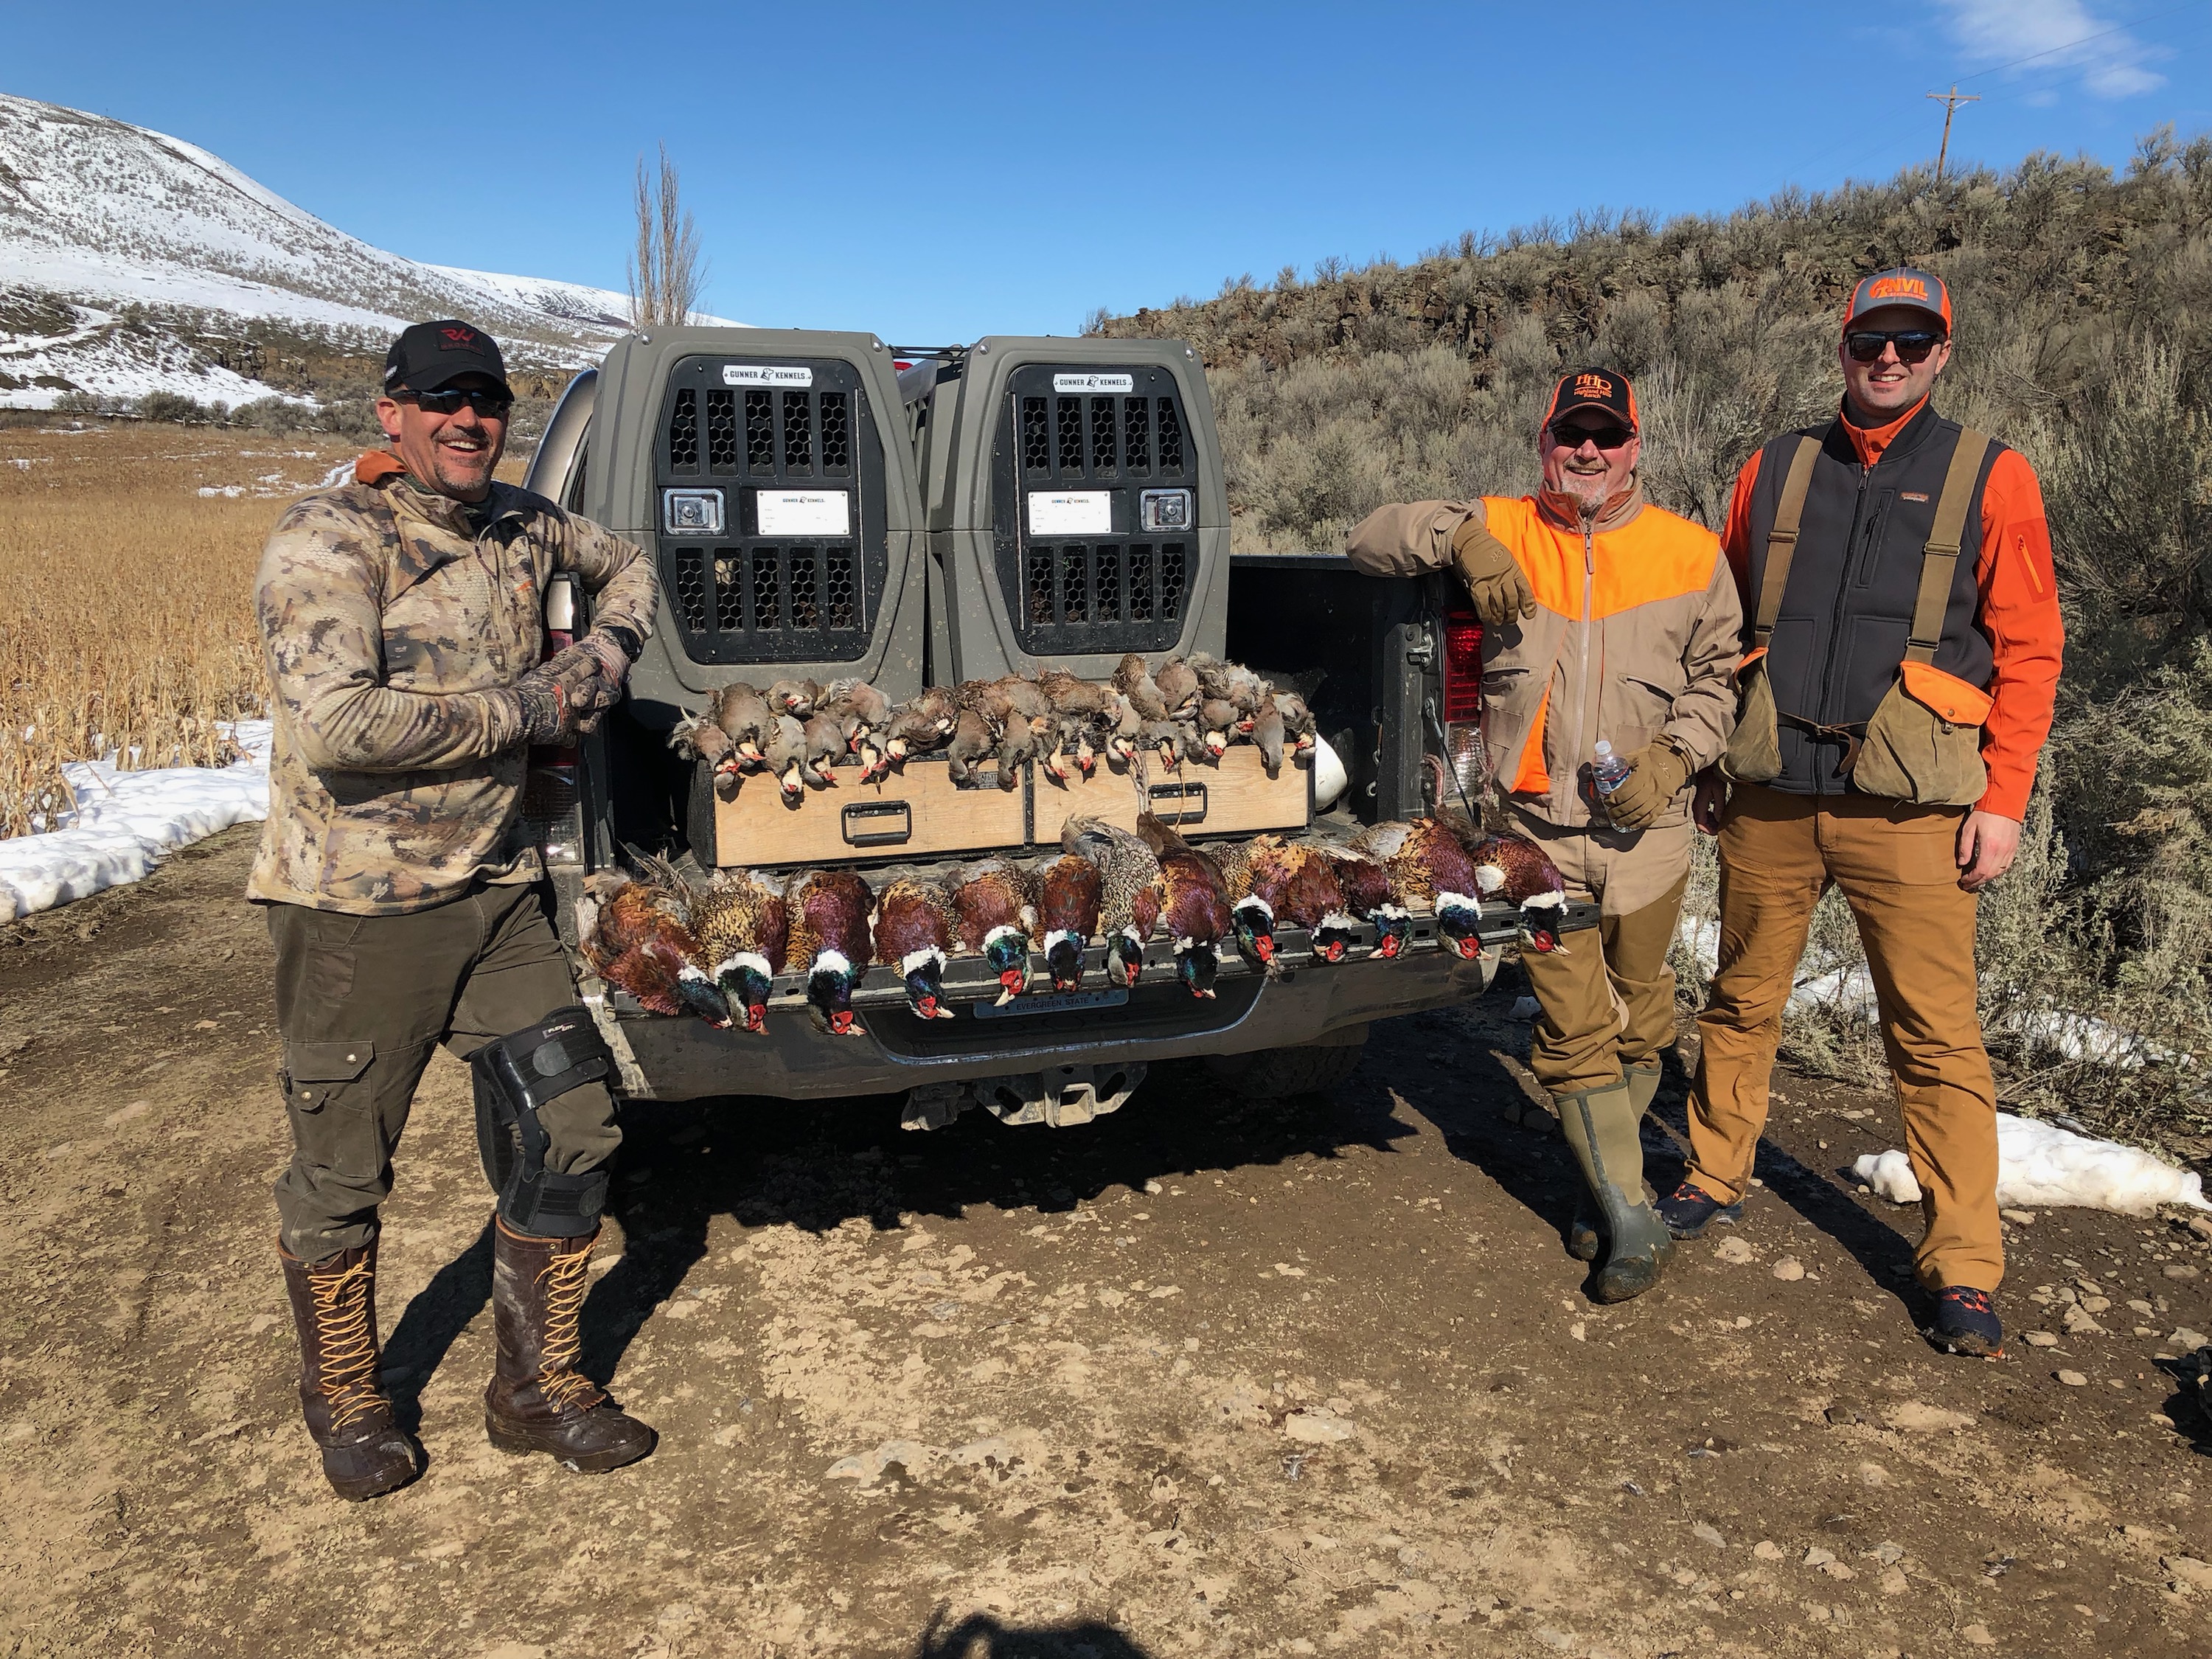
Every year we take a little trip to Eastern Oregon to do some bird hunting at Highland Hills. A fantastic Orvis Endorsed hunting lodge that has spectacular upland game hunting, a beautiful lodge and stunning scenery that makes us come back every year. When I leave this place I have two things in my possession, a smile on my face and a cooler full of upland game birds. This year I decided to work on a recipe for my friend Travis who also follows my blogs and recipes. He likes spicy, and he also has a lot of birds in his freezer as well.
This is Travis…you can see he is already hungry
So lets rock this thing and make some Jalapeno stuffed poppers shall we?
Ingredients for a dozen:
6 large jalapenos
2-4 chucker breast (1 lb)
1/2 cup of vegetable cream cheese
1/2 cup of shredded Colby jack cheese
1/4 cup parmigiano Reggiano
3 chopped garlic cloves
2 cups of vegetable oil
1 cup of flour
1 cup of panko (optional if you want crunchy texture, otherwise use 1 cup additional of flour)
2 eggs
1 tablespoon of butter, and little olive oil
Salt, Pepper, ancho seasoning to taste
Generously season the chucker with salt, pepper, and ancho seasoning. Bring pan up to medium high, add butter, and about 1 tablespoon of olive oil. Add chucker breast and reduce to medium. Cook for about 4-5 minutes on each side. Do not over cook them, medium rare is perfect. Remove the breast and let them stand for 5 minutes while you prepare the jalapenos.
Cut Jalapenos length wise and remove seeds. Set aside.
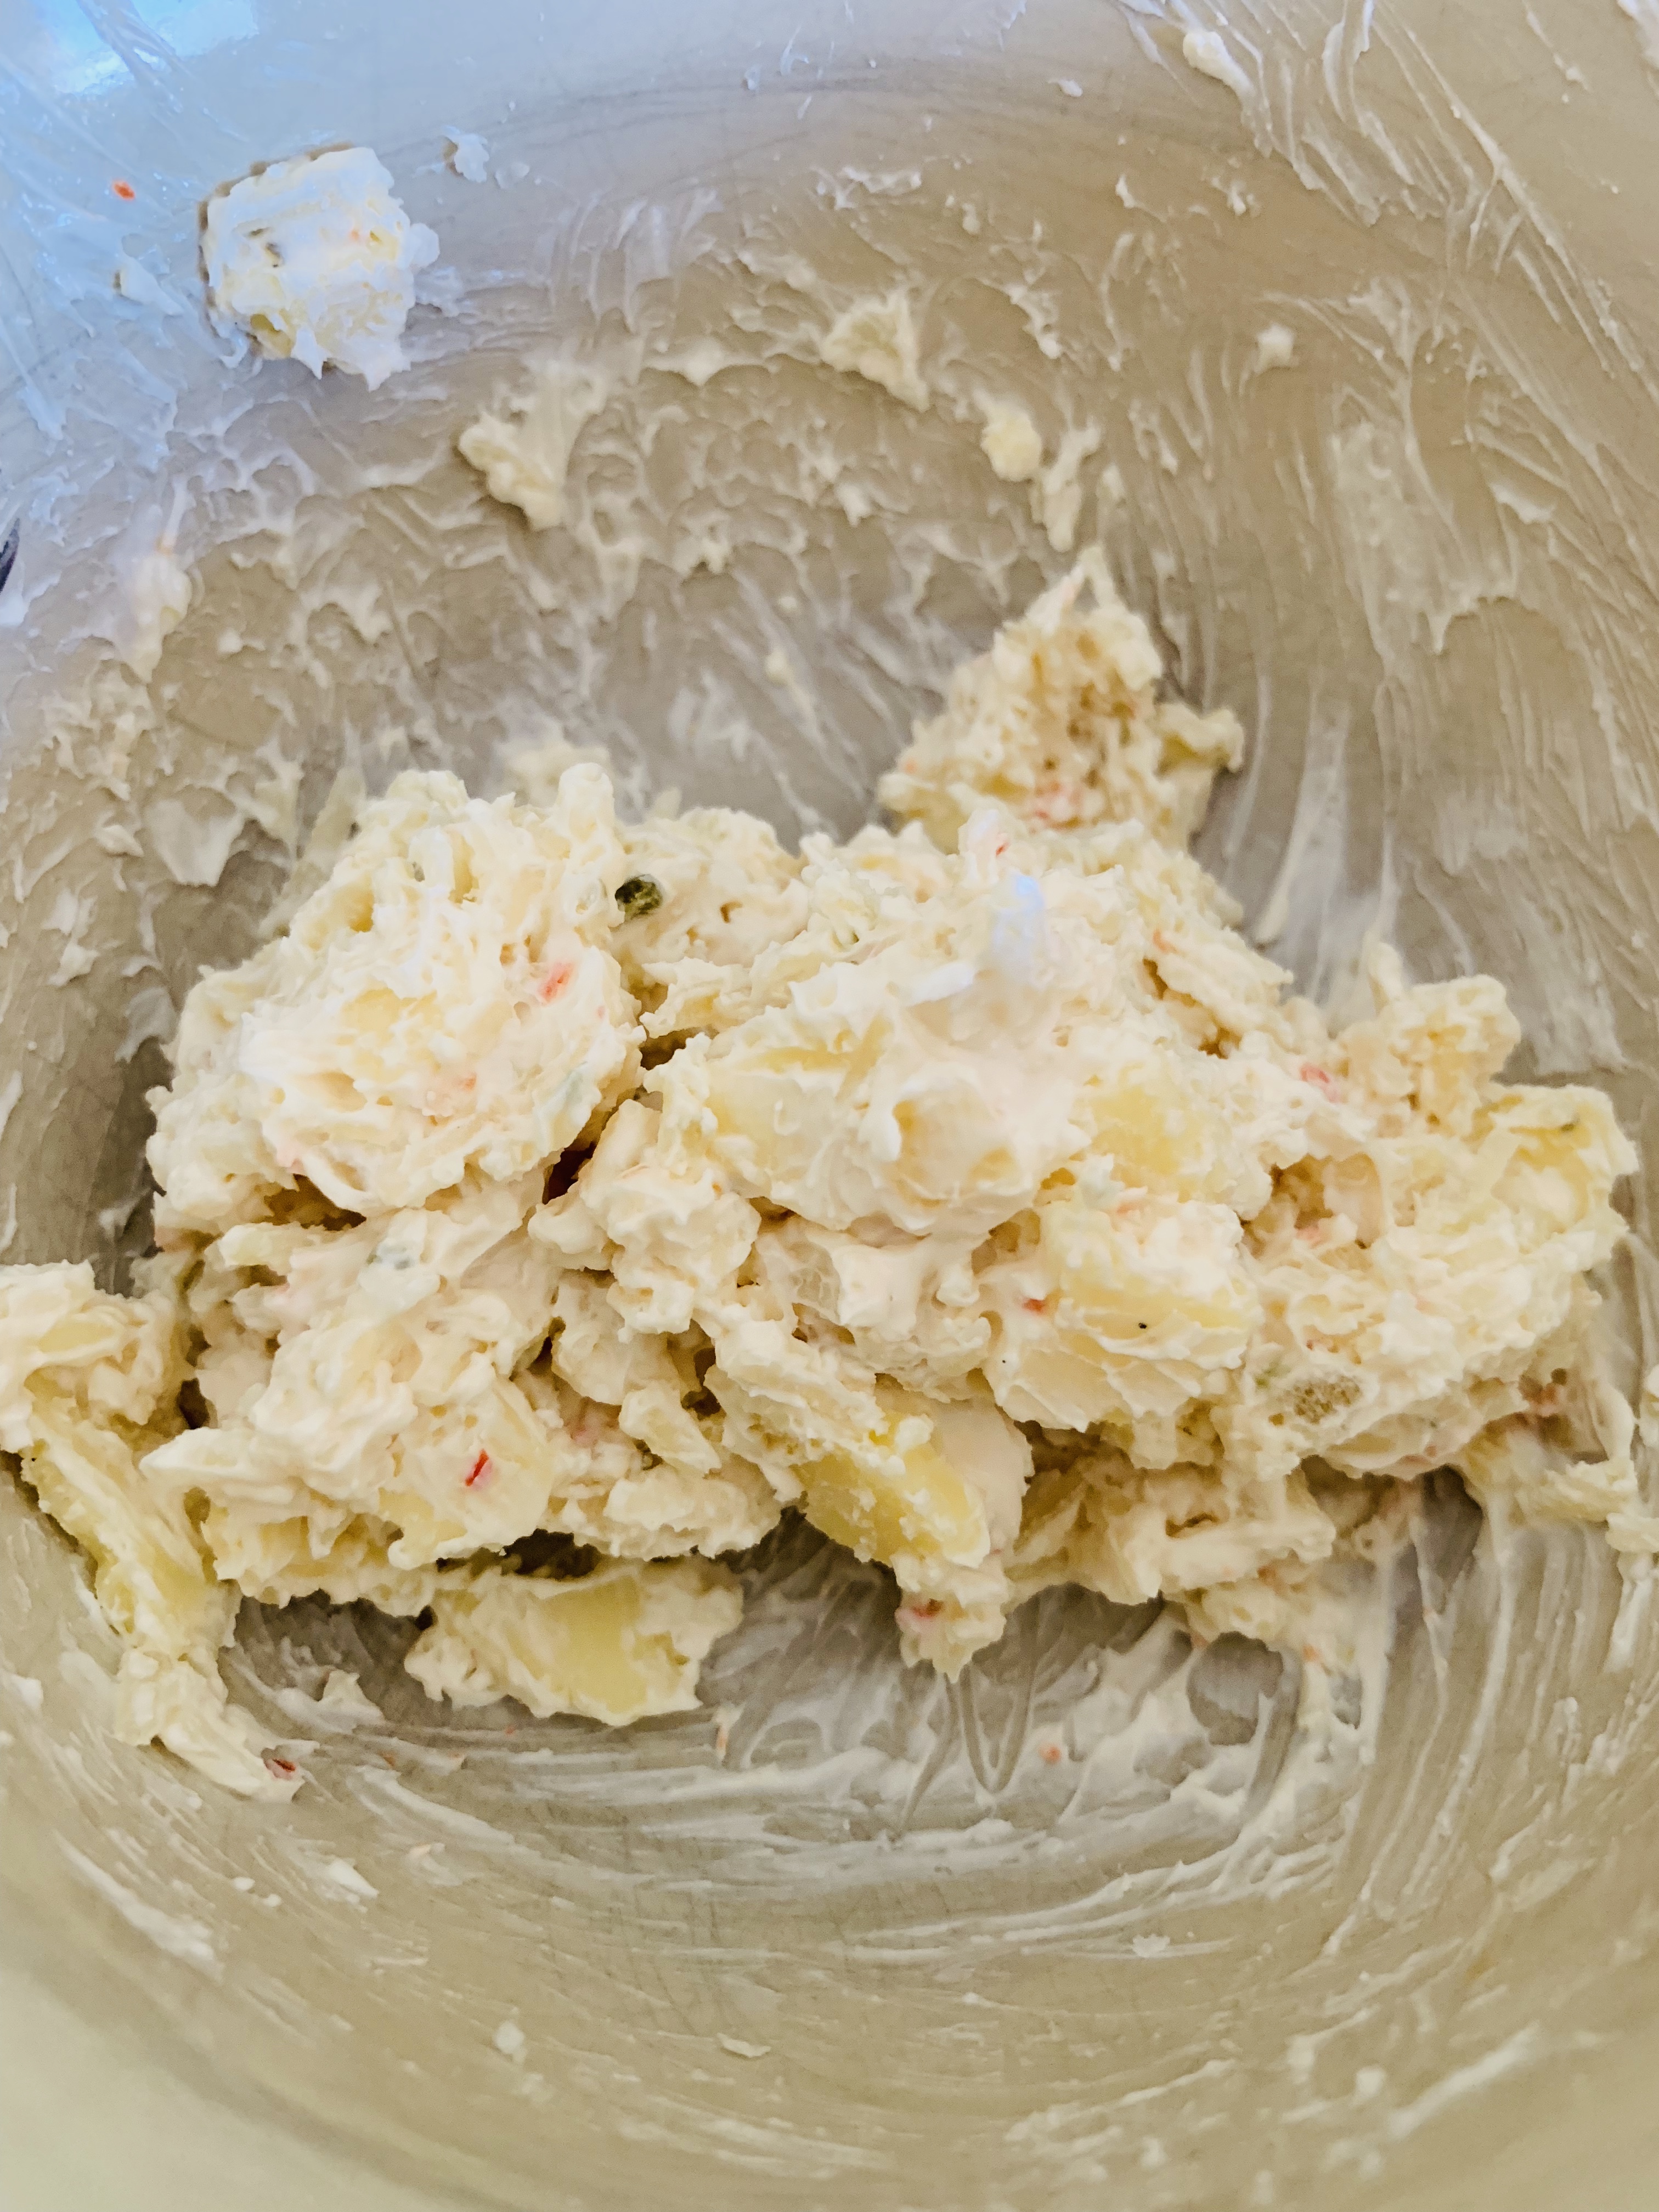
Mix vegetable cream chesse, Parmesan, Colby jack, and chopped garlic to bowl and mix. Set aside.
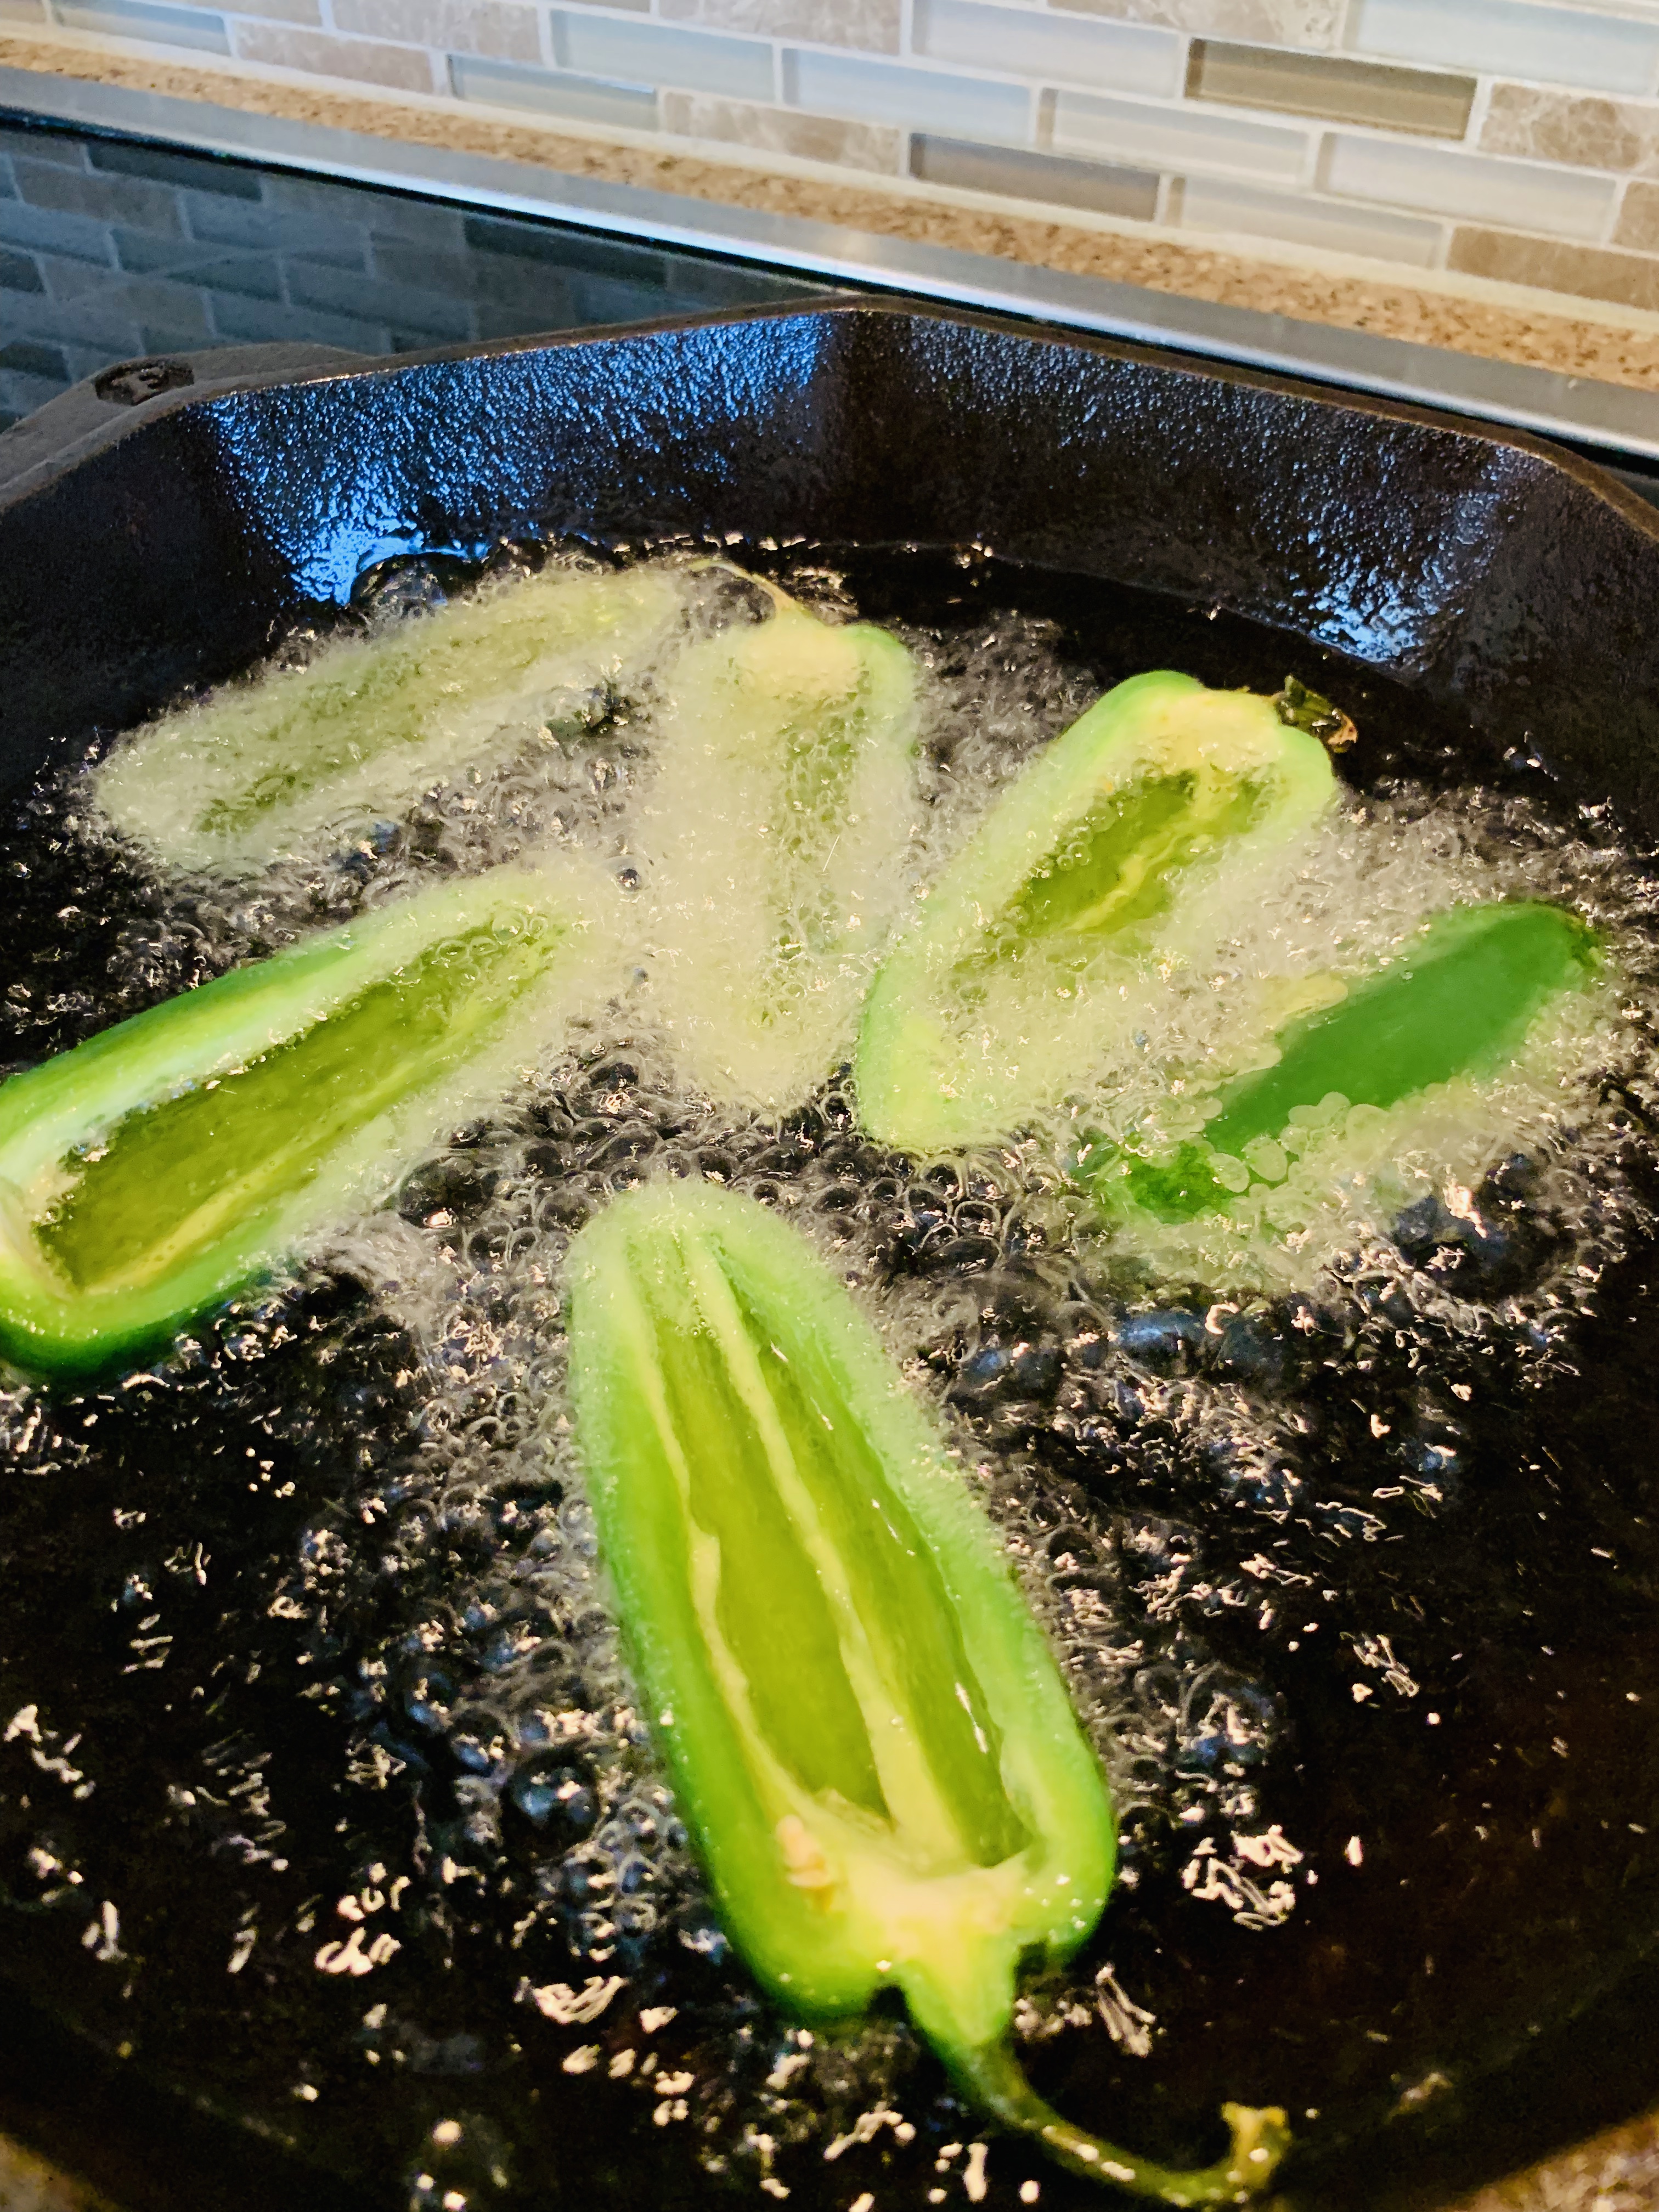
Bring vegetable oil in a high heat in cast iron pan, or something deep dish. Add jalapenos for 3 minutes.
Remove and set aside
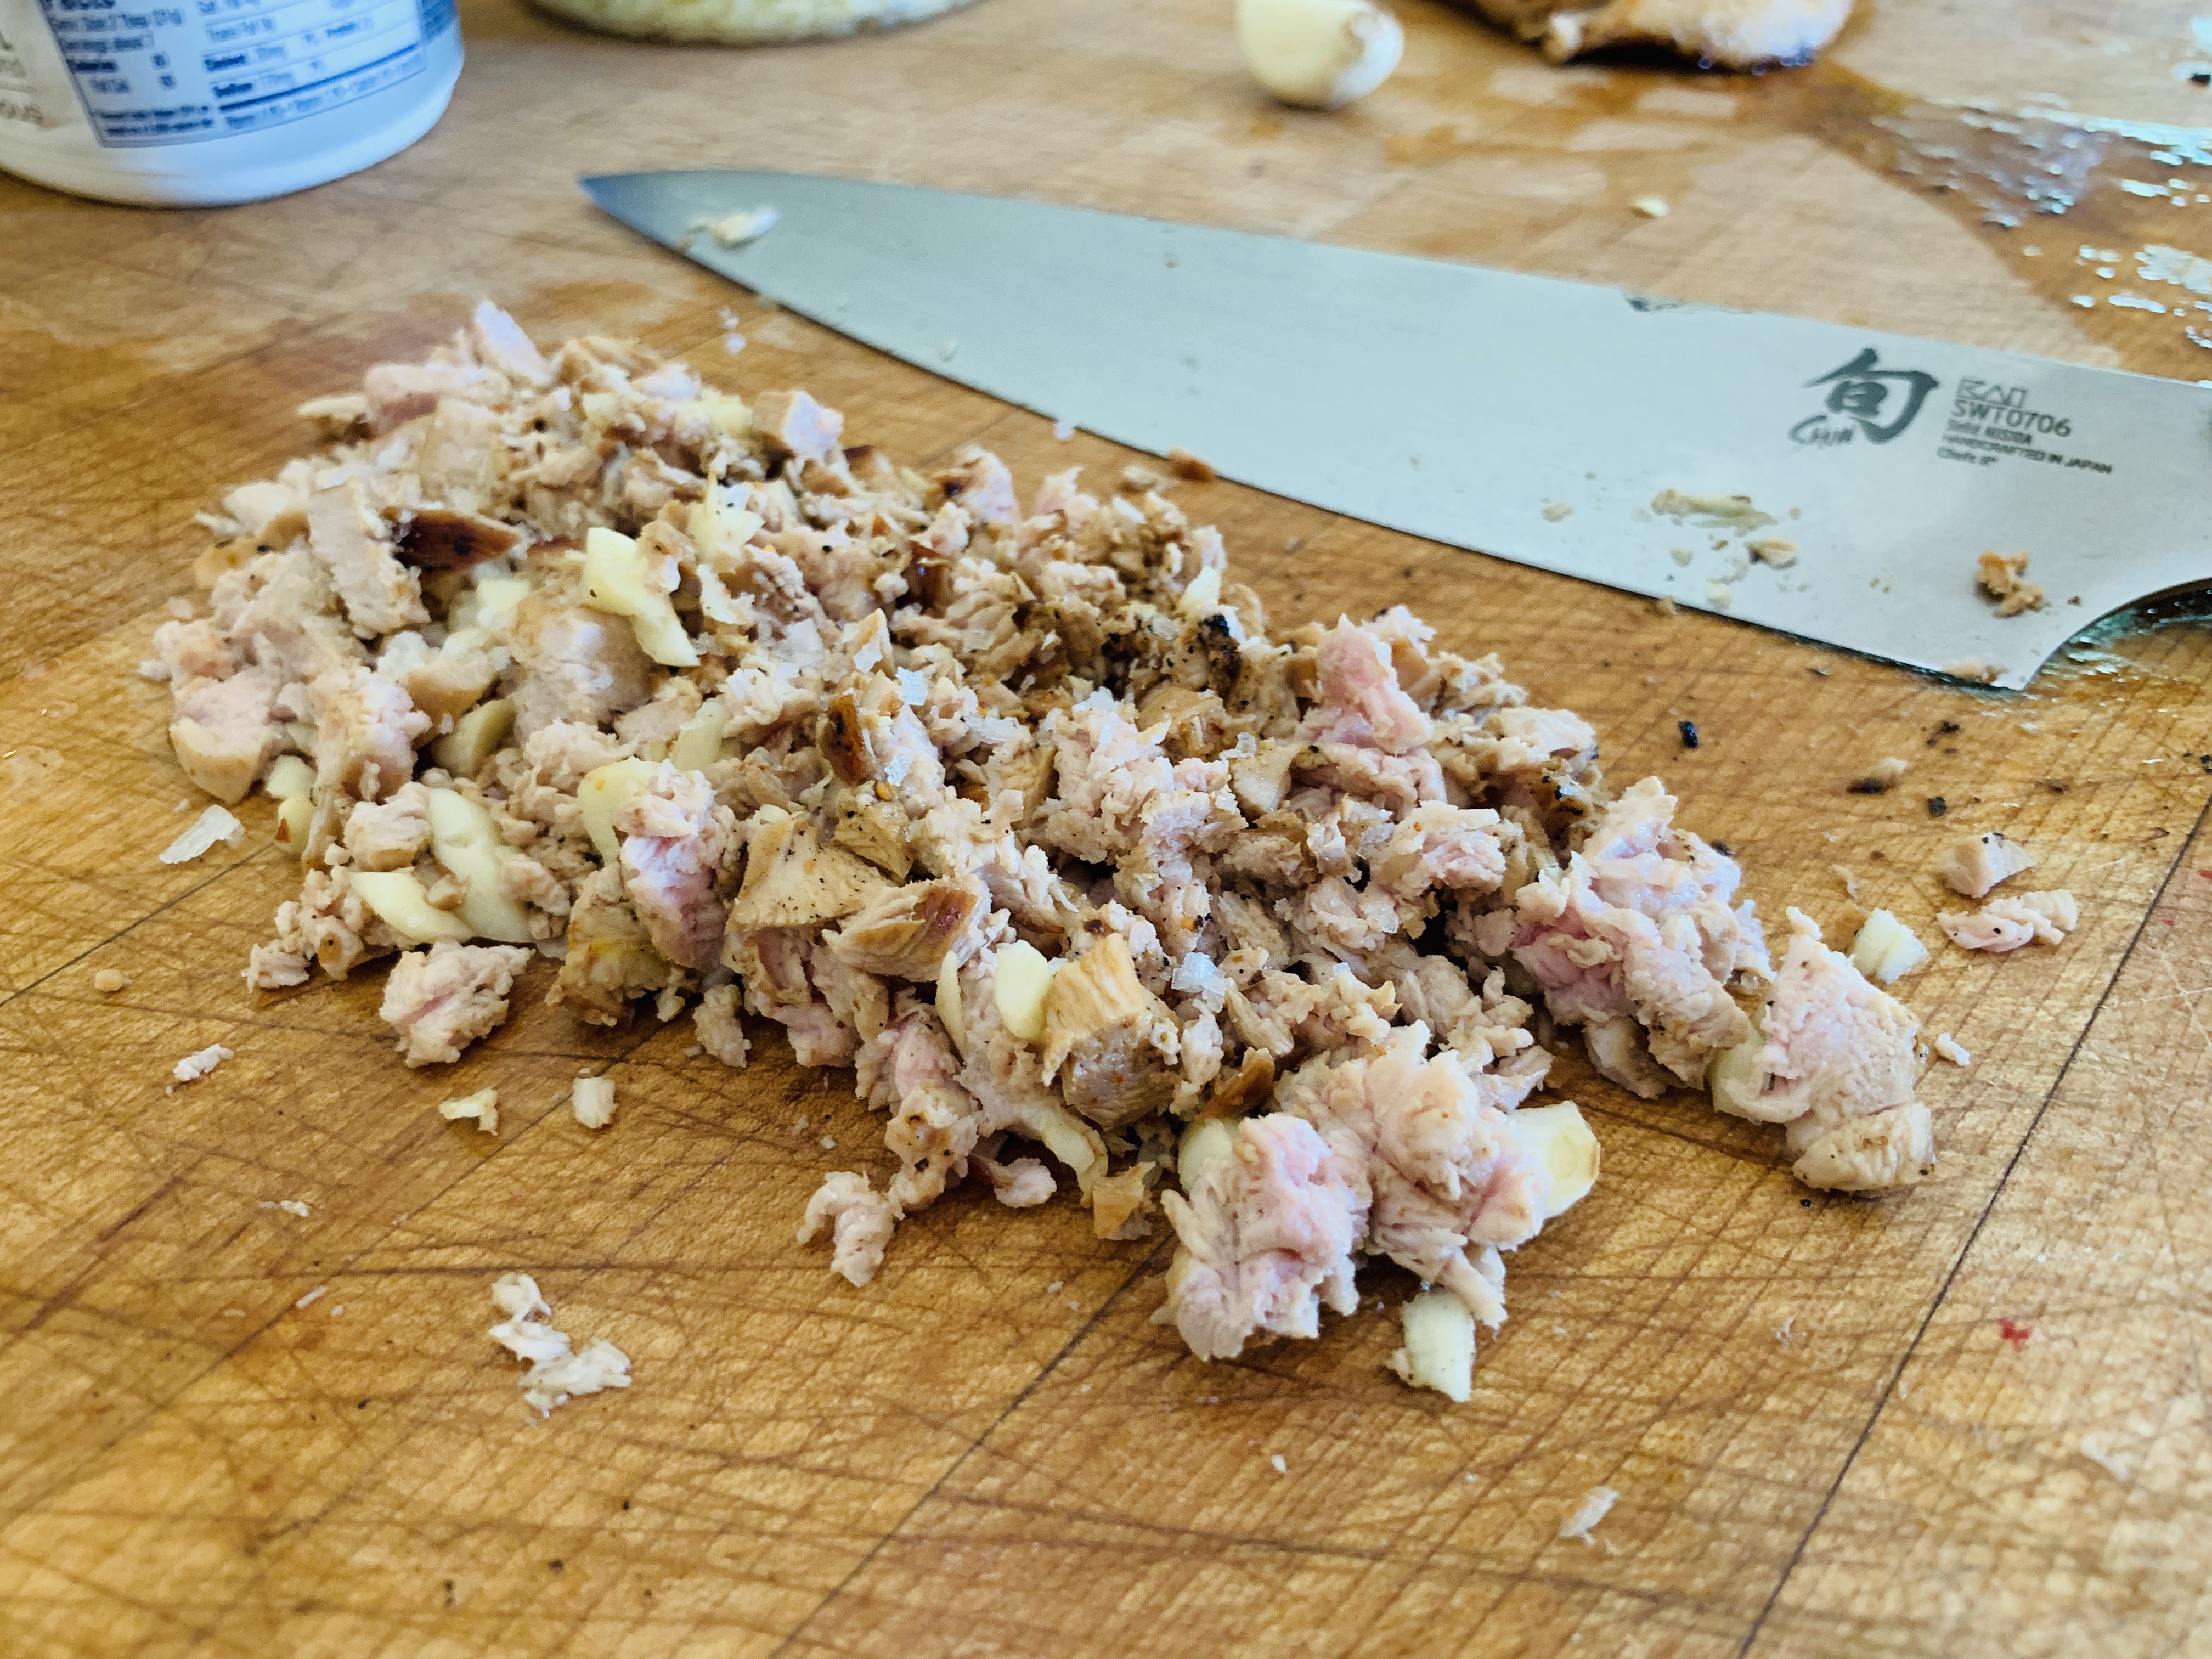
Then chop the chucker breast.
Now you are ready for assembling the popper. But before you do, get your breading line together and a few toothpicks. Scramble the eggs. This is the first decision you need to make. Do you like your jalapenos poppers crunchy texture? If you do use the Panko in the third dish, otherwise use flour again. I prefer the softer texture, but in this demonstration I used panko.
Add some chucker, then top with cheese, and roll it over and pin it with a toothpick.
Get all your poppers lined up and ready for the coating. It is easier that way and creates less of a mess.
The soldiers are ready to report to the coating station.
I usually set a cookie sheet for the end of the coating station. Dip in flour, then in egg wash, redip in the panko or flour. Set aside.
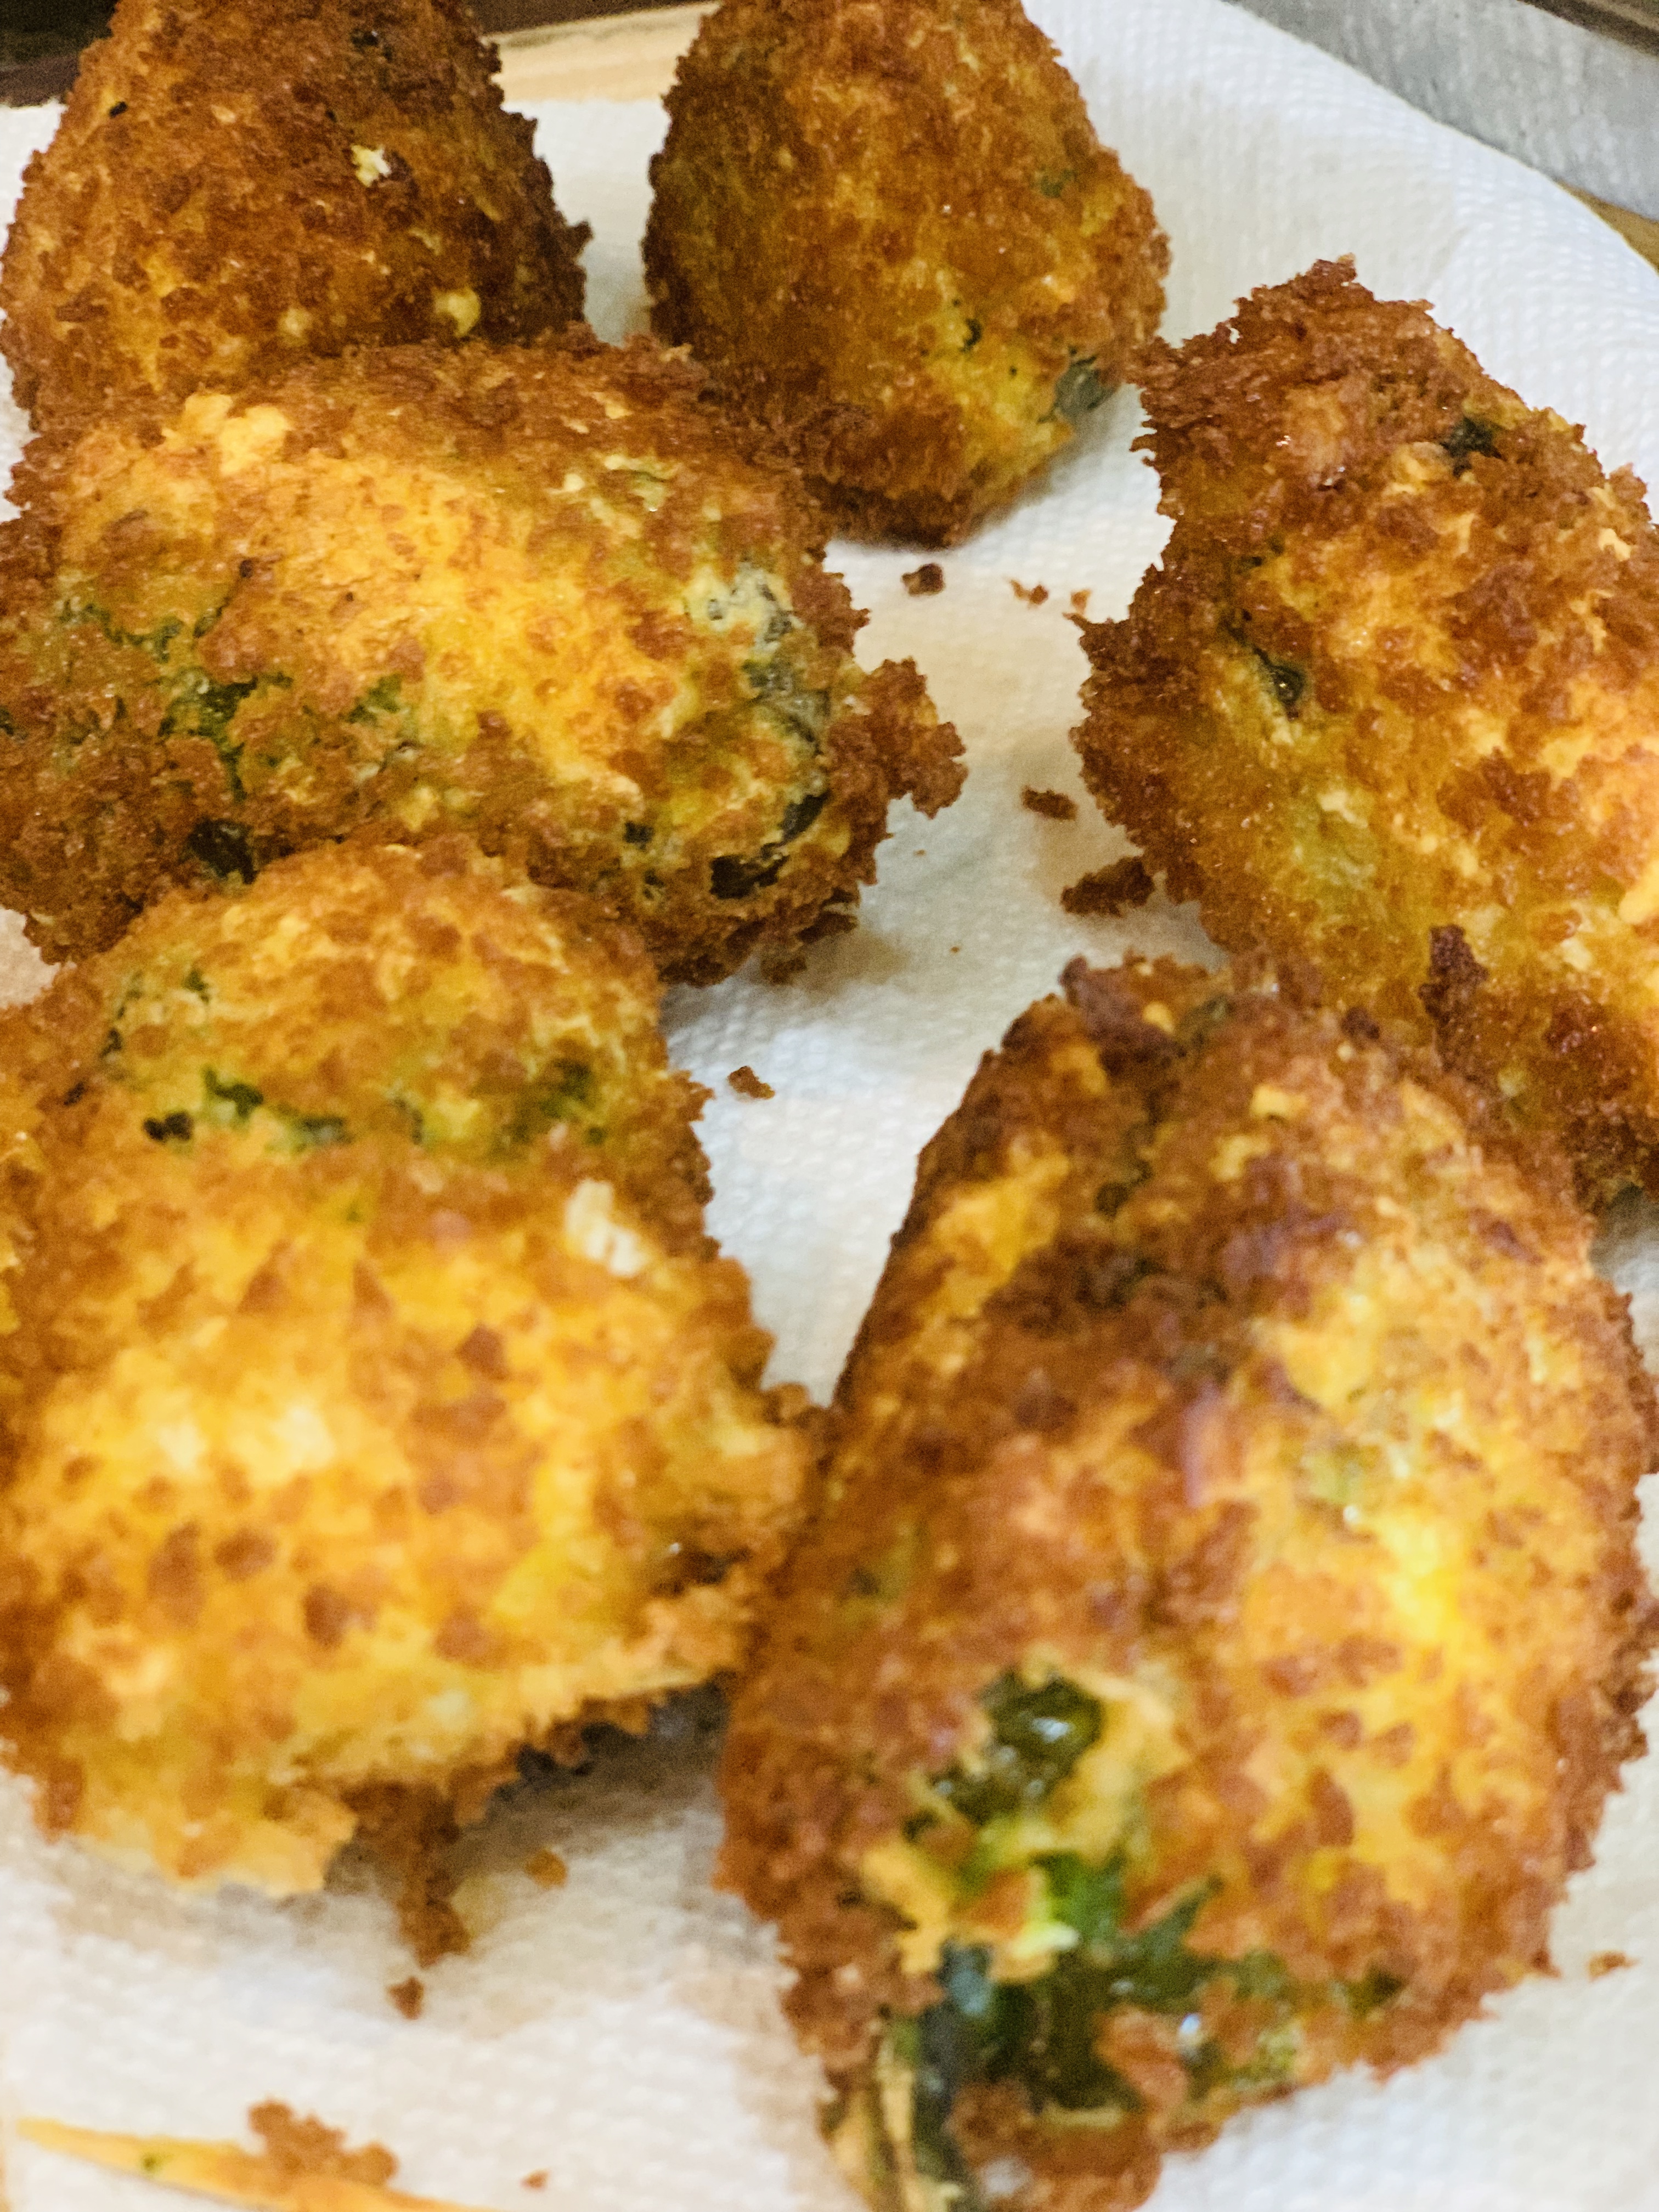
Your oil that you used for jalapenos we will use again. Get the oil up to medium high, and everything is precooked so all you want to do is brown them.
Just brown them in the oil.
Set them aside on a paper towel. This part is SUPER IMPORTANT. REMOVE THE TOOTHPICKS NOW.
REMOVE ALL TOOTHPICKS
Then serve and watch your guest smile.
Just look at this little golden treasure full of double whammy Pow
You can use pheasant or chucker, or any other wild game you may have in this recipe. The technique of pre cooking the peppers, and the egg wash is what is important. I hope you enjoy, get to work on cooking that game in your freezer.
The Hunting Chef
Never stand next to the really tall guy in the hunting photos
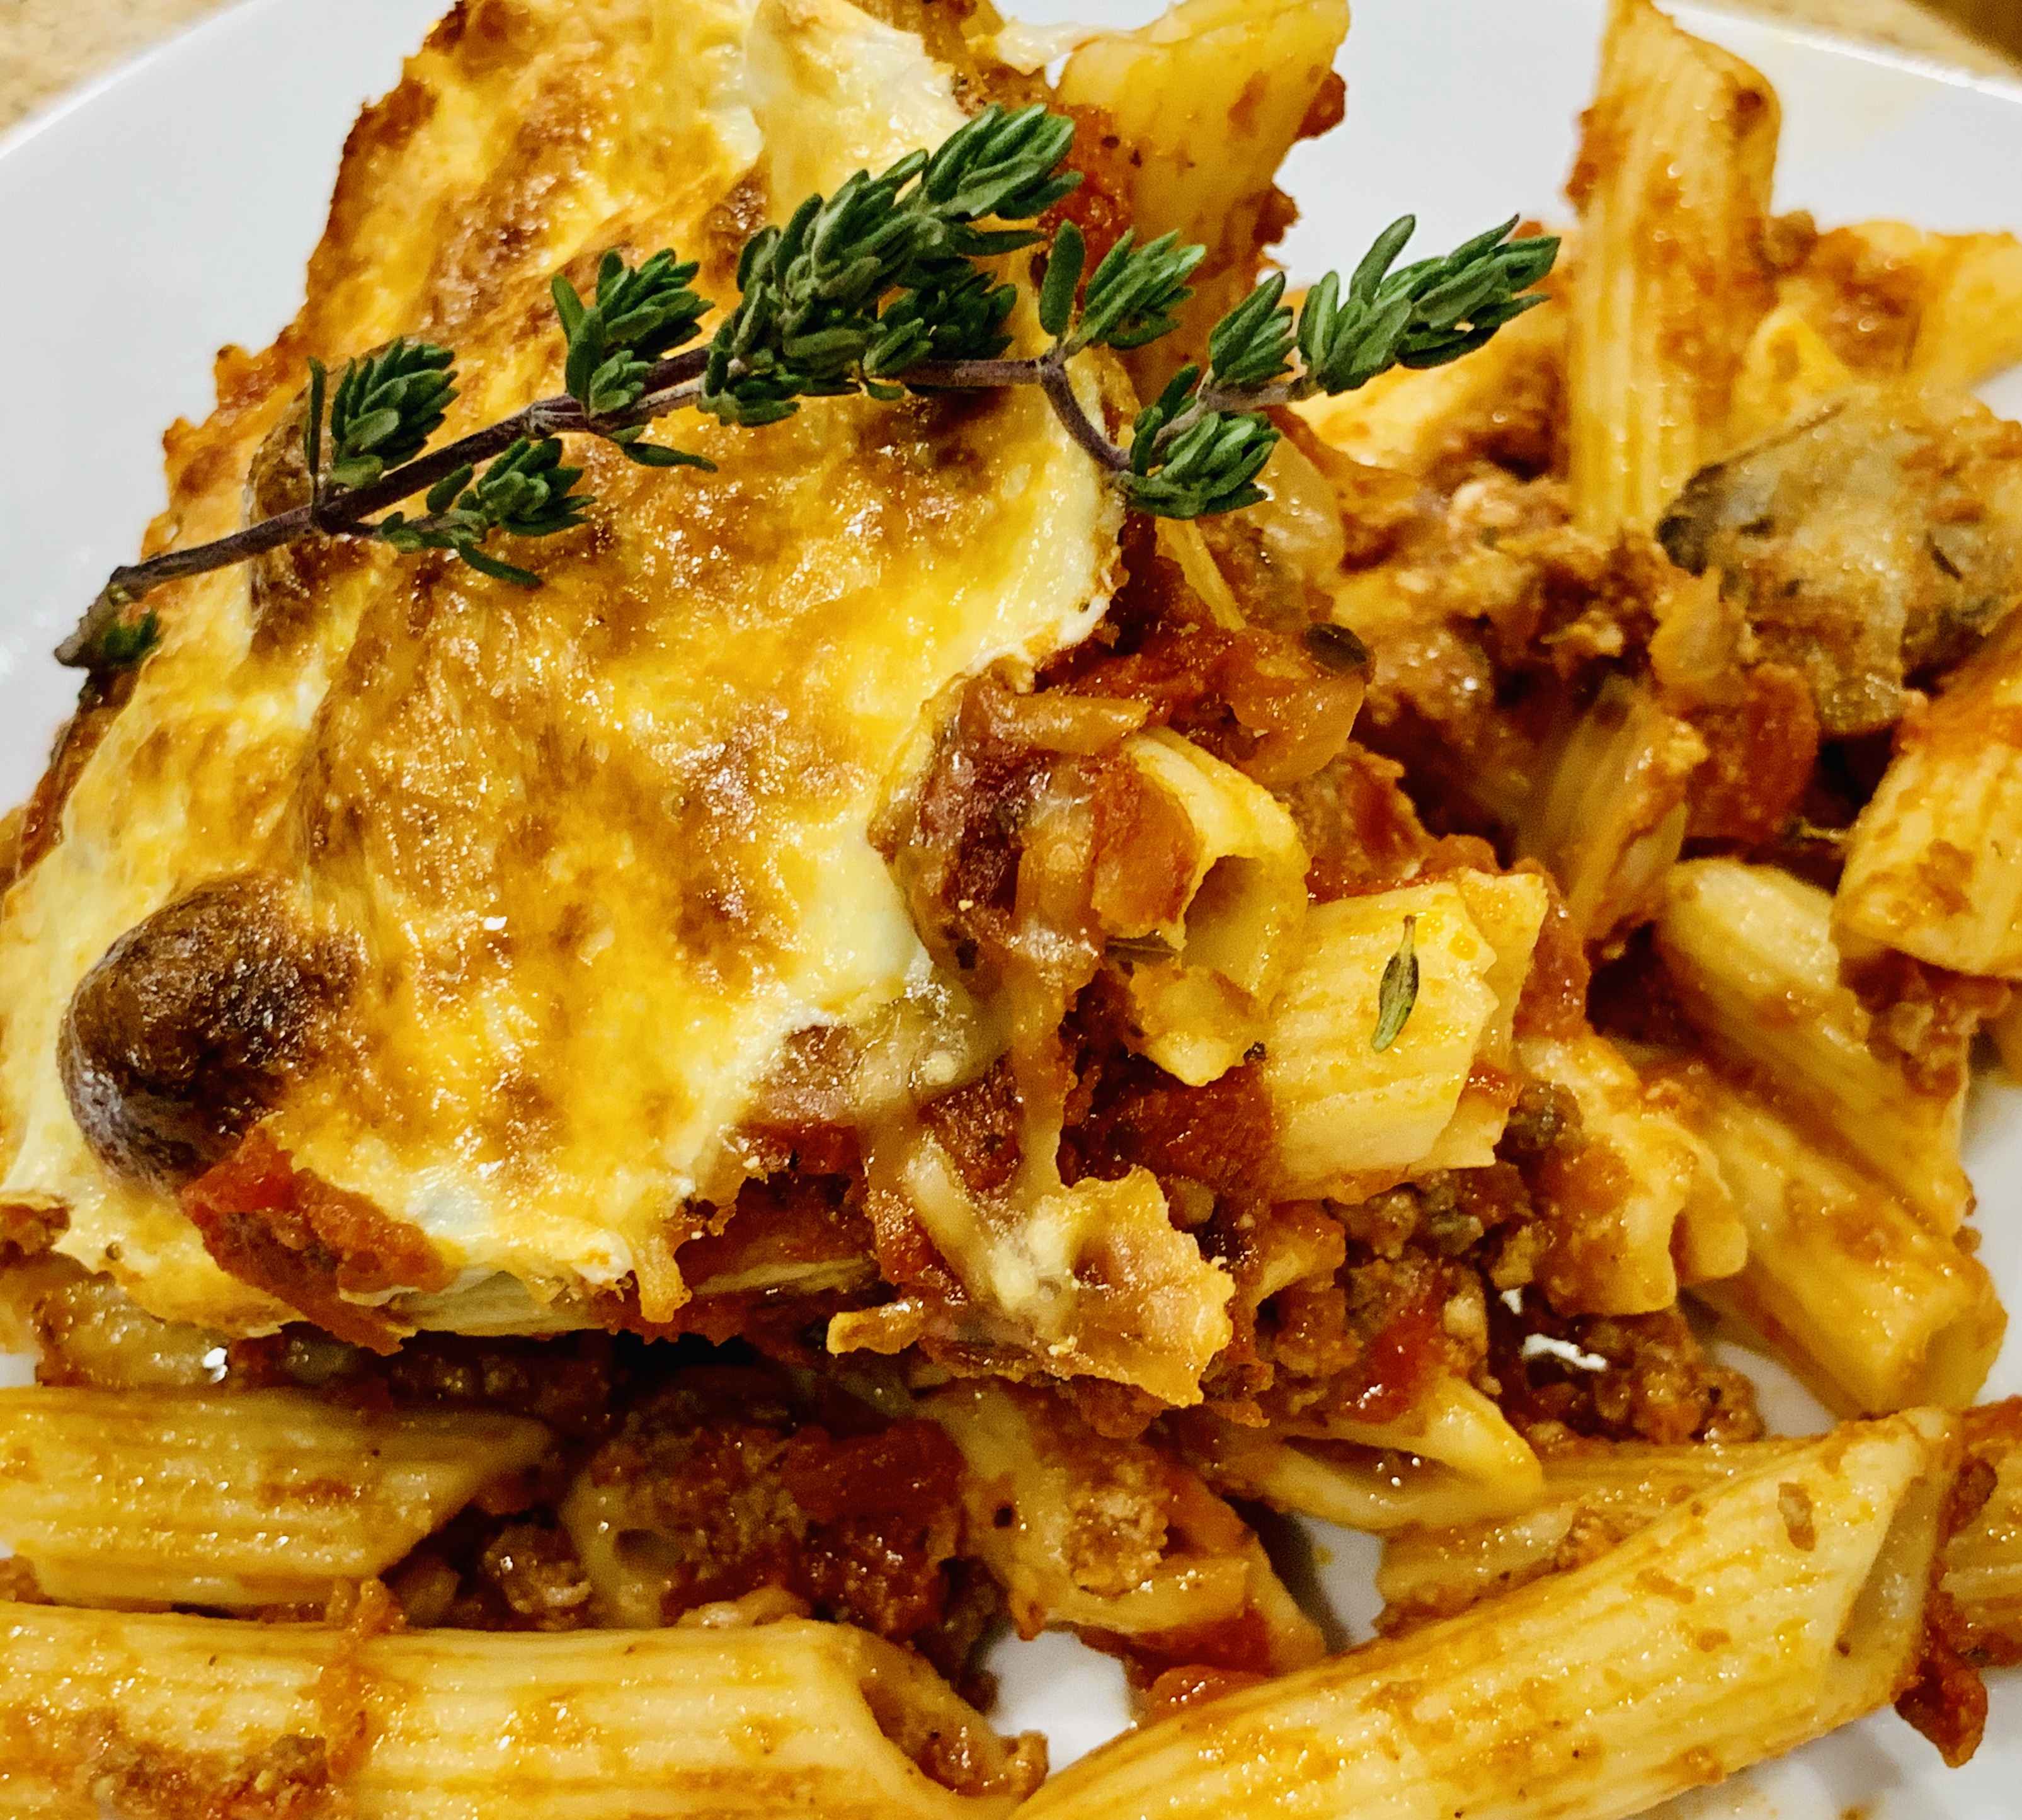
This past weekend, I woke up very early and was flipping thru the channels until I came across The Godfather. I know all of us have a few movies that resonate in our DNA that when we come across them on the TV we cannot help ourselves but to watch it for the hundredth time. What can I say….I was hooked. When I get to the part where they are cooking Italian food, I start smelling it like I was there. I put my plan into action based on three basic principles. A fantastic meat sauce, a meatball from flavor town, and some great pasta. We got ourselves Baked Ziti on the way, and that how this recipe started. I had plenty of elk and everything to make this dish in my freezer. So off I went…at 5 am. in the morning.
The first thing I need to start on was the stuffed meatballs. Did I just say that? Stuffed Meatballs? Yes I did. They are just plain awesome.
Stuffed Meatballs:
1.5 lbs of Elk Burger.
1.5 lbs of ground veal, or Italian sausage
5 cloves of garlic minced.
1/2 cup of breadcrumbs. I use the Italian flavor.
1/2 cup of grated parmesan cheese.
1 tablespoons of oregano
2 eggs
1/4 cup of milk
1/2 tablespoon of salt and pepper
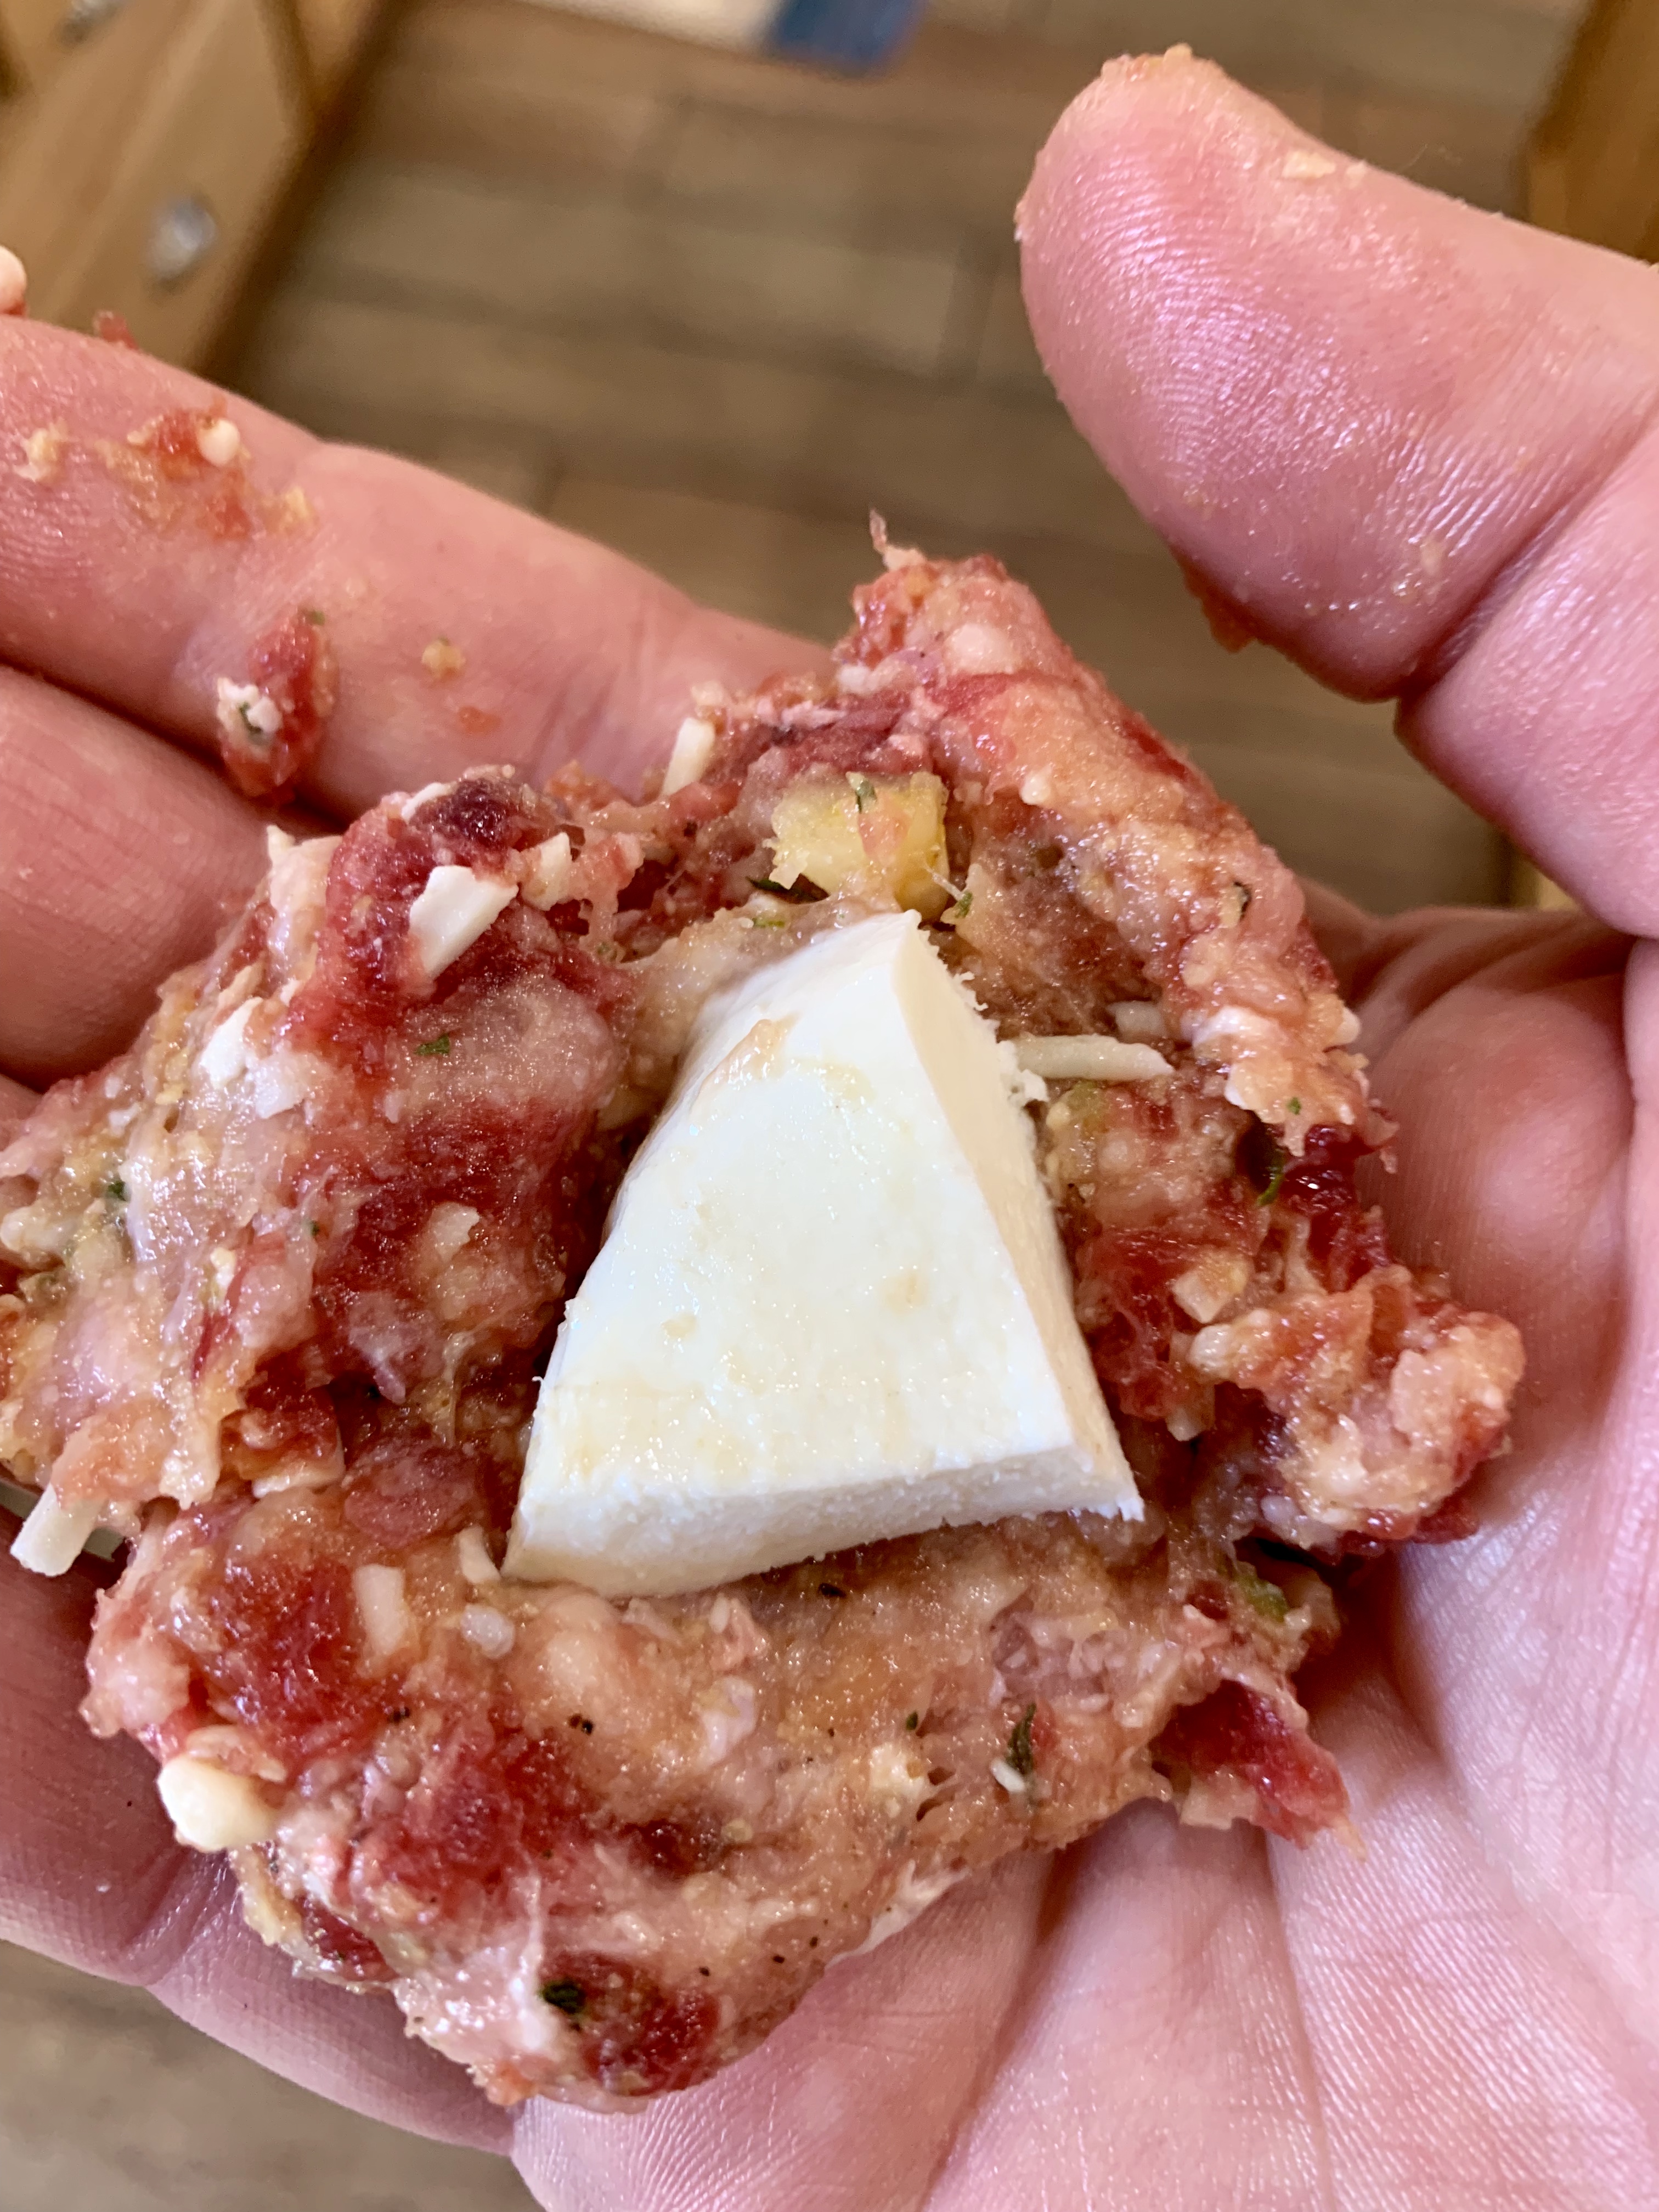
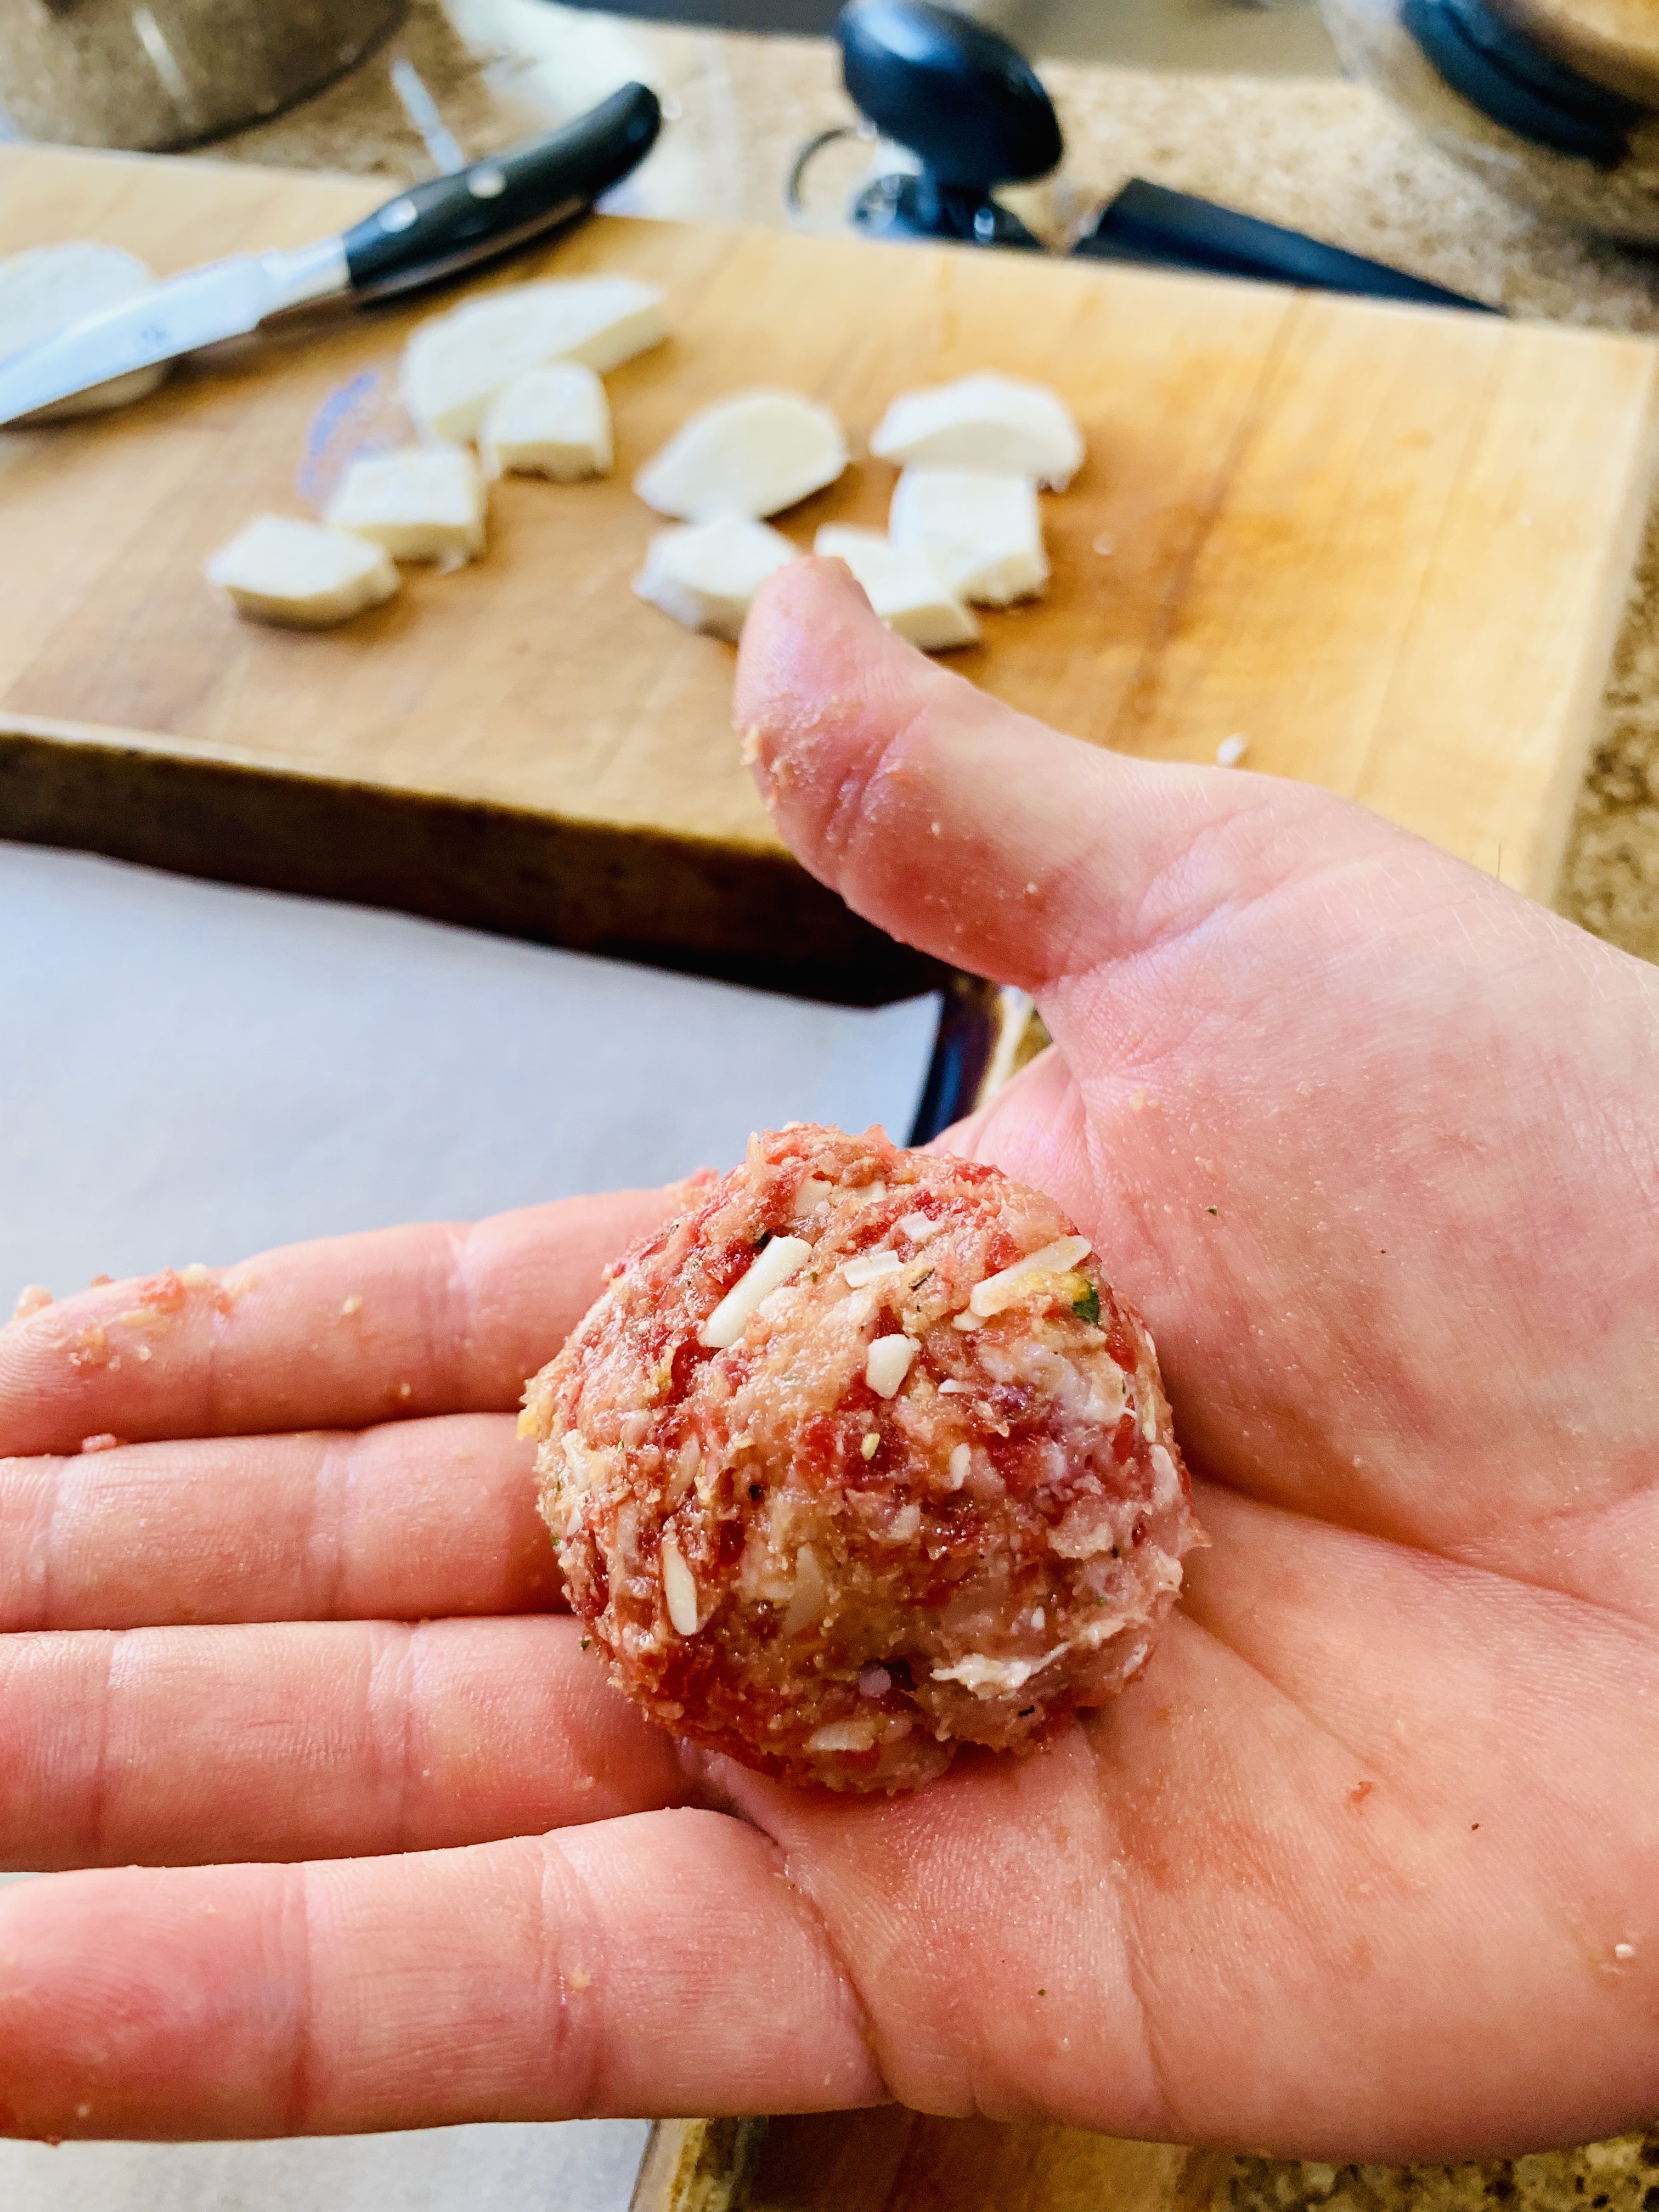
1/2 inch cubed mozzarella slices
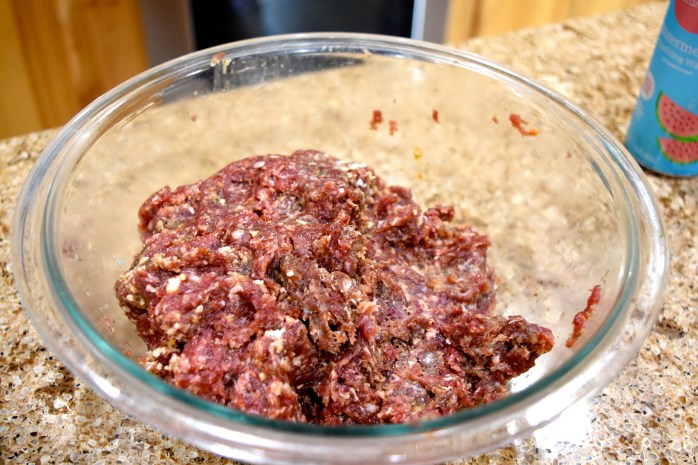
Mix all the ingredients together, exept for the mozzarella. Make one inch balls in your hand, then flatten and add your mozzarella.
Then roll the ball over the cheese and roll in your hand until you form a perfect ball.
Try to make sure that you cannot see the mozzarella inside or it will leak out during the cooking process.
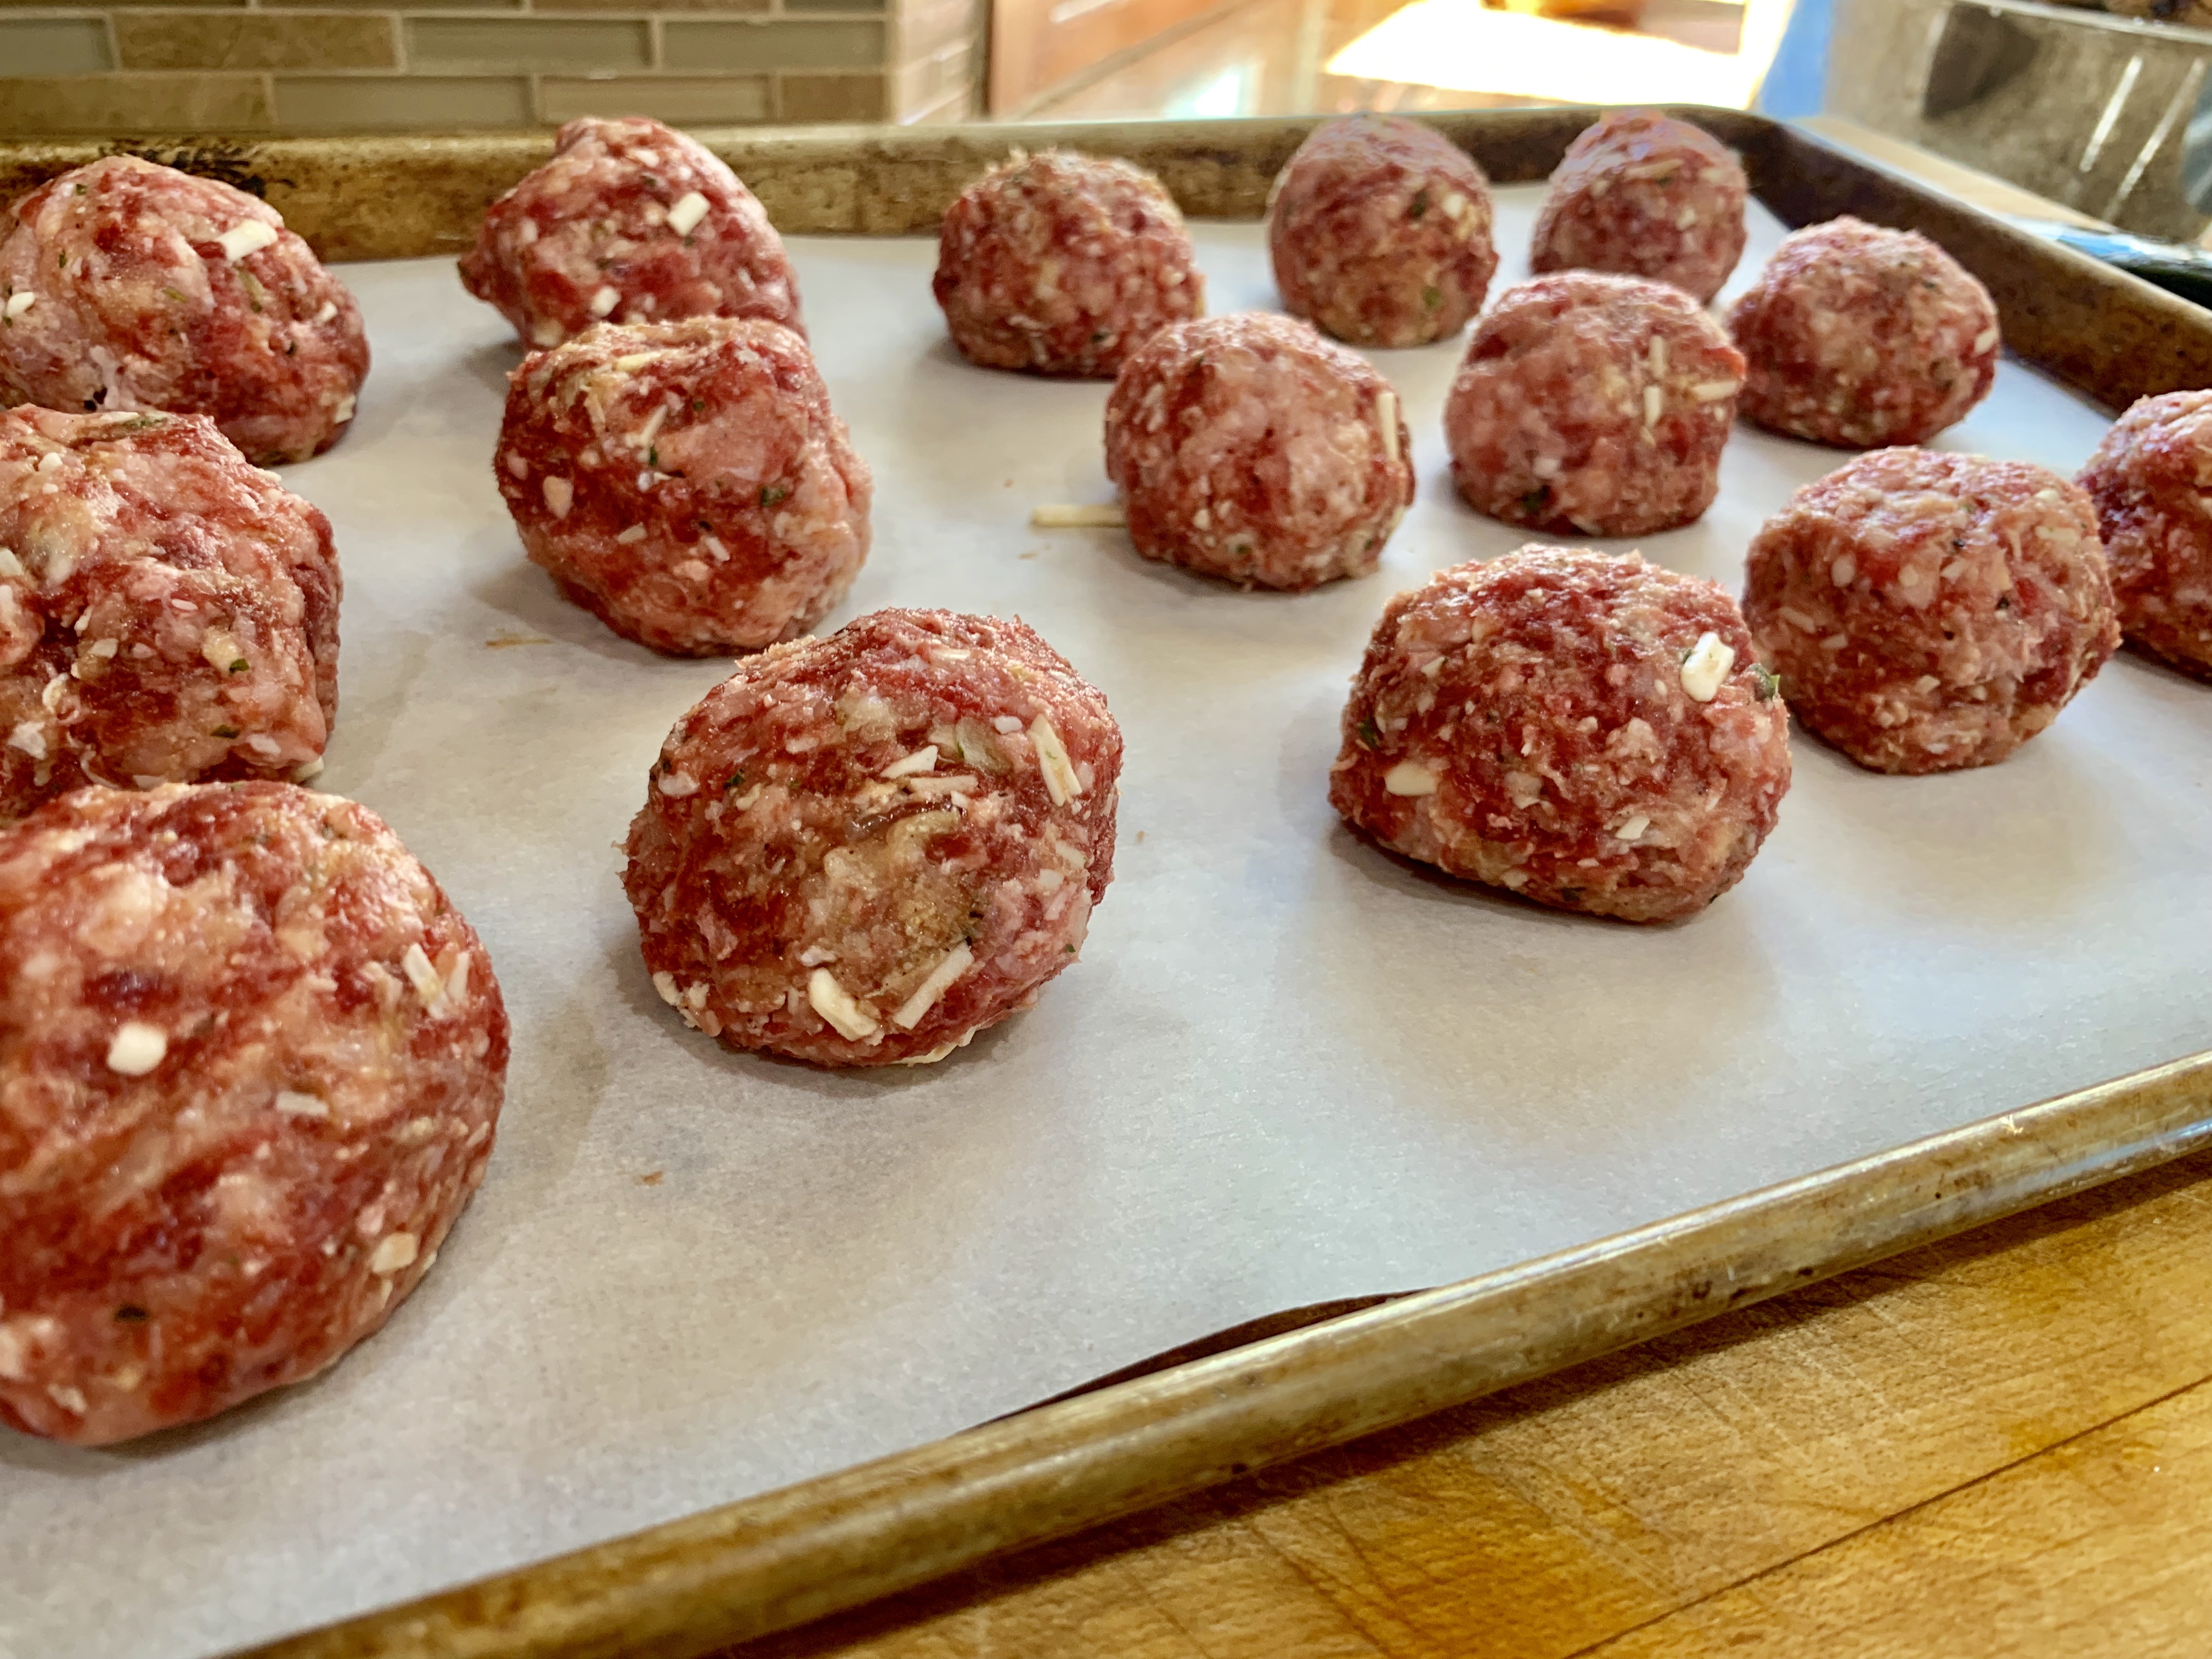
Take a cookie sheet and I put cooking paper down, you can also grease the pan. Form, about as many meatballs that you are going to use for the dish. Save the remainder for your meat sauce. I have a huge cooking pot, so I made a lot of meatballs.
Bake at 400 degrees for 20 minutes.
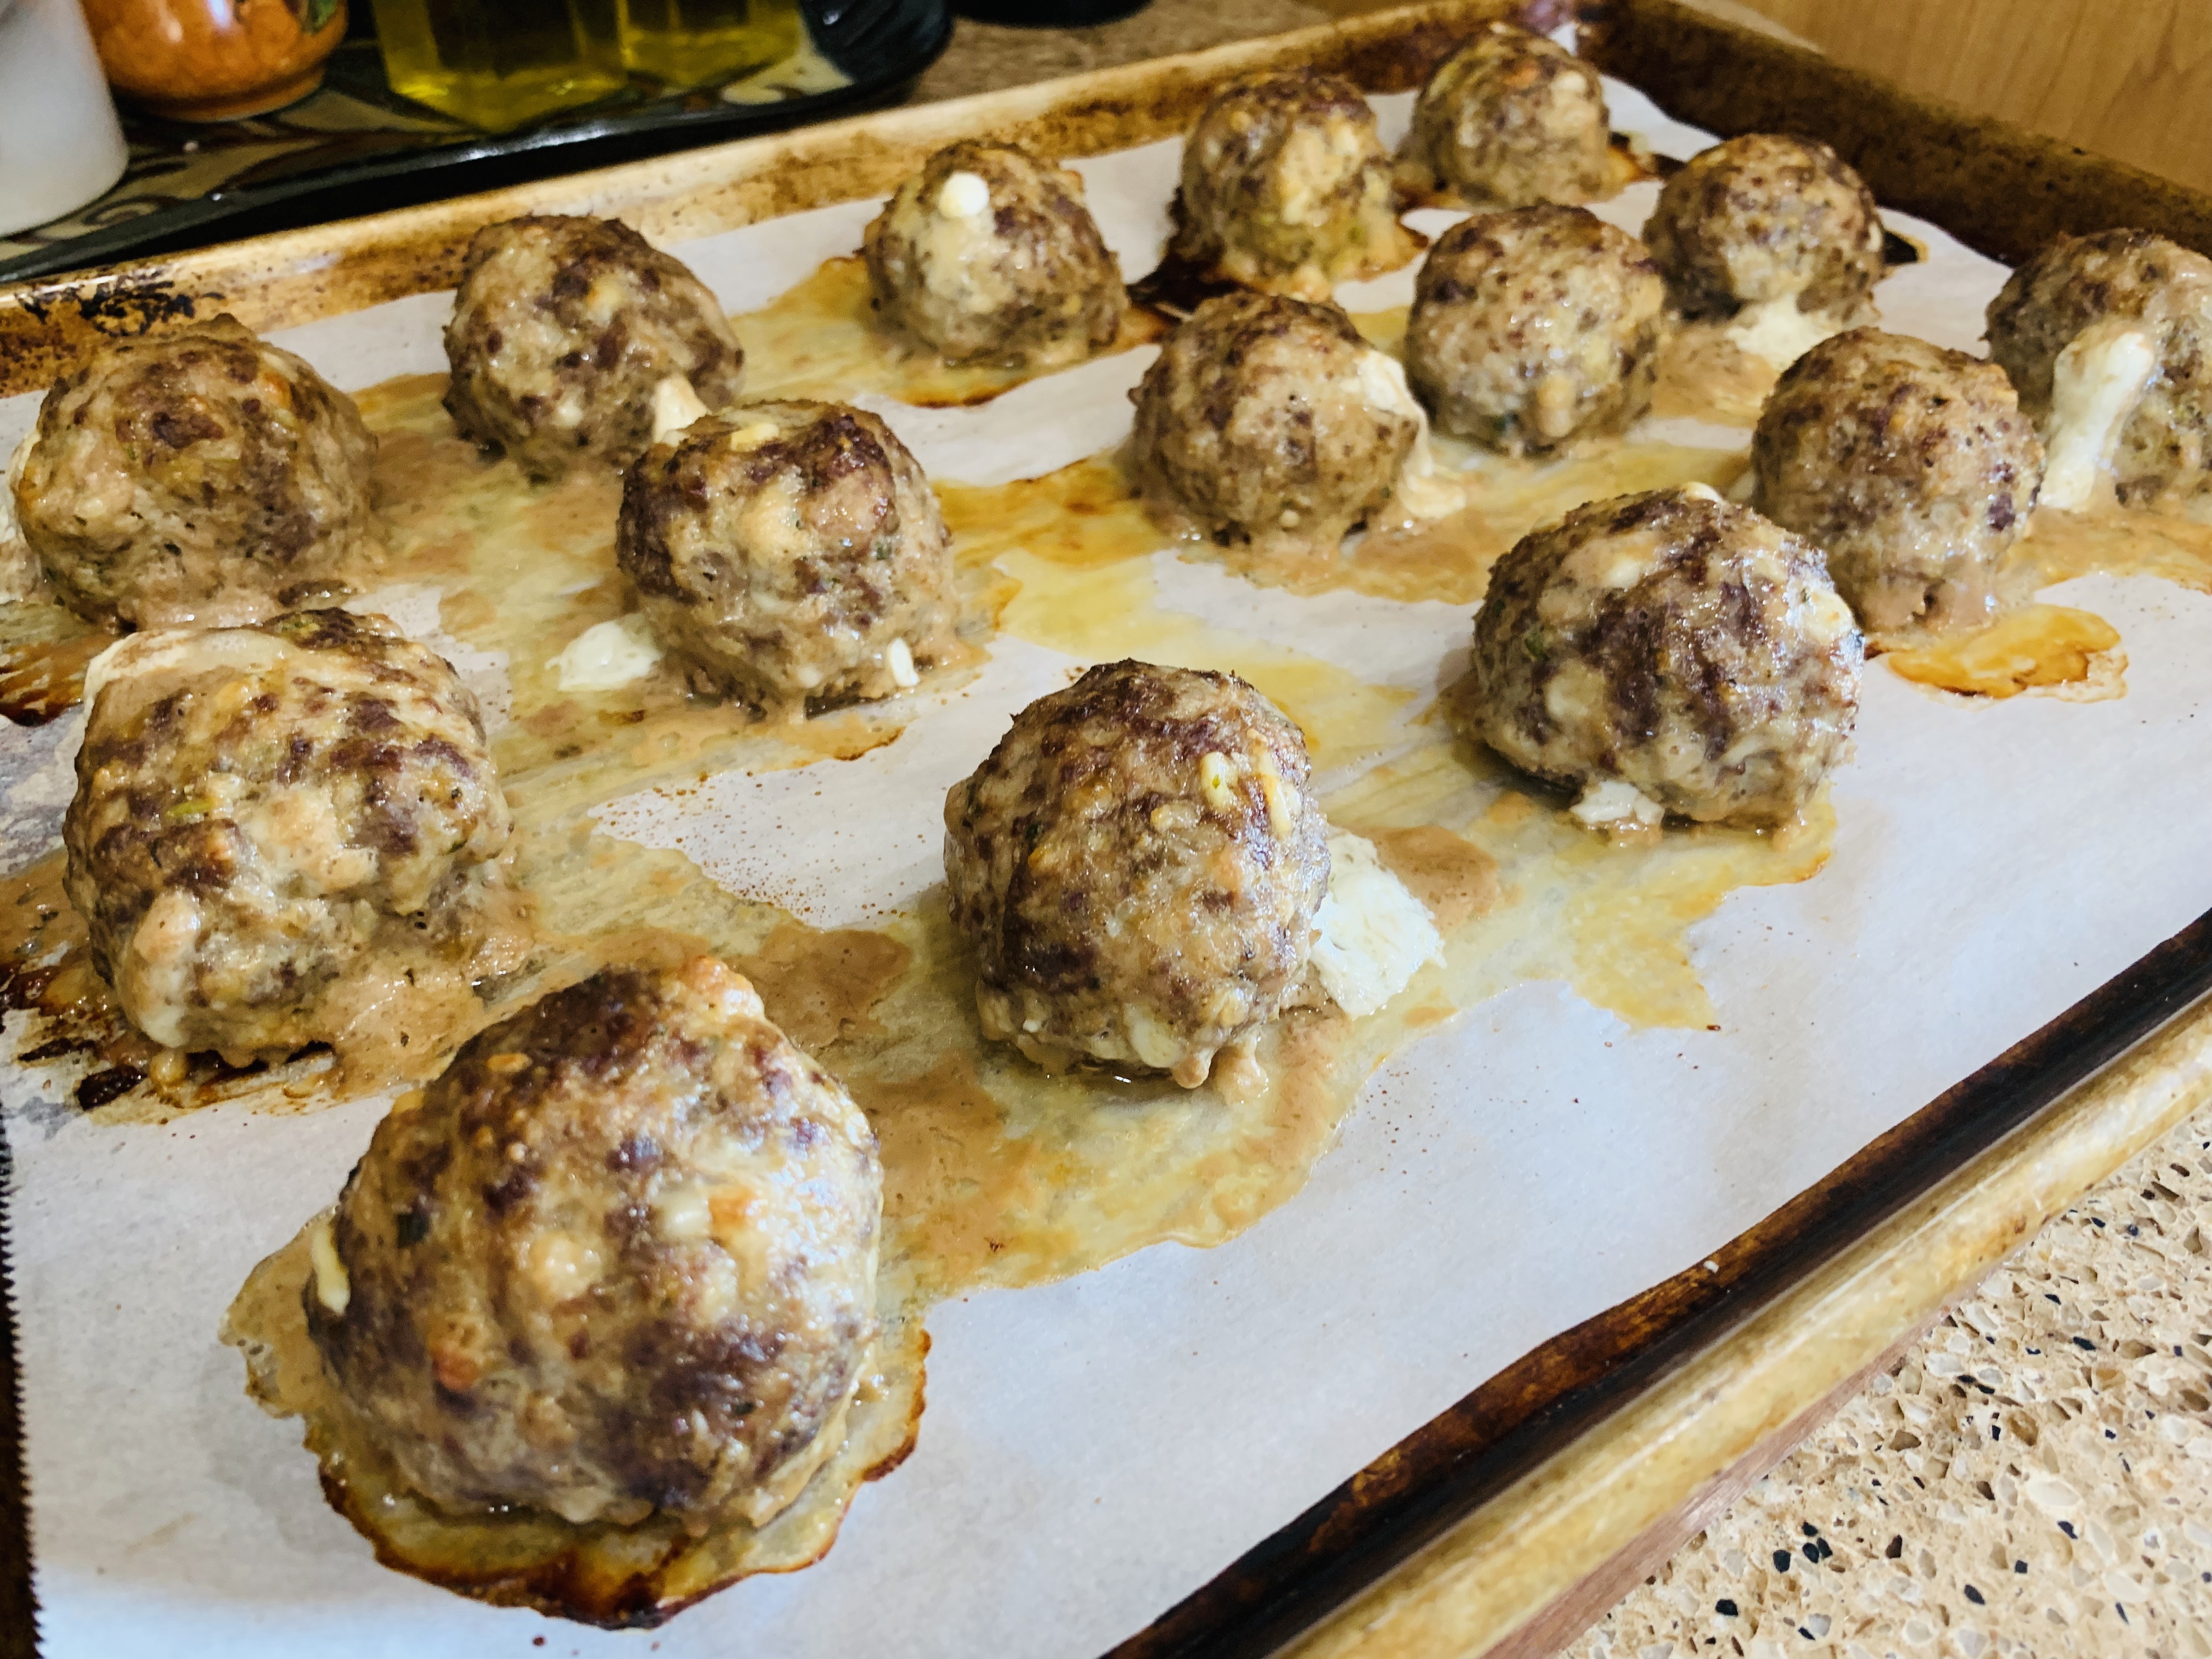
As you can see some of my meatballs leaked some cheese. I will do better next time. Now, you have some left over meatball ingredients left in the bowl, set that aside.
Meat Sauce:
4 green onions chopped
1 onion chopped
4 garlic cloves chopped
1 cup of mushrooms (I add more because I love them) sliced.
1.5 cups of smoked linguica sausage (optional). Carlton Farms has the best.
28 oz, and 1 more 12 oz can of stewed tomatoes
6 oz tomato paste
1 tablespoon of oregano.
1/4 cup of fresh basil chopped
2 tablespoon of sugar
2 teaspoons of crushed red pepper
2 teaspoons of salt and pepper add more to taste
olive oil
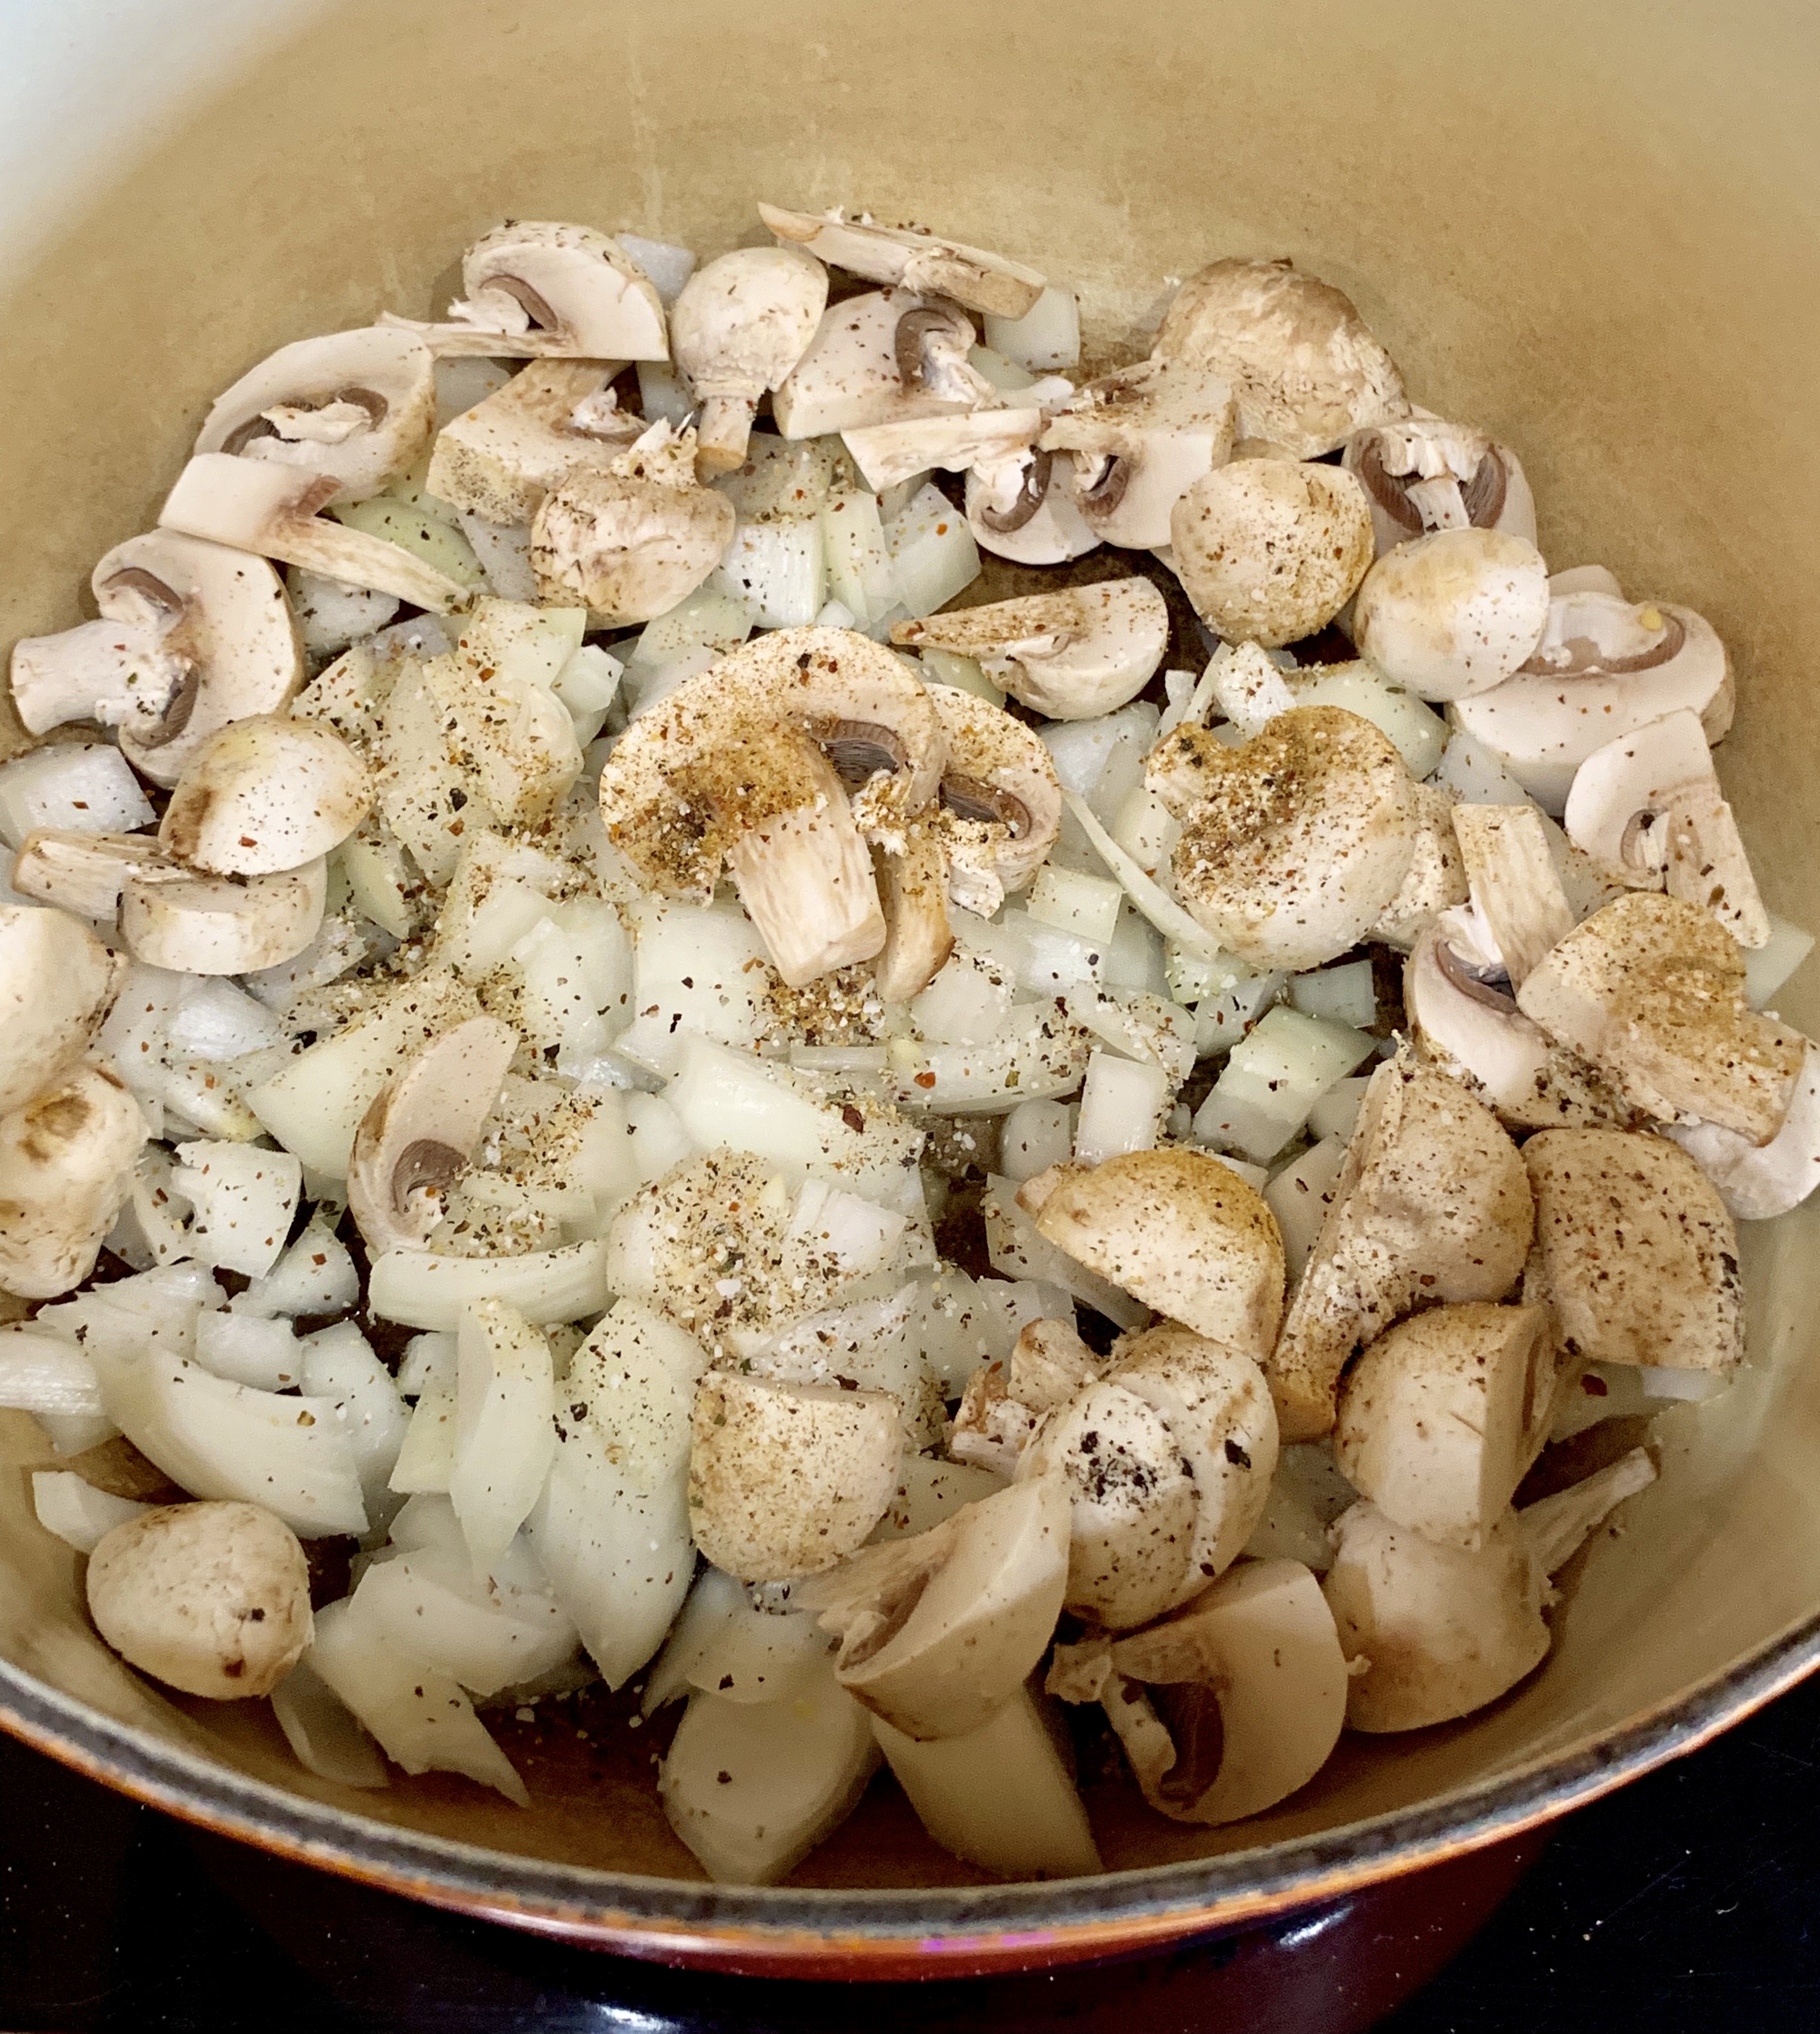
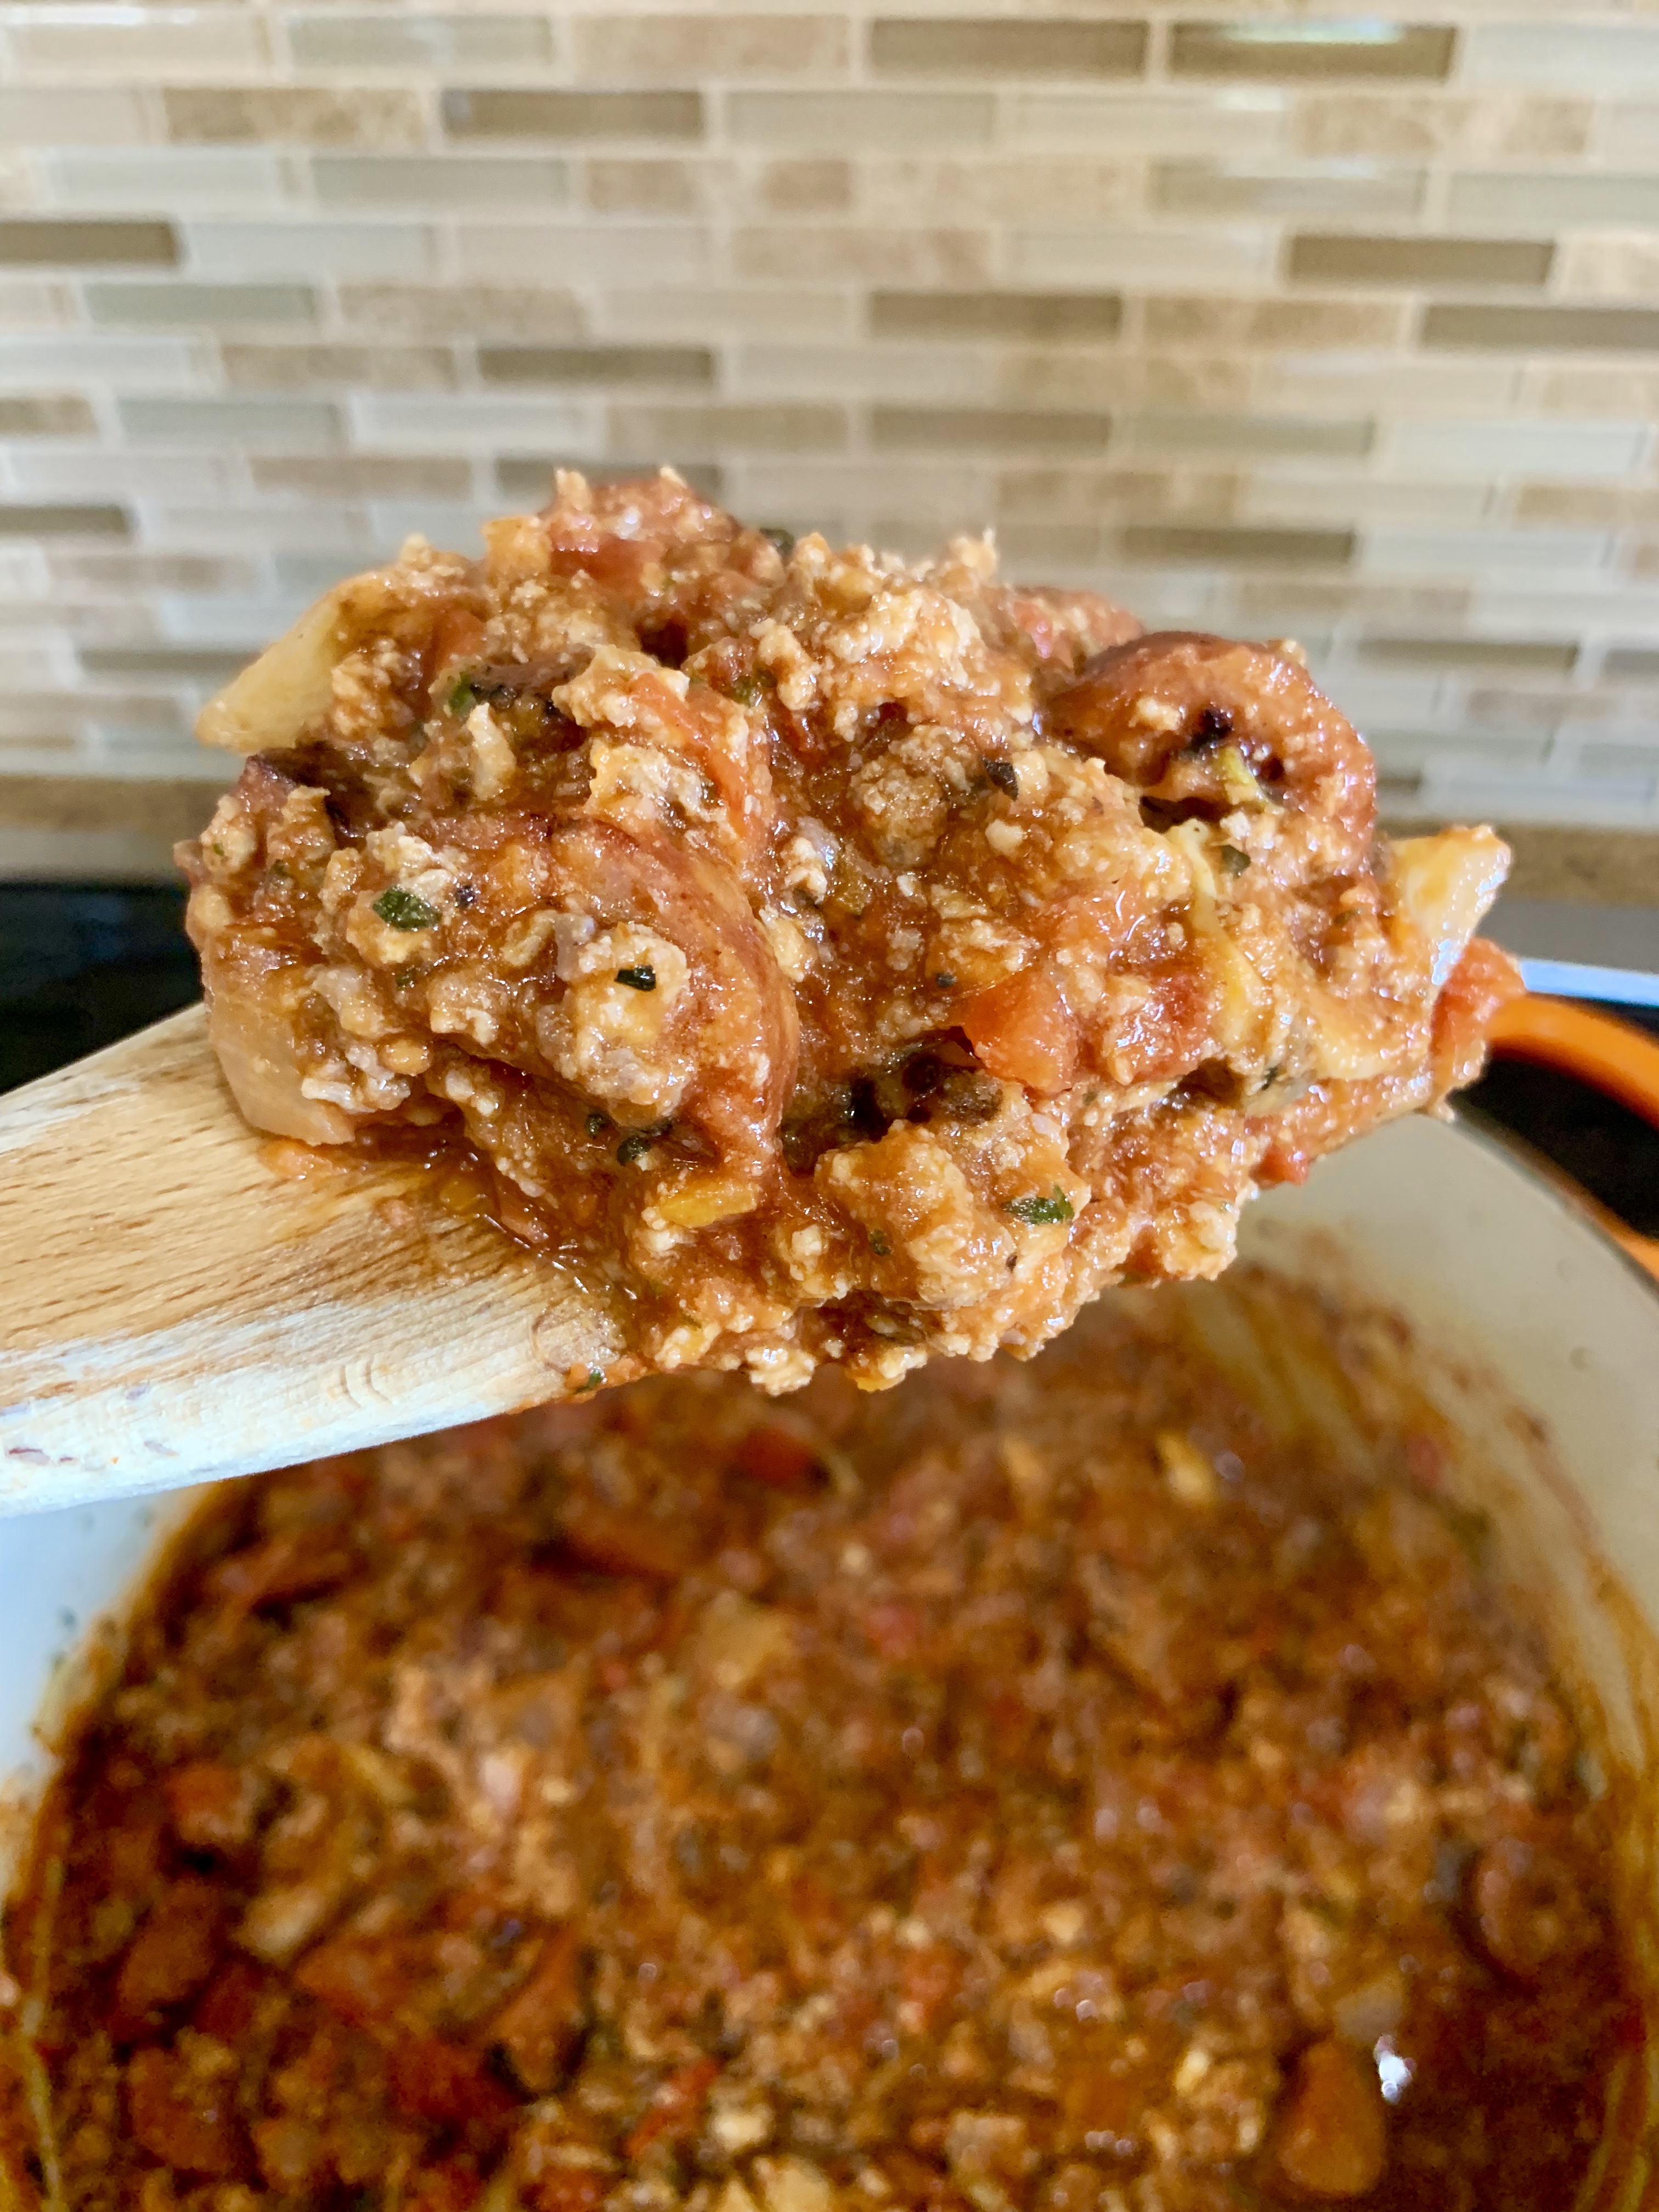
Add olive oil to pot, onions, mushrooms, garlic, and green onions. Add the crushed red pepper, salt and pepper and cook on medium high until translucent, 4-6 minutes. Add the meatball left over ingredients. Cook until browned. Drain any fat off.
Add tomatoes and paste, oregano, sugar and basil. Taste it, does it need salt and pepper. Season to taste…Be liberal with your salt.
Stir and cook on low.
I cut my linguica smoked sausage up and cook in frying pan to render any fat, and add to pot.
Stir and cook on low.
Cook pasta dente, per instructions.
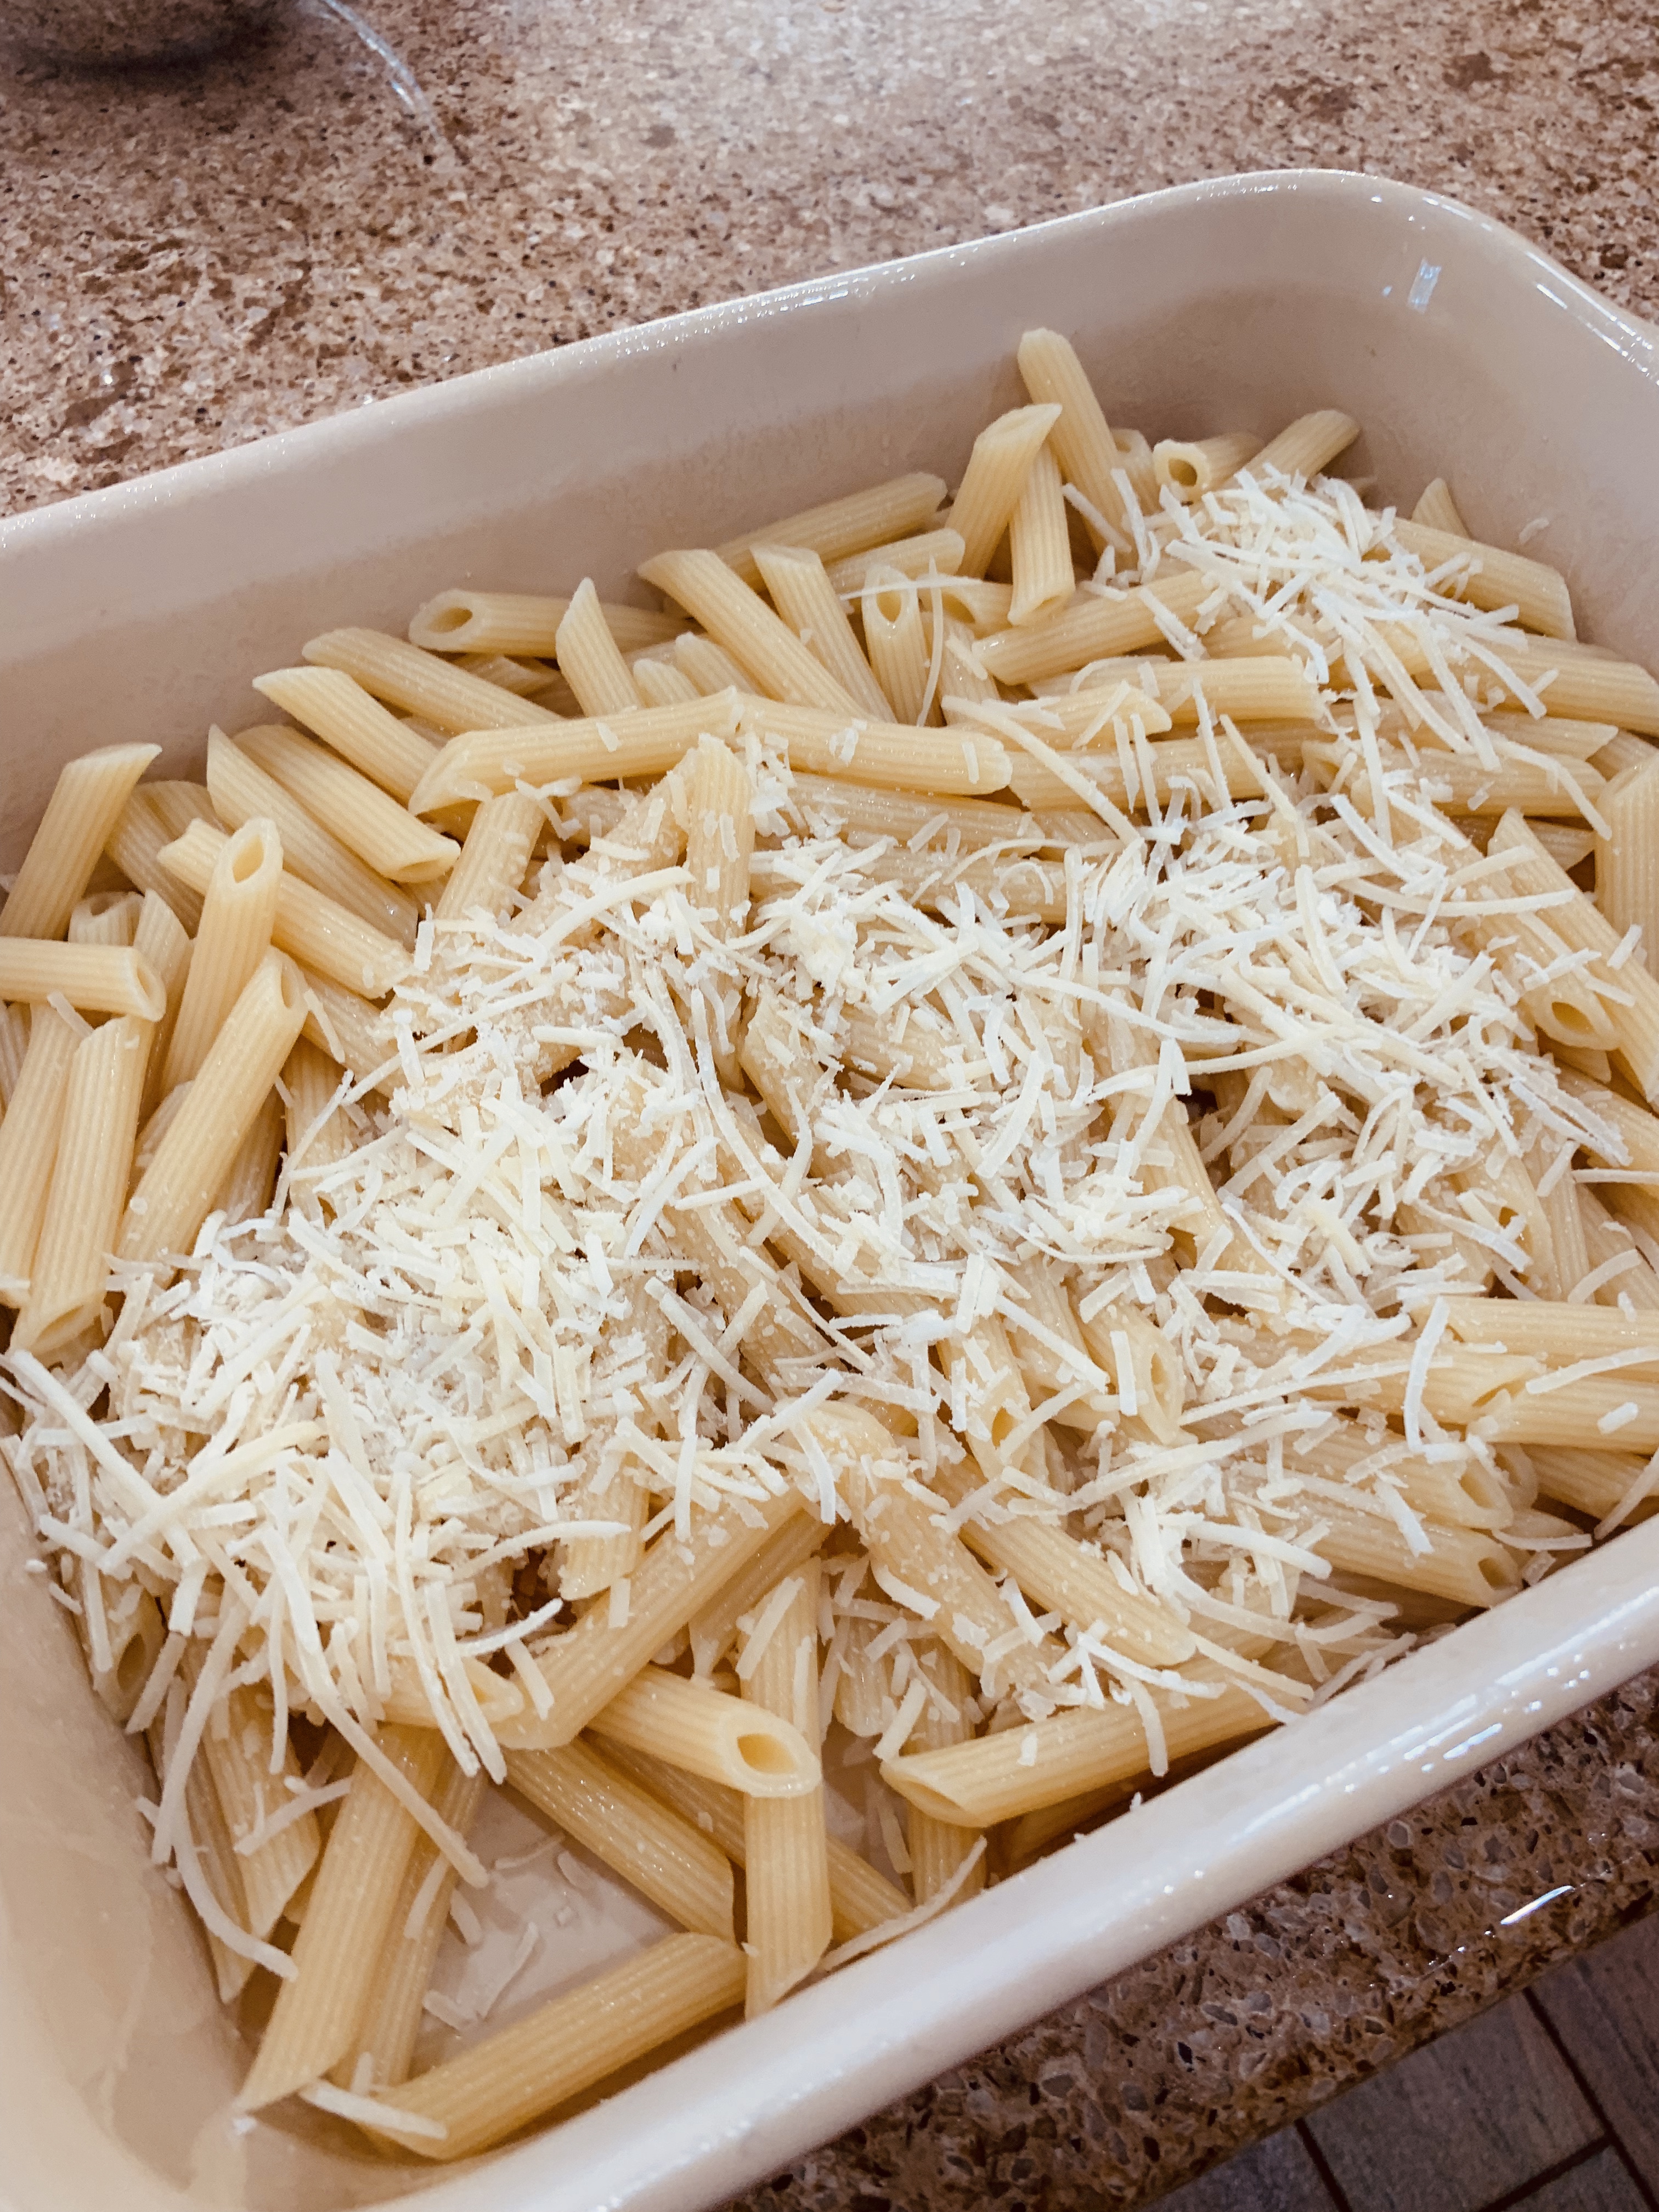
Make sure to grease your ziti pan, add pasta sprinkle it with a little parmesan cheese.
Add 3/4 of the red sauce and mix pasta in.
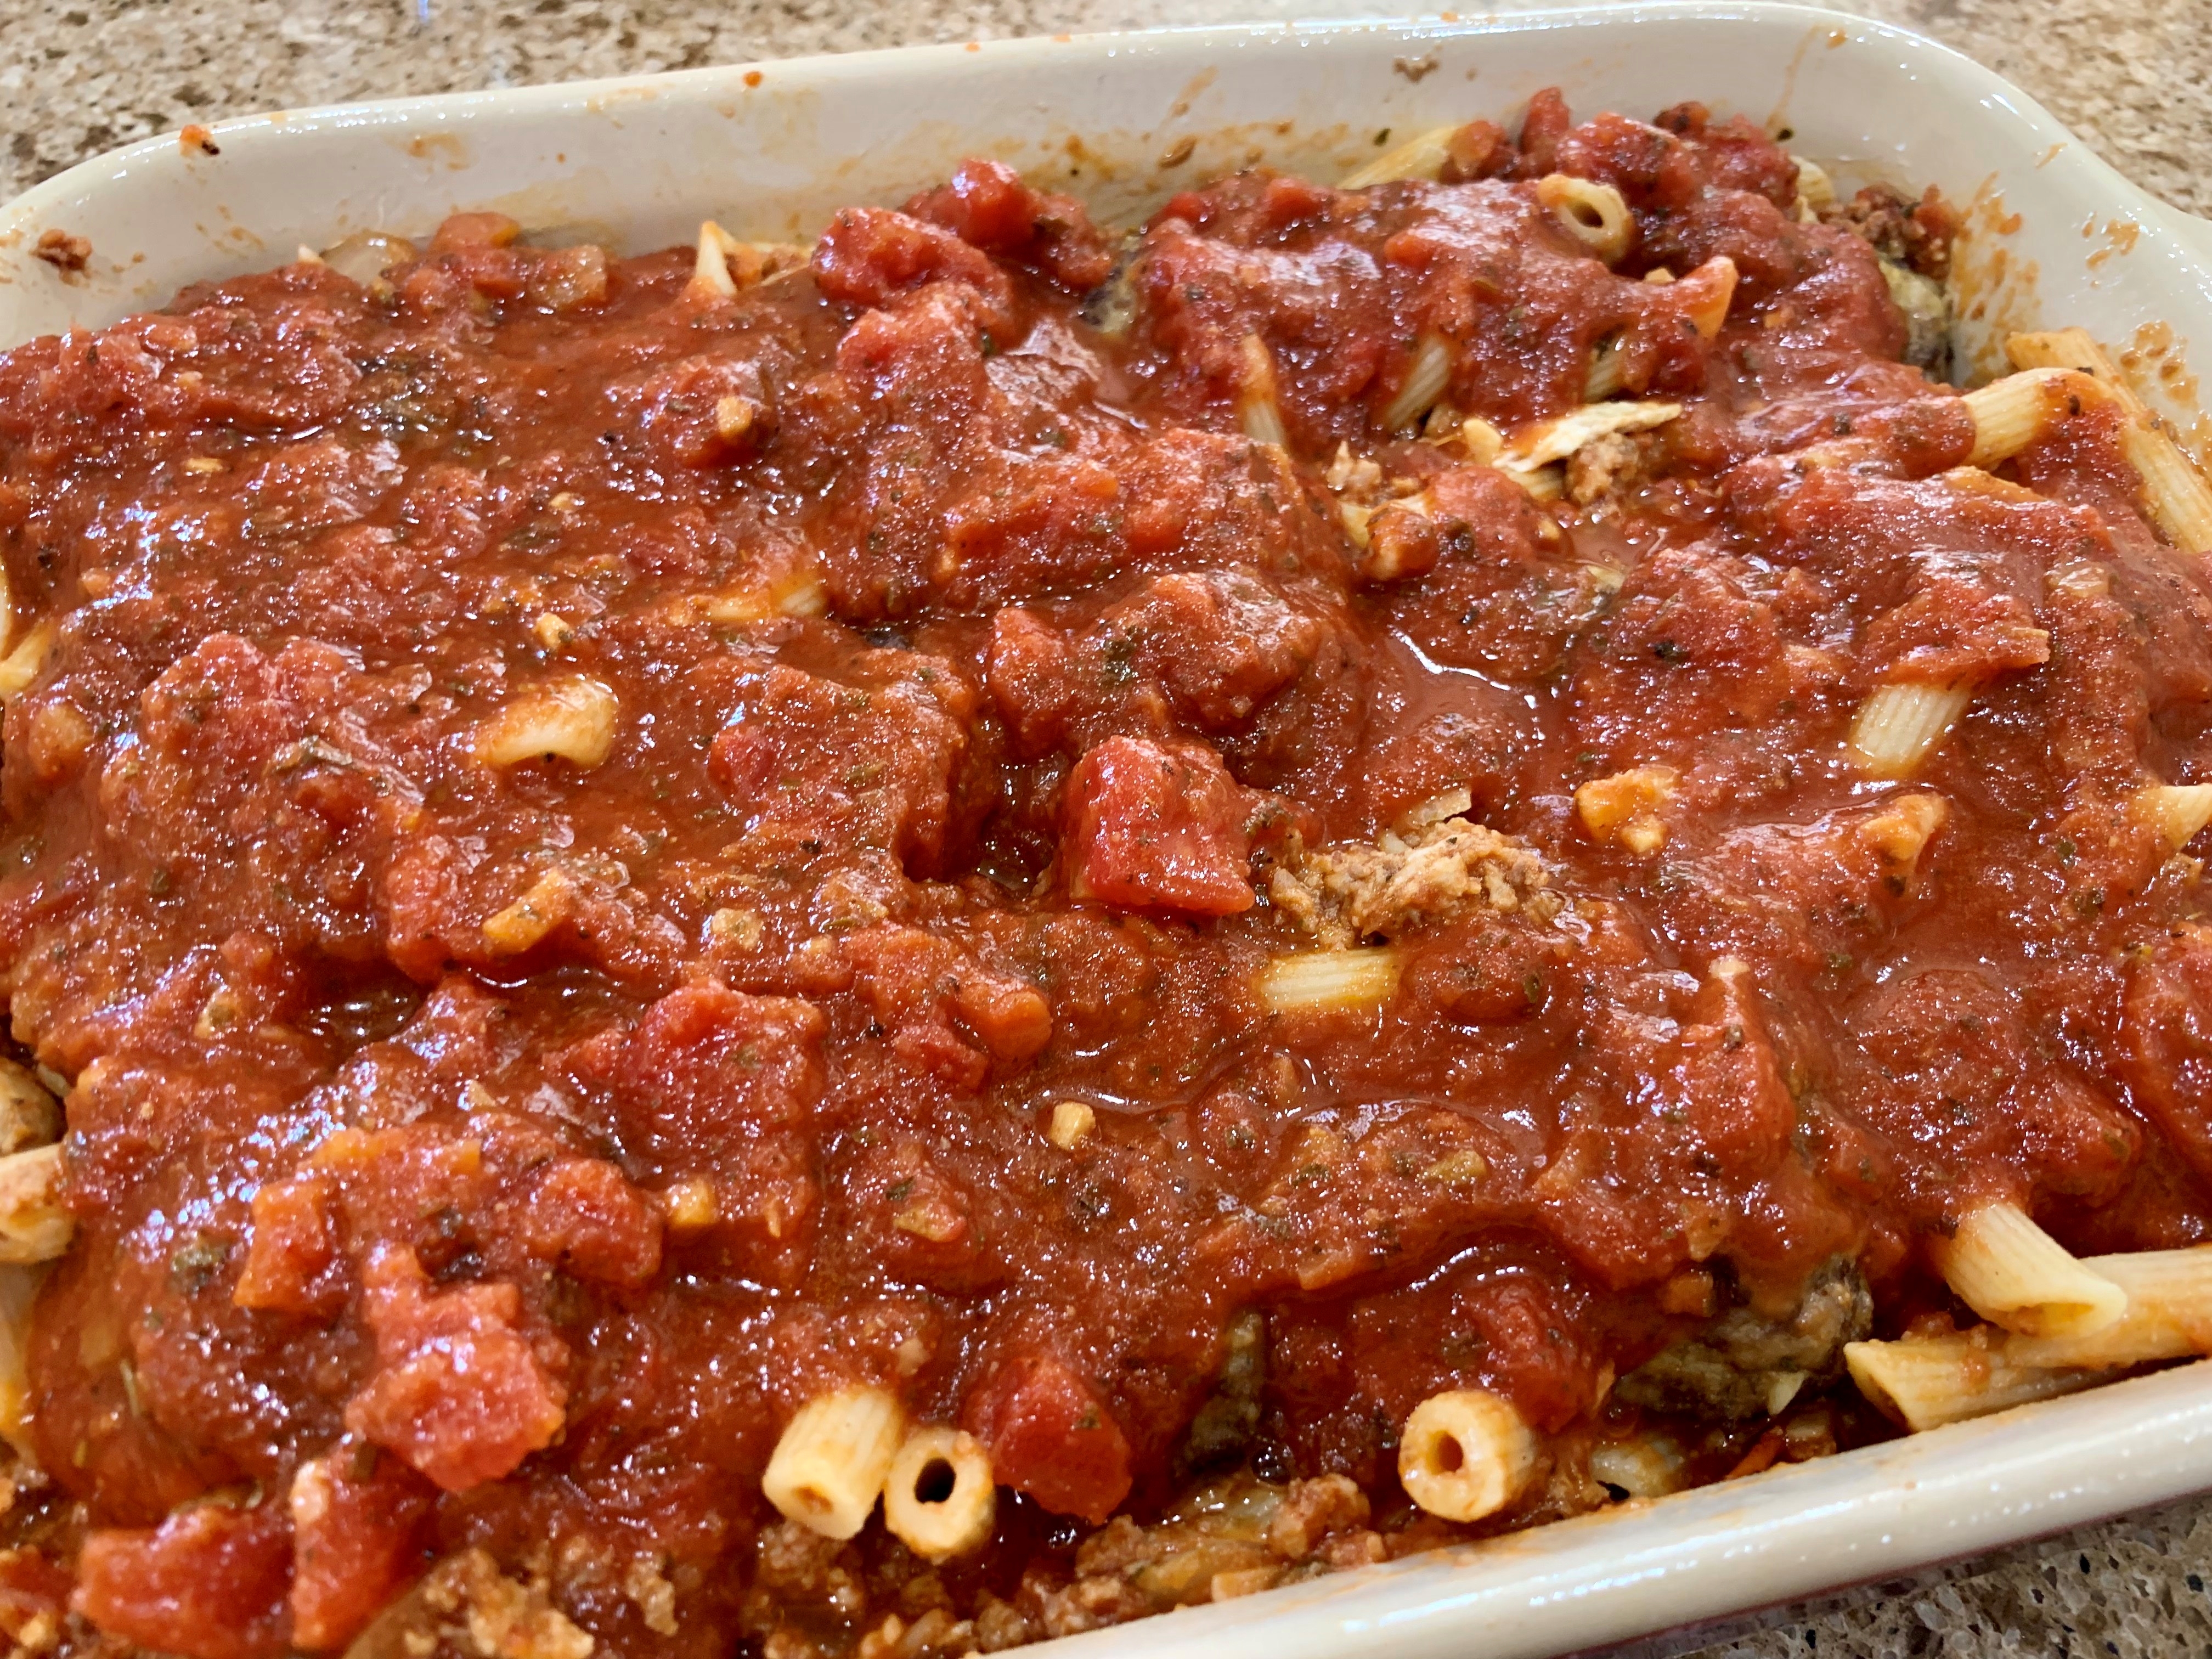
Place your meatballs strategically so when you dish the pasta later you got a hidden meatball surprise in each plated dish. Shove them down into the pasta.
Pour remaining sauce over pasta and meatballs.
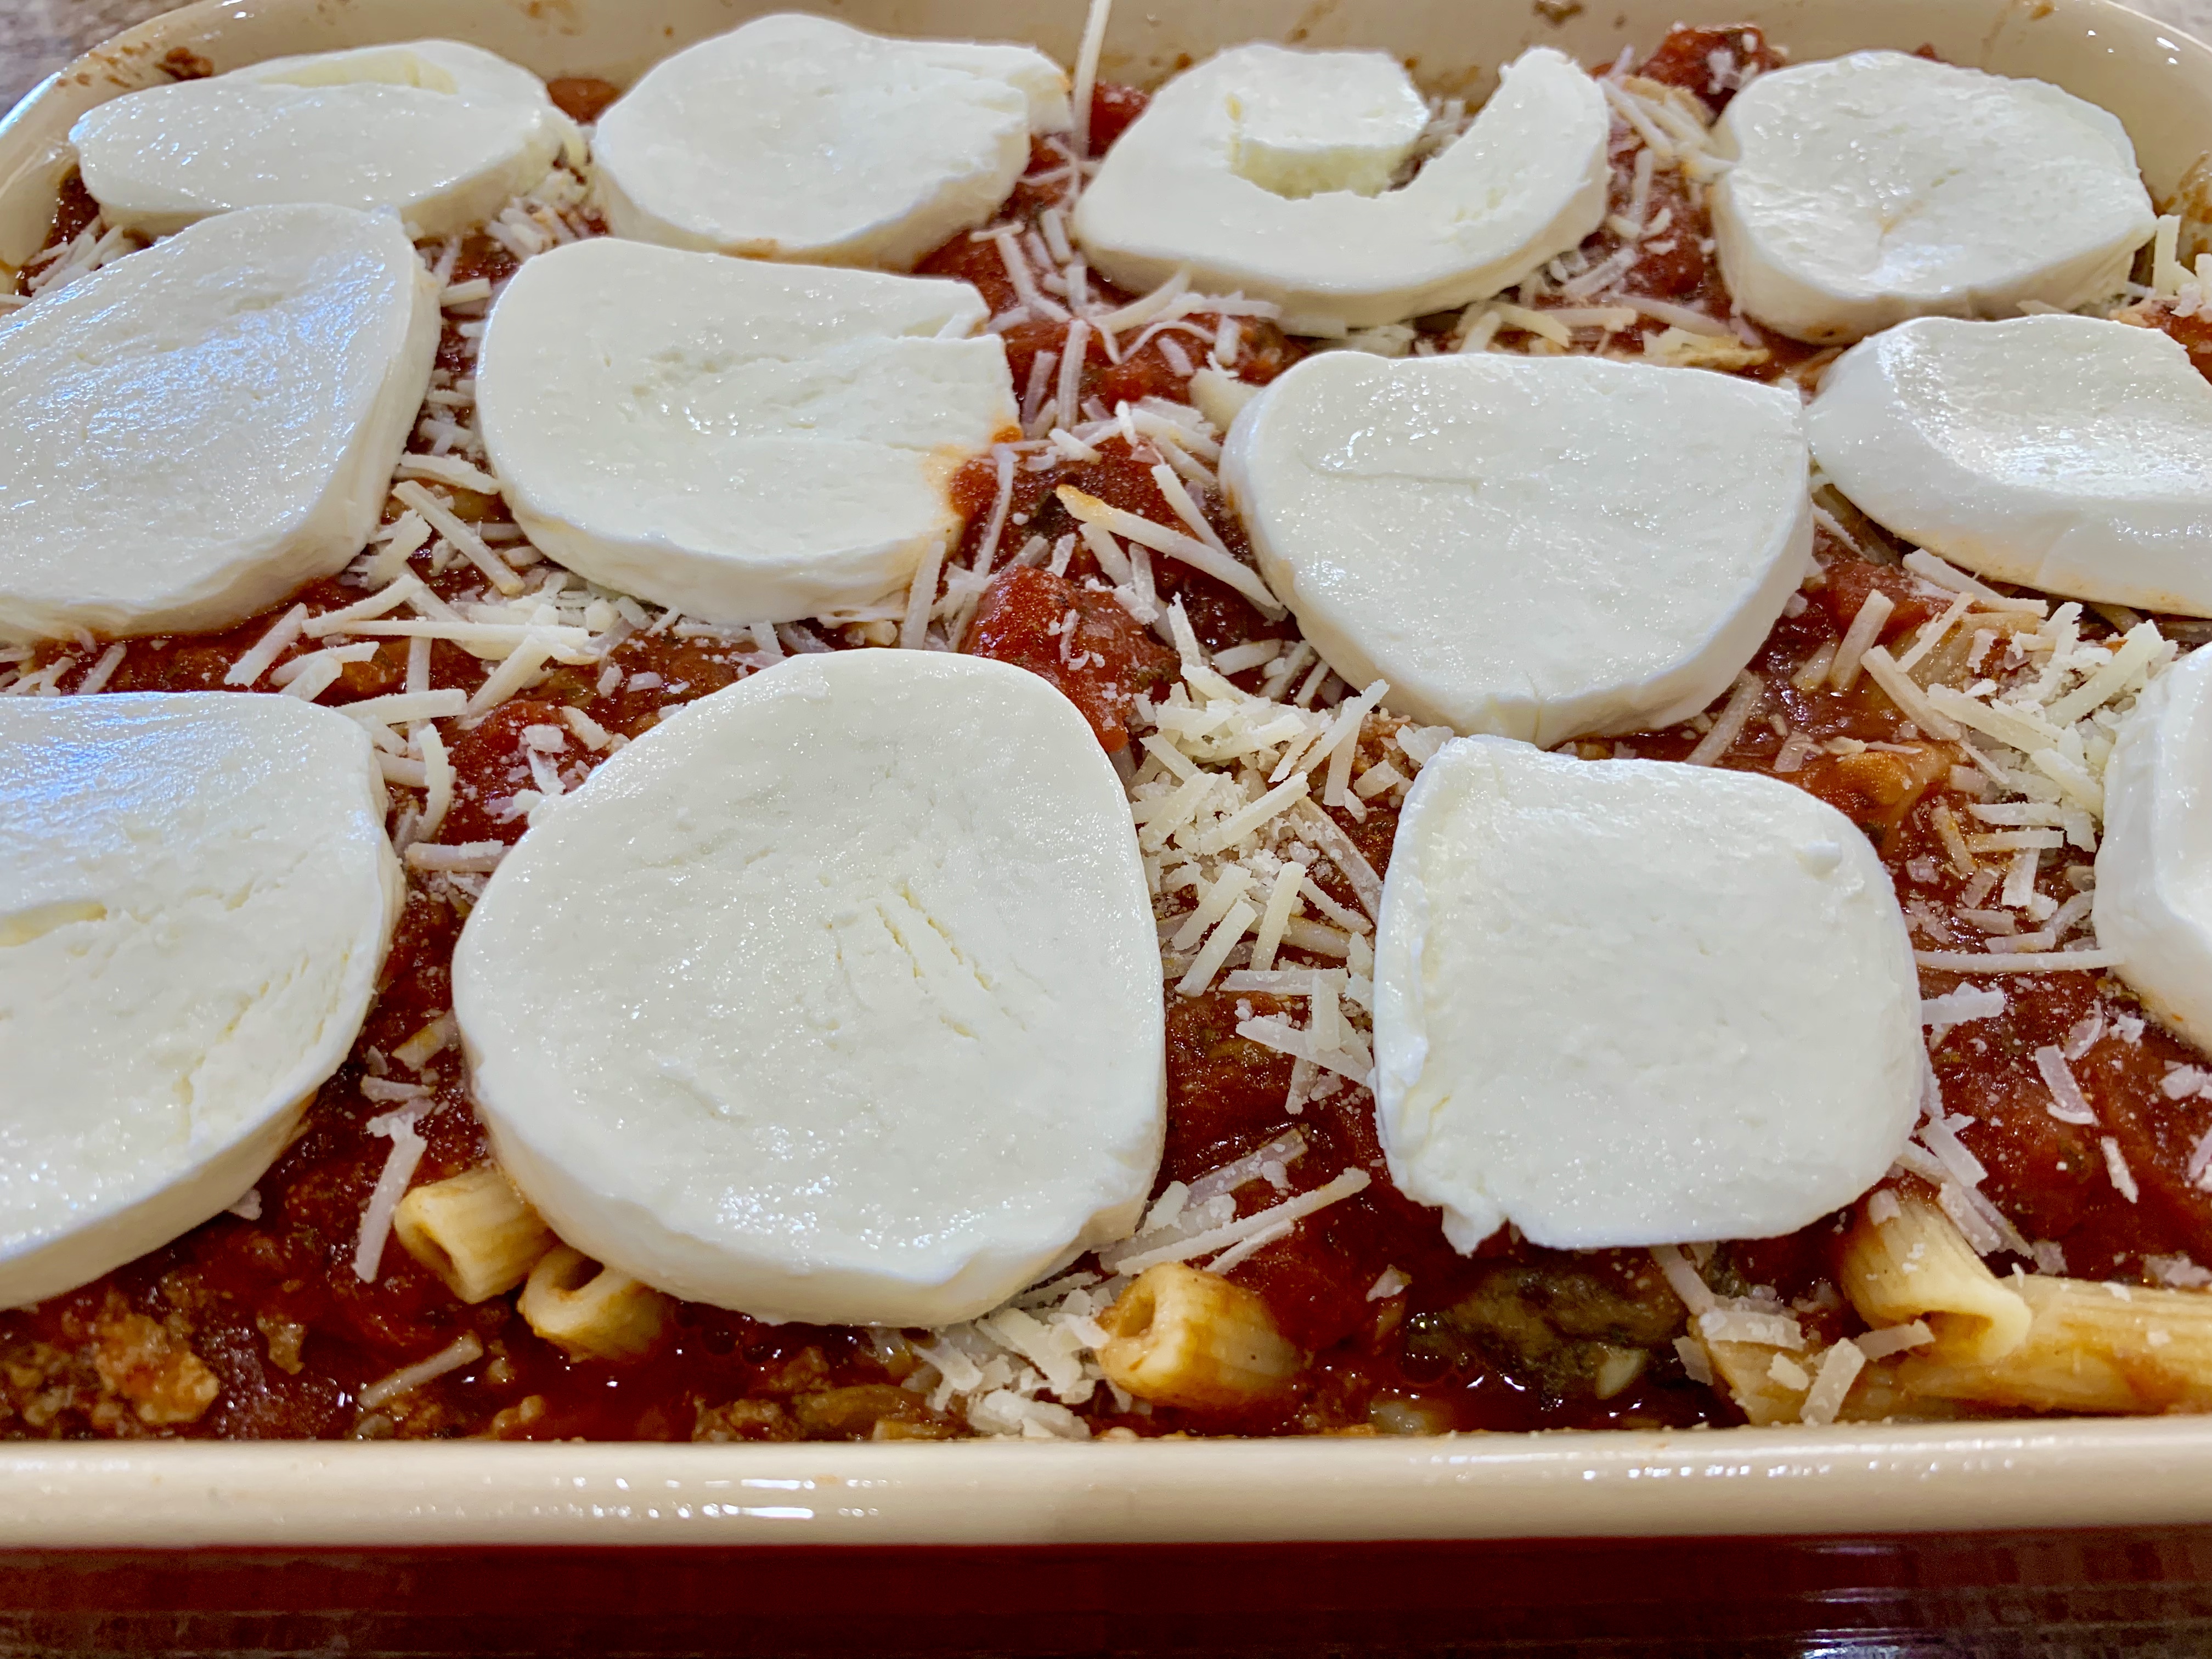
Then layer the fresh mozzarella over the top.
Set the oven to 350 degrees when you are ready, bake for 20 minutes, brown the top if needed.
Your guest will have no idea that there is a meatball waiting for them. This is a jaw dropper dish, but it is even better the next day. If the Italians wanted to set a trap for me, this is what they would put in the trap.
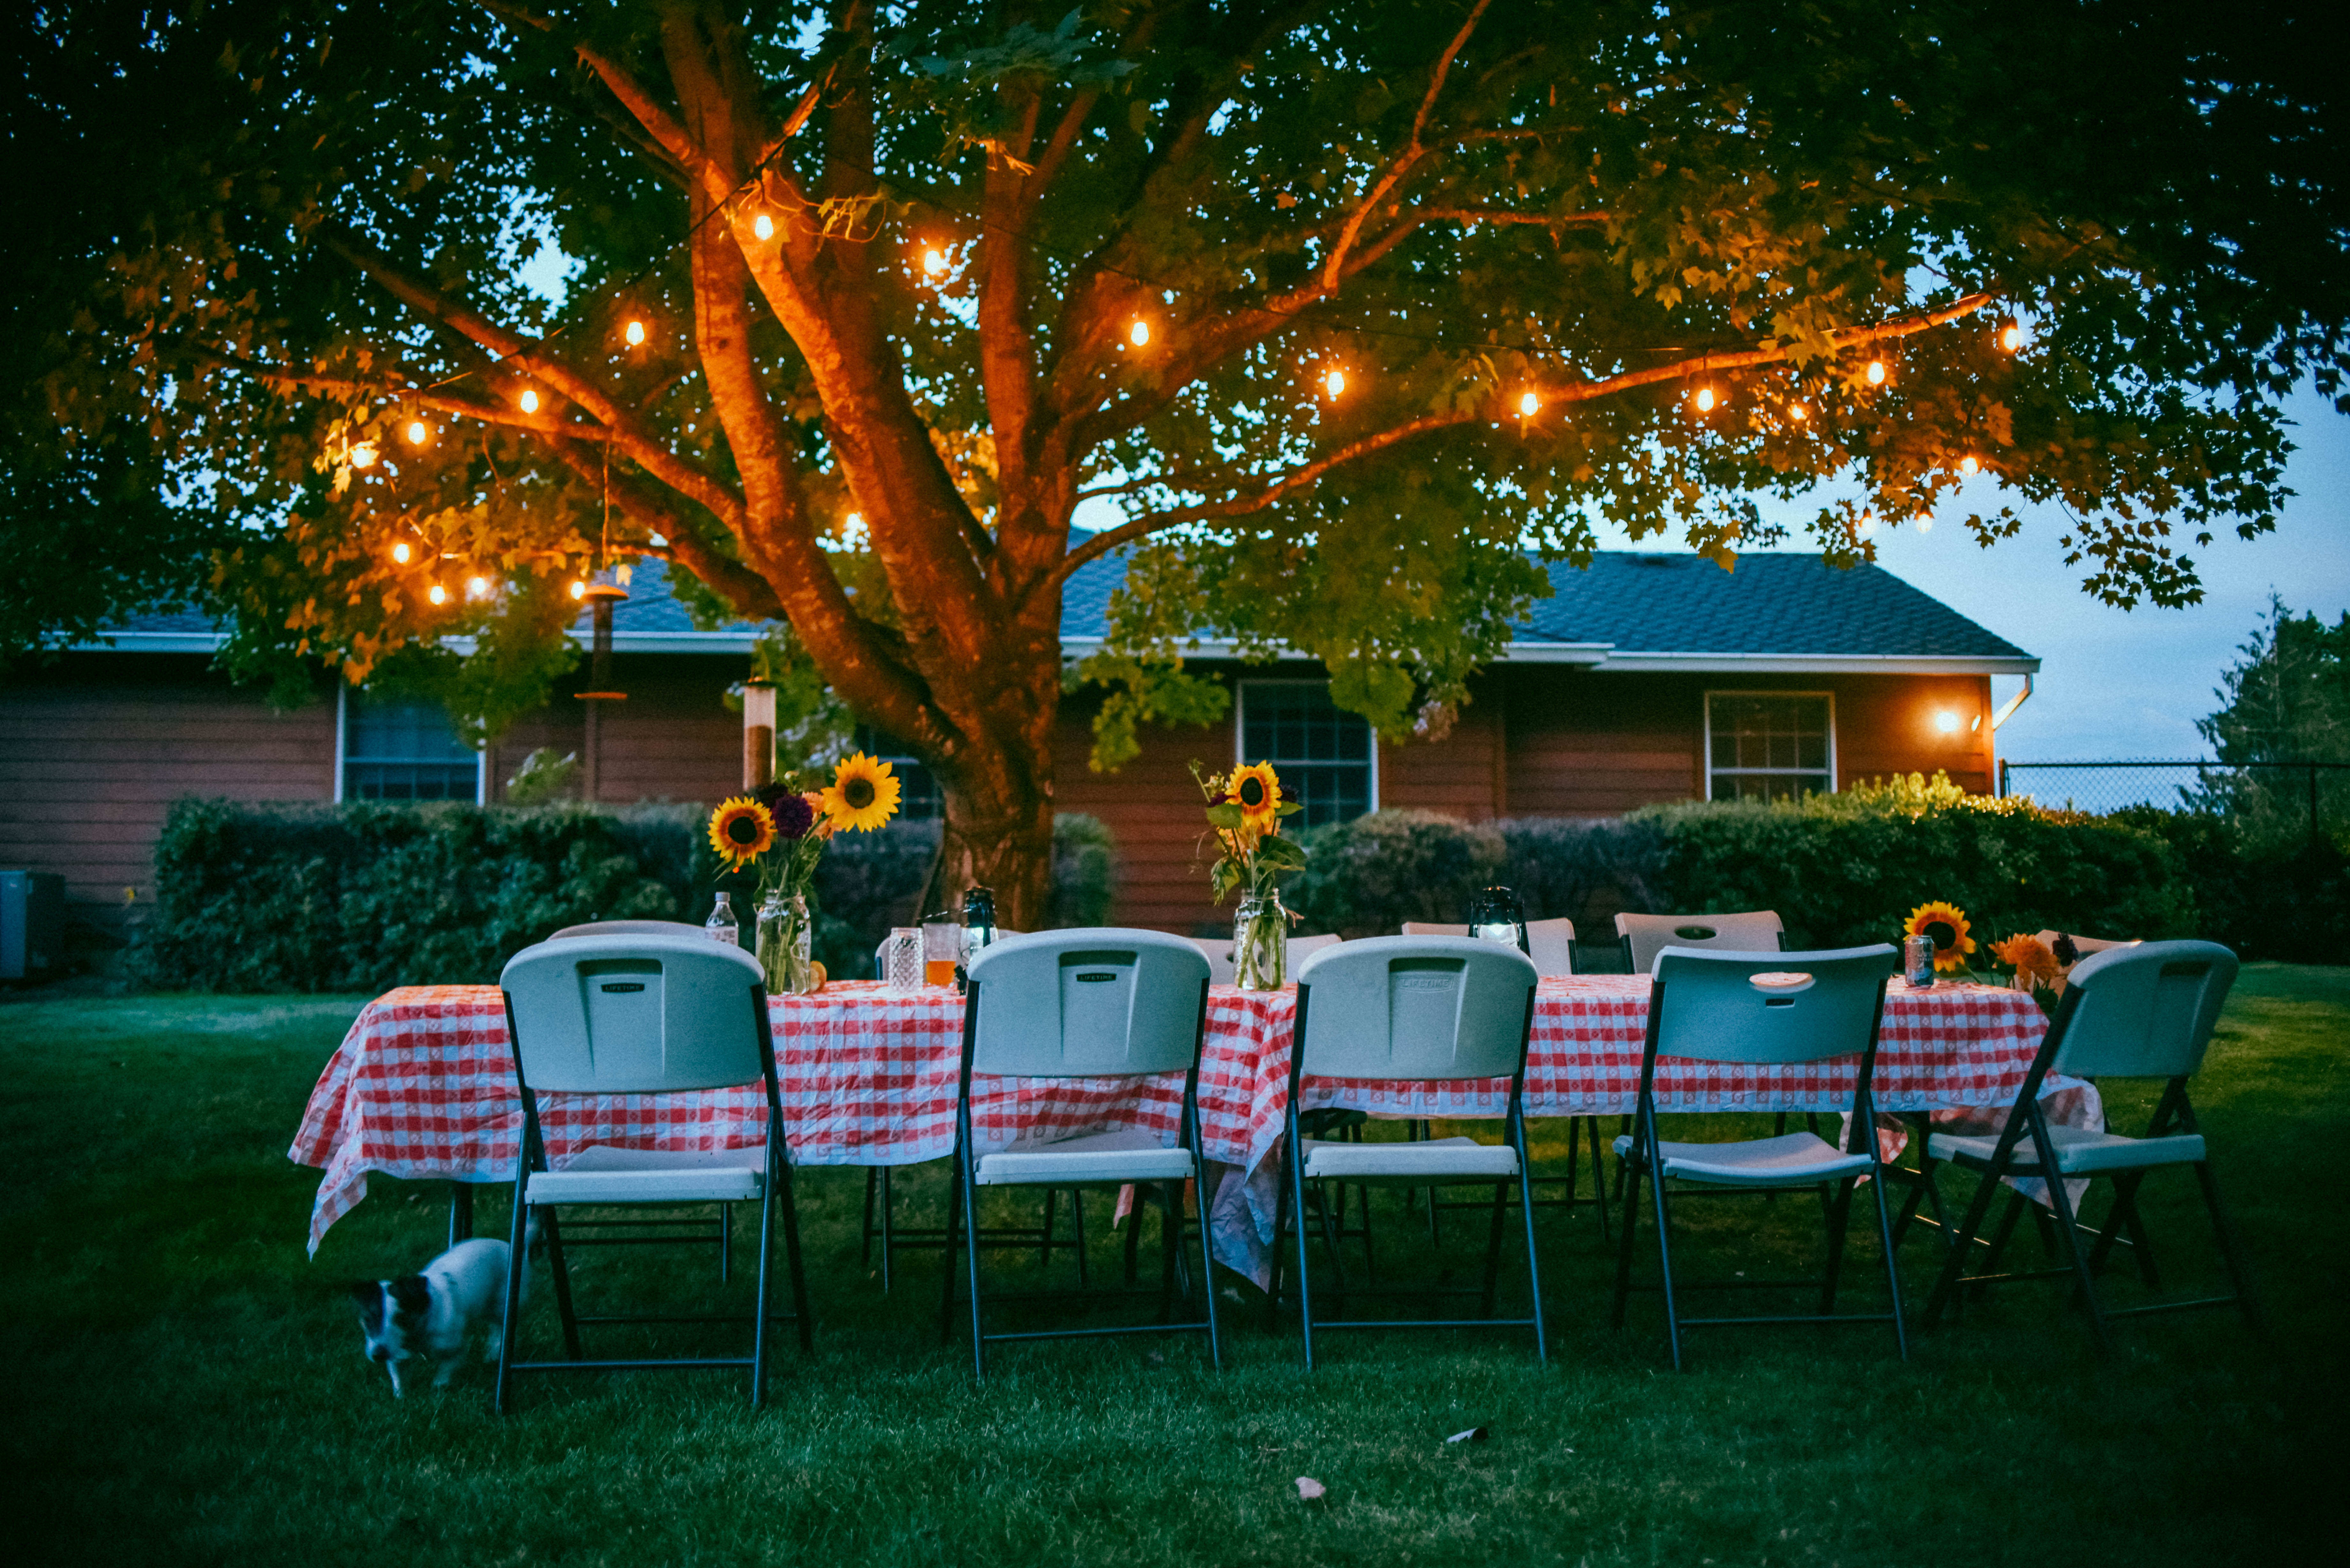
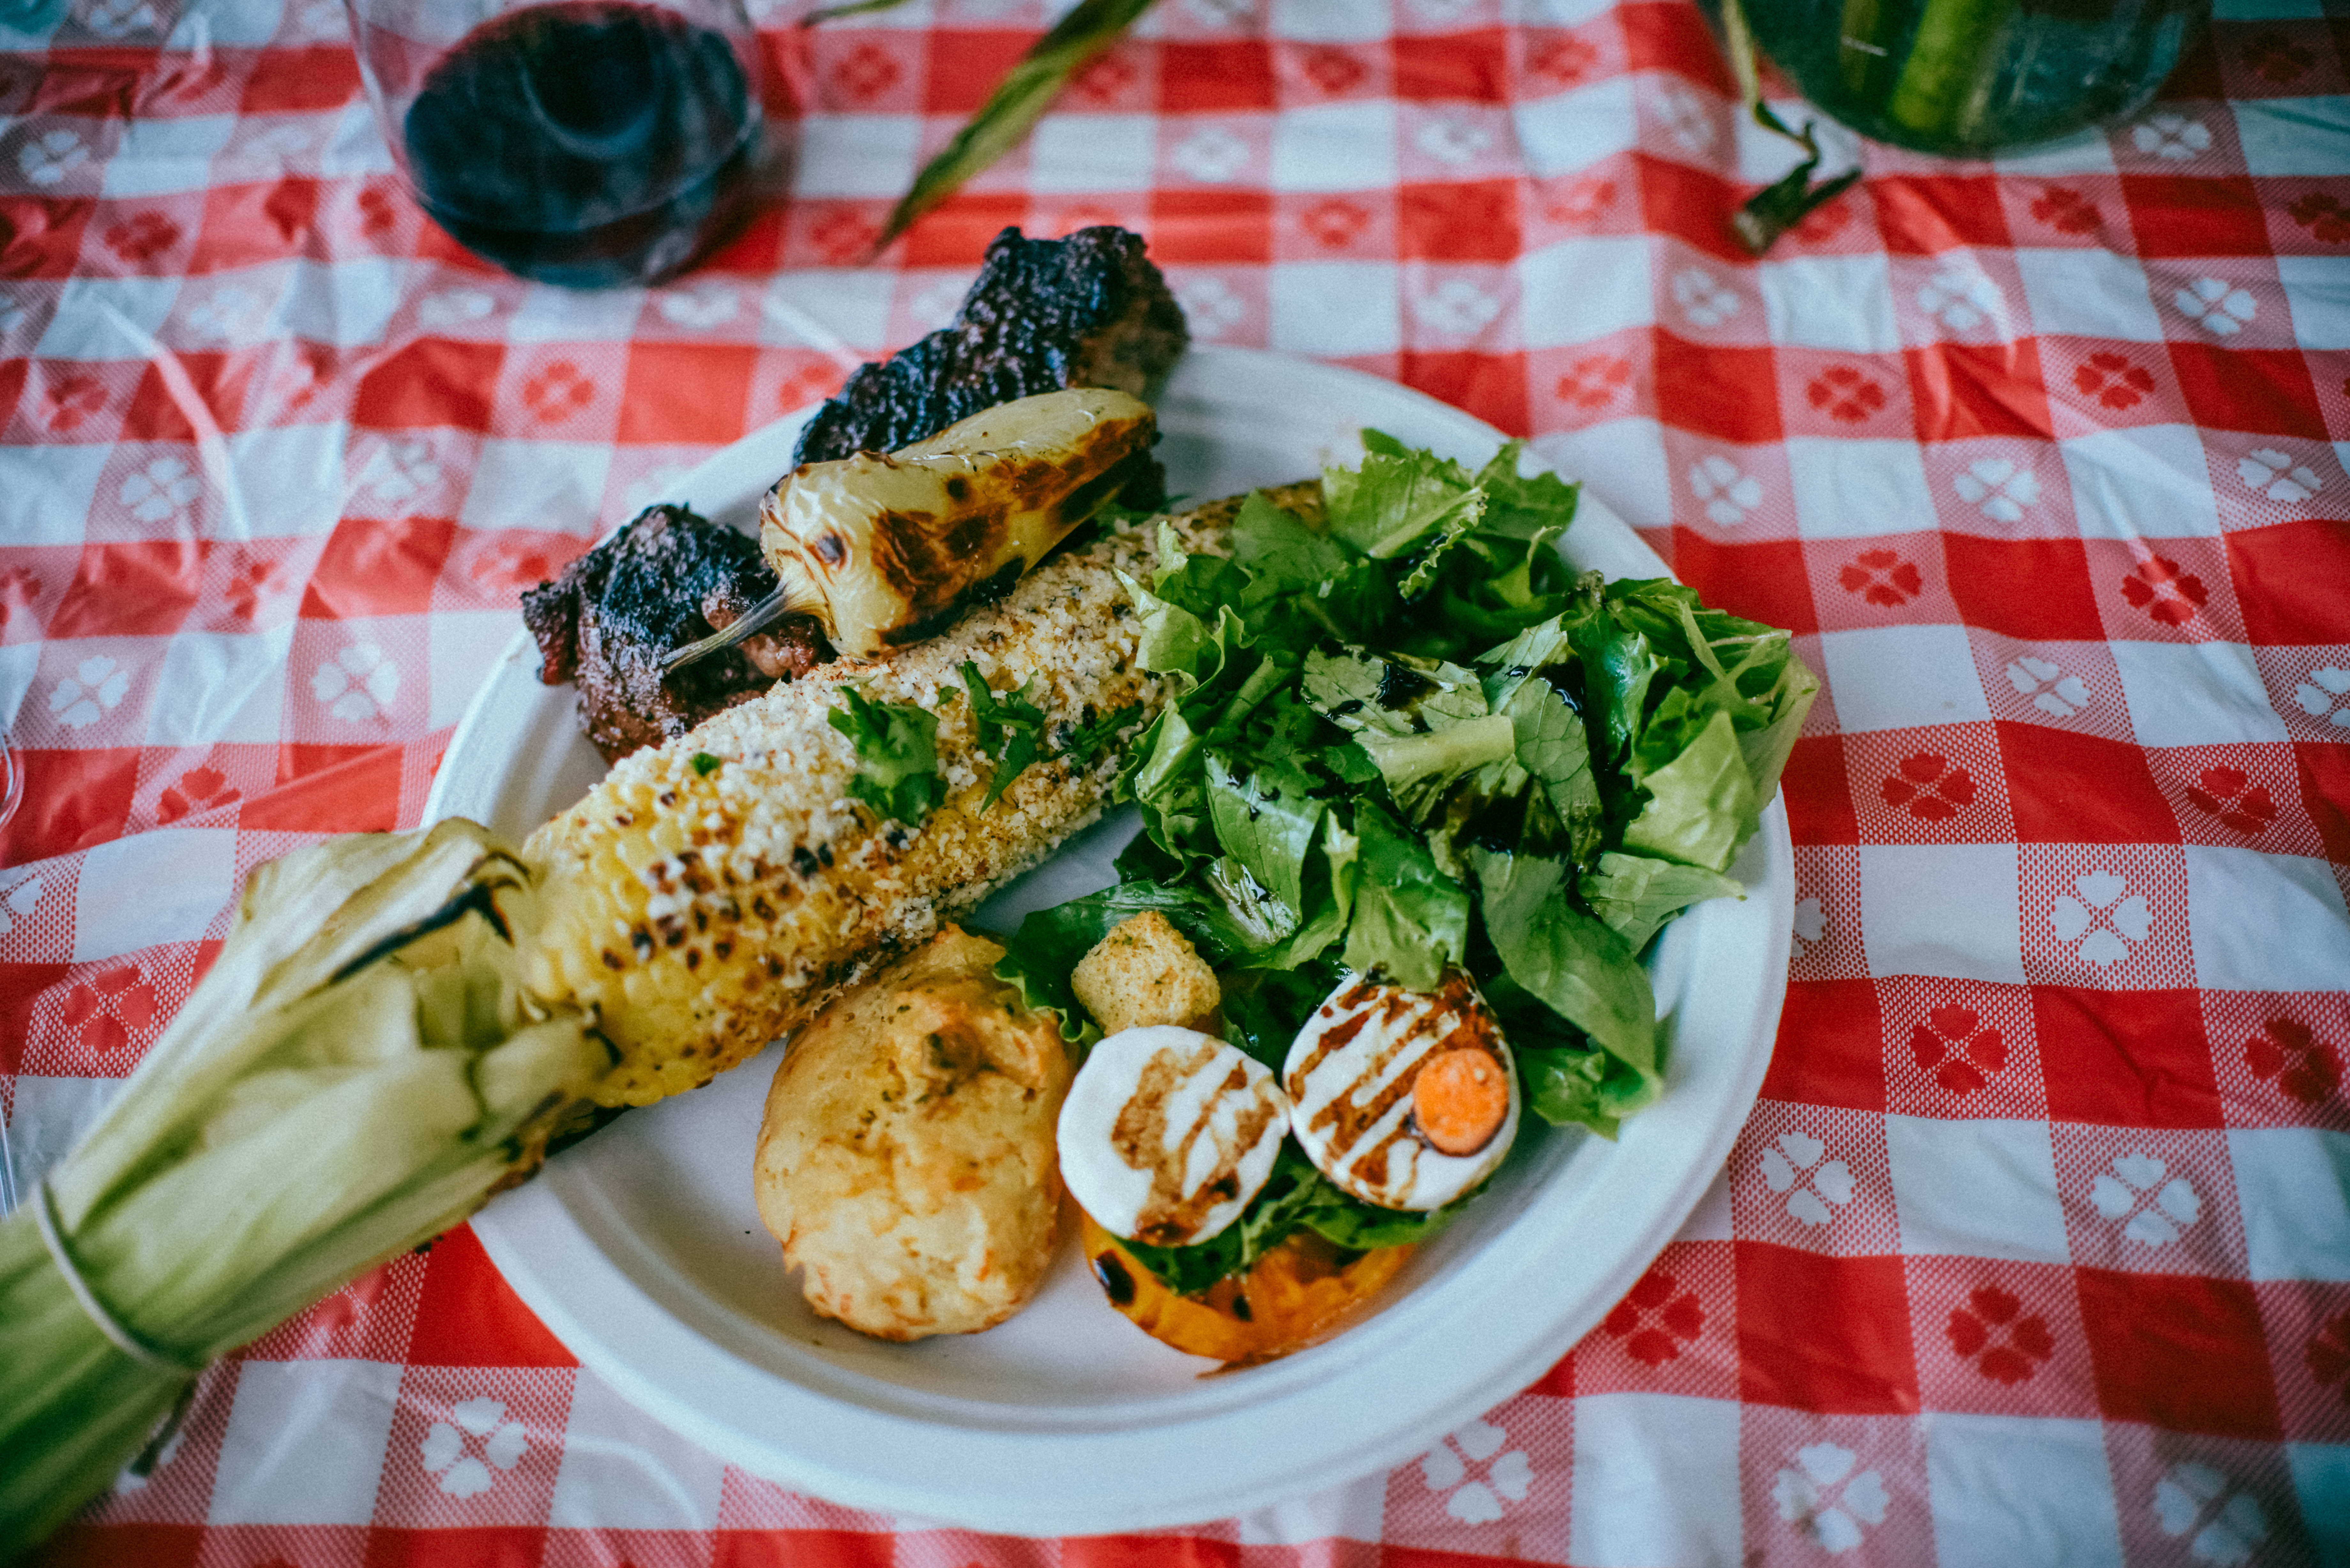
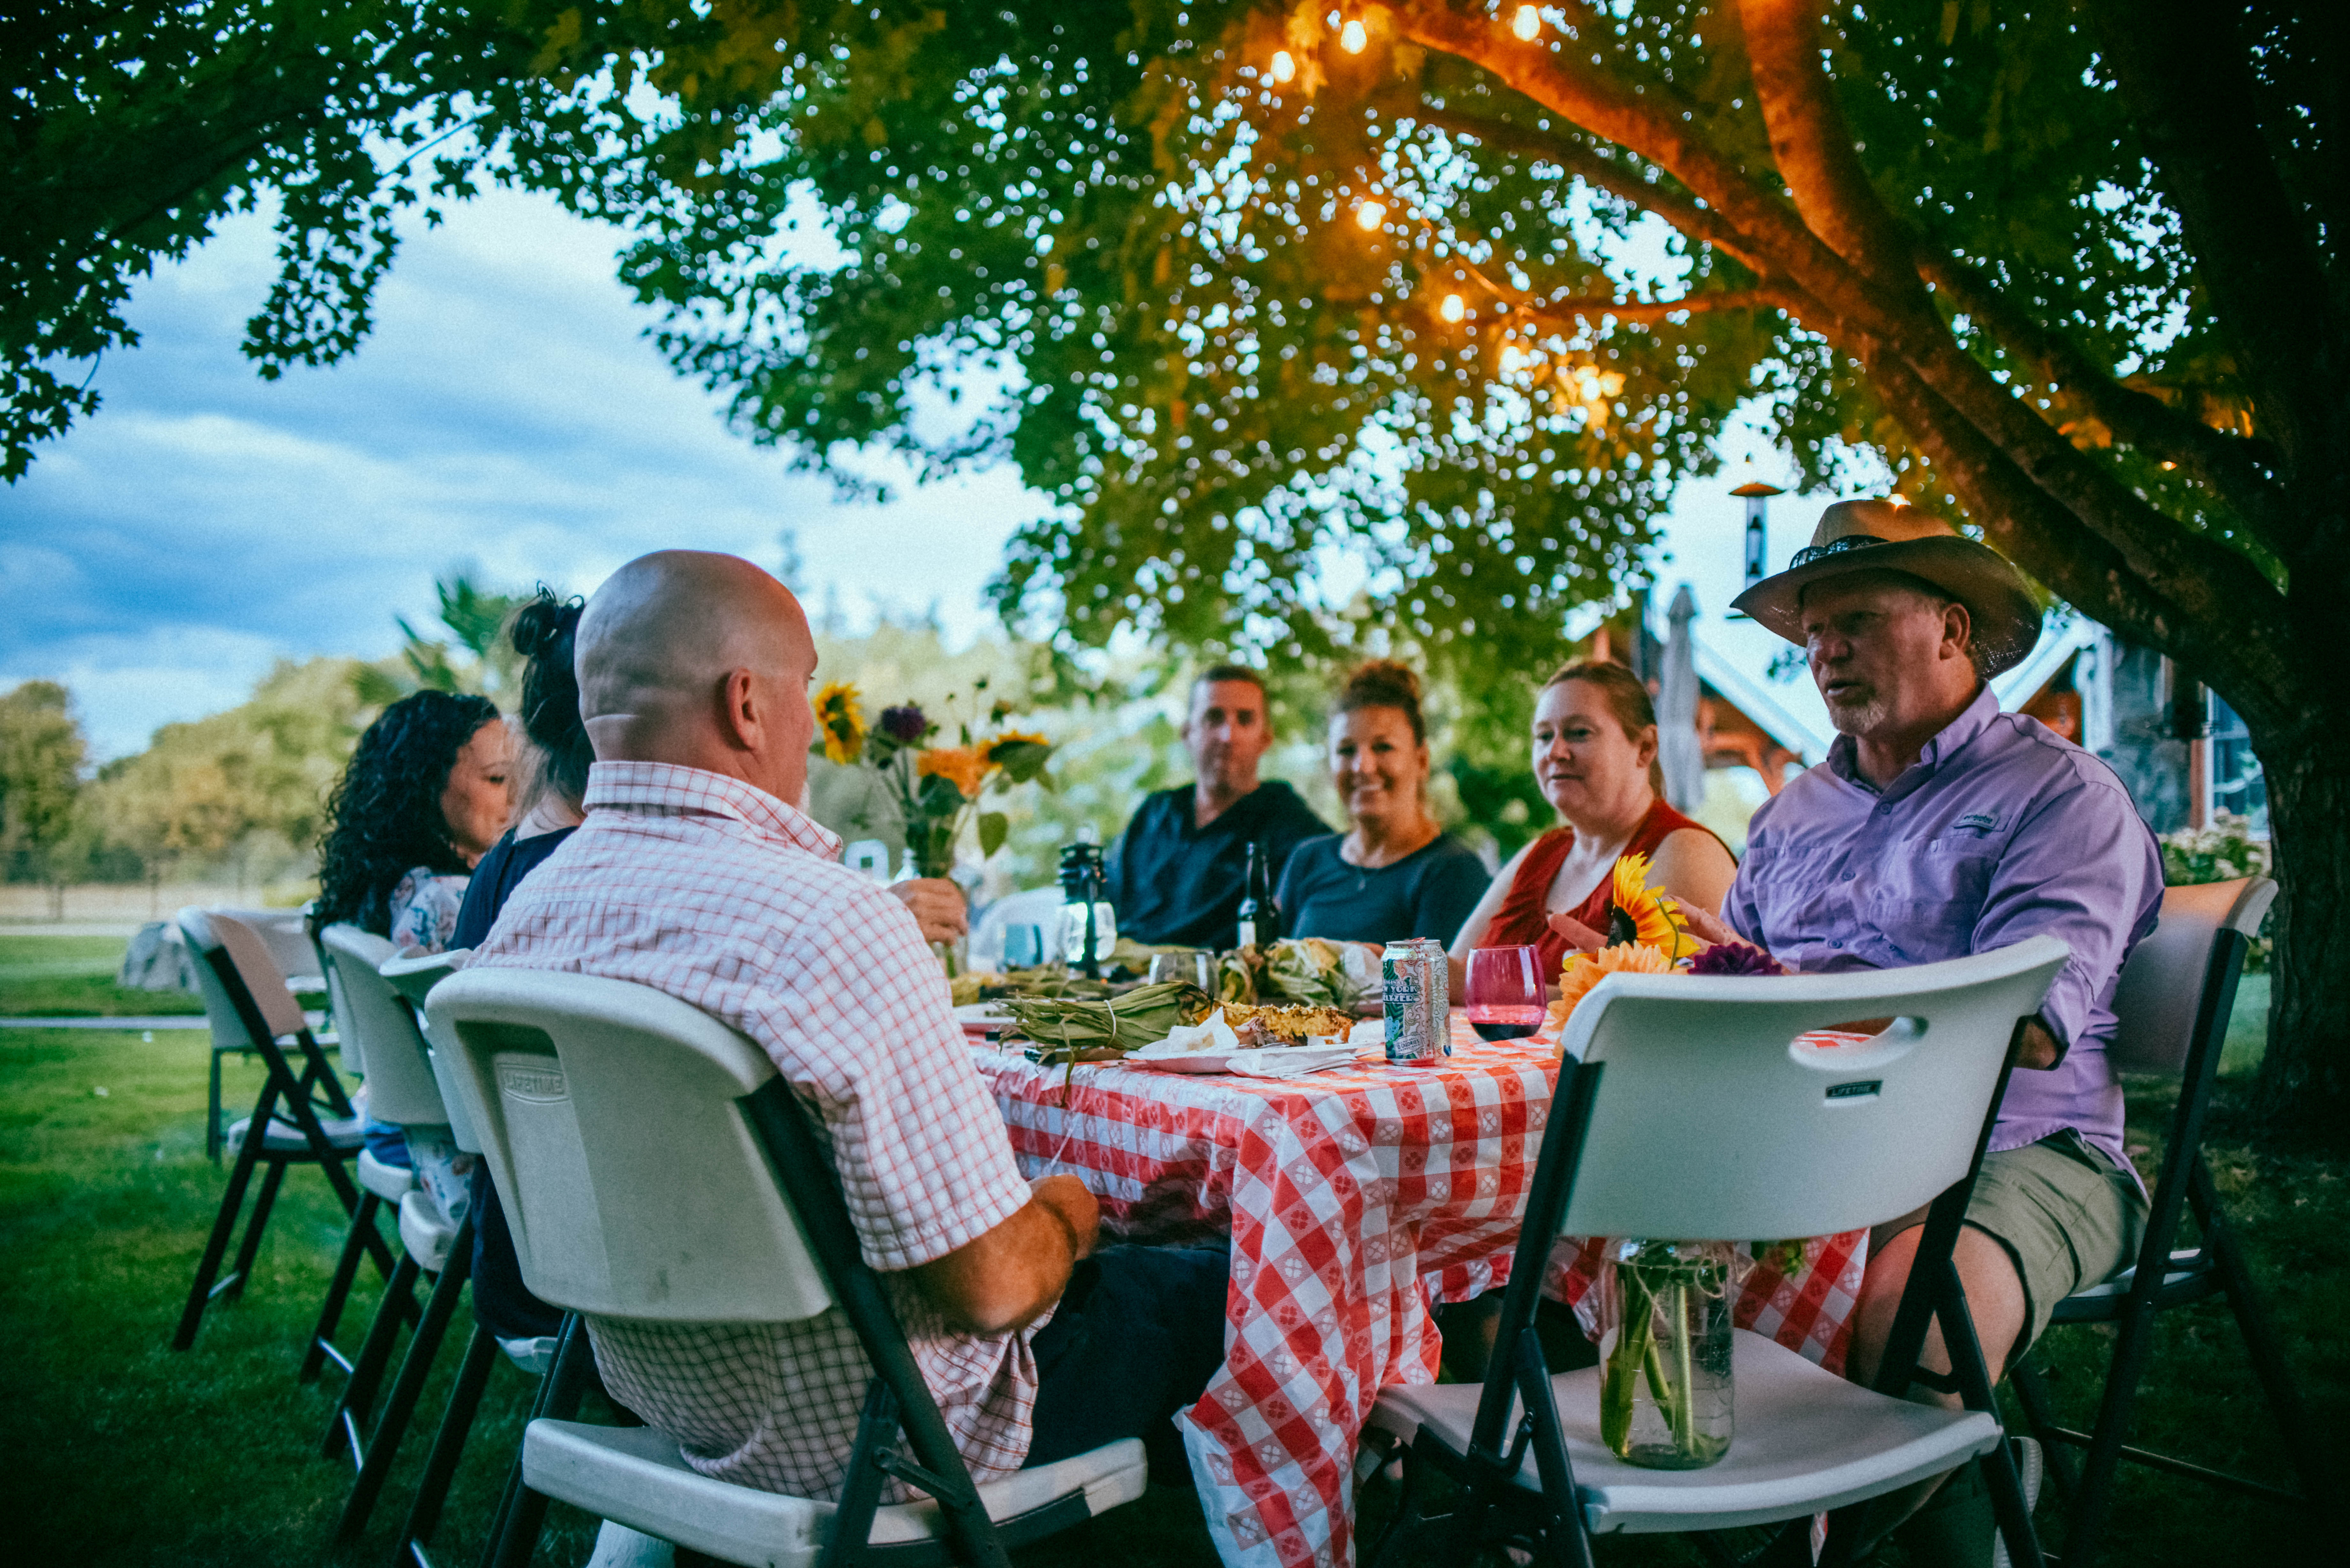
One of the things I love about summer is the outdoor dinner parties. I am in the middle of Winter, snow is falling and I was going thru some of my photos that my daughter Megan took and I found myself longing for Summer once again.
The photos tell the story….
The photos say it all….
The Hunting Chef and my daughter Meg who took the photos.
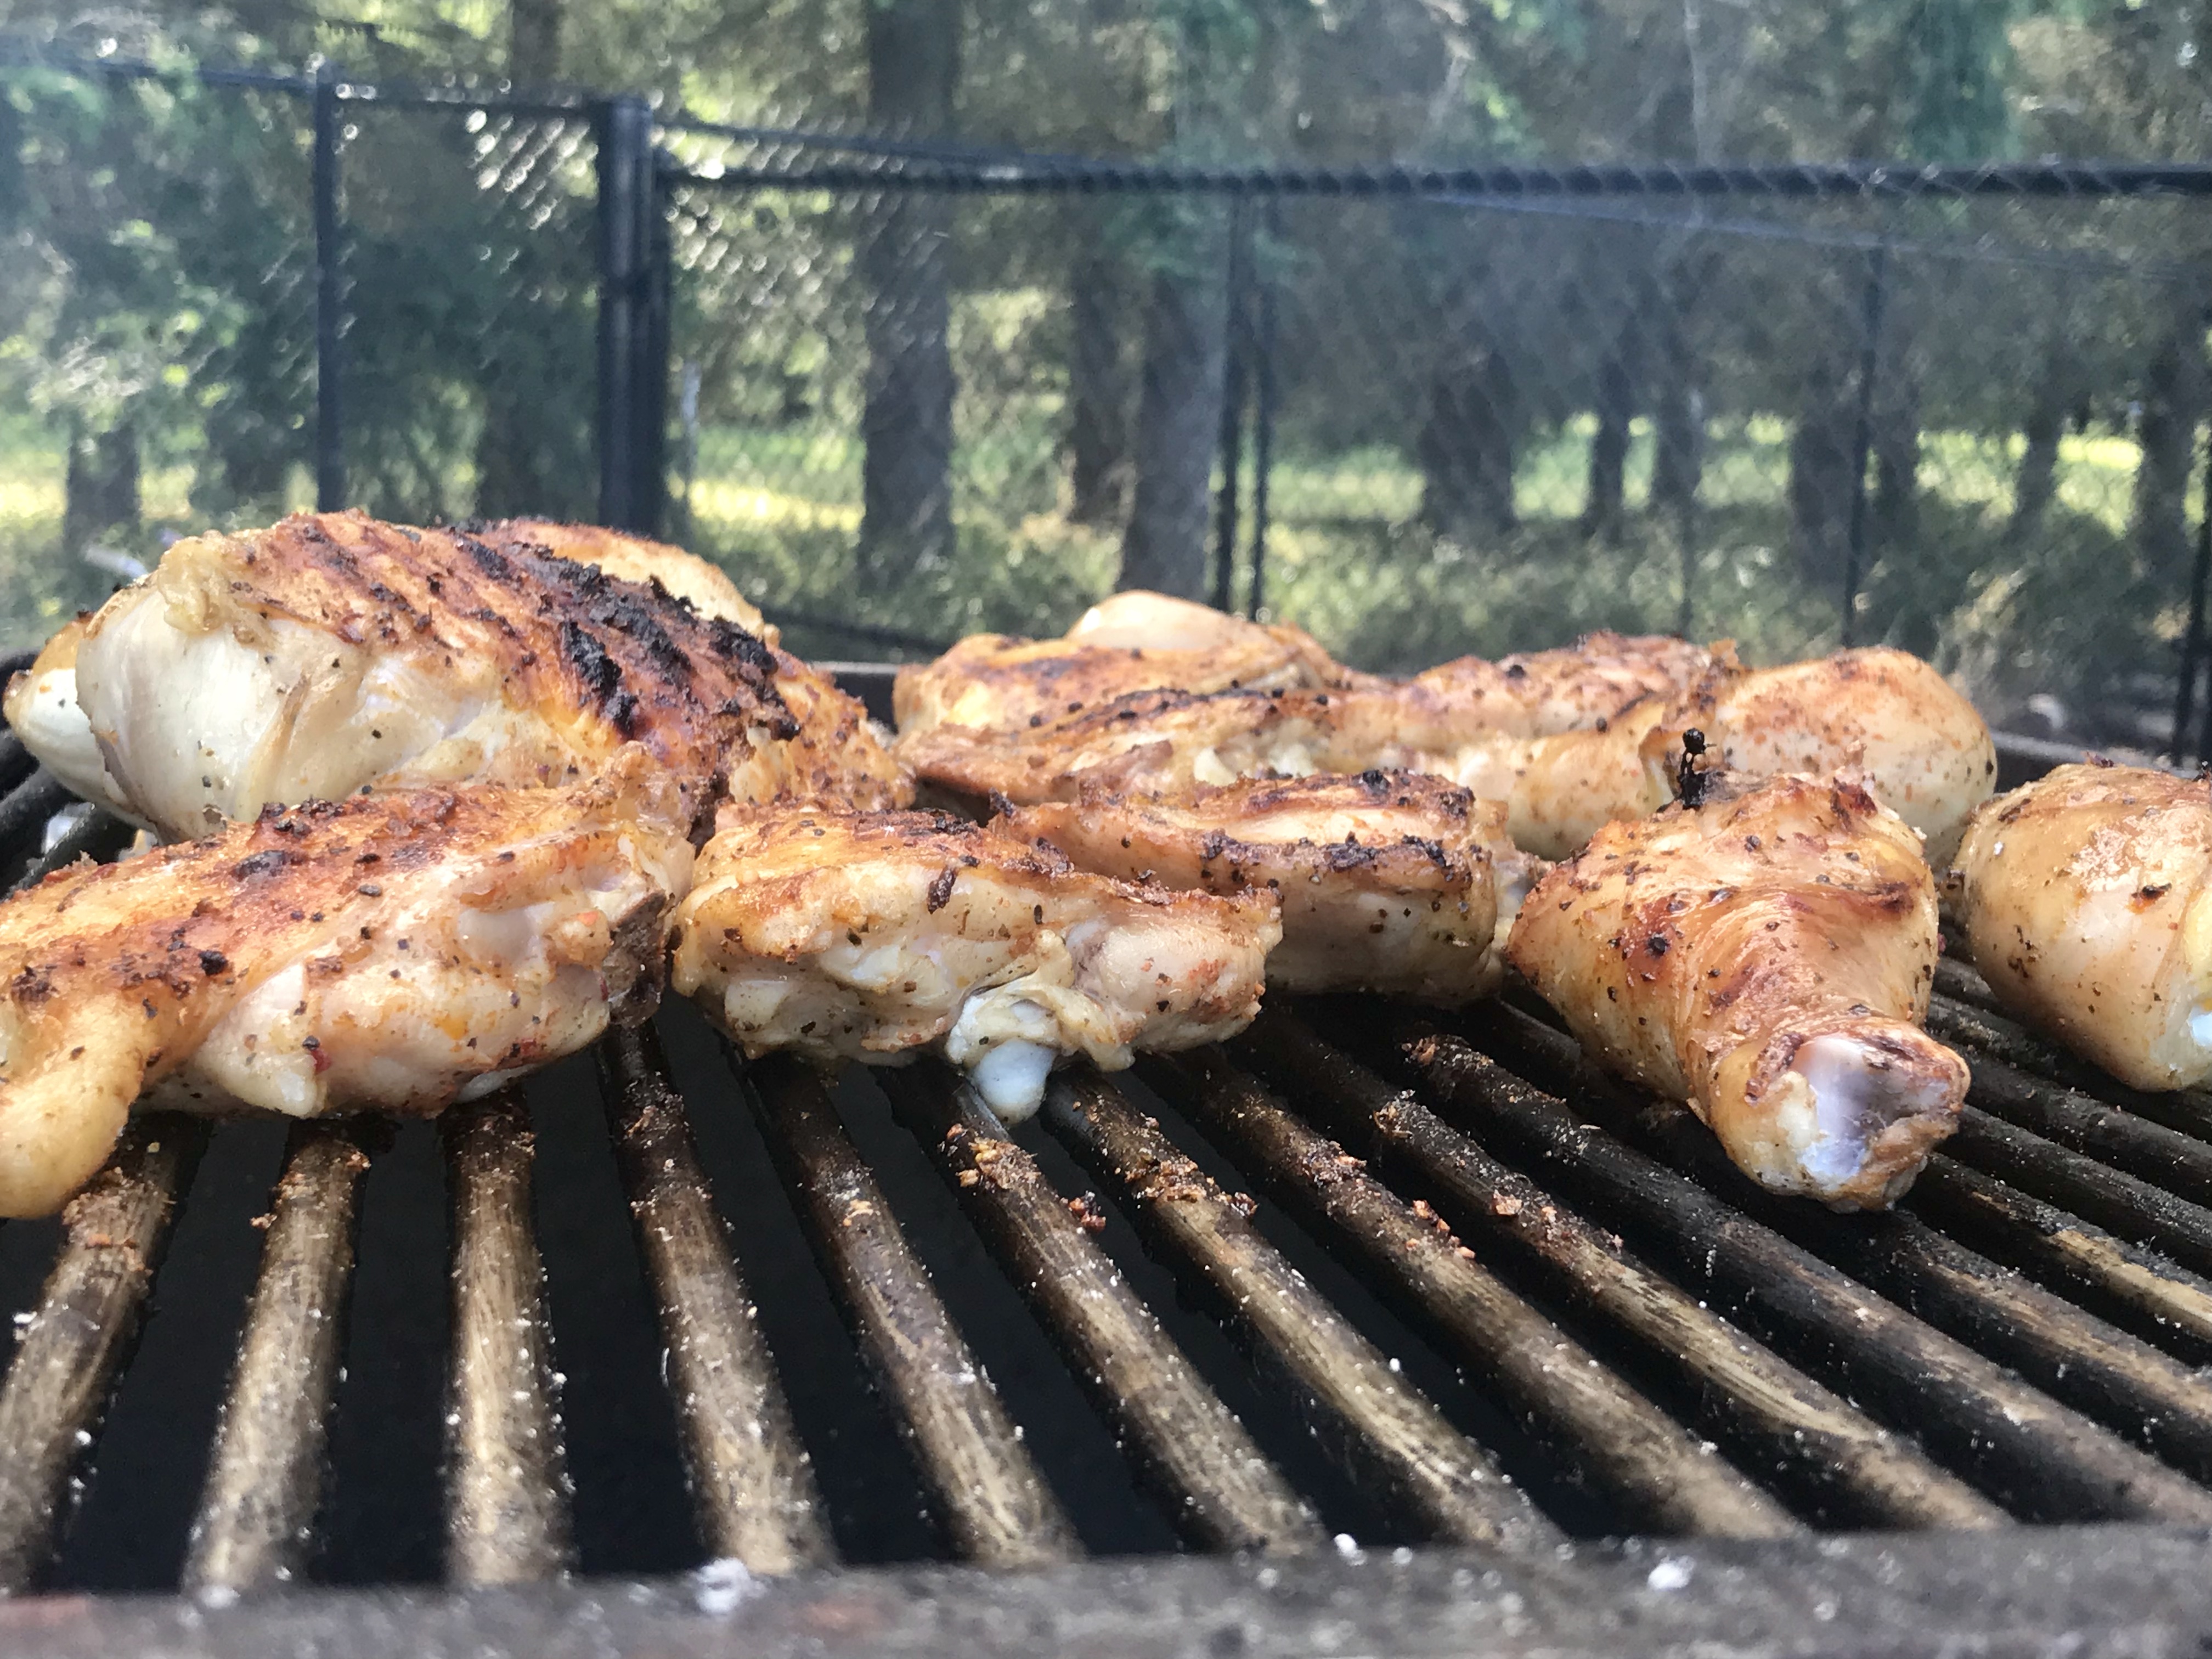
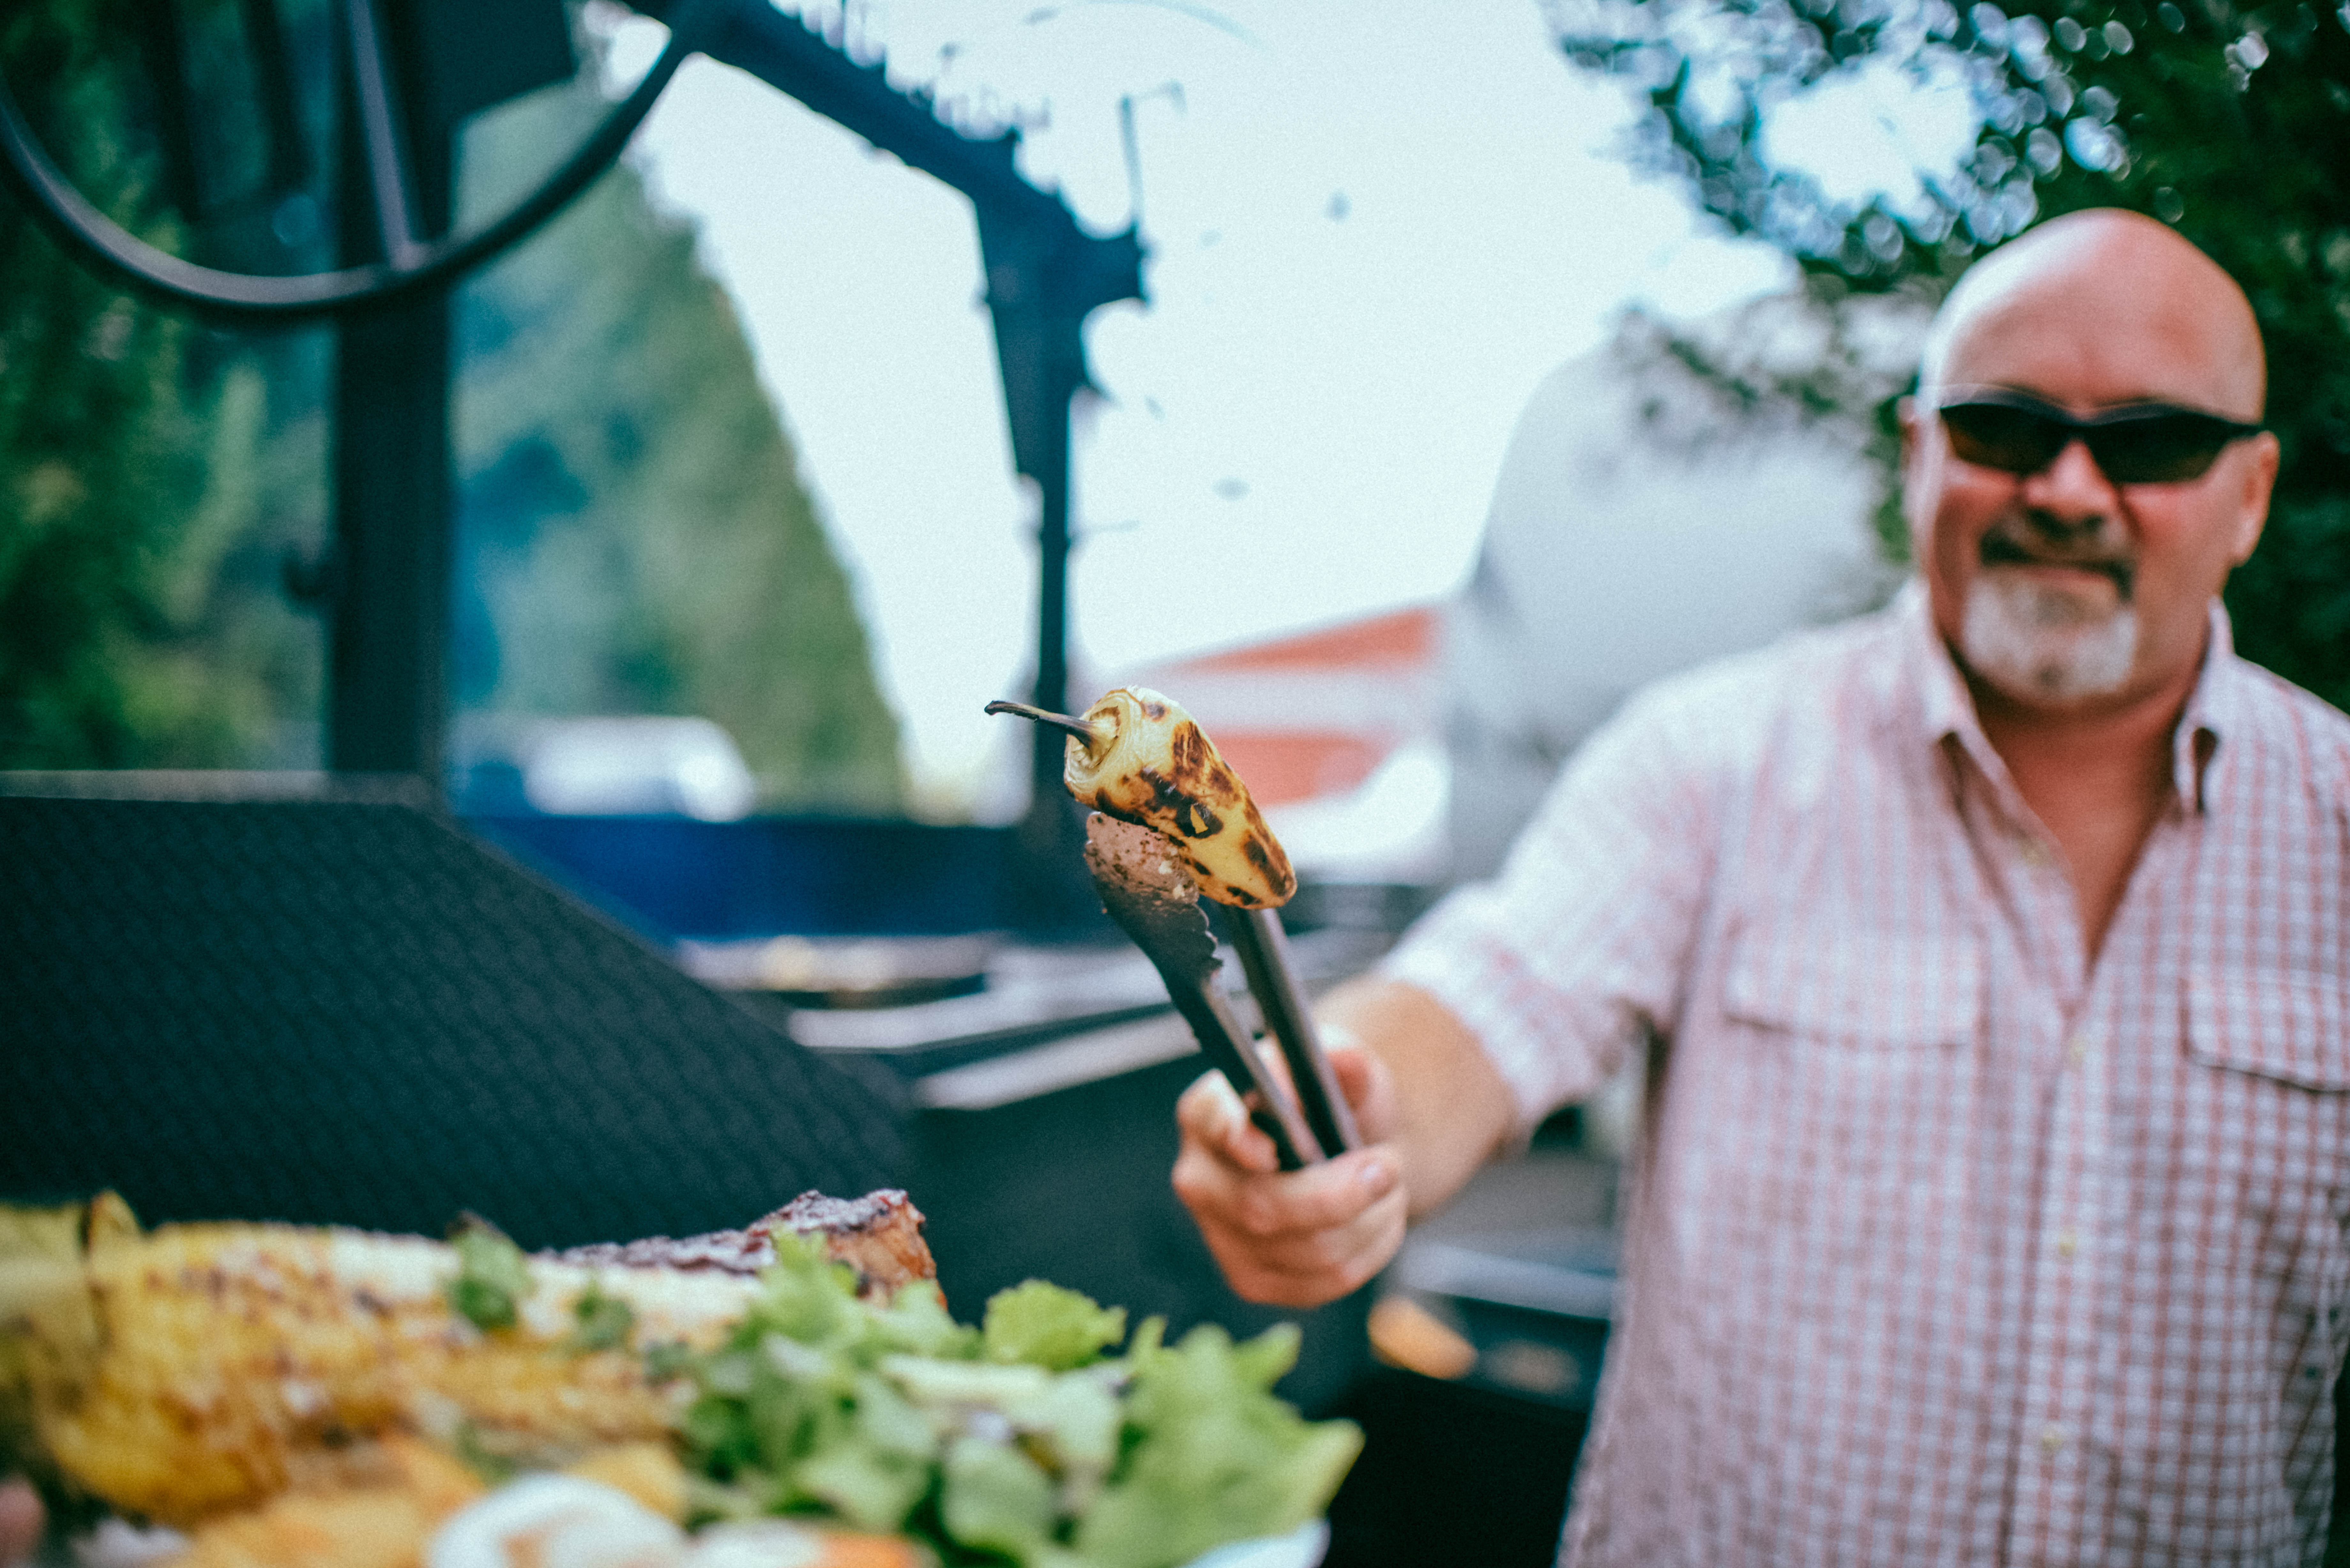
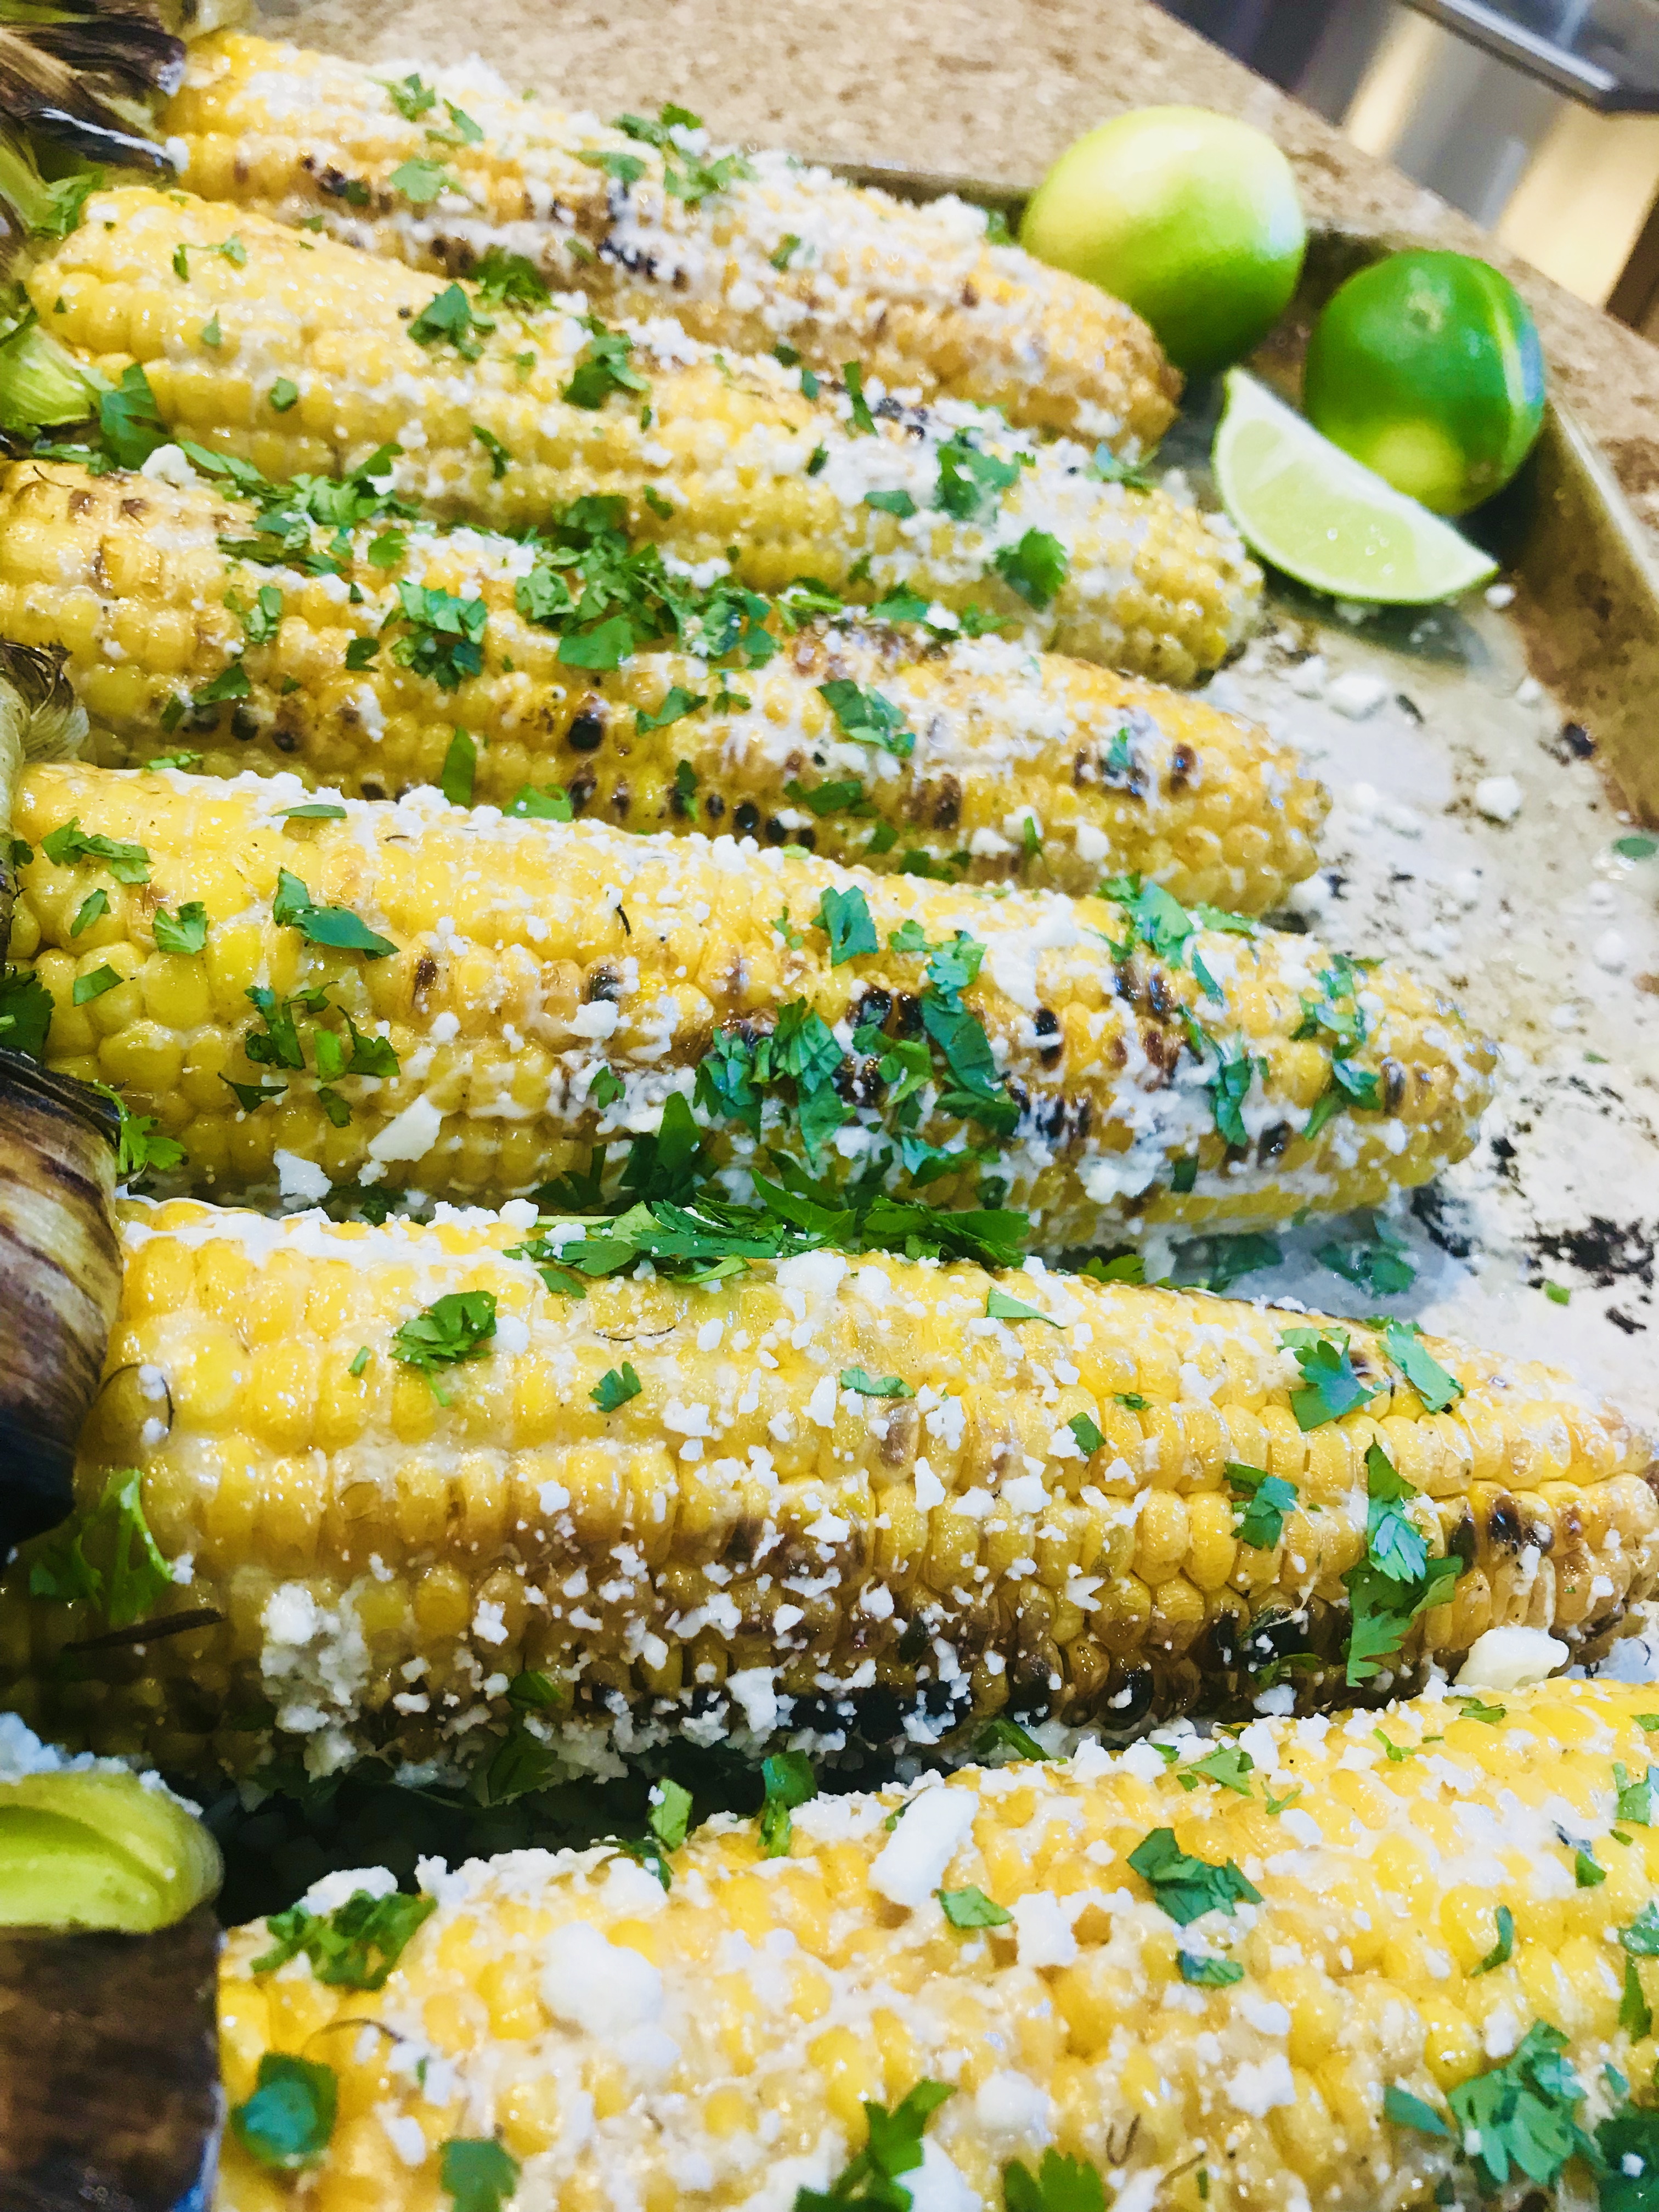
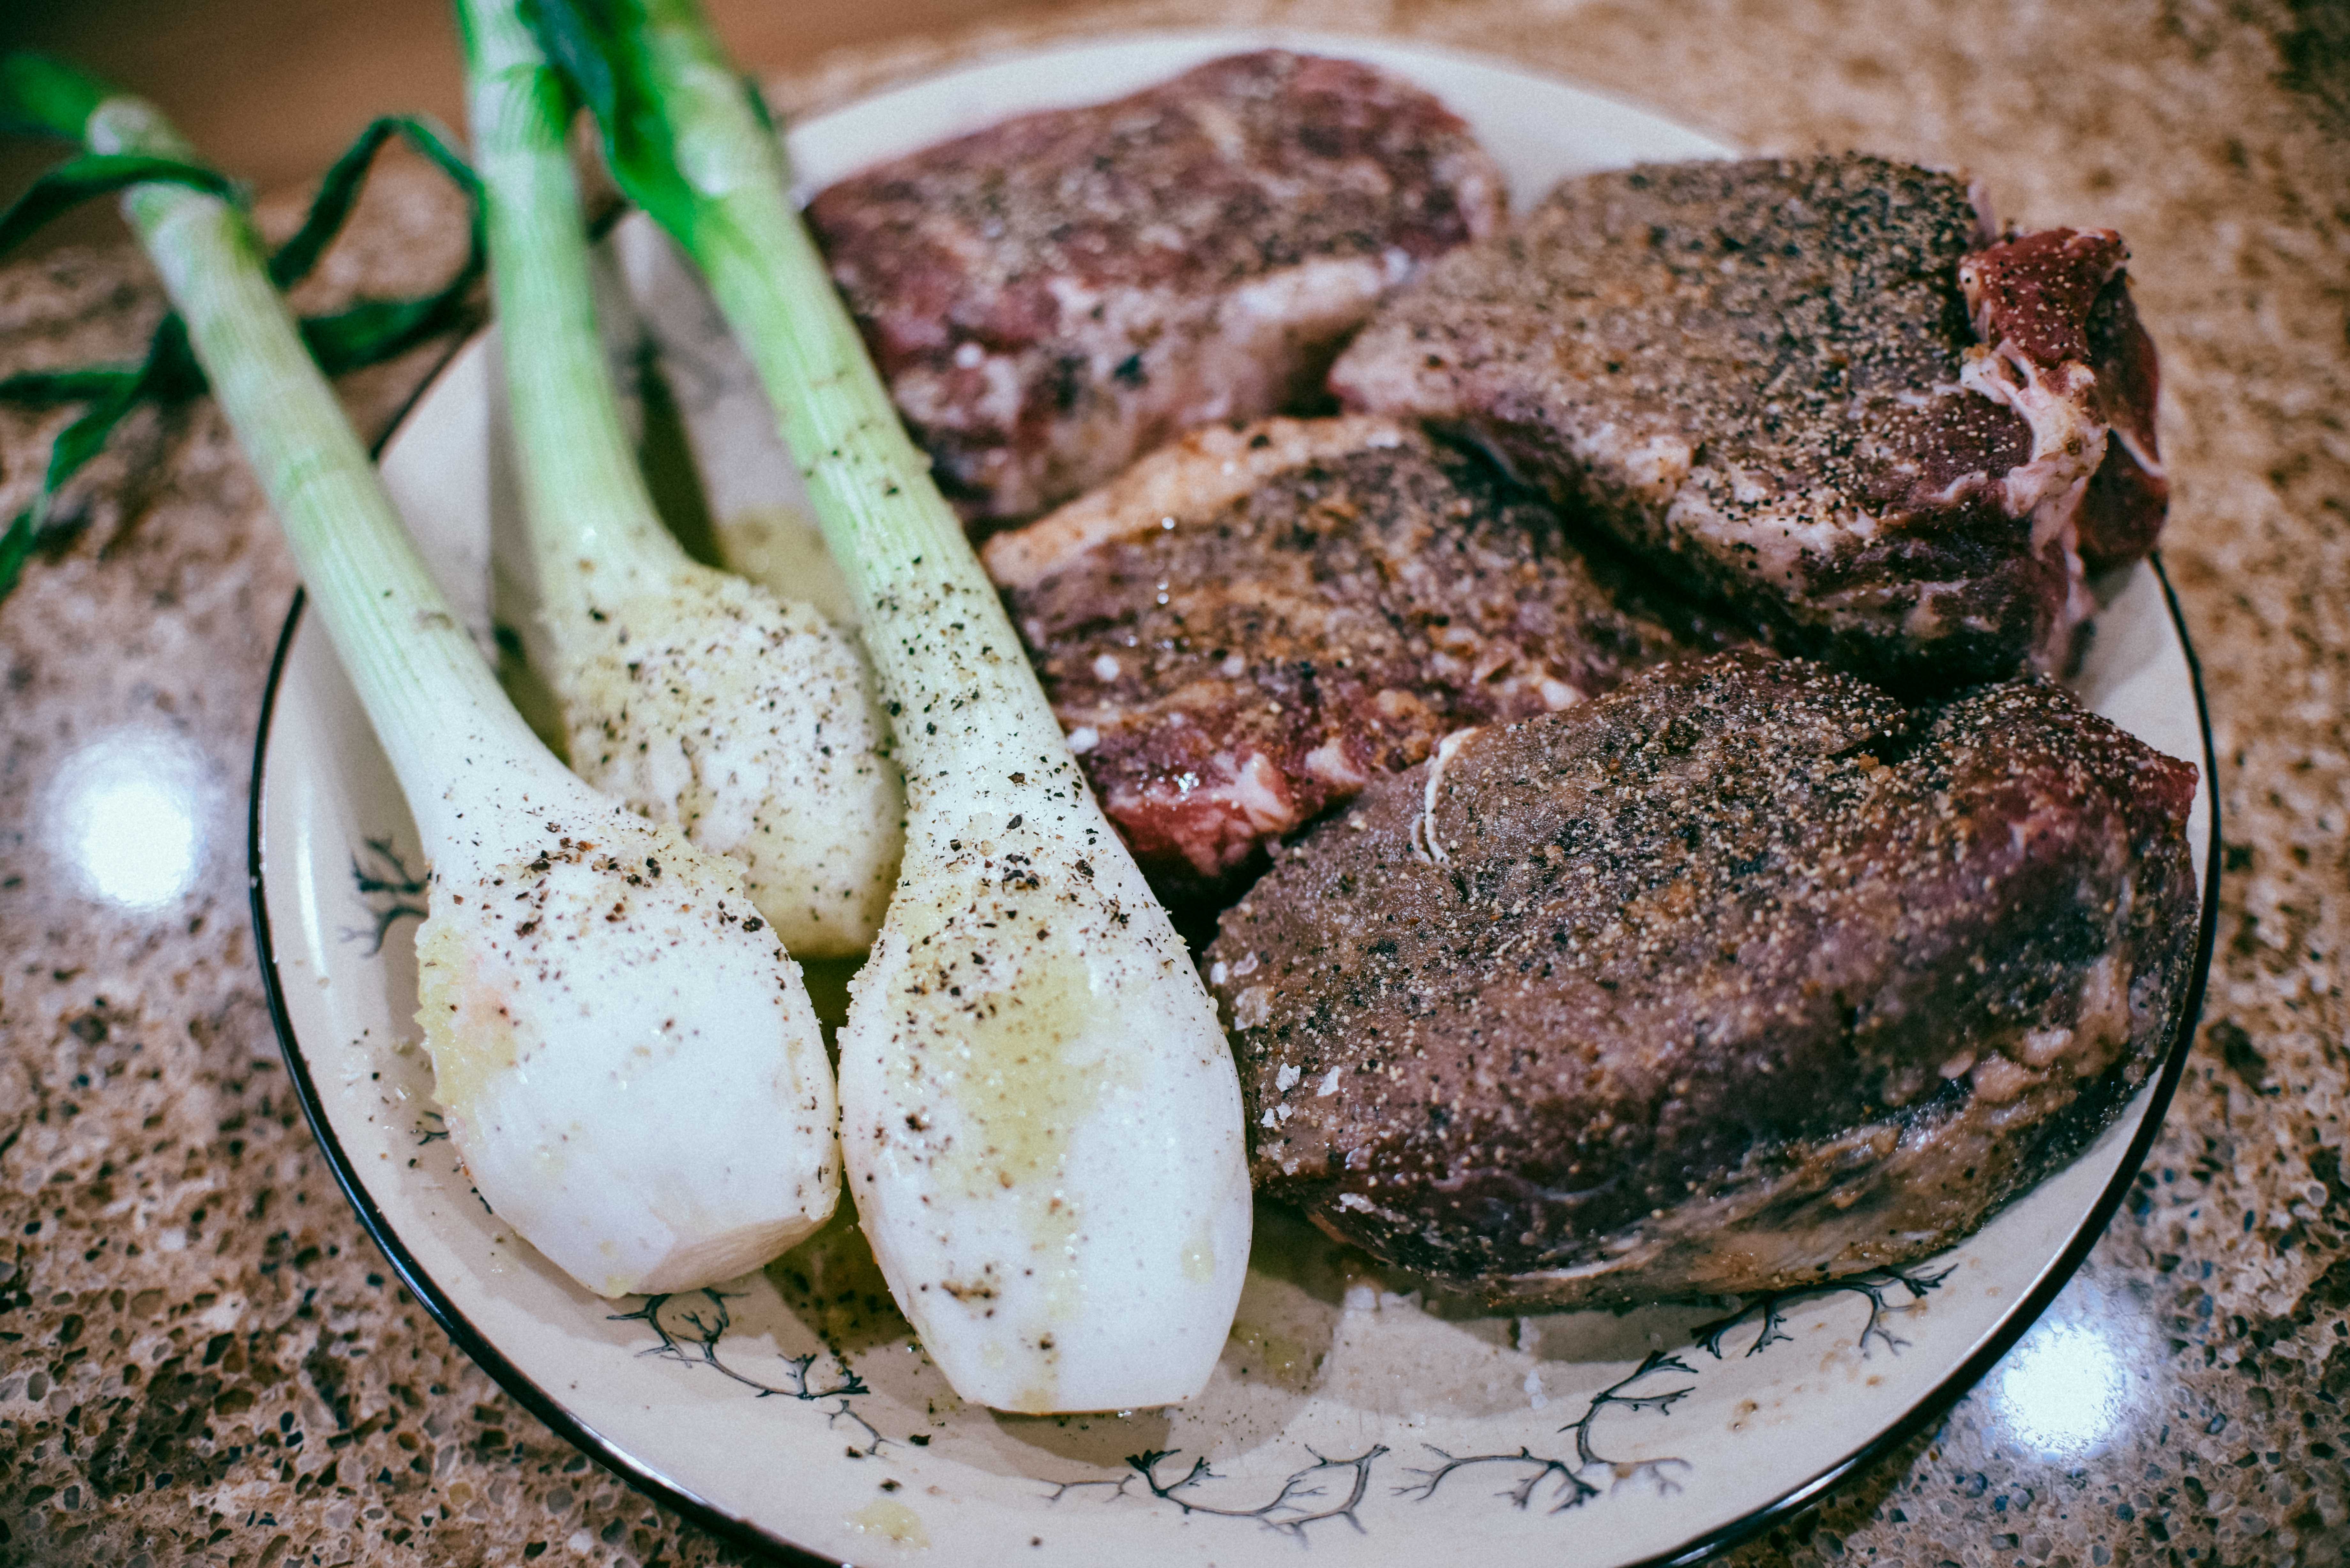
I love steak, my family loves steak, and if you are a friend of mine….you love steak too. We were born meat eaters, and steak is at the top of the list for special nights at the farm. I love cooking them on the smokers, wood bbq, charcoal, on a stick, sous vide, dutch oven, and cast iron. I usually change my method based off the weather. If it is 10 degrees outside I am using kitchen technique, once the weather breaks I find myself outside on one of my barbecues.
I am always surprised when I find chefs, restaurants, and friends that claim to know how to make the best steak but fall short of their promise because they have a lack knowledge, or they just don’t care. When I hear people tell me that they do everything from feel, I know what to expect…imperfection. I hear this all the time. “I just press on the steak and if it feels like the hand below the thumb its done.” So here is my thought on that….if you are camping and have nothing else use that technique, but it will not be perfect, not by a long shot. Steaks all have a different feel based on the product, quality, and the cut. Temperatures can swing very fast based on the temperature of the method using. I carry a meat probe, and my steaks come off the grill, and sit on the cutting board coming up to the perfect temperature, before a knife presented for its first pristine cut.
What you need
A great cut of steak
Salt and Pepper
Meat probe
BBQ (I am using fire, nothing better for a Ribeye)
It is that simple.
TIP # 1
Take the meat out of the fridge to get to room temperature at least 45 minutes before you cook it.
Tip # 2
Season the steaks generously with salt and pepper while it is sitting there coming to room temperature. Do not worry if you over season it a little, it will burn off on the fire if it is a ribeye. If it is another cut with less fat, be more particular and accurate with seasoning.
I am not afraid of seasoning my steaks. BE CONFIDENT. BE BOLD.
TIP #3
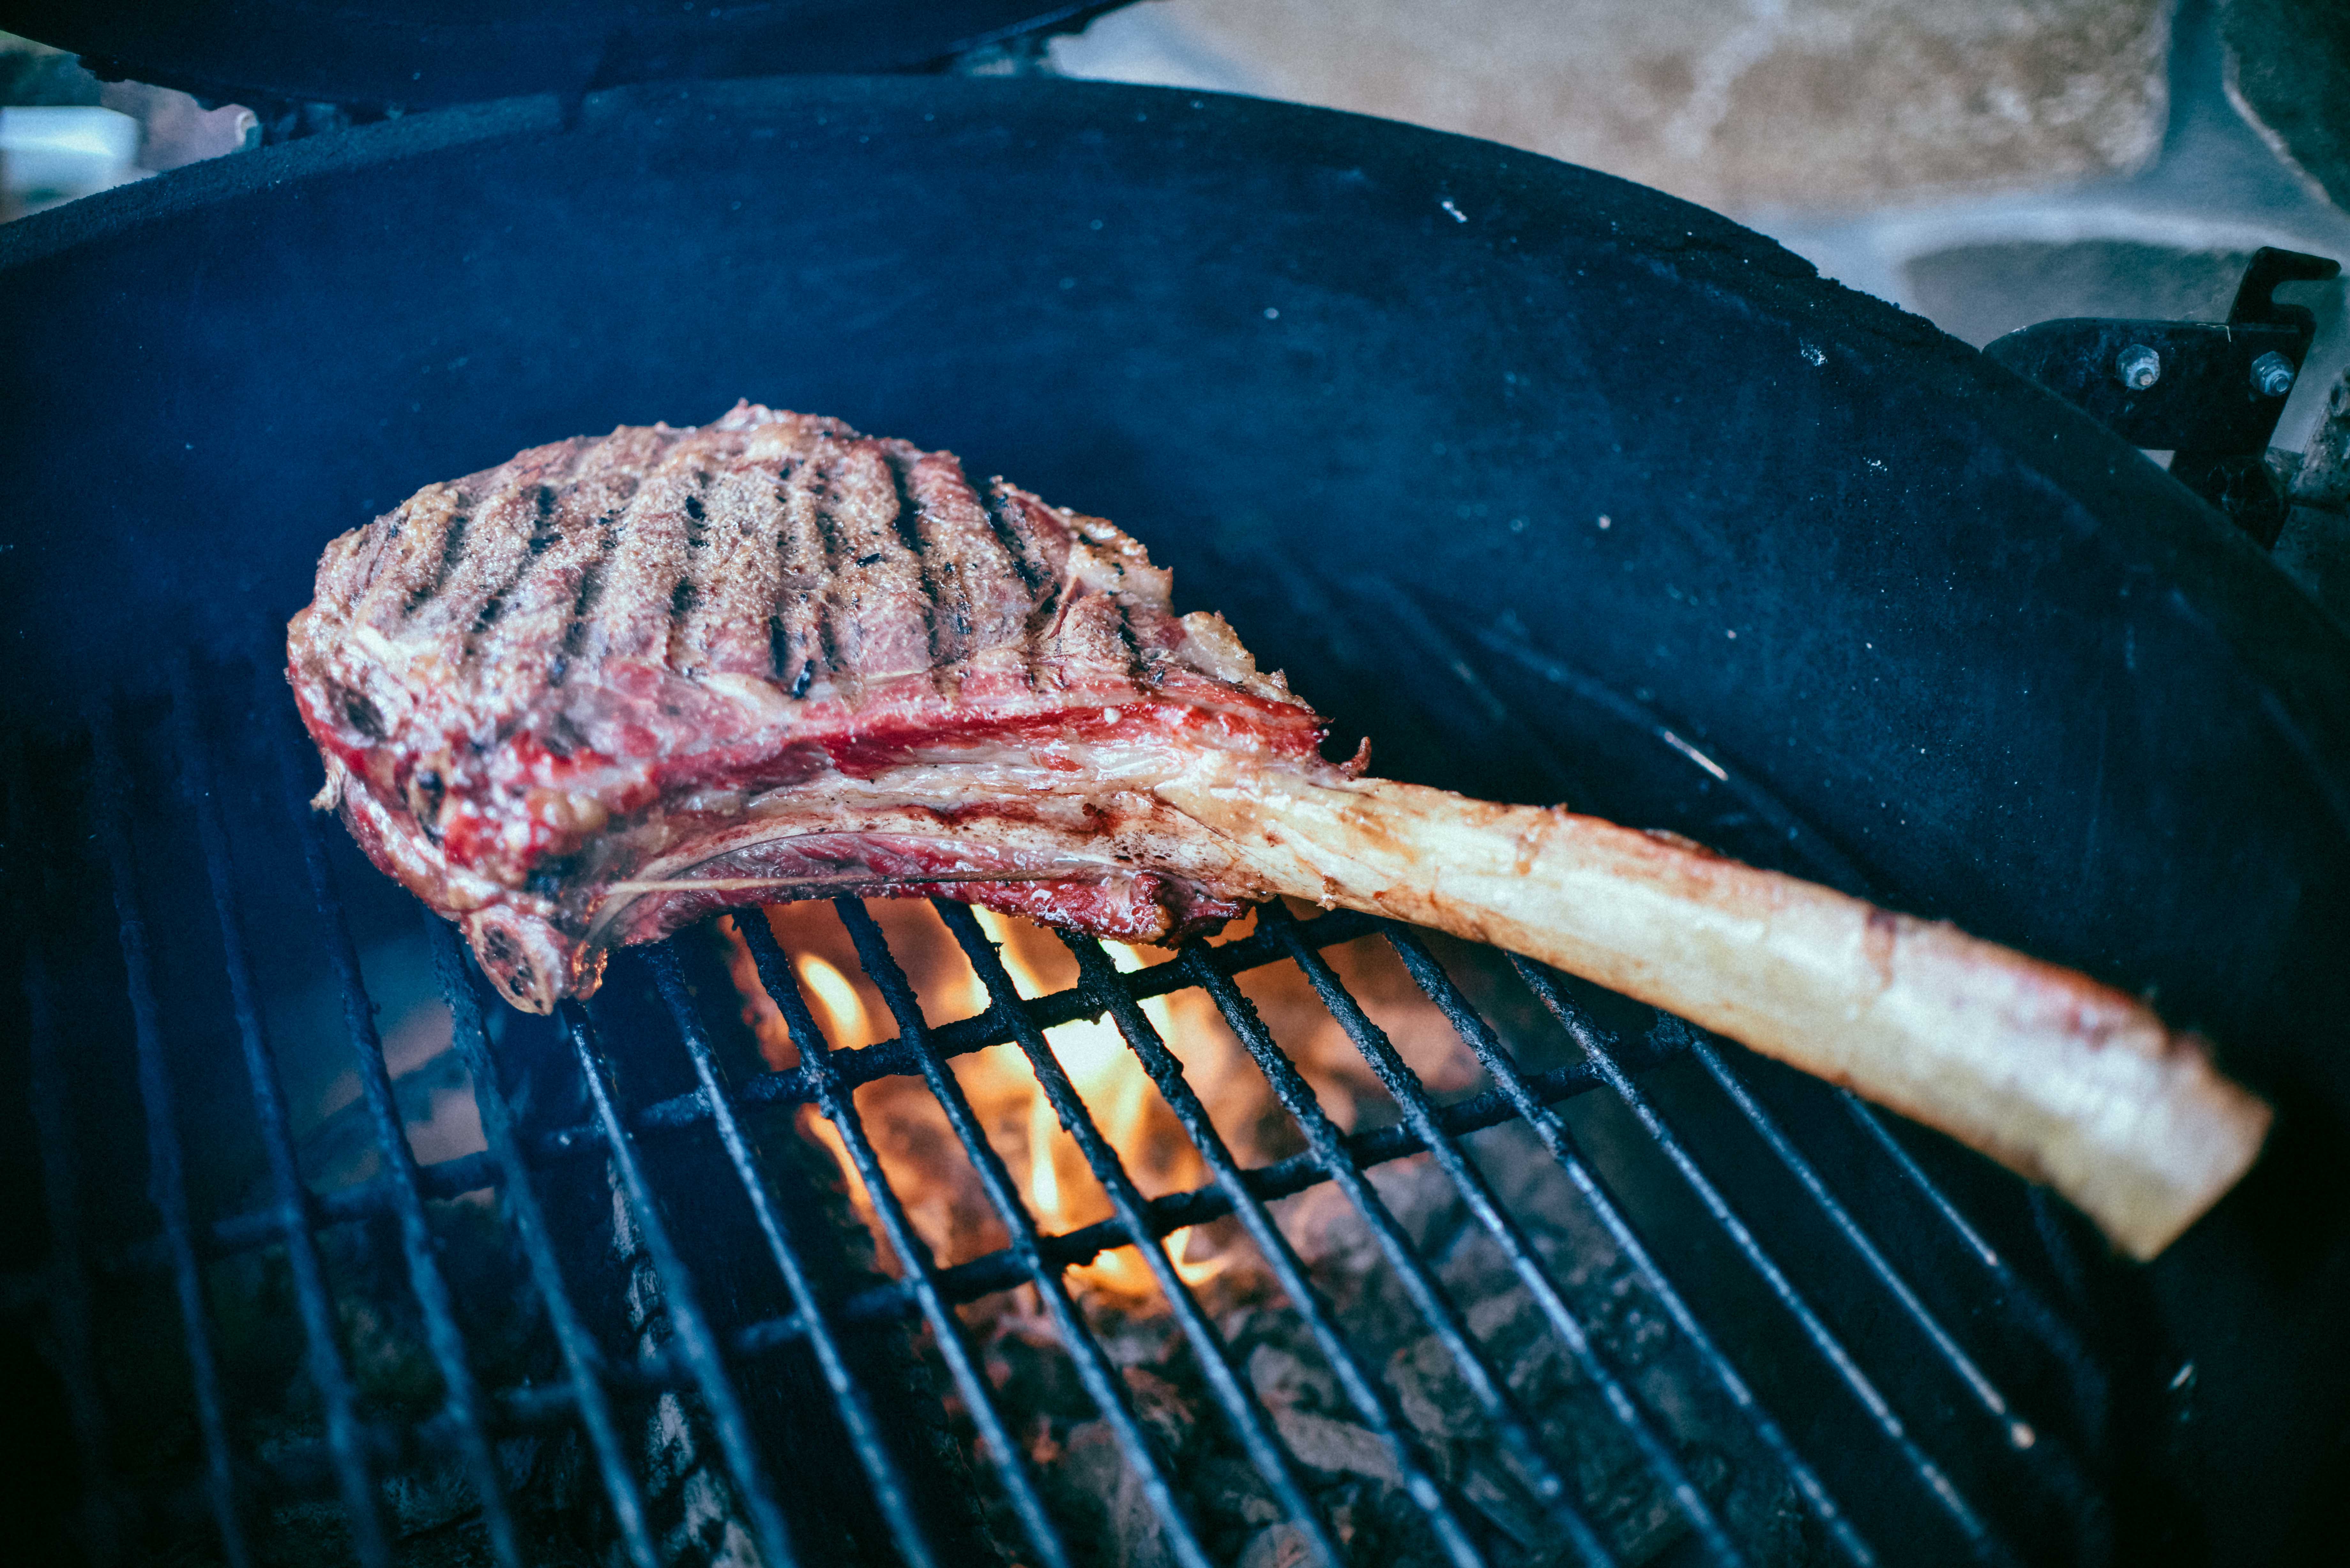
RIBEYES LOVE THE FLAME OF A FIRE. SIZZLE IT!
Tip #3
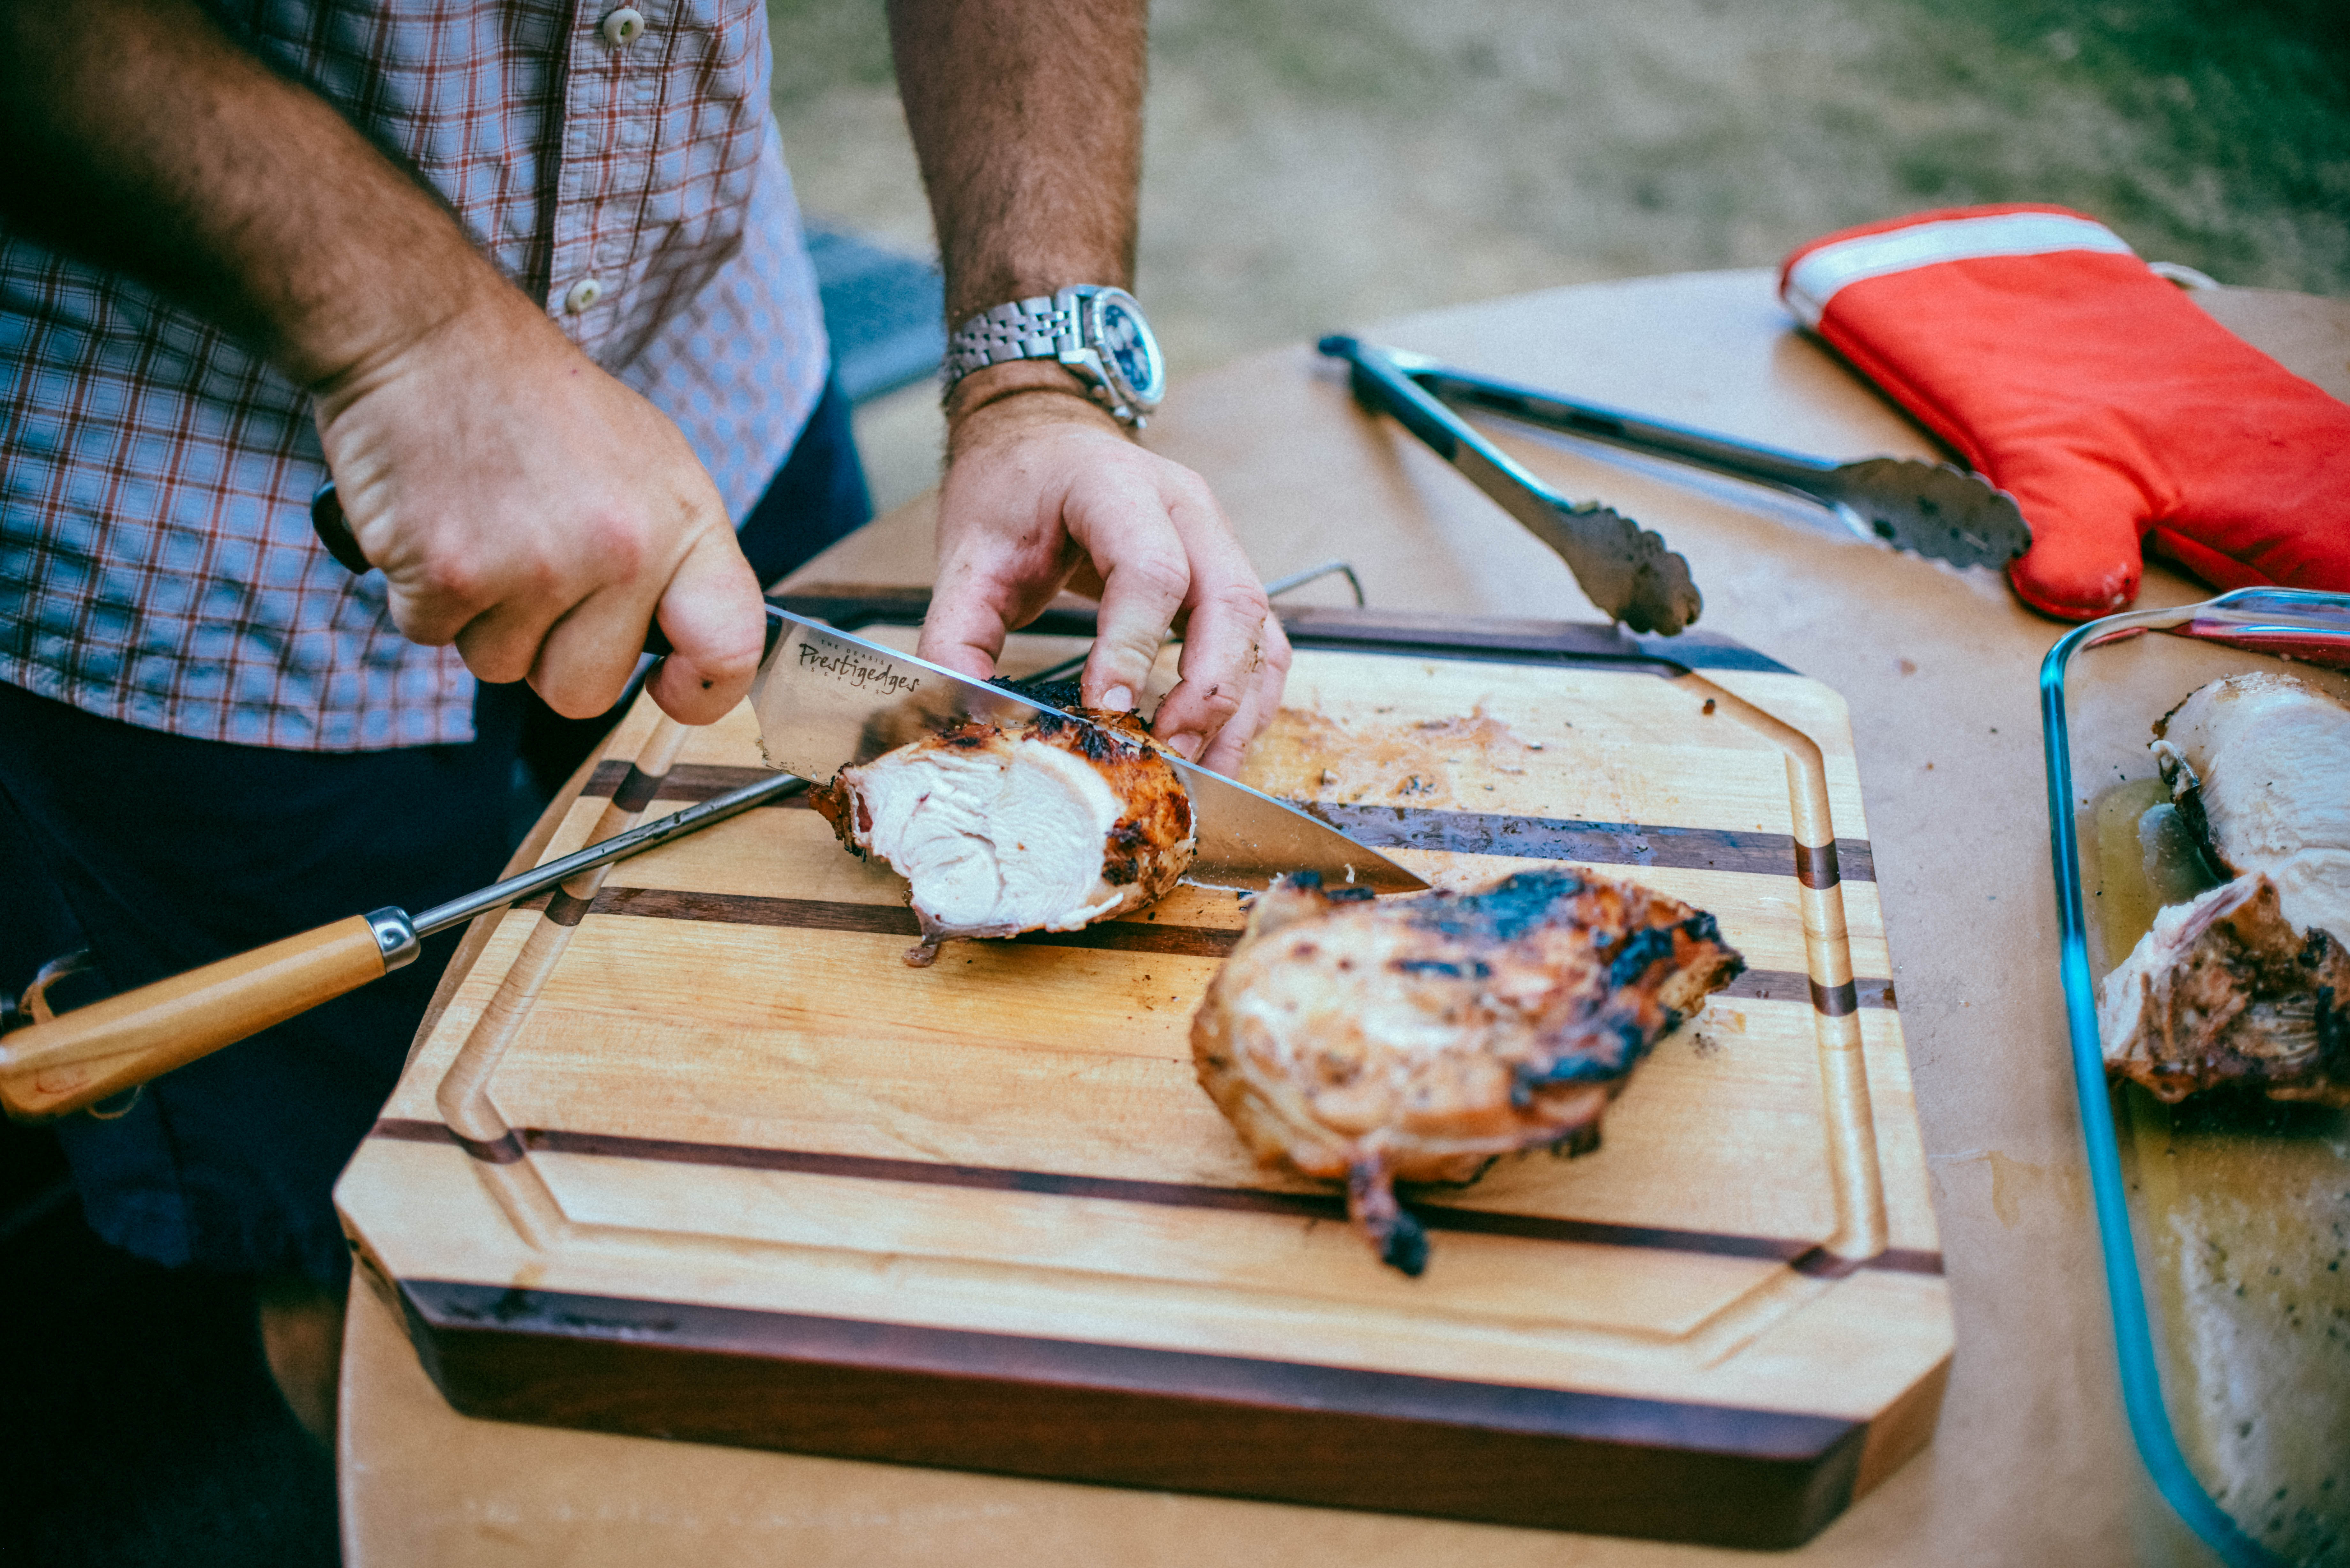
USE A MEAT PROBE. Steaks will cook differently depending on their location of the bbq. Be a pro, use a temp probe for accuracy. I pull my steaks at 136 degrees, then let them sit for 5 minutes before serving. I don’t want them bloody and I do not want them overcooked. I will not even serve people at my farm if they want it well done. I want my steaks to be a tweener, just over Medium Rare and under Medium.
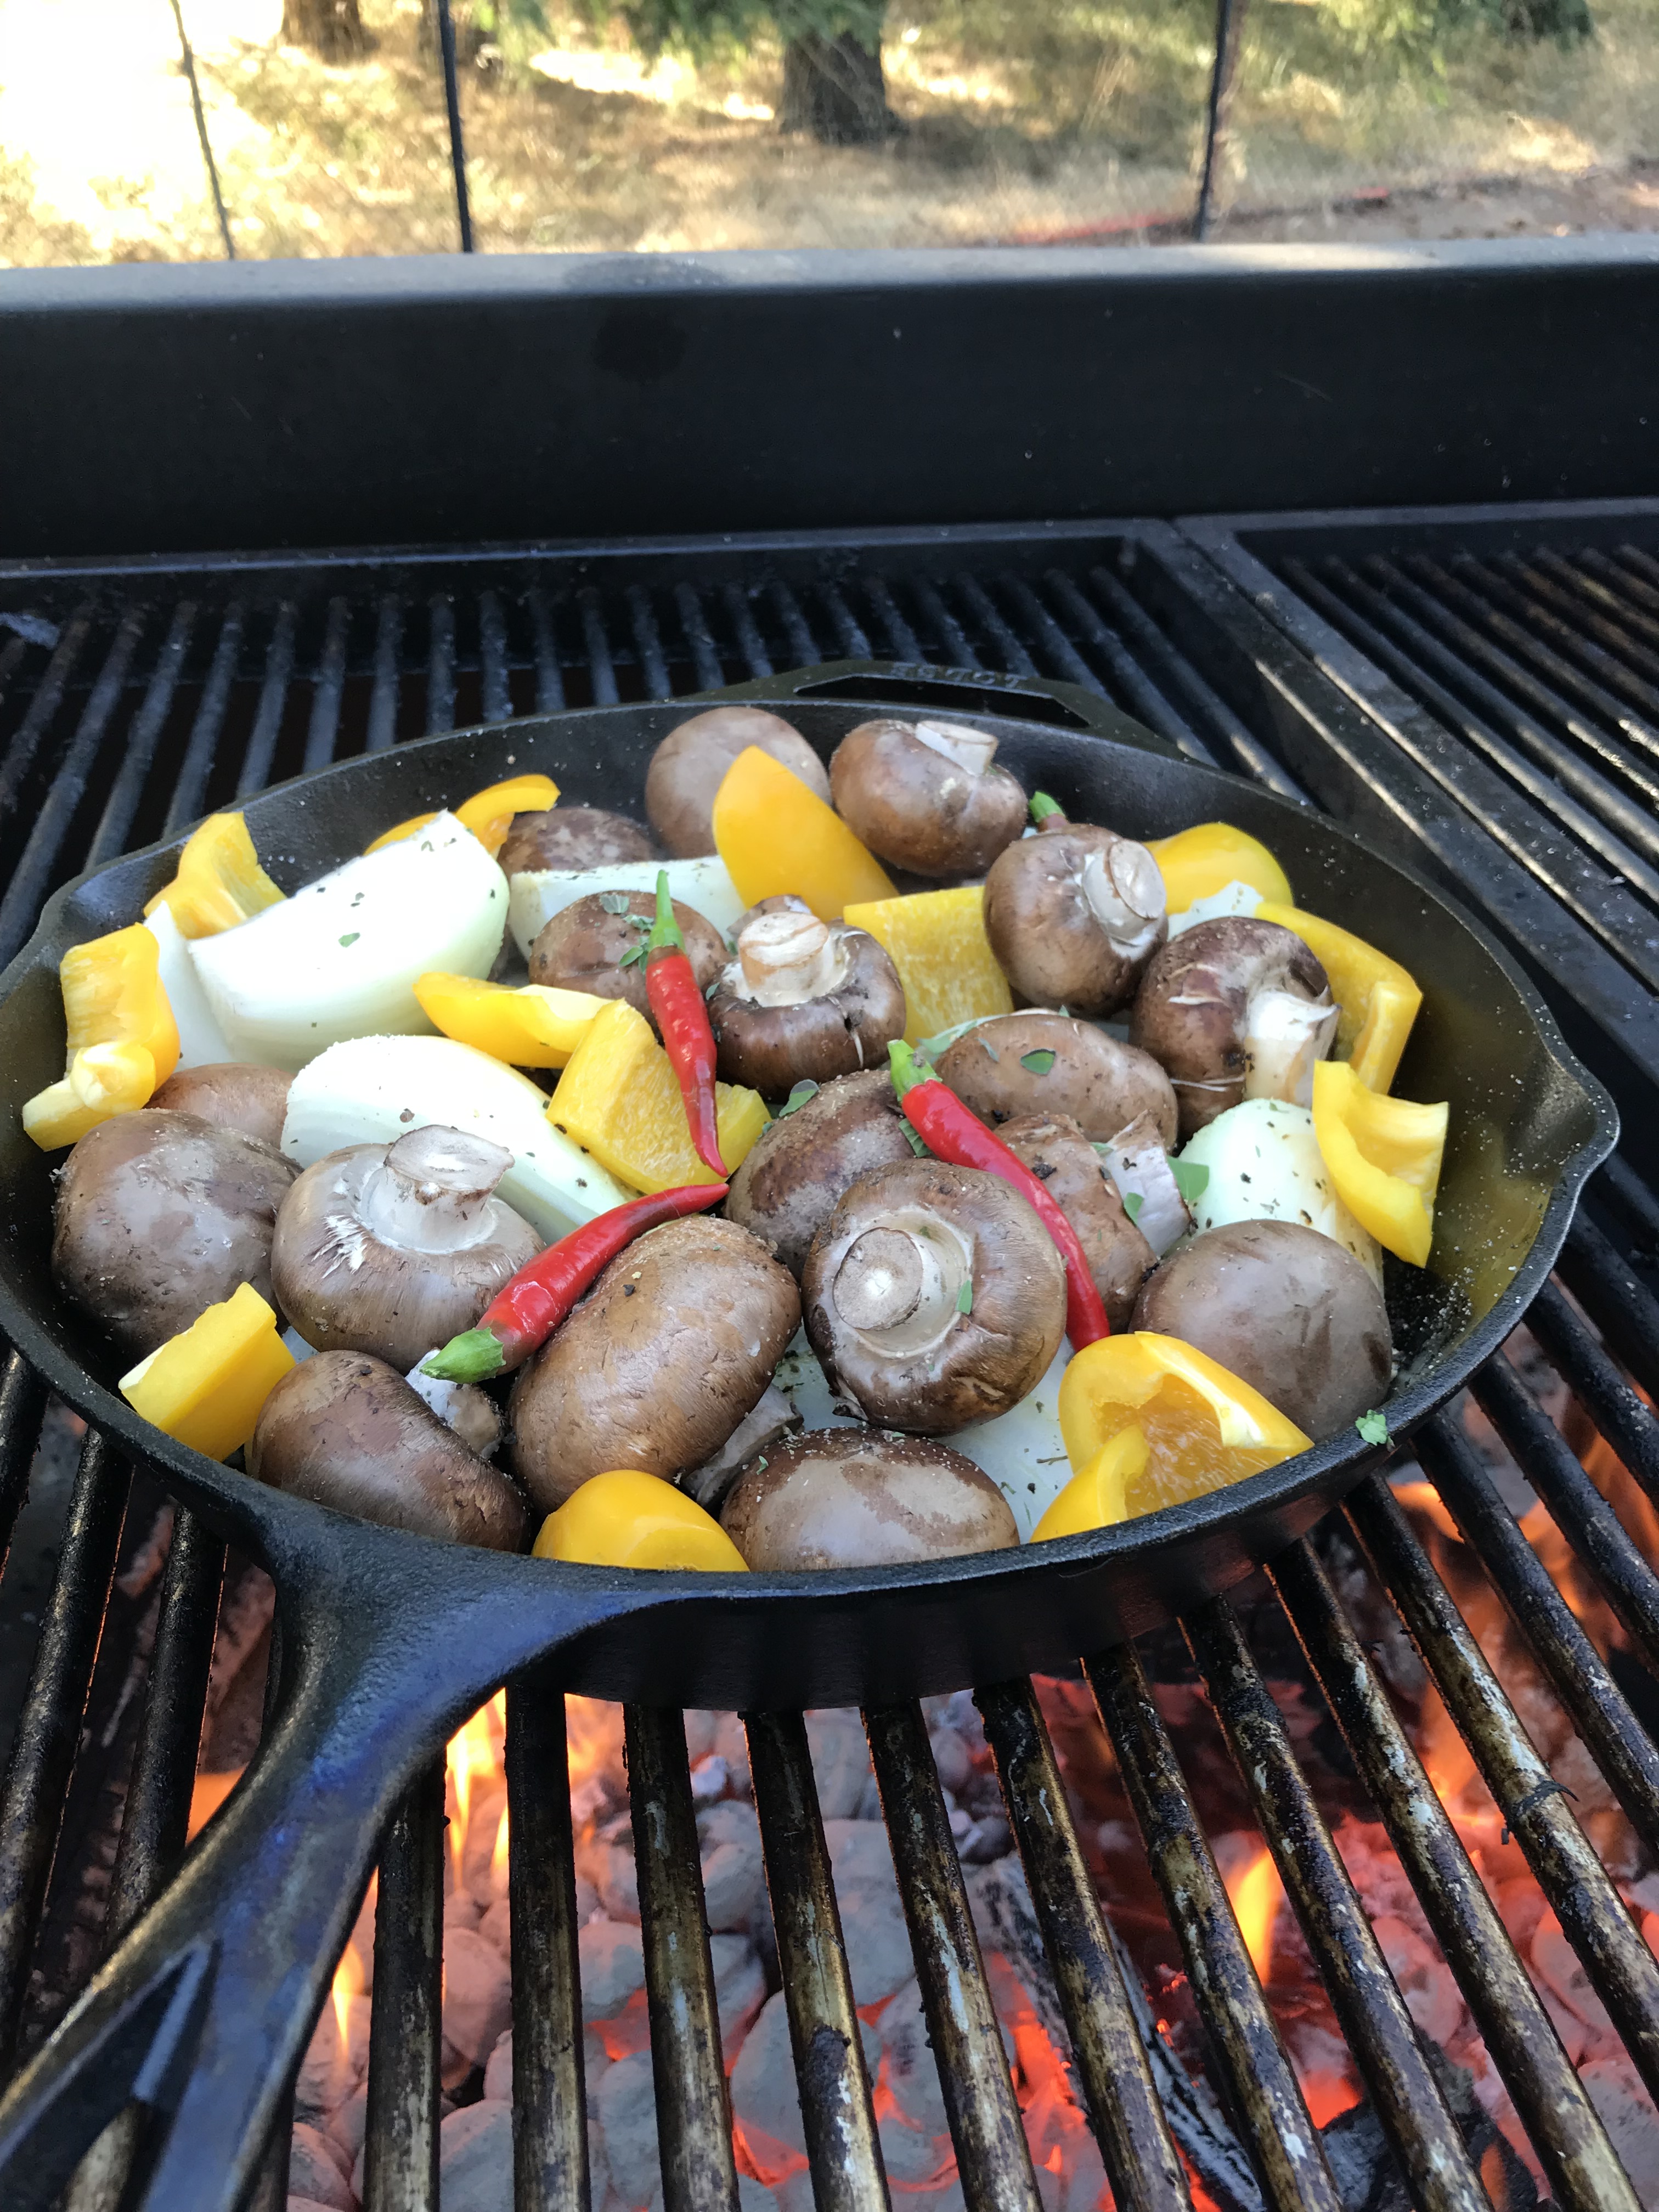
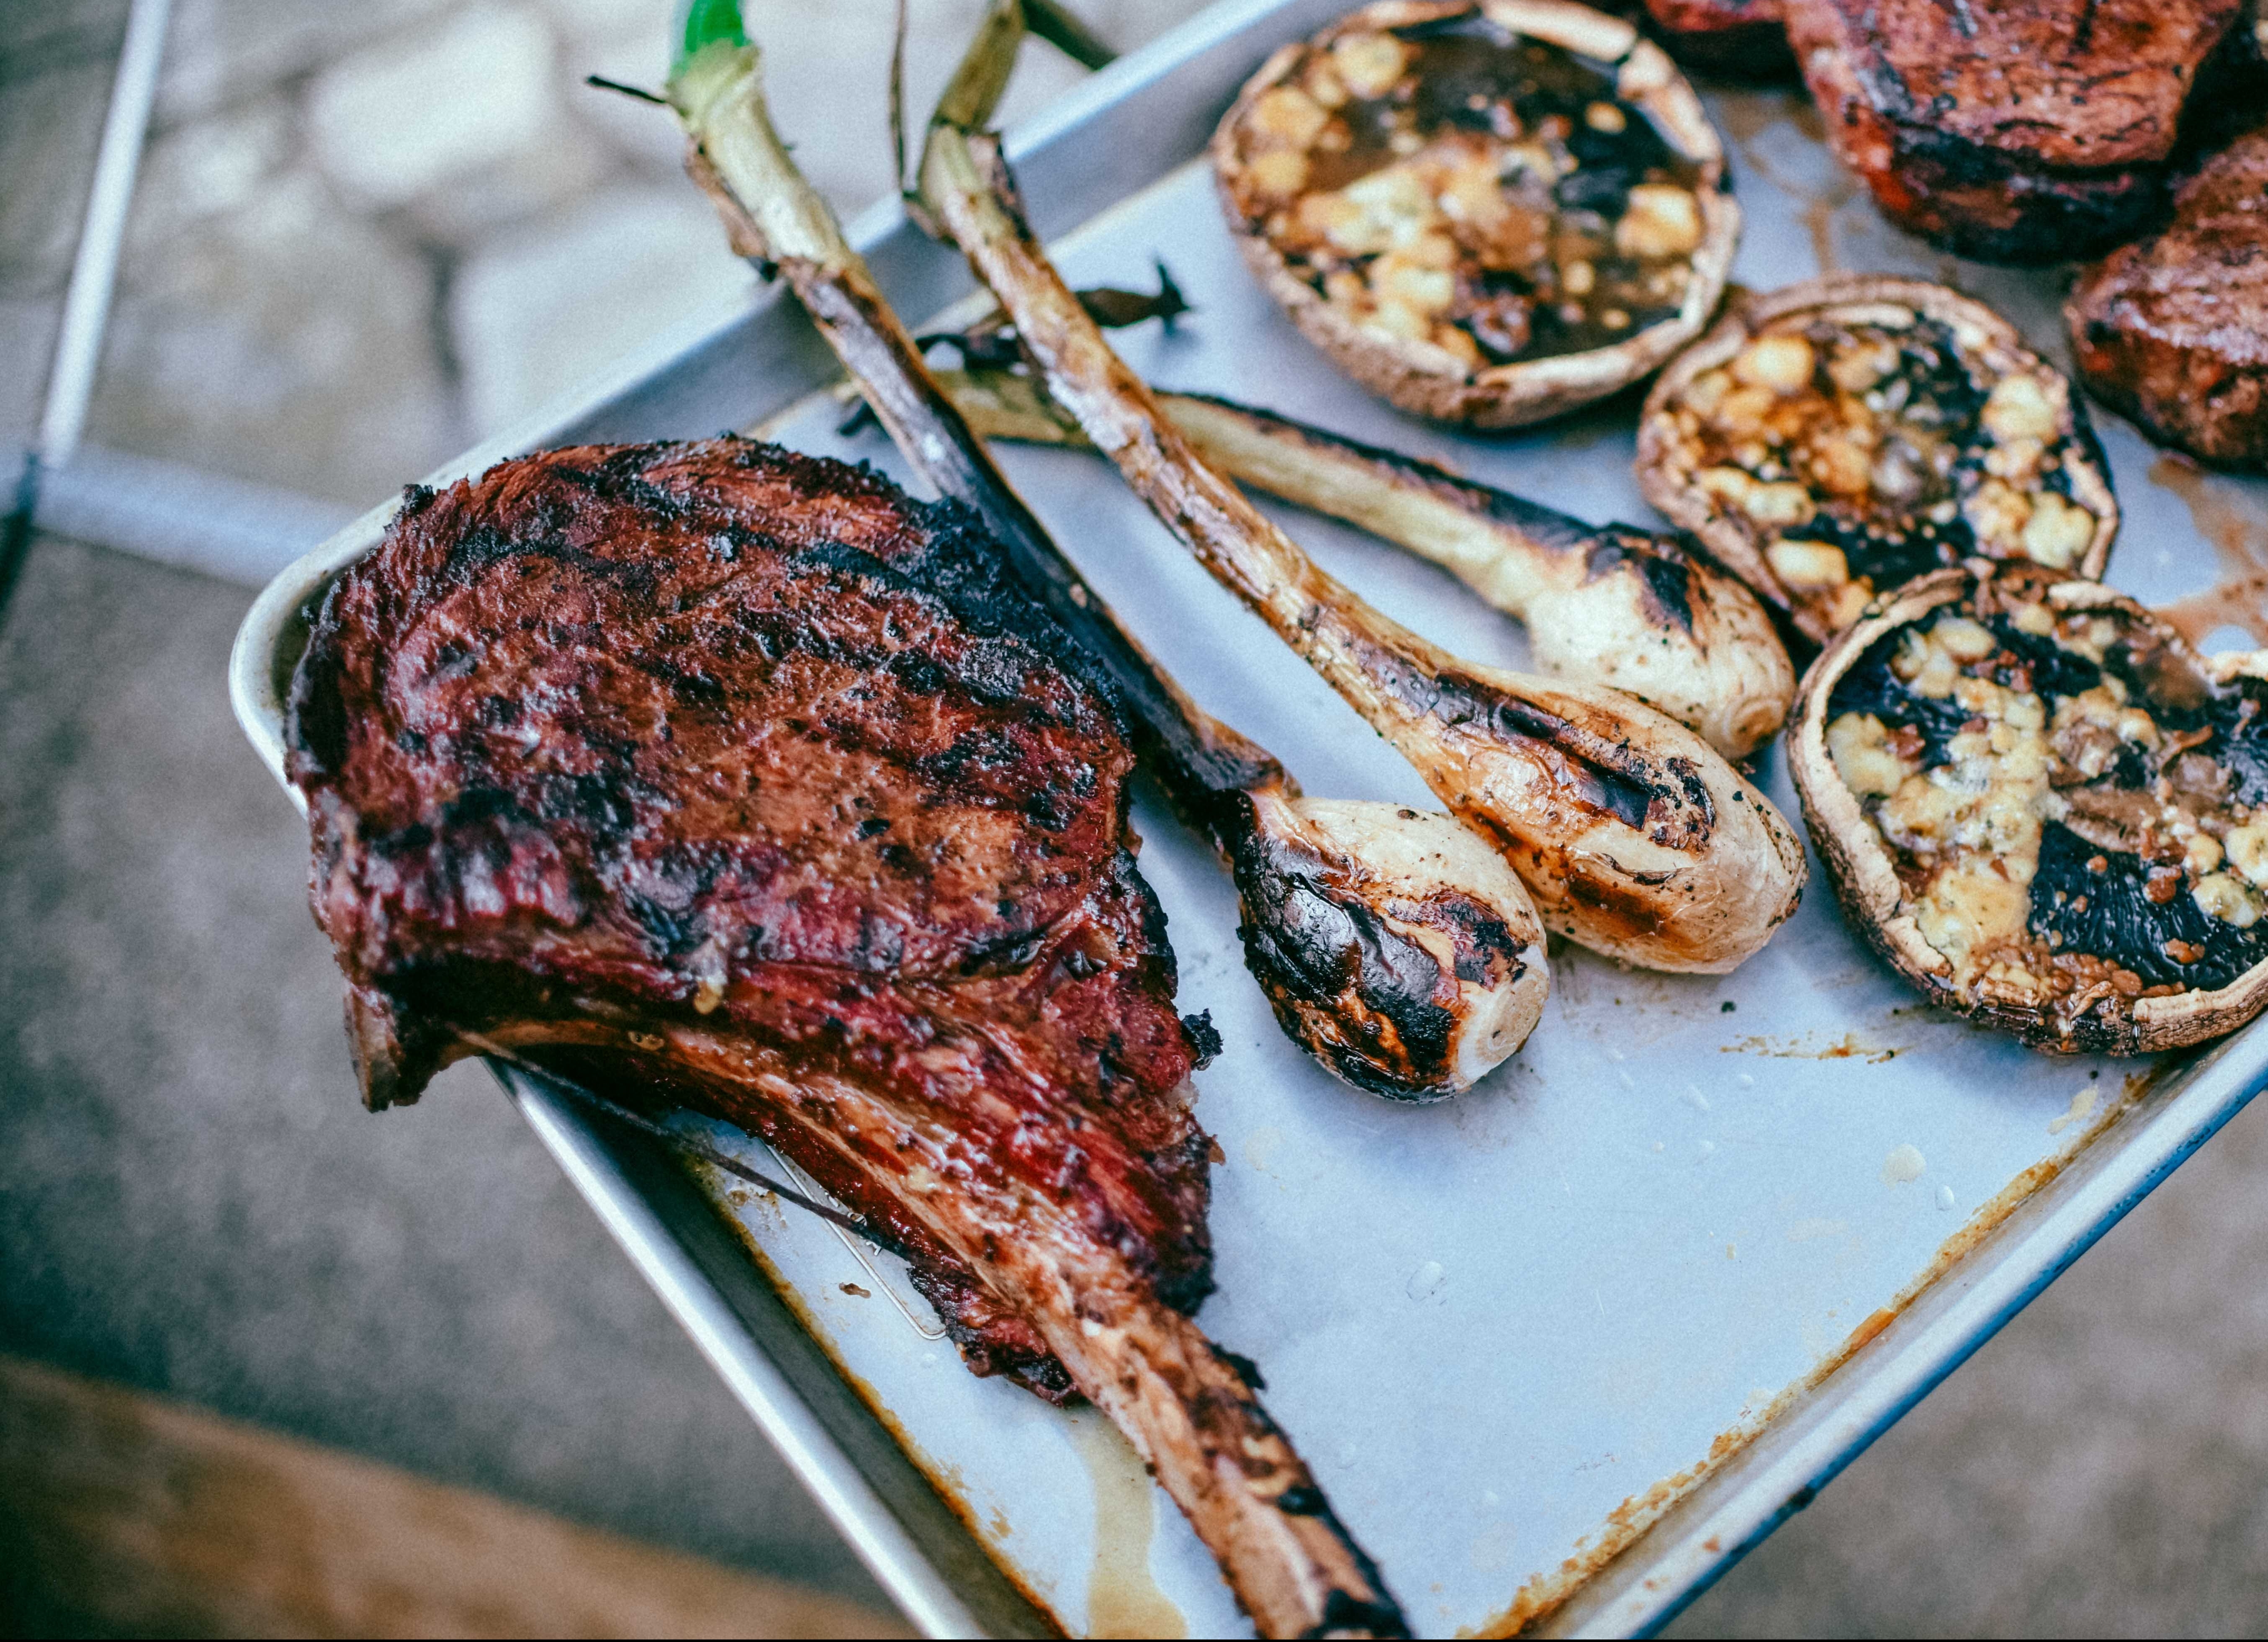
Just look at the oils on that beauty. Those onions and marinated mushrooms are awesome as well
TIP #4
Find a good butcher. There is a major difference in quality of good beef and meat. This is a shout out to my boys at Cutforths Market in Canby Oregon. The home of the Bone in Tomahawk Ribeye!
The perfect Temperature. My daughter Meg added a little Argentina Chimichurri sauce to her steak
That folks is how you do it. Do not over think it, and do not be afraid of it. Keep it simple and precise. The method is the important part.
My father loved smoked salmon, and it was because of that love that I worked hard over the past twenty years to make it better and better until I finally broke the code about a year before he passed away. This learning curve was tested on 200 lbs. of salmon over the years I suspect. I got a call the other day from an old friend that has had my smoked salmon and said his father really liked it. So I said “You bring me the salmon and I will smoke it up for you.” I decided to blog my recipe because I think it should be shared, and if anything should ever happen to me I do not want the family not to have some record of it.
Here is what you are going to need:
A lot of salmon with the skin on. If you are using stuff from the freezer, butcher it properly so it does not have any freezer burn on it. That is the worst.
1 cup sugar
1 cup salt
1 cup of pineapple juice
1/2 cup brown sugar
1/2 cup of soy sauce
1/2 cup of water
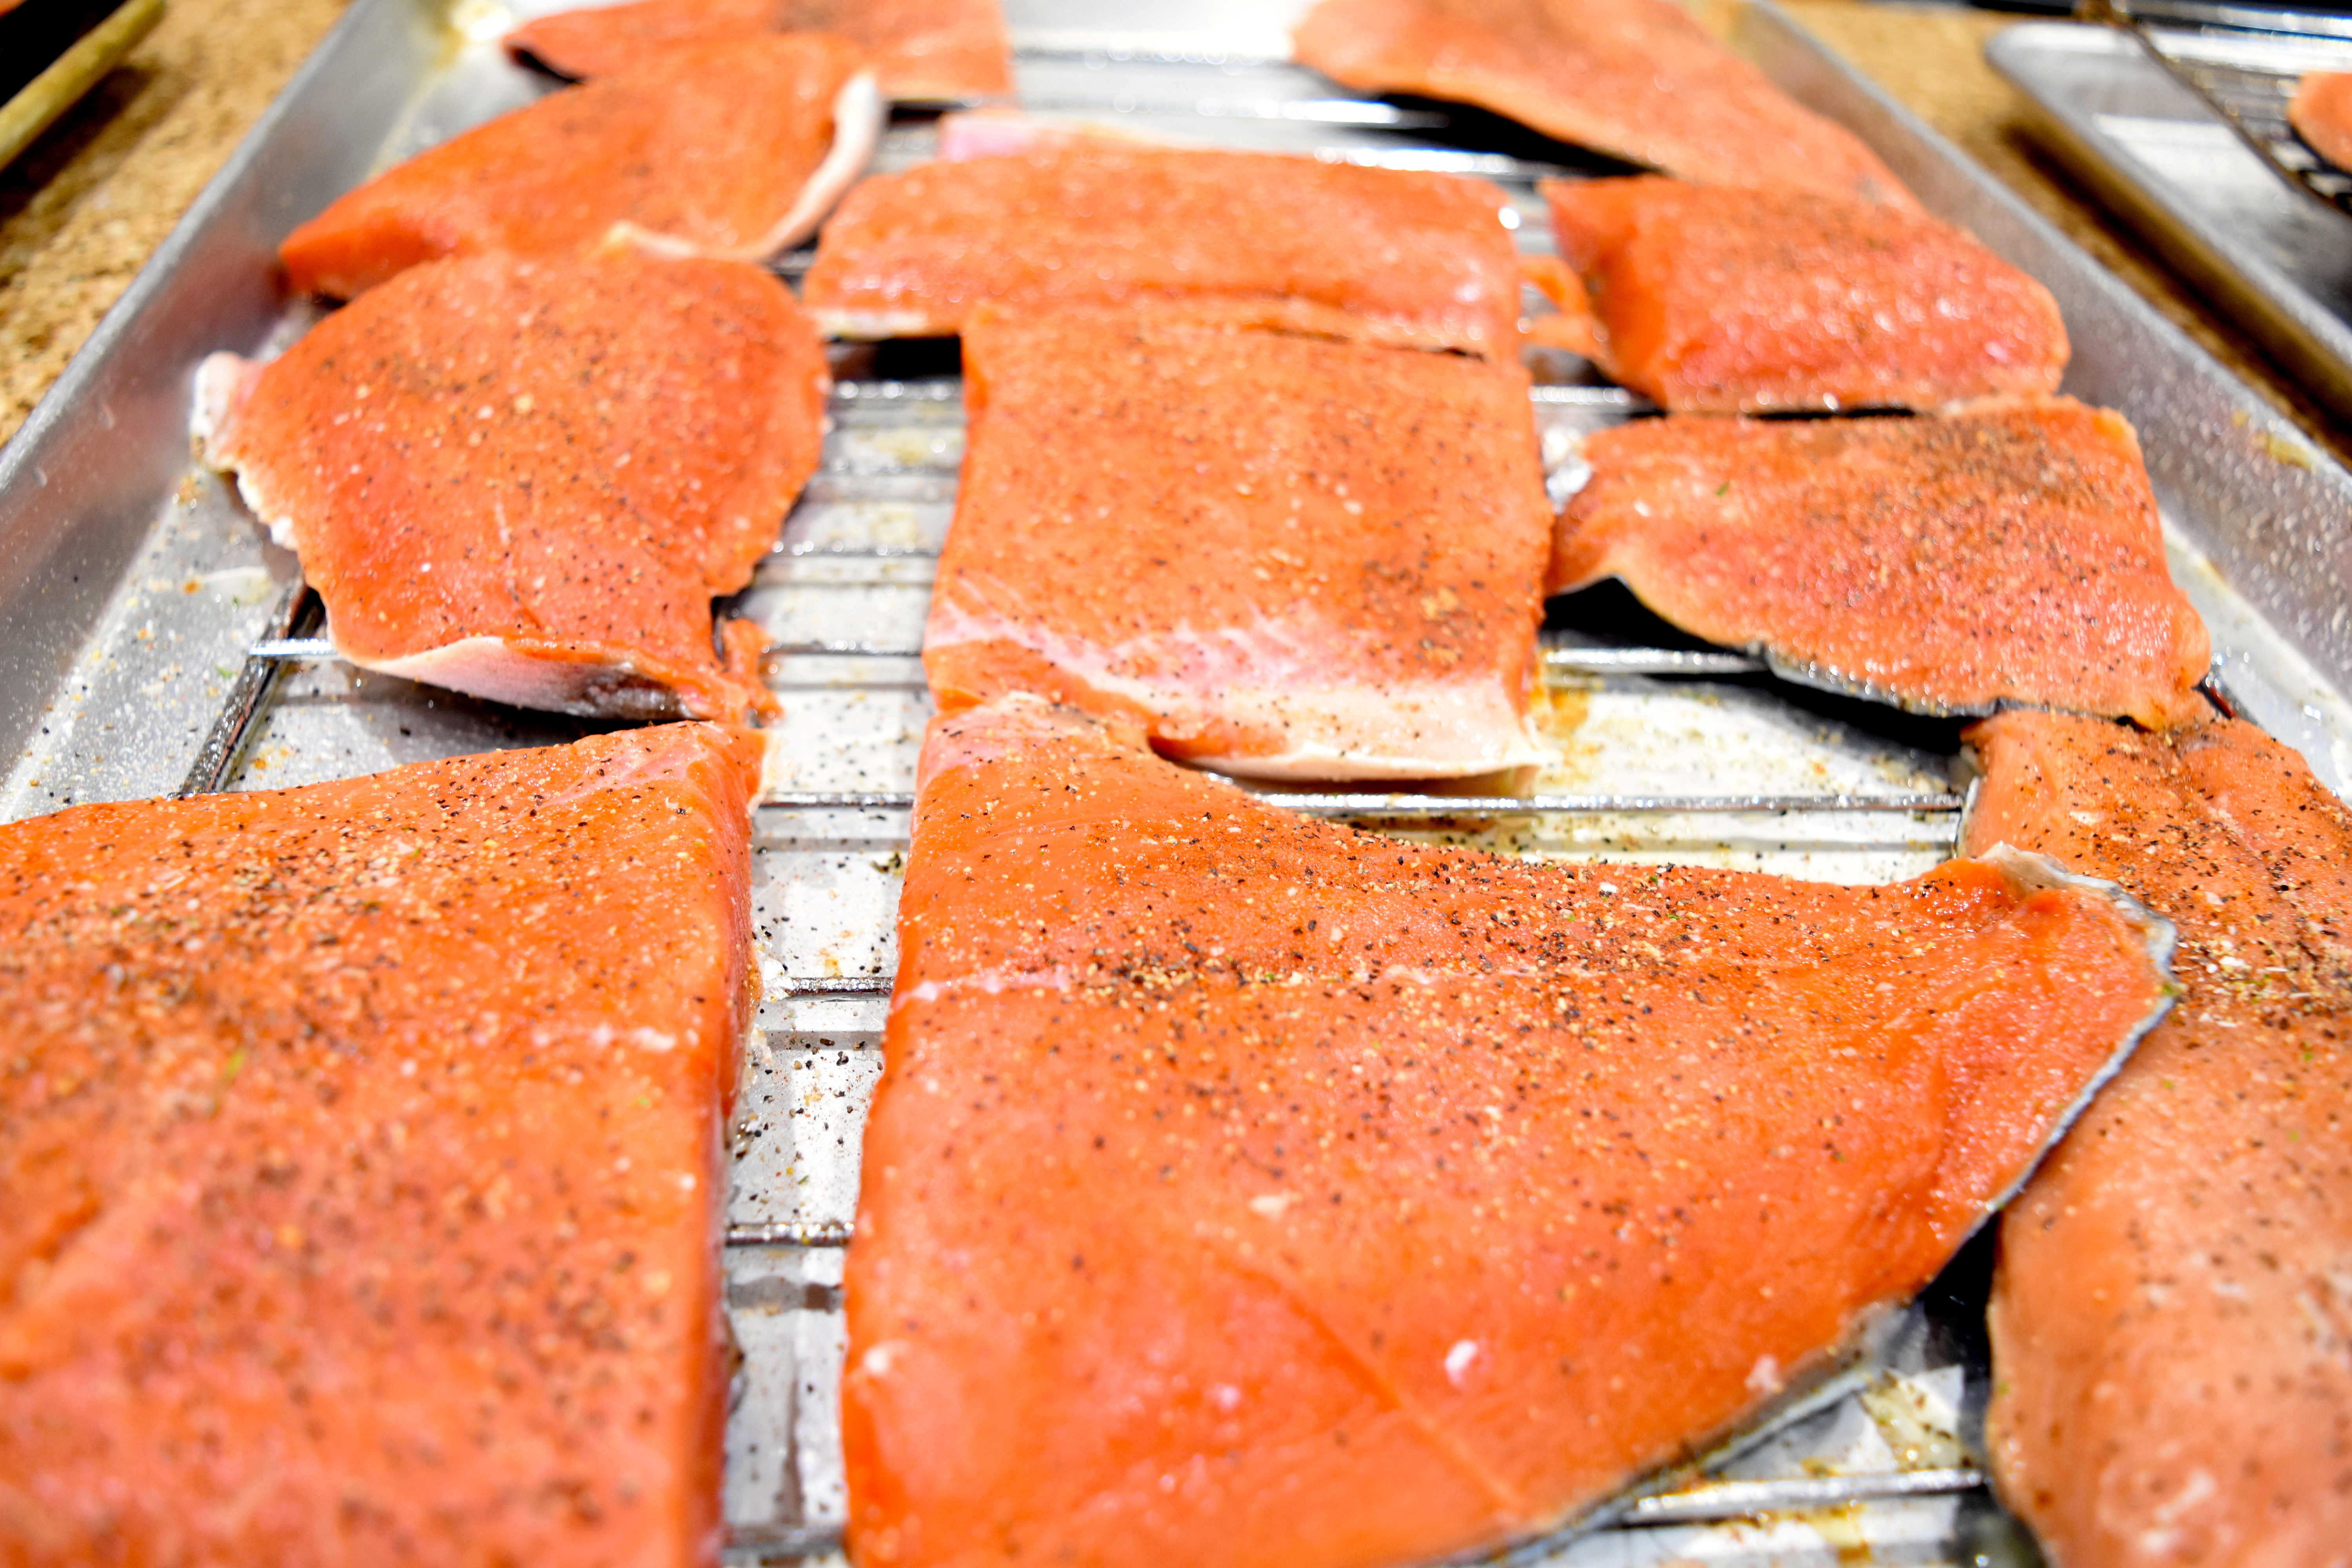
I wrote them down in easy portions because you may need more depending on how much salmon you are smoking. If you are filling the entire smoker which is about 15-20 pieces you will most likely need to times the brine ingredients by three. I use Tupperware, do not use anything metal. You can use zip lock bags, or a big cooler if you want. Mix all the dry ingredients together and generously pour over pink flesh side of the fish. Then pour all the wet ingredients over the fish into to the tupperwear. Shake, or mix all of it around.
You are going to brine the fish for 8 hours or over night. Not all the fish is going to be under the liquid so its important to turn the Tupperware upside down to rotate the fish, or mix the fish around. Once the 8 hours is completed. Take the fish out, rinse it very well with fresh water. I use racks on a cookie sheet so you can get good air flow. This next process is very important. Dry the fish with a fan for about 2-3 hours until the fish is tacky. It should not be wet at all. This process will keep the fish from leaching fluids or allowing the moisture out of the top of the fish during the smoking process.
After one hour of air drying get these ingredients into a bowl.
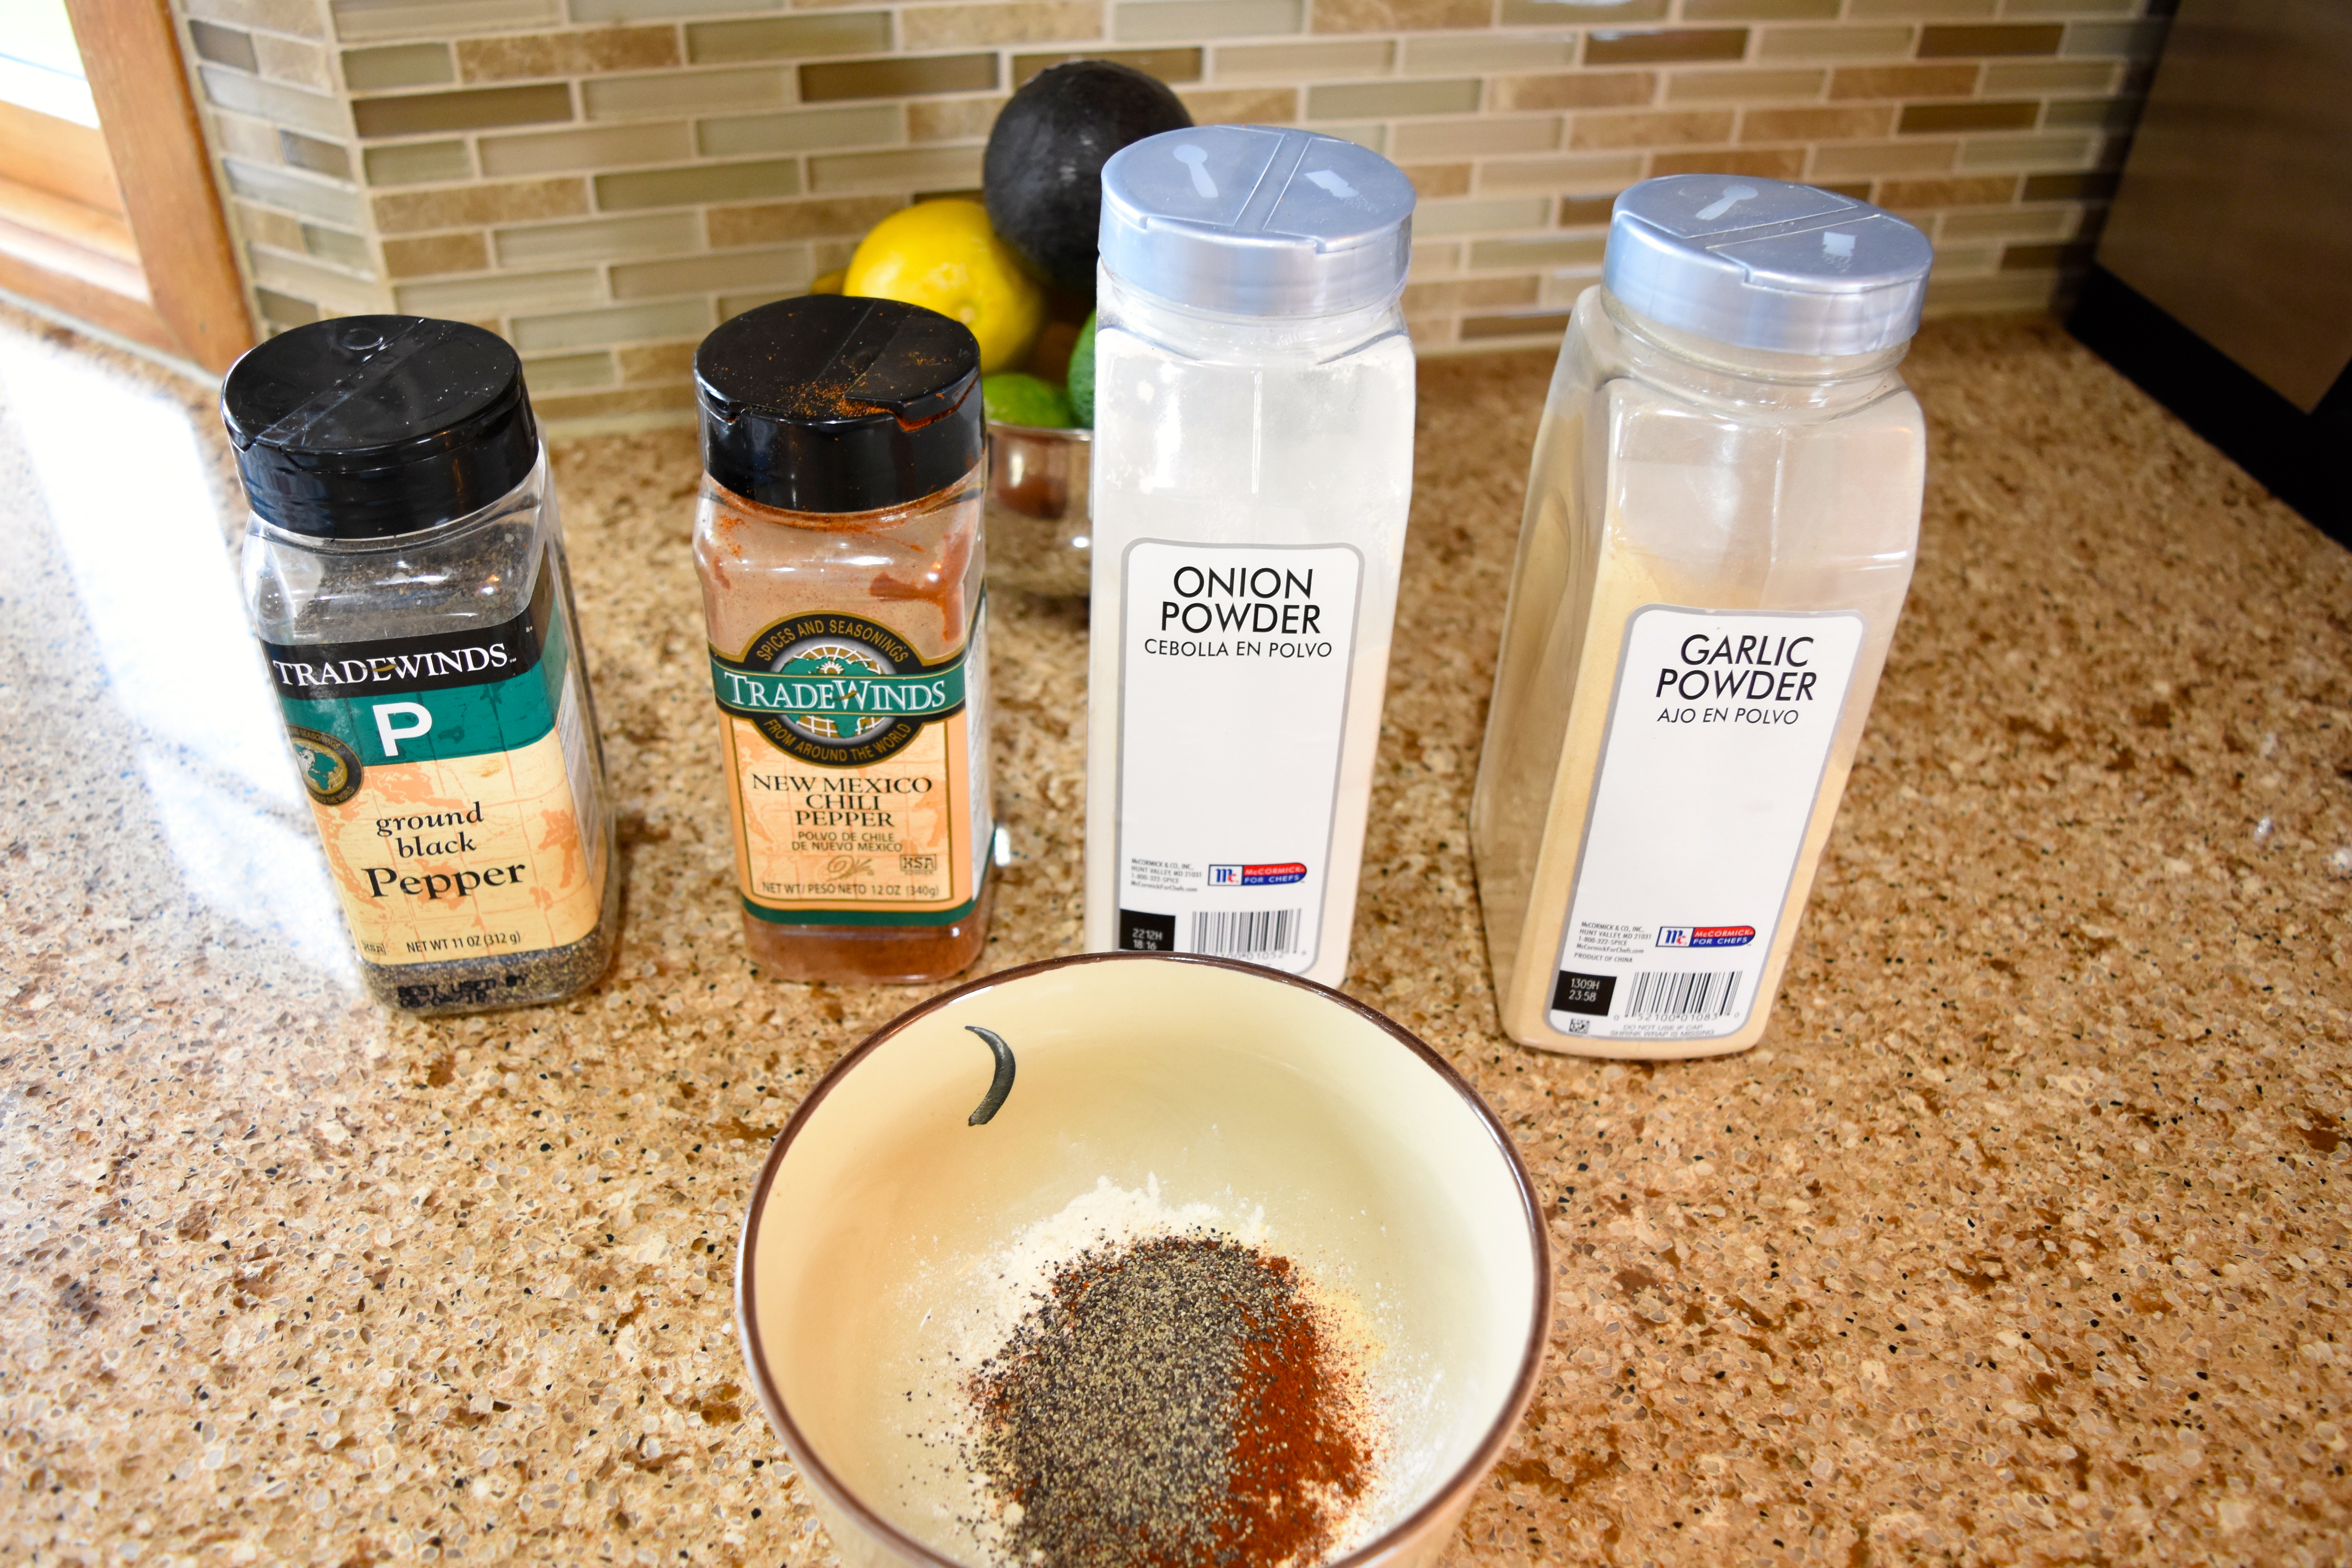
1 tablespoon of pepper
1 tablespoon of onion powder
1 tablespoon of garlic powder
1 tablespoon of New Mexico chili powder
Sprinkle nicely over the fish.
Then return to drying for the remaining 2 hours, or until tacky.
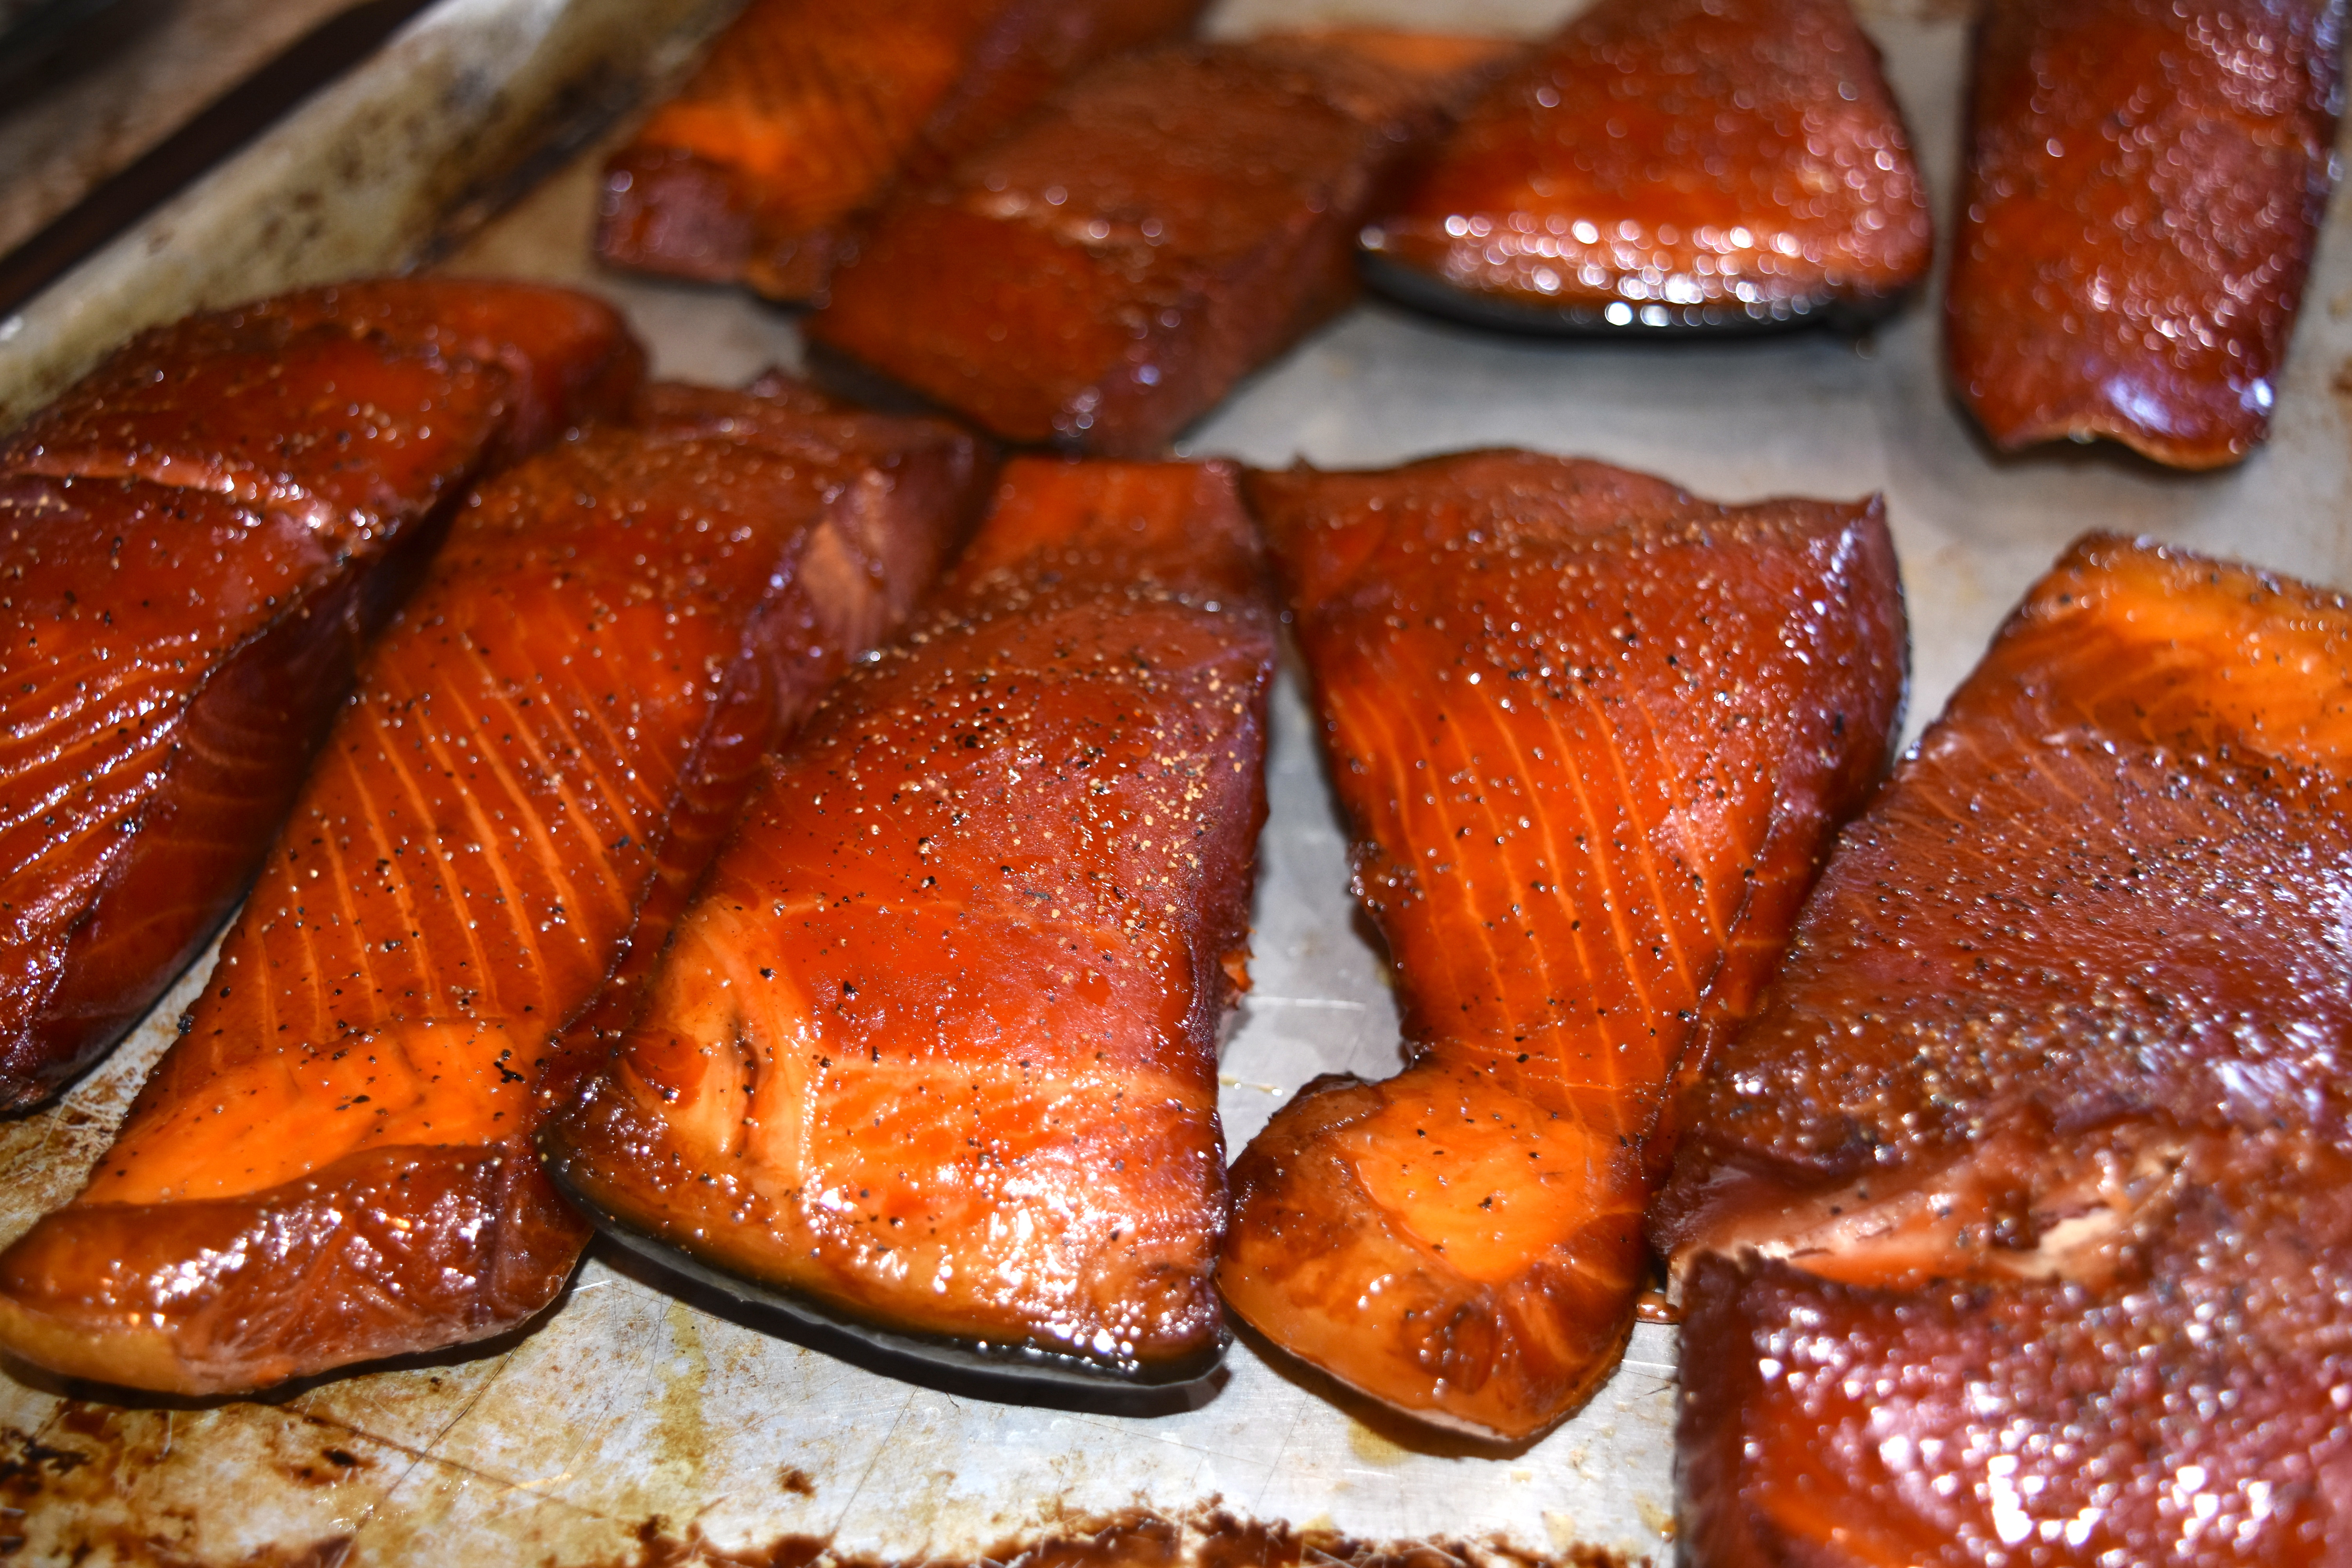
Once the fish is dry, take it to your smoker. I use my good old fashion Big Chief. Make sure to spray the racks with spray pam so the fish comes out of the smoker with ease. When it comes to the wood chip selection I am unsure if one really can tell the difference with smoked fish. I have used apple chips, mesquite, and cherry. This batch is getting apple chips. I usually start out by running three loads of chips in about three hours. I check to see if the fish is getting cooked, check to see if it is flaking at all. It probably will not be, so throw another load of chips. I check the fish by taking the largest piece and the smallest and see how flexible it is. It’s all about feel for me, shouldnt be rock hard, and should break apart nicely. If you have no experience grab a temperature probe and check to see if the fish is 150 degrees.
Remove the fish, and get ready for the last step. Bring into the kitchen. Start your oven at 200 degrees.
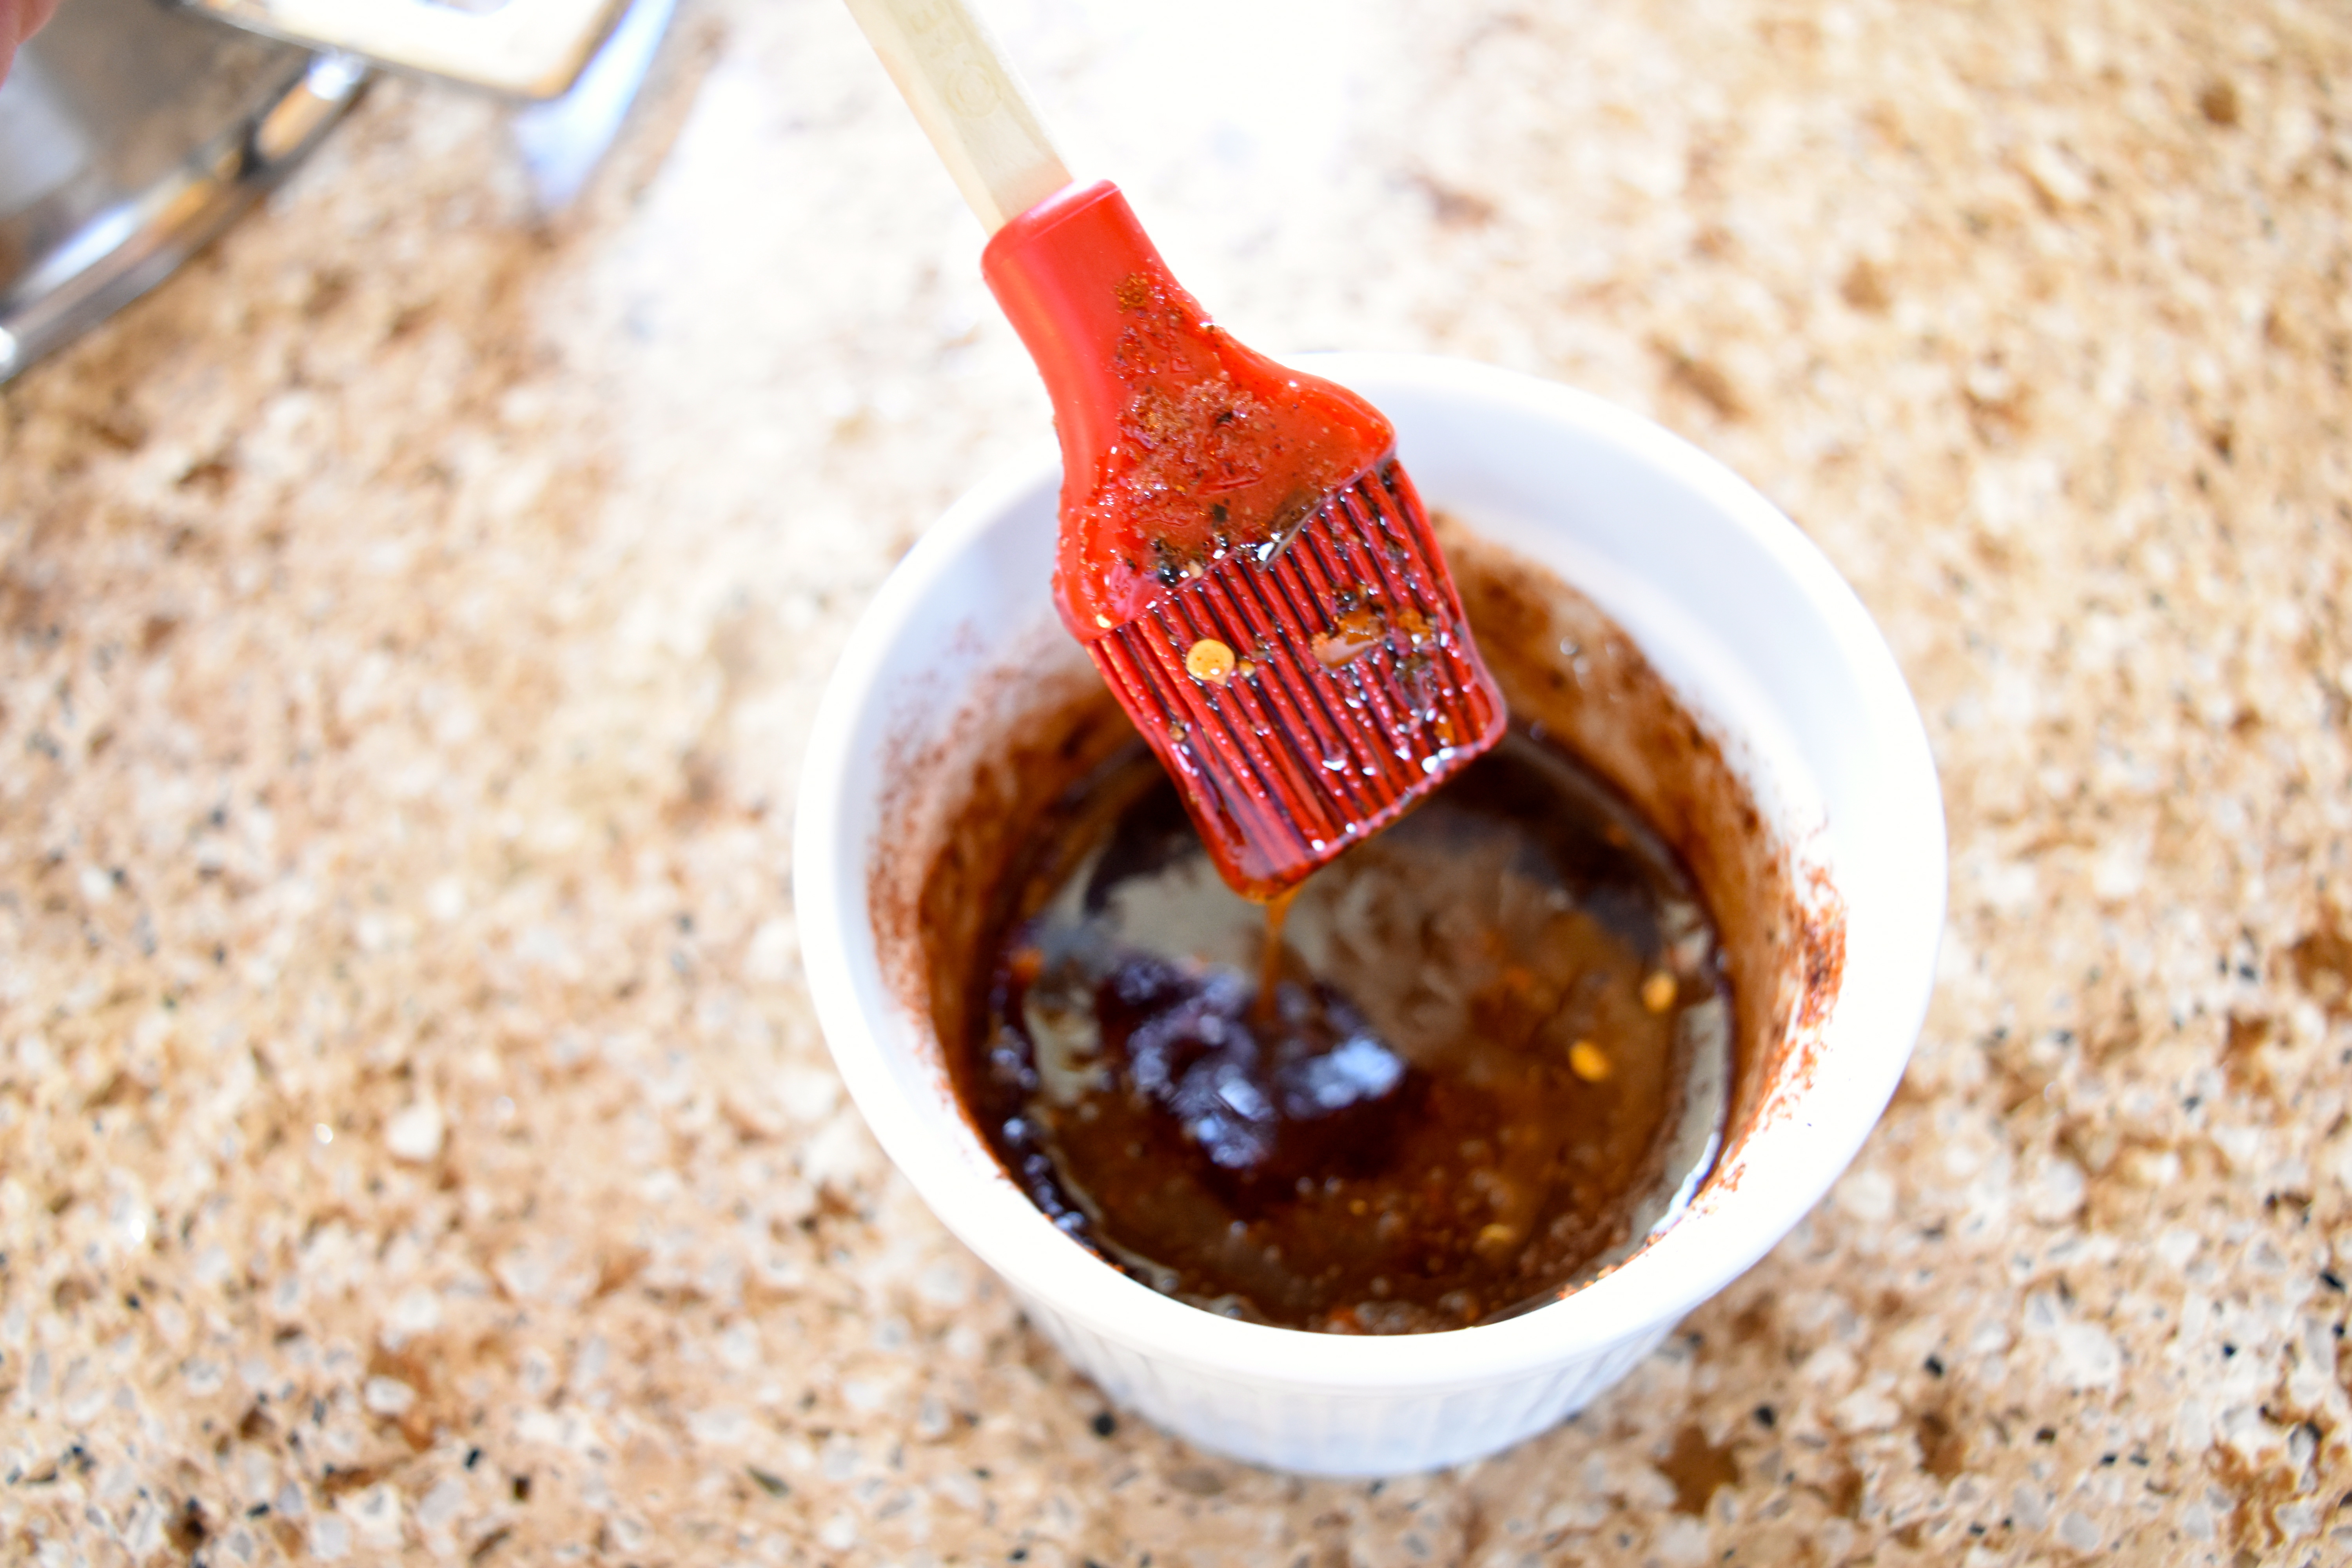
Mix 1/4 cup of honey, 1 tablespoon of ancho seasoning, 1 tablespoon of red chili peppers. Microwave for 20 seconds, then spread over the fish.
Generously slather over the salmon.
Insert the fish on the cookie racks into the oven and slowly cook for 20 minutes. Remove from oven and it should be nice and brown.
I let the fish completely cool for about 1 hour or until cool to the touch, sometimes more than I vacuum pack them for the freezer.
Making this always makes me think of my father. I know he is looking down smiling and licking his lips. He probably sneaks in and takes a few packages. It is nice to know somethings havent changed.
I hope you enjoy this as much as we do.
The Hunting Chef
This was the last time I cooked for my father. Arthur R. Nanna was loved and he was 81 years old and his favorite dish was fried chicken.
Have you ever went to the freezer and just took some elk burger out and put it on the counter to dethaw and thought to yourself “I will figure out what to do with it in the morning.” I say this to myself all the time. The next day was Easter and I had the entire family of meat eaters coming over for one of my meals. There are two things that is on the menu at the Nanna Household. 1. Meat 2. More Meat.
That night I actually dreamed about making teriyaki meatballs for an appetizer, but adding pineapple into the middle of it for flavor and moisture. I woke up made a cup off coffee and made the ingredients and did a “meatball test run”. They came out perfectly, here is what you are going to need.
1 lb of Elk Burger
2 teaspoons of sesame oil
1 farm egg
1/2 cup of panko
1 tablespoon of ginger
1 tablespoon of minced garlic
2 tablespoon of soy sauce
1/3 cup of pineapple chunks for stuffing
Add the below ingredients when plating
2 green onions or 3 tablespoons of finely sliced green onions
1 tablespoon of sesame seeds optional
Teriyaki sauce for finishing. Use the thick stuff you like.
Mix the burger, garlic, ginger, soy sauce, sesame oil, and egg into a large bowl and mix.
Mix the burger with ingredients.
Start the oven and get that baby fired up at 400 degrees. Meanwhile grab your wifes friend and tell her you will feed her if she helps you in the kitchen. Cut your pineapple chunks so they are about 1/4 inch thick.
Then get some of that burger mix and put it in your hand, you want enough to make meatballs about the size of of a golf ball. They always end up better. First, lay down some parchment paper on a cookie sheet. If you do not have any spray some non stick on it.
Flatten out a ball and add the pineapple. Then roll it to make sure the ball has sealed the pineapple inside nicely.
Kristina is happy because she is hungry.
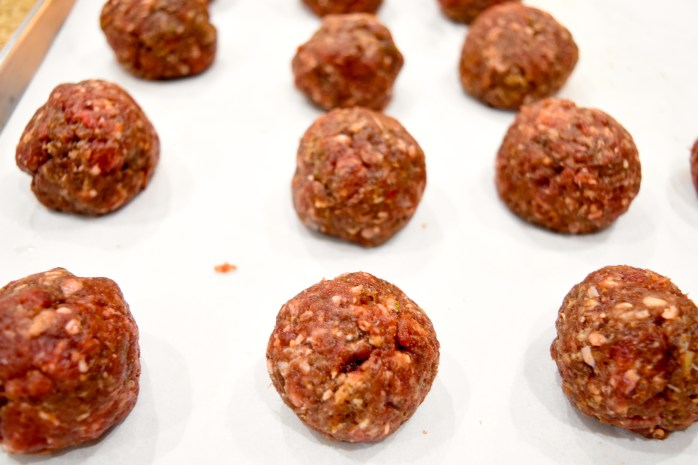
Then finish rolling balls with pineapple until you are done.
One meatball needs a little help. Do you see it?
Insert into the oven for 18-20 minutes until golden brown.
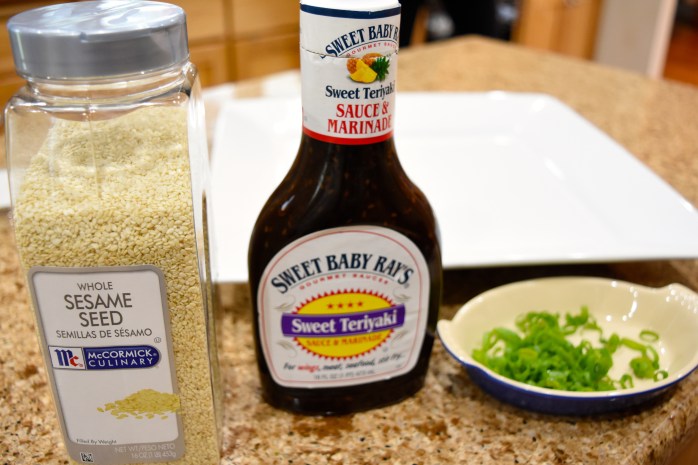
Let meatballs cool for about 4 minutes then plate. Drizzle some Teriyaki sauce then sprinkle green onions and sesame seeds. I take wooden skewers and insert them but it is not mandatory.
Look at that little meatball party. Get a good mental picture of them because they are going to go quick. I love to stand in the kitchen about 10 feet away to watch my family members take a bite then look in the middle to find a pineapple chunk. That made me smile.
I hope you all had a wonderul Easter. We sure did.
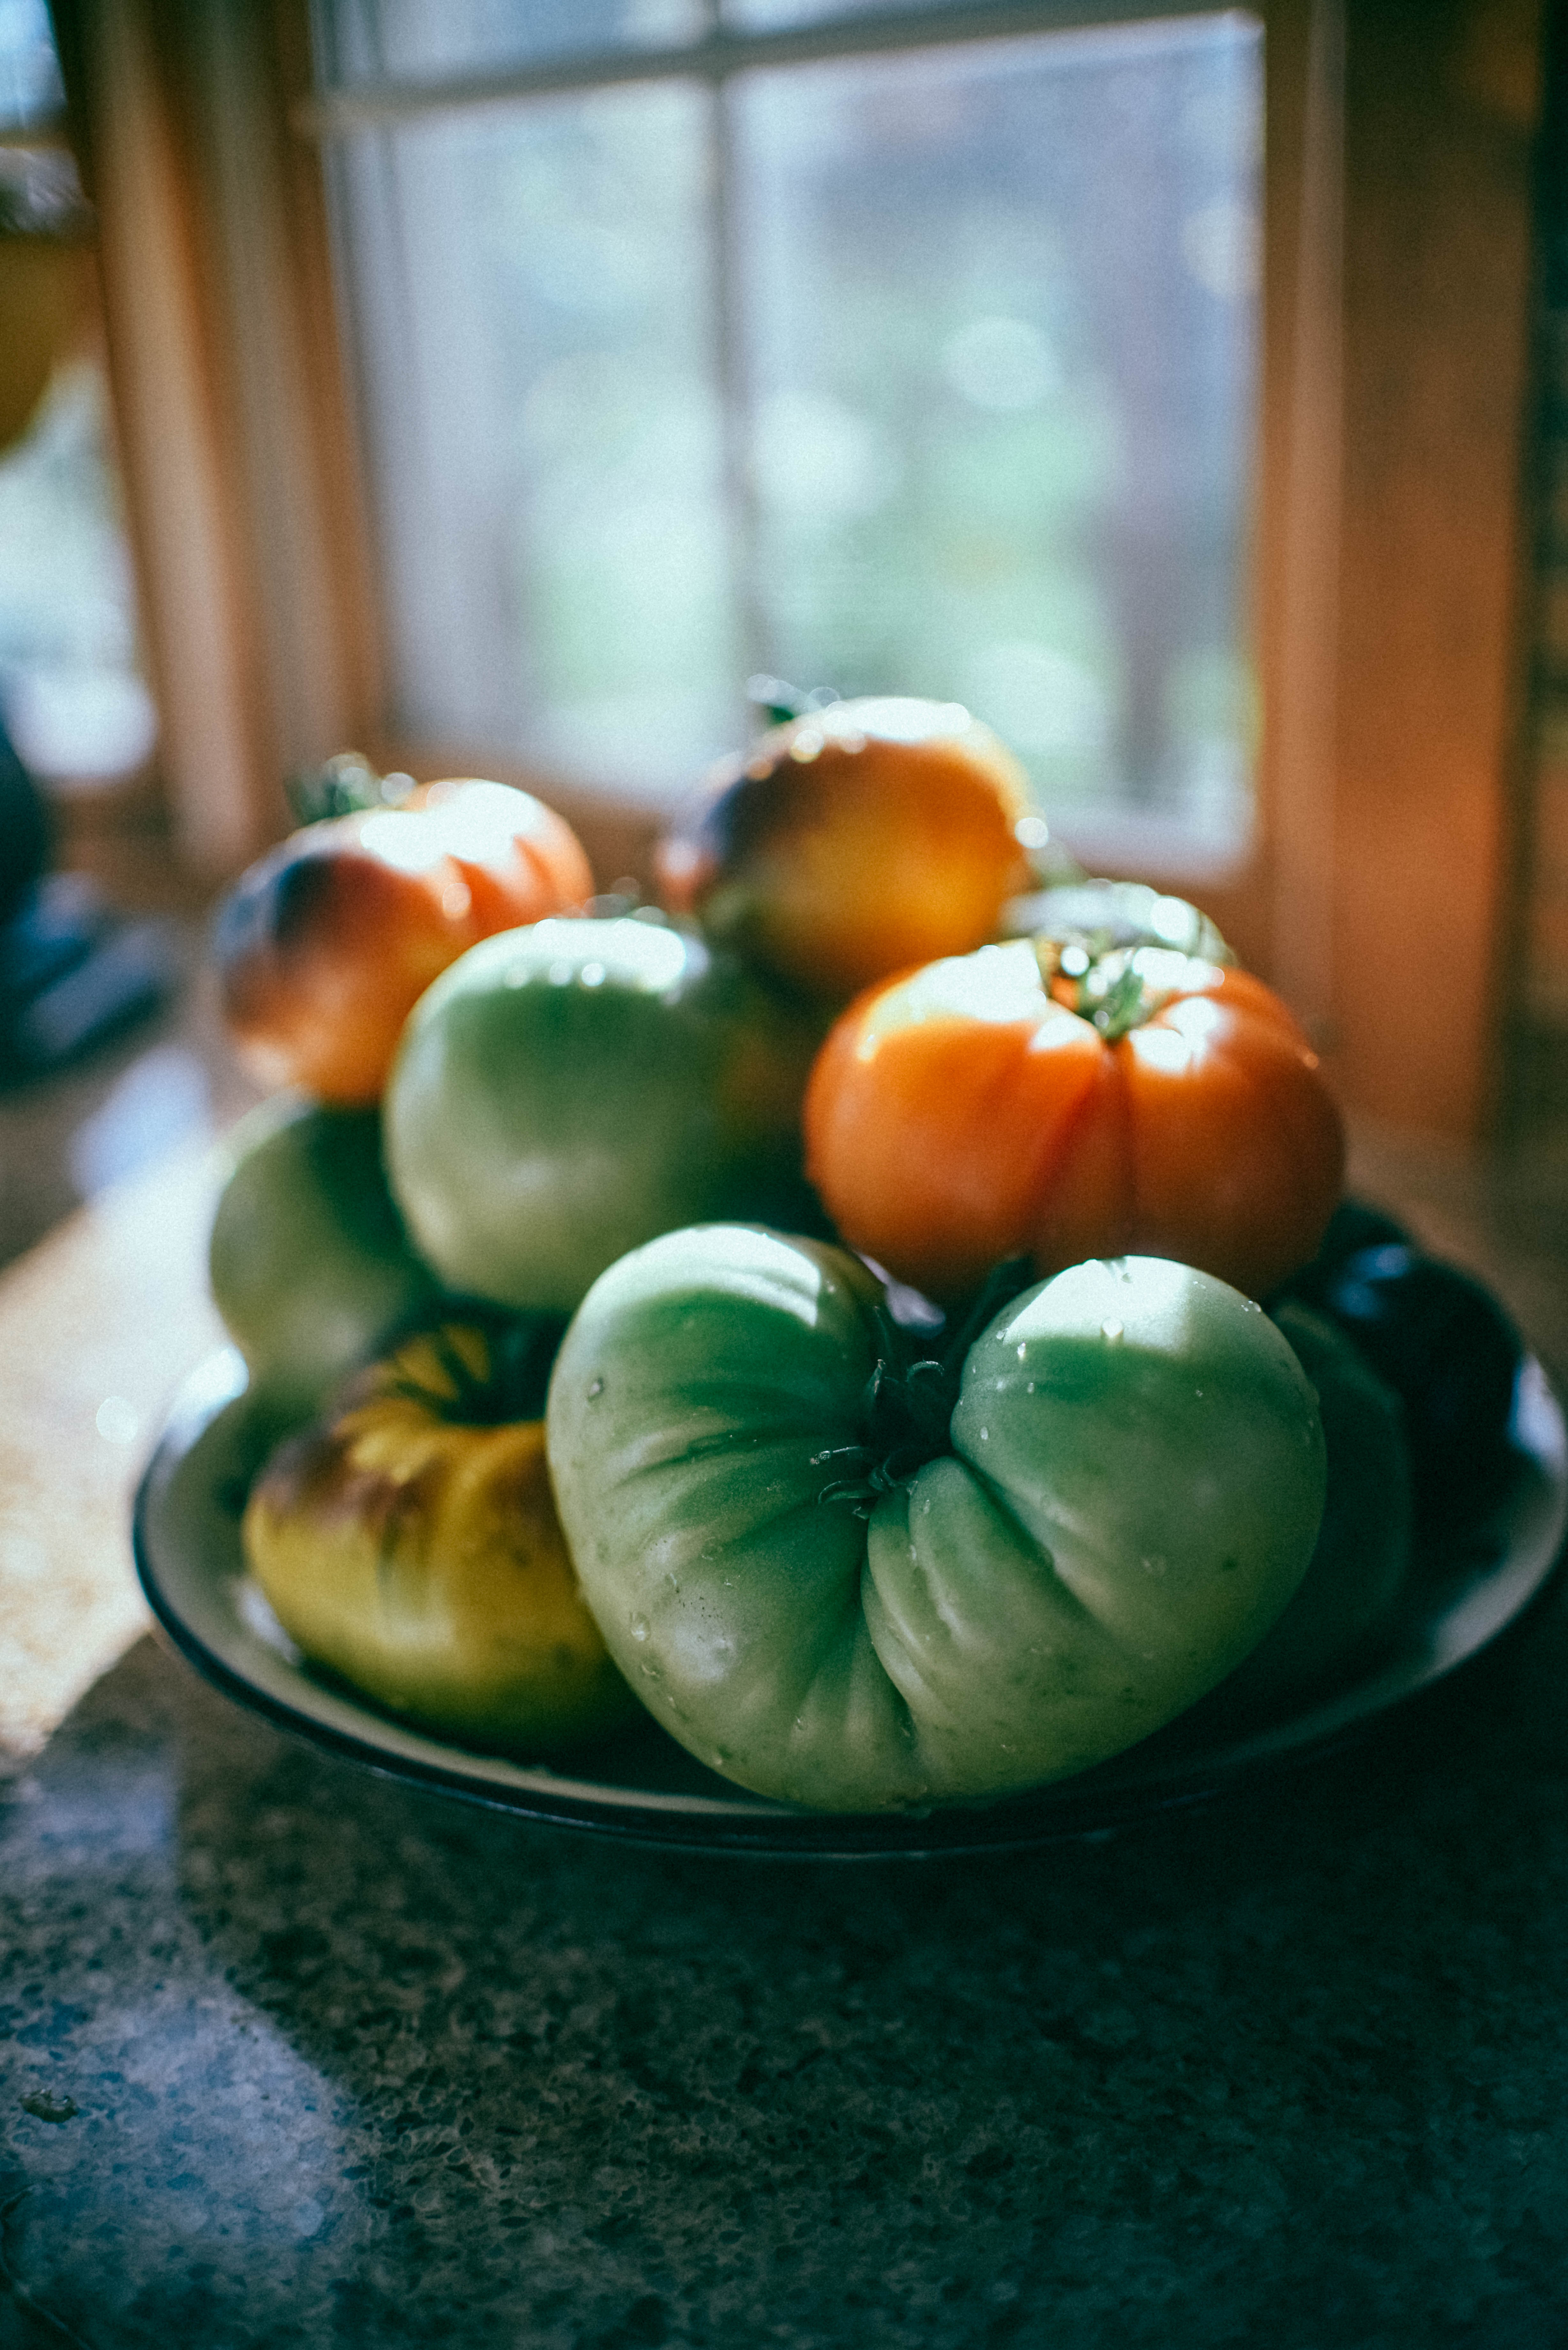
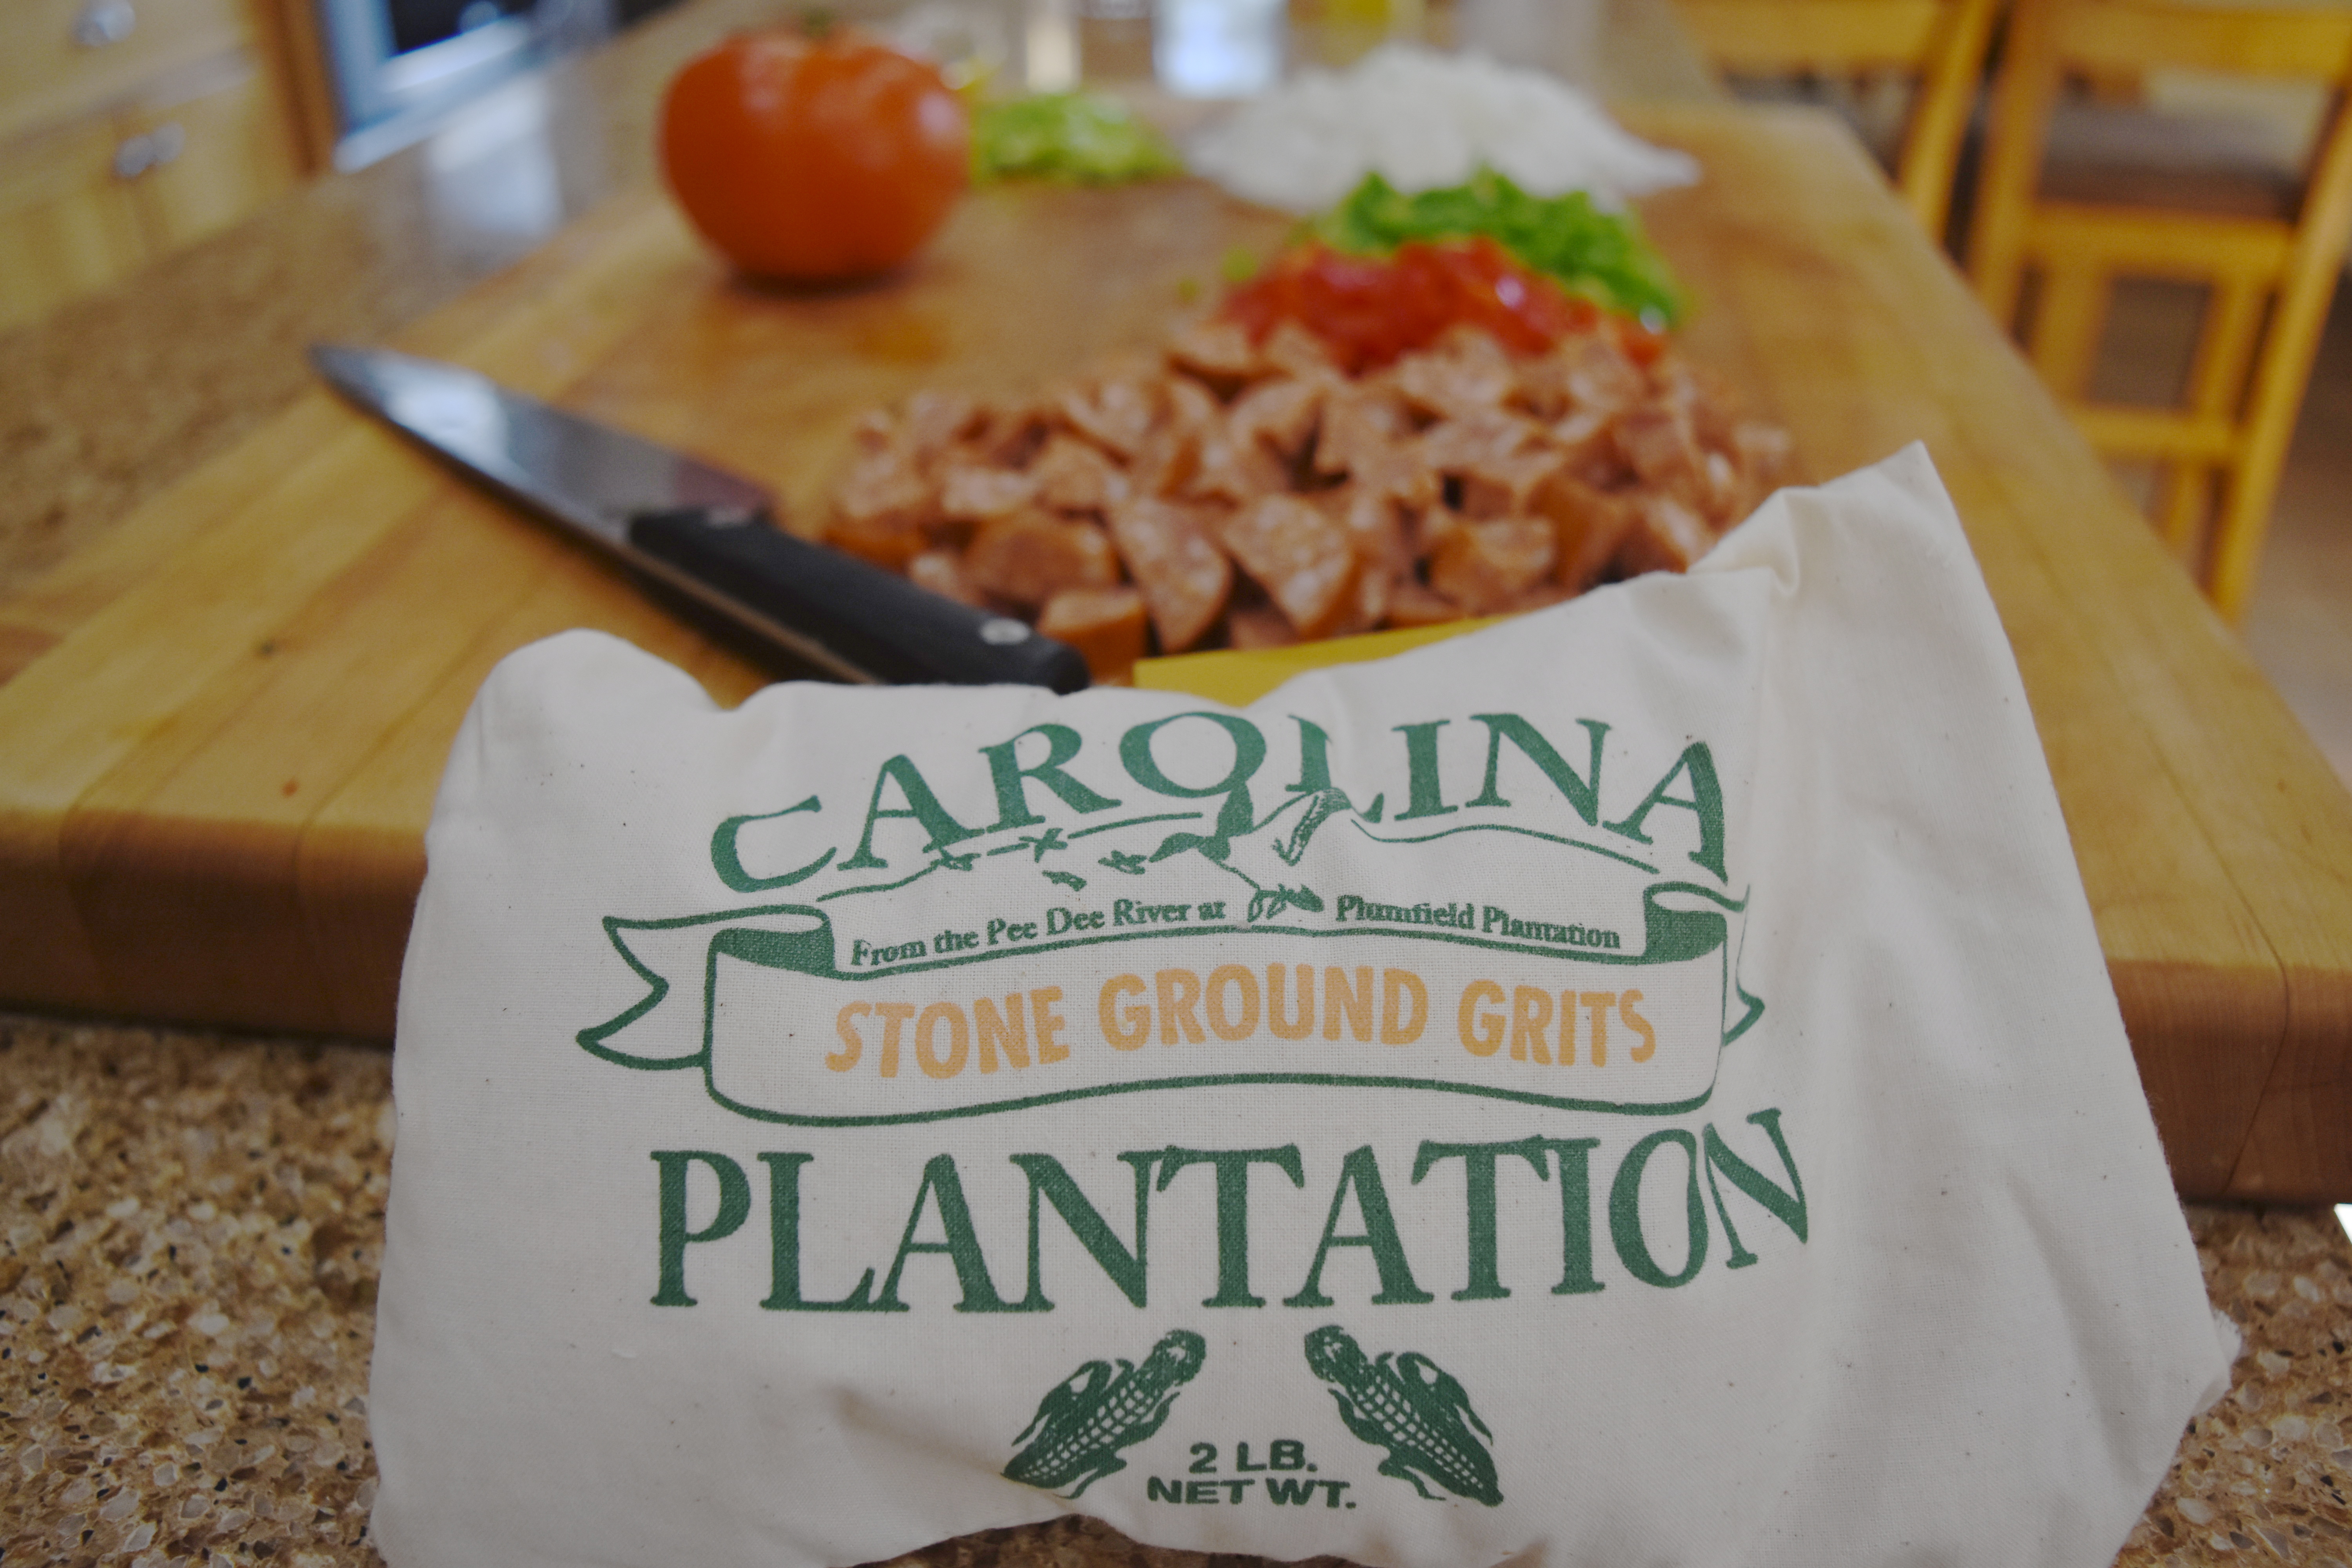
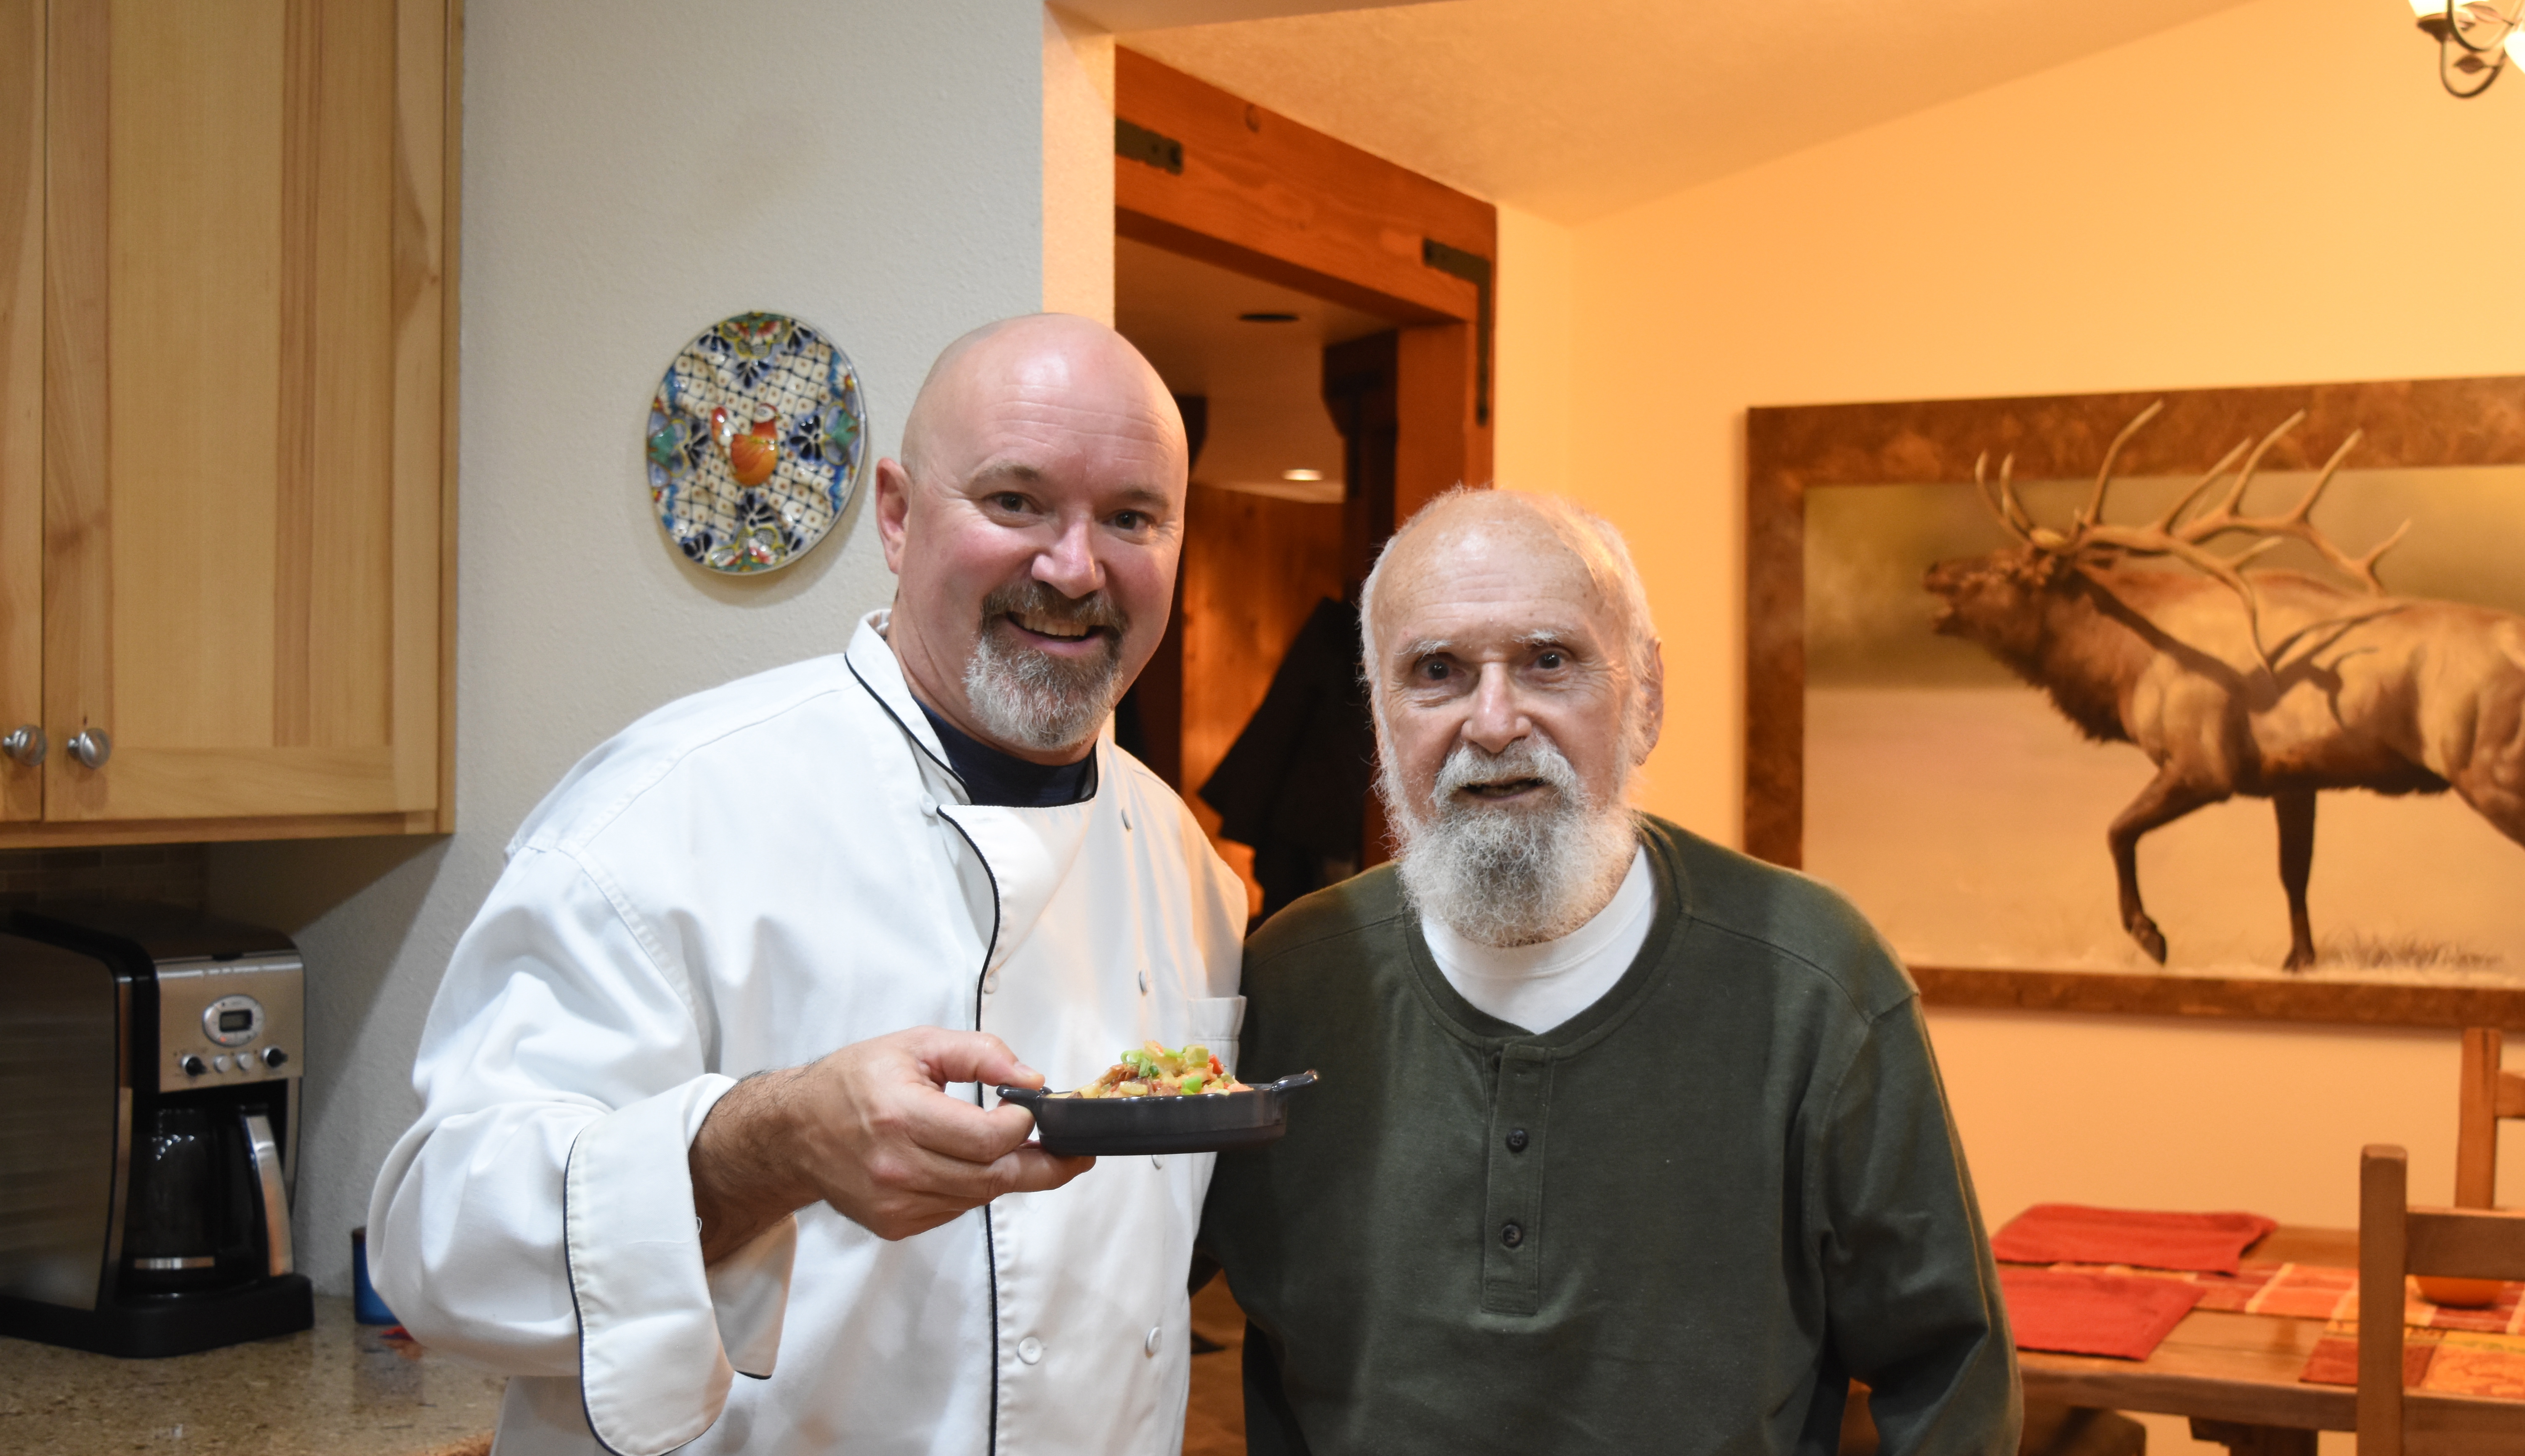
I have been in a “artistic cooking rut” lately. I just haven’t had the energy or the focus to work on recipes lately. I know it happens, but I didn’t know what would happen next. About two months ago, I was watching a news show on the history of Carolina grits and how this man was bringing the old seed stock back into production and chefs every where were ordering this product for new innovative throw back recipes. I thought to myself, “My father loves Southern grits and I have some wild boar andouille sausage and Hood Canal shrimp in the freezer….hmmmmm.” That is as far as I got until I got this random email from someone that read my blog. Her name is Cornelia Wilde, and she owns a restaurant called Funky Art Café in Brenham, Texas. She emailed me to tell me that she had read my blog and found it to be very interesting, and inspirational. I am telling you this not to gloat or for my own ego. I am sharing with you because her kind words in fact inspired me to get back on my horse and keep working on my passion. I told her that I was very humbled by her email and appreciated the kind words. Then we got to talking about her menu at her restaurant and I noticed she had grits on her menu and that began an email education from her Southern back ground on the key elements of working with grits. So, Cornelia Wilder of Brenham, Texas. This one is for you and my ailing father. Thank you for your inspiration and grits wisdom. I hope someday to come into your place and surprise you.
My father grew up in the South, a little town called Cape Girardeau, Missouri. My grandmother used to cook grits pretty often for the family. I was watching a Sunday morning news show on history of grits, so I ordered myself a bag of South Carolina Gold. The rest is history. I am going to tell you something right now, I was nervous about this one, but it is easy smeezy chicken peasy.
Lets rock this thing.
4 1/2 cups water
1 cup grits (Carolina Gold is the best)
1 tablespoon oil
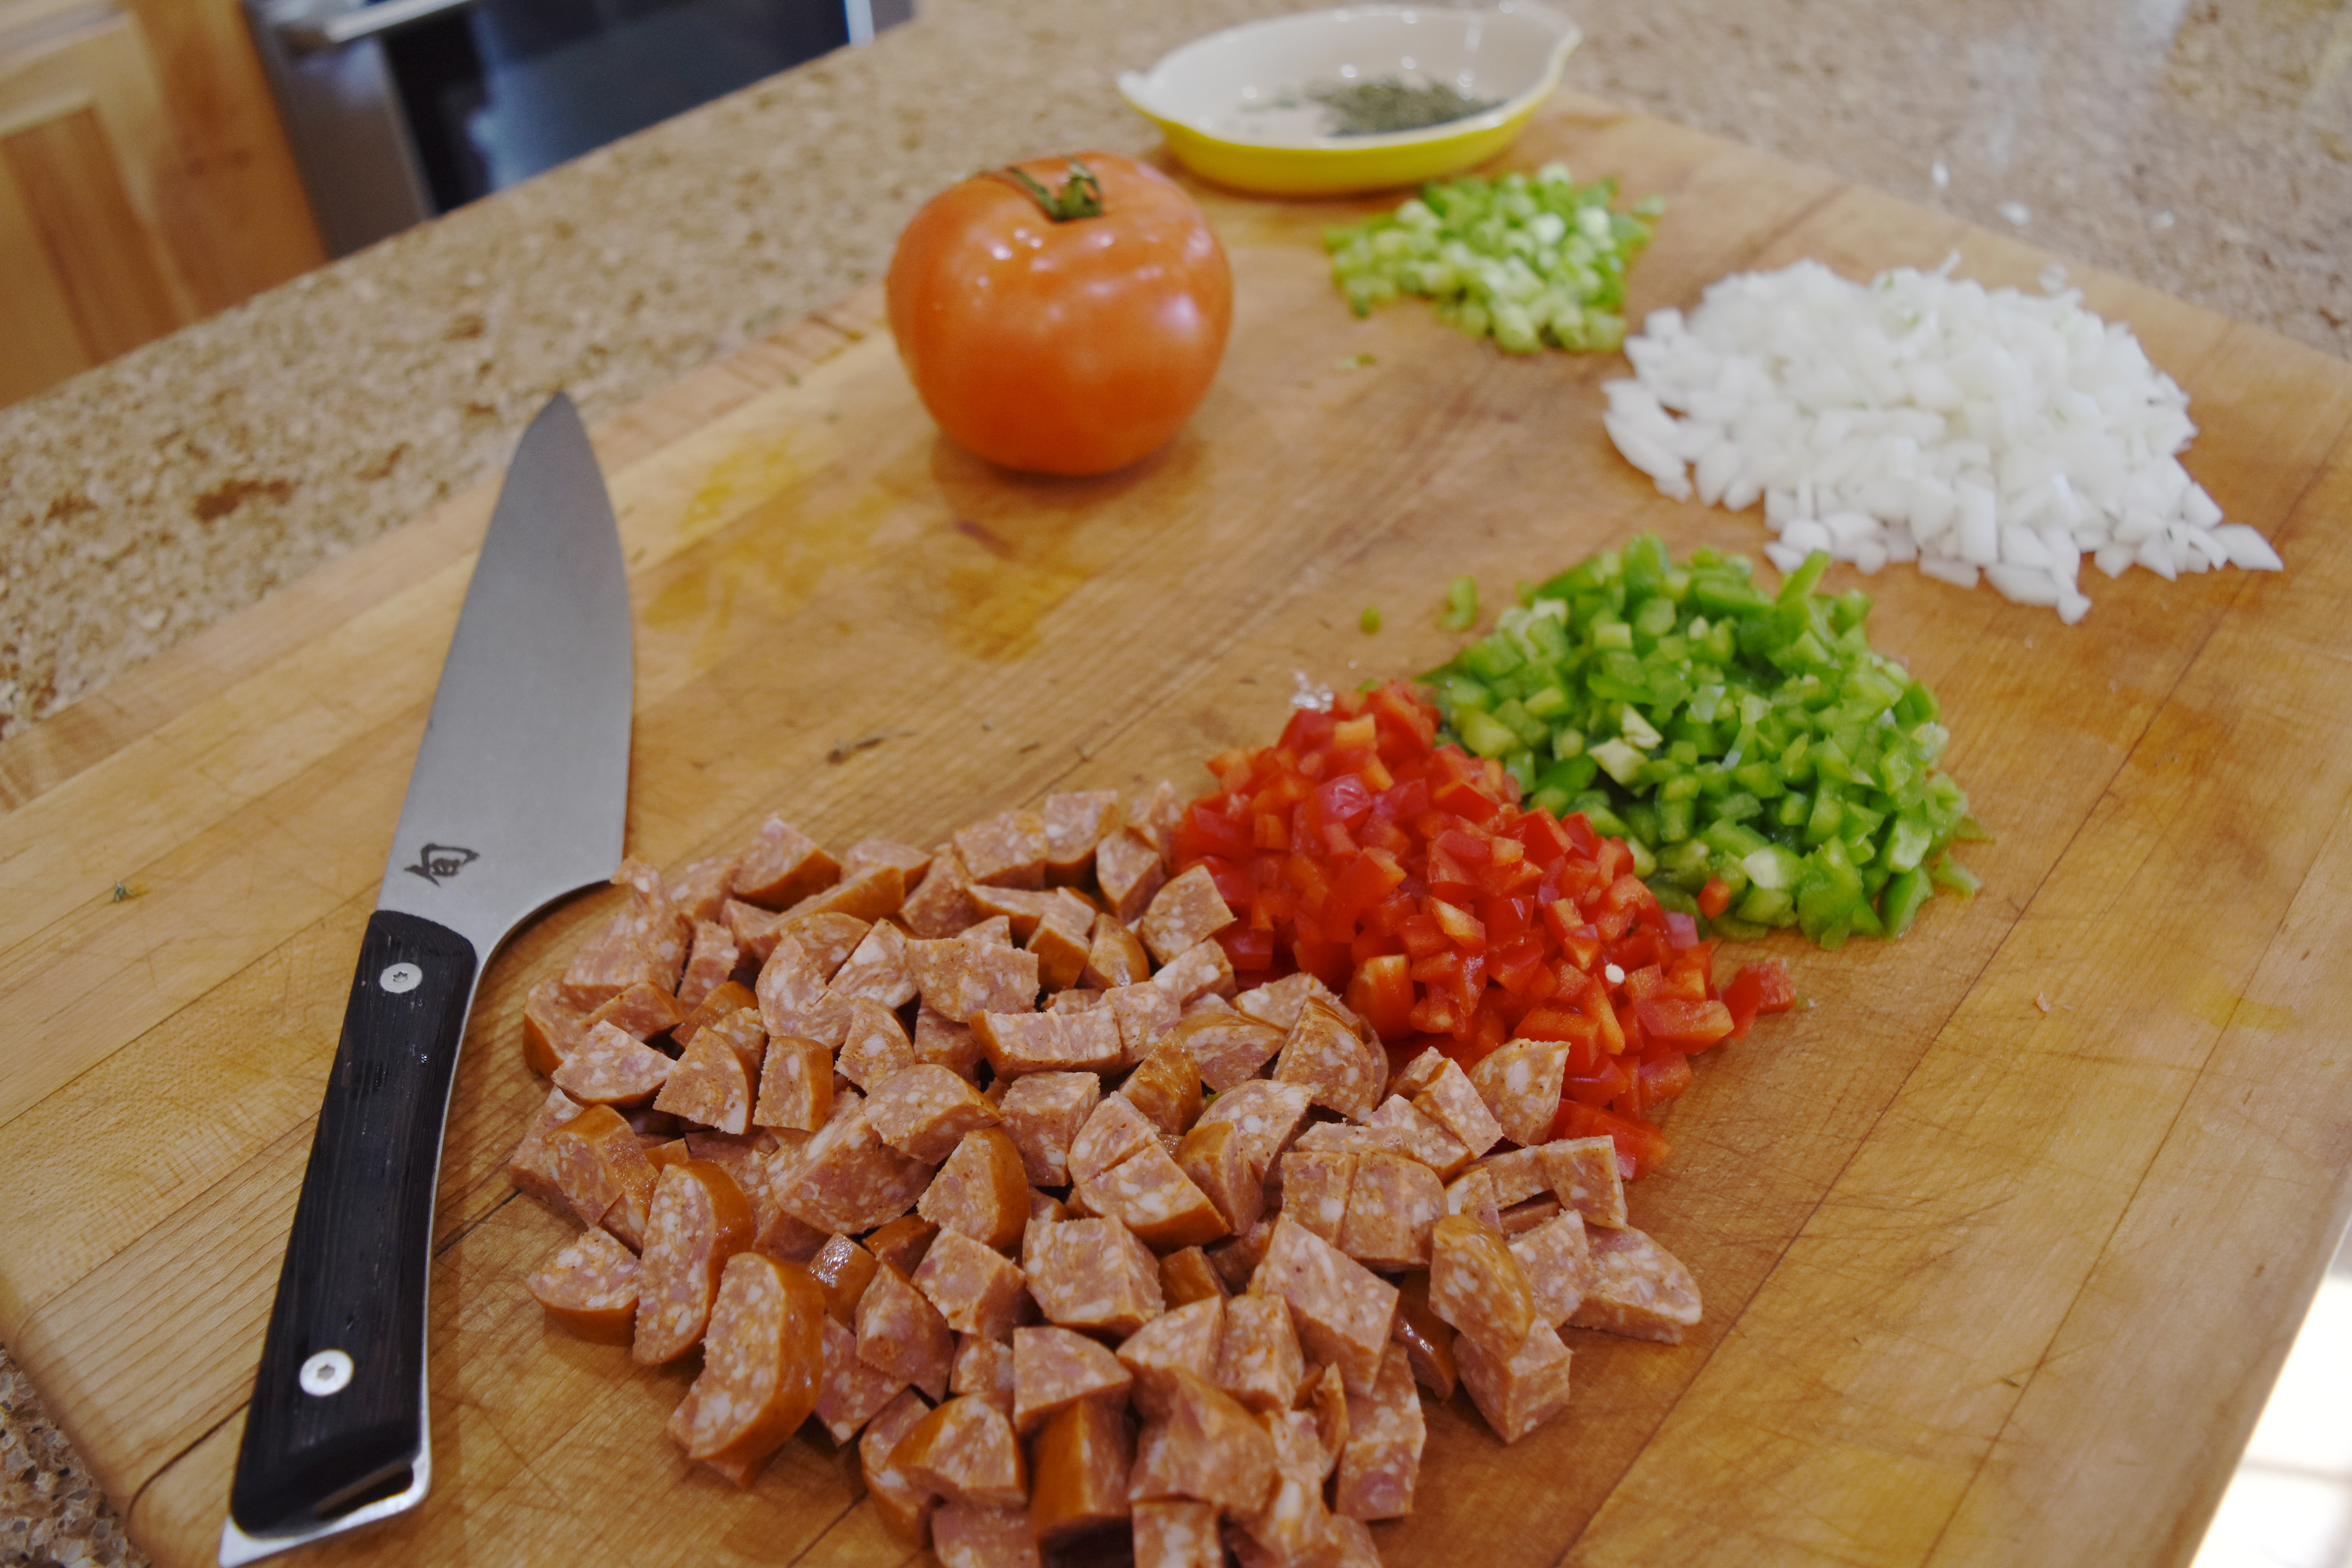
1/2pound wild boar andouille sausage cut into small pieces
1 tablespoon Cajun seasoning
1/2pound wild shrimp (peeled and de-veined, the black little line at the back of the shrimp, pull it out…taste nasty)
1 tablespoon oil
1 onions (diced)
1/2green bell pepper (diced)
1/2red bell pepper (diced)
3 cloves garlic (chopped)
1/2teaspoon thyme (chopped)
1 tablespoon Cajun seasoning
1 cup chicken broth (use that Costco chicken to make your own broth)
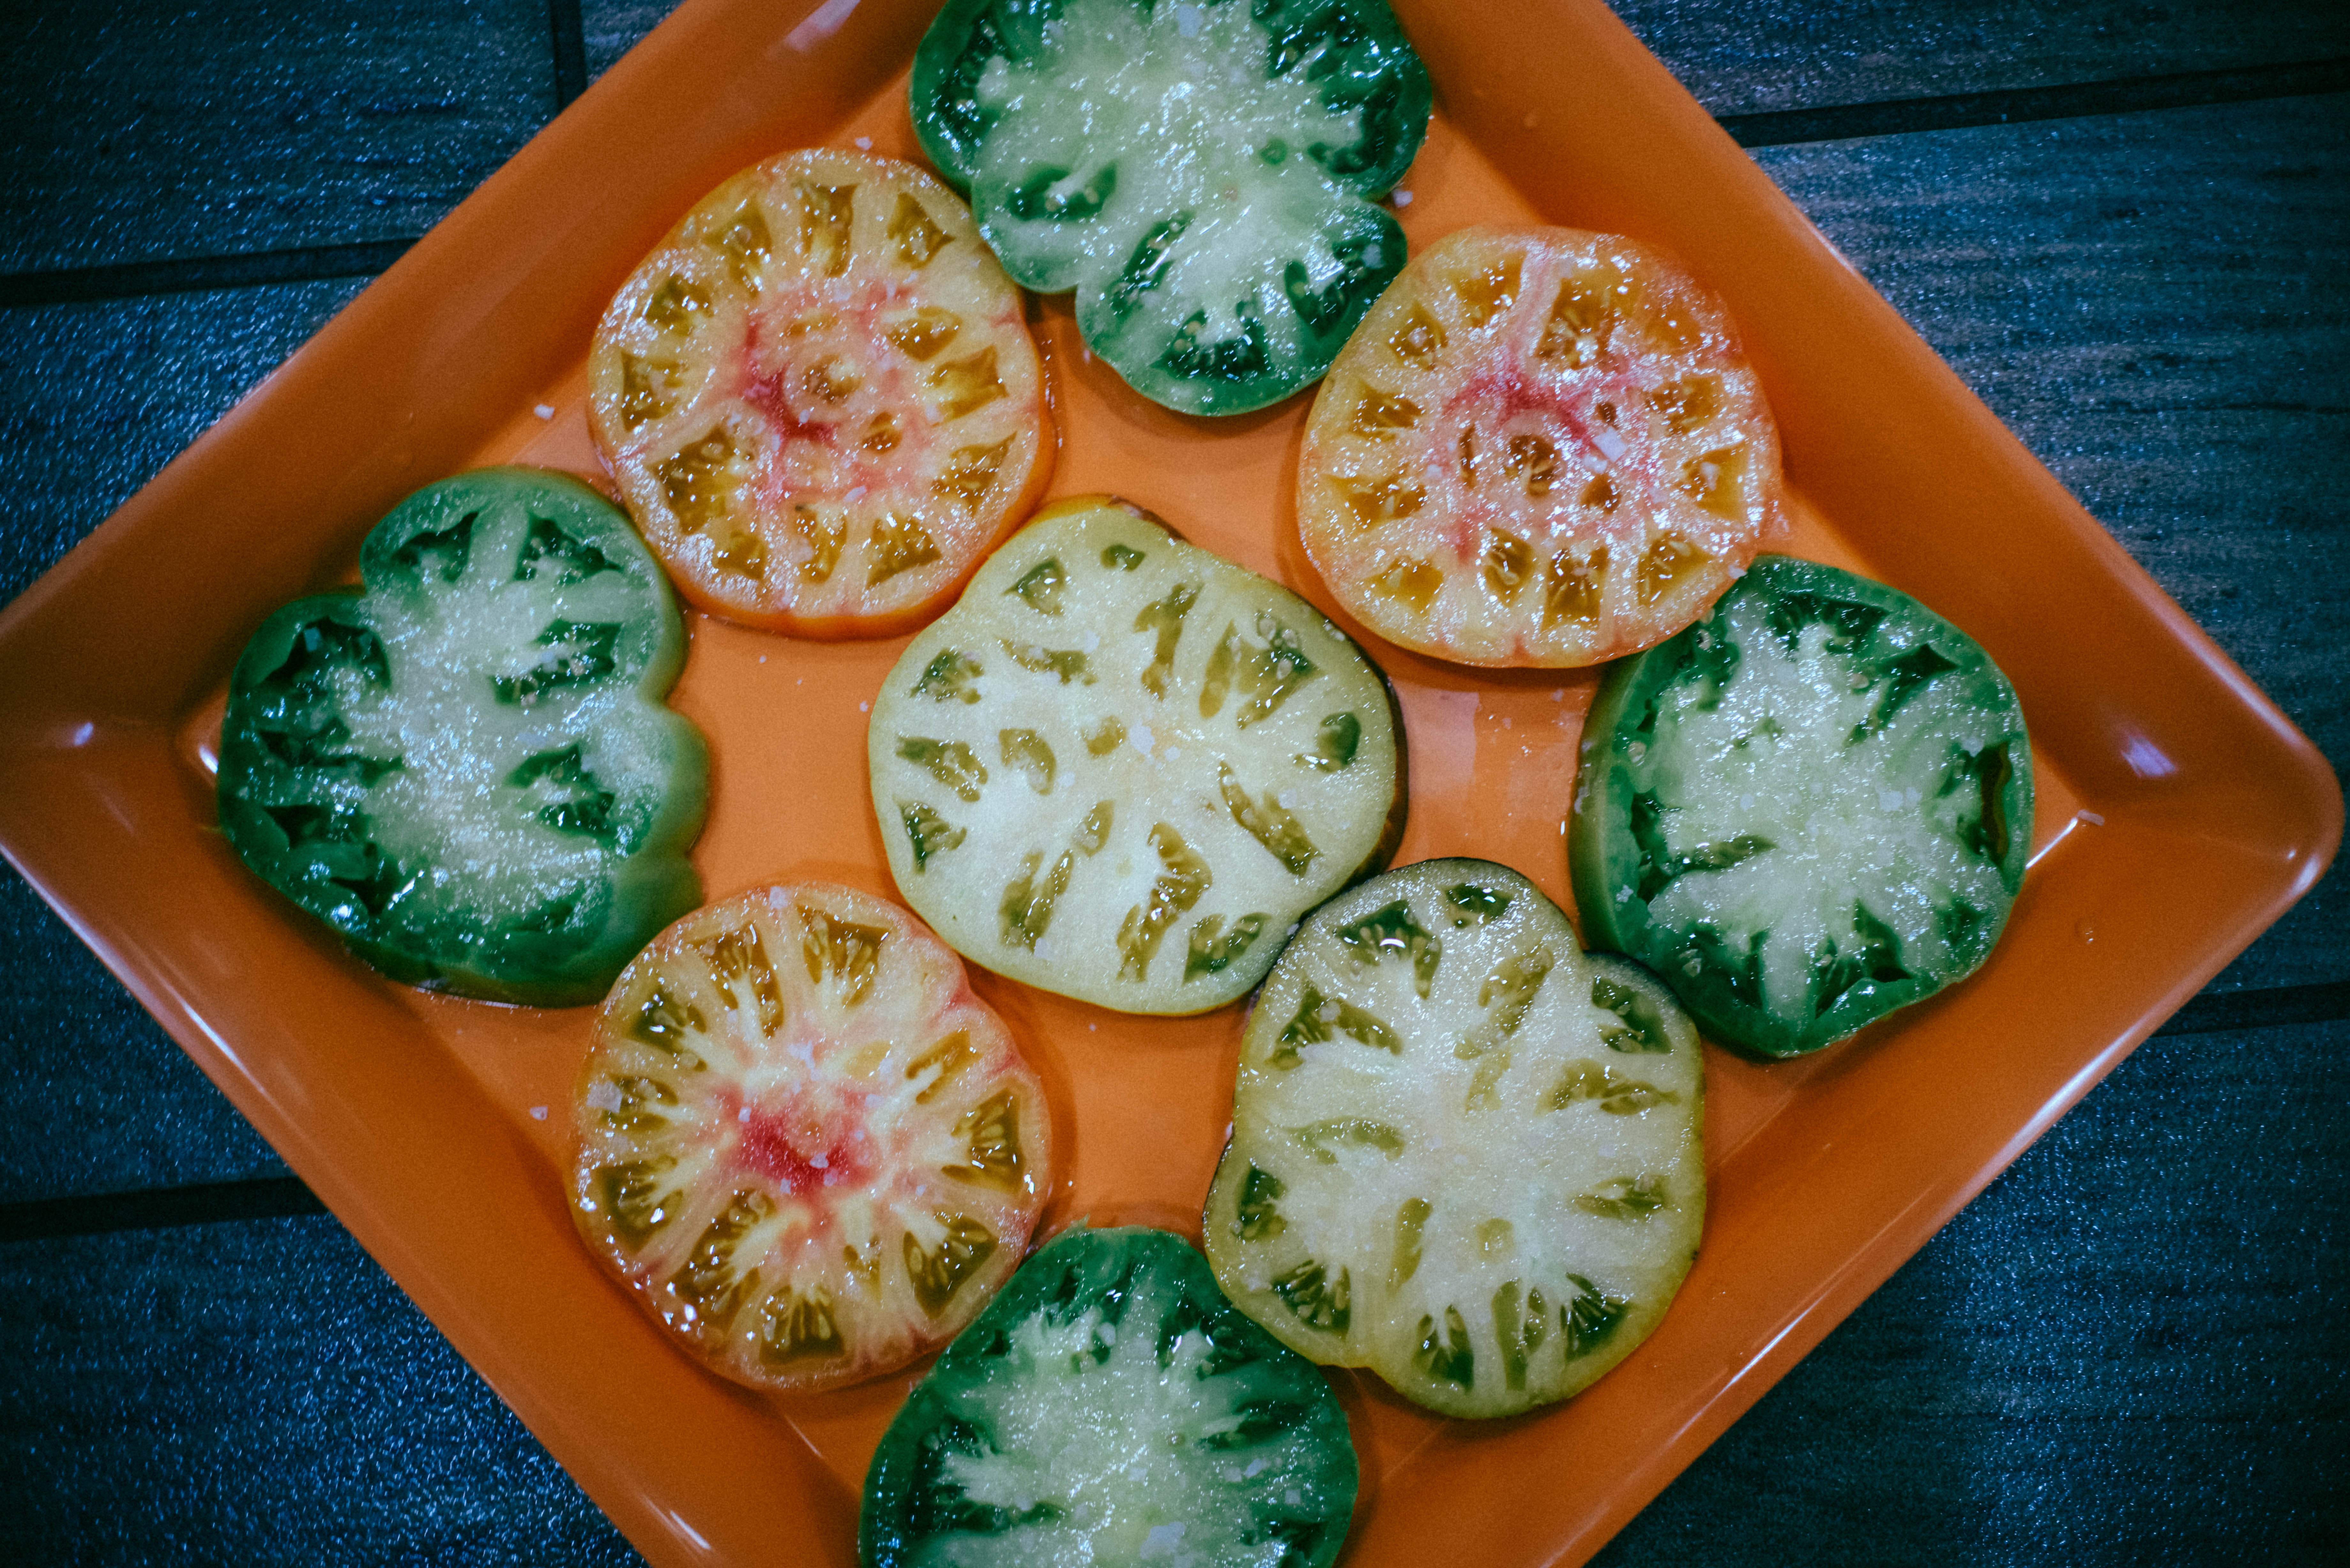
1 tomatoes (diced)
salt
pepper
1/4cup heavy cream
3 green onions (sliced), keep 1 tablespoon for plating at the end.
1 handful parsley (chopped)
2 tablespoons butter
1 cup cheddar cheese (grated)
salt
pepper
I got myself a little “Photo bomber”
Directions:
Follow the directions on how to make grits on the back of the grit container, or in my case the bag. Boil 4.5 cups of water, and add 1 cup of the finest grits you can find. Here is the key, making grits is about love. You got to love on them by stirring them constantly. Once it boils, turn the heat down to simmer. This does not mean forget about them, you can’t do that because you love them so you stir every so often. I do this as I cook the other good stuff for an hour. As my friend in Texas says “don’t overcook them… undercook rather than overcook them… like that pheasant meat, overcooked grits turn into gelatinous rubber… kinda like something the nutty professor would prepare, make sure the grits are a bit loosy-goosy when putting into a casserole or a bowl… putting it in the oven to melt the cheese will cook the grits a bit more so the consistency should be just right… if not, you’ll need a knife & fork to eat the grits”.
I like to prep all my ingredients because I do not want to miss my “Grits window”.
Sear the andouille sausage on medium heat until brown. Keep in mind, keep stirring those grits
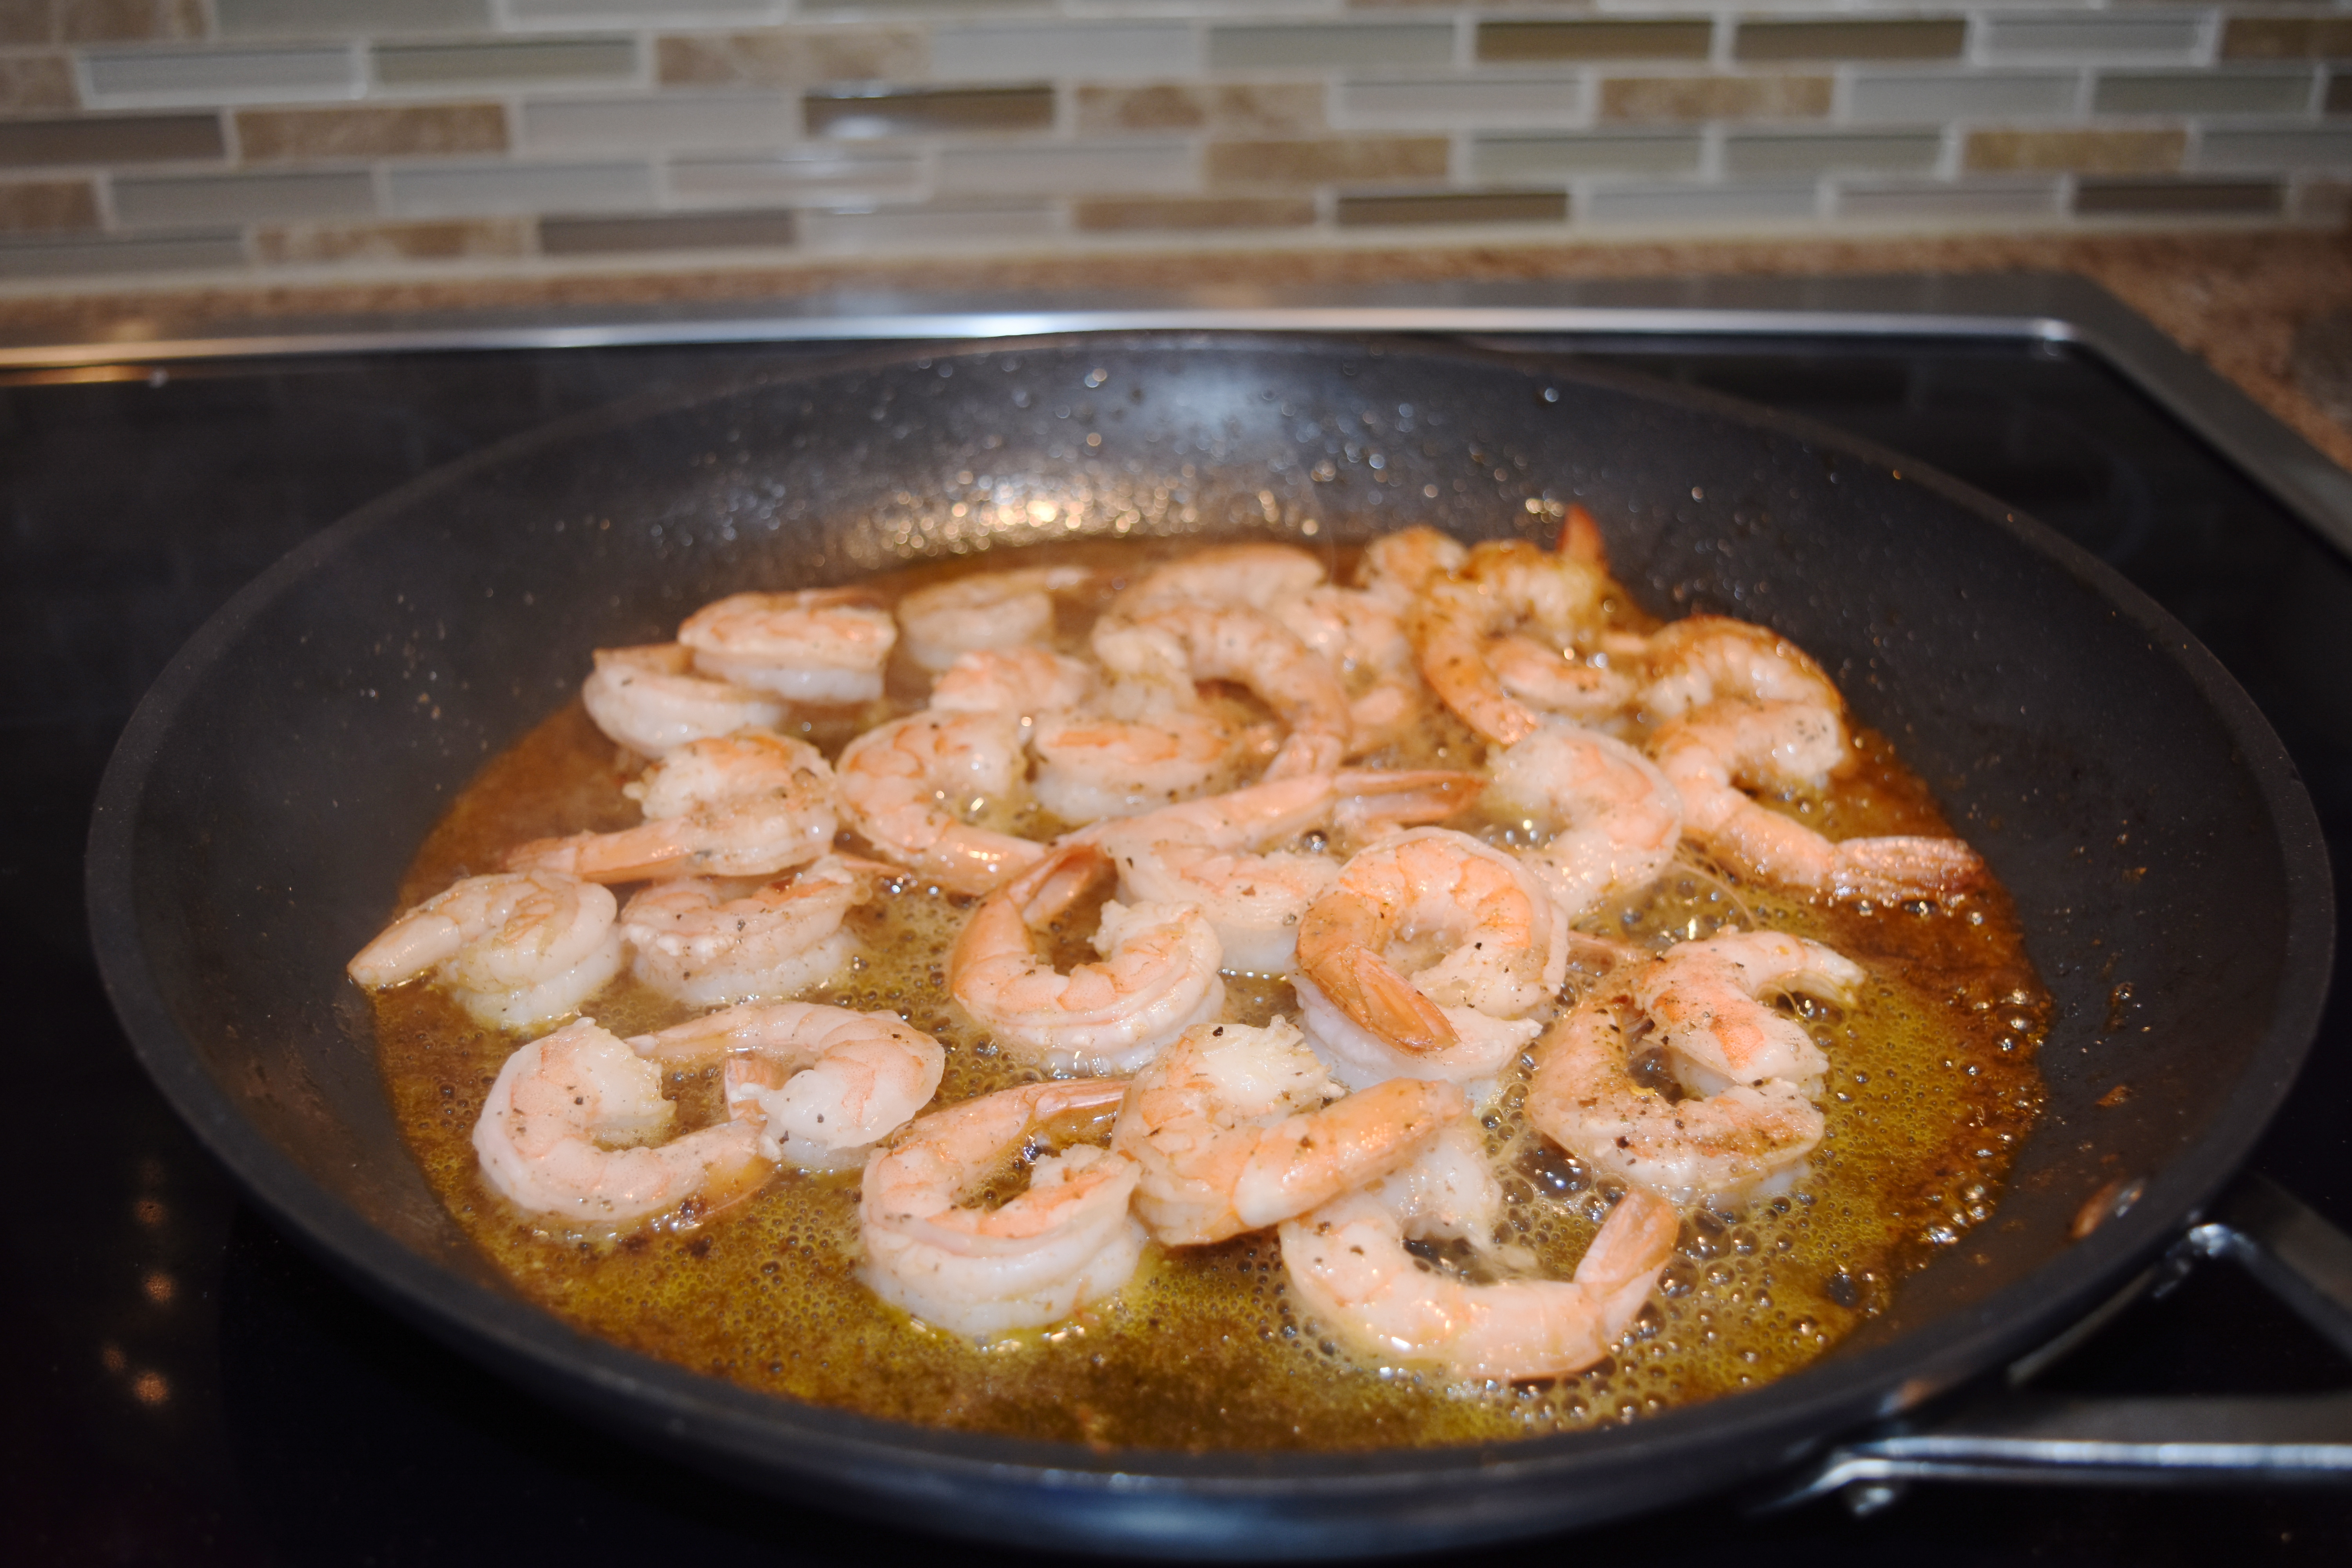
Once the sausage is browned, remove and set aside. I leave that oil in the pan to sear the shrimp. Add some cajun seasoning to the shrimp and cook for about 3 minutes, make sure to not over cook the shrimp.
Remove shrimp from pan, clean pan, and add oil to it and the diced up veggies for about 7 minutes until tender.
I like to add a little Cajun seasoning to the onions for a wee little kick. At this time, look over your shoulder and give a holler out to the Thyme girl who is taking the small leaves off the stem.
She is very focused….VERY Focused
Add the garlic, thyme, and remainder of Cajun seasoning and cook until fragrant, that means until you start smelling the garlic and thyme. That takes a few minutes.
Are you stirring the grits? Give them some love.
Add the broth and chopped tomatoes and simmer to reduce about 1/3rd. This takes roughly 5 minutes.
Please notice that I pour my homemade chicken broth out of a wine glass like it is the holy grail. That is how much I believe a great chicken broth can change the outcome of the dish. I also make the sound “ta-daaaaaa” when I pour it in.
Add the sausage and shrimp back into the pan. Season with salt and pepper. Mix in the green onions, cream and remove from heat. Stir very well.
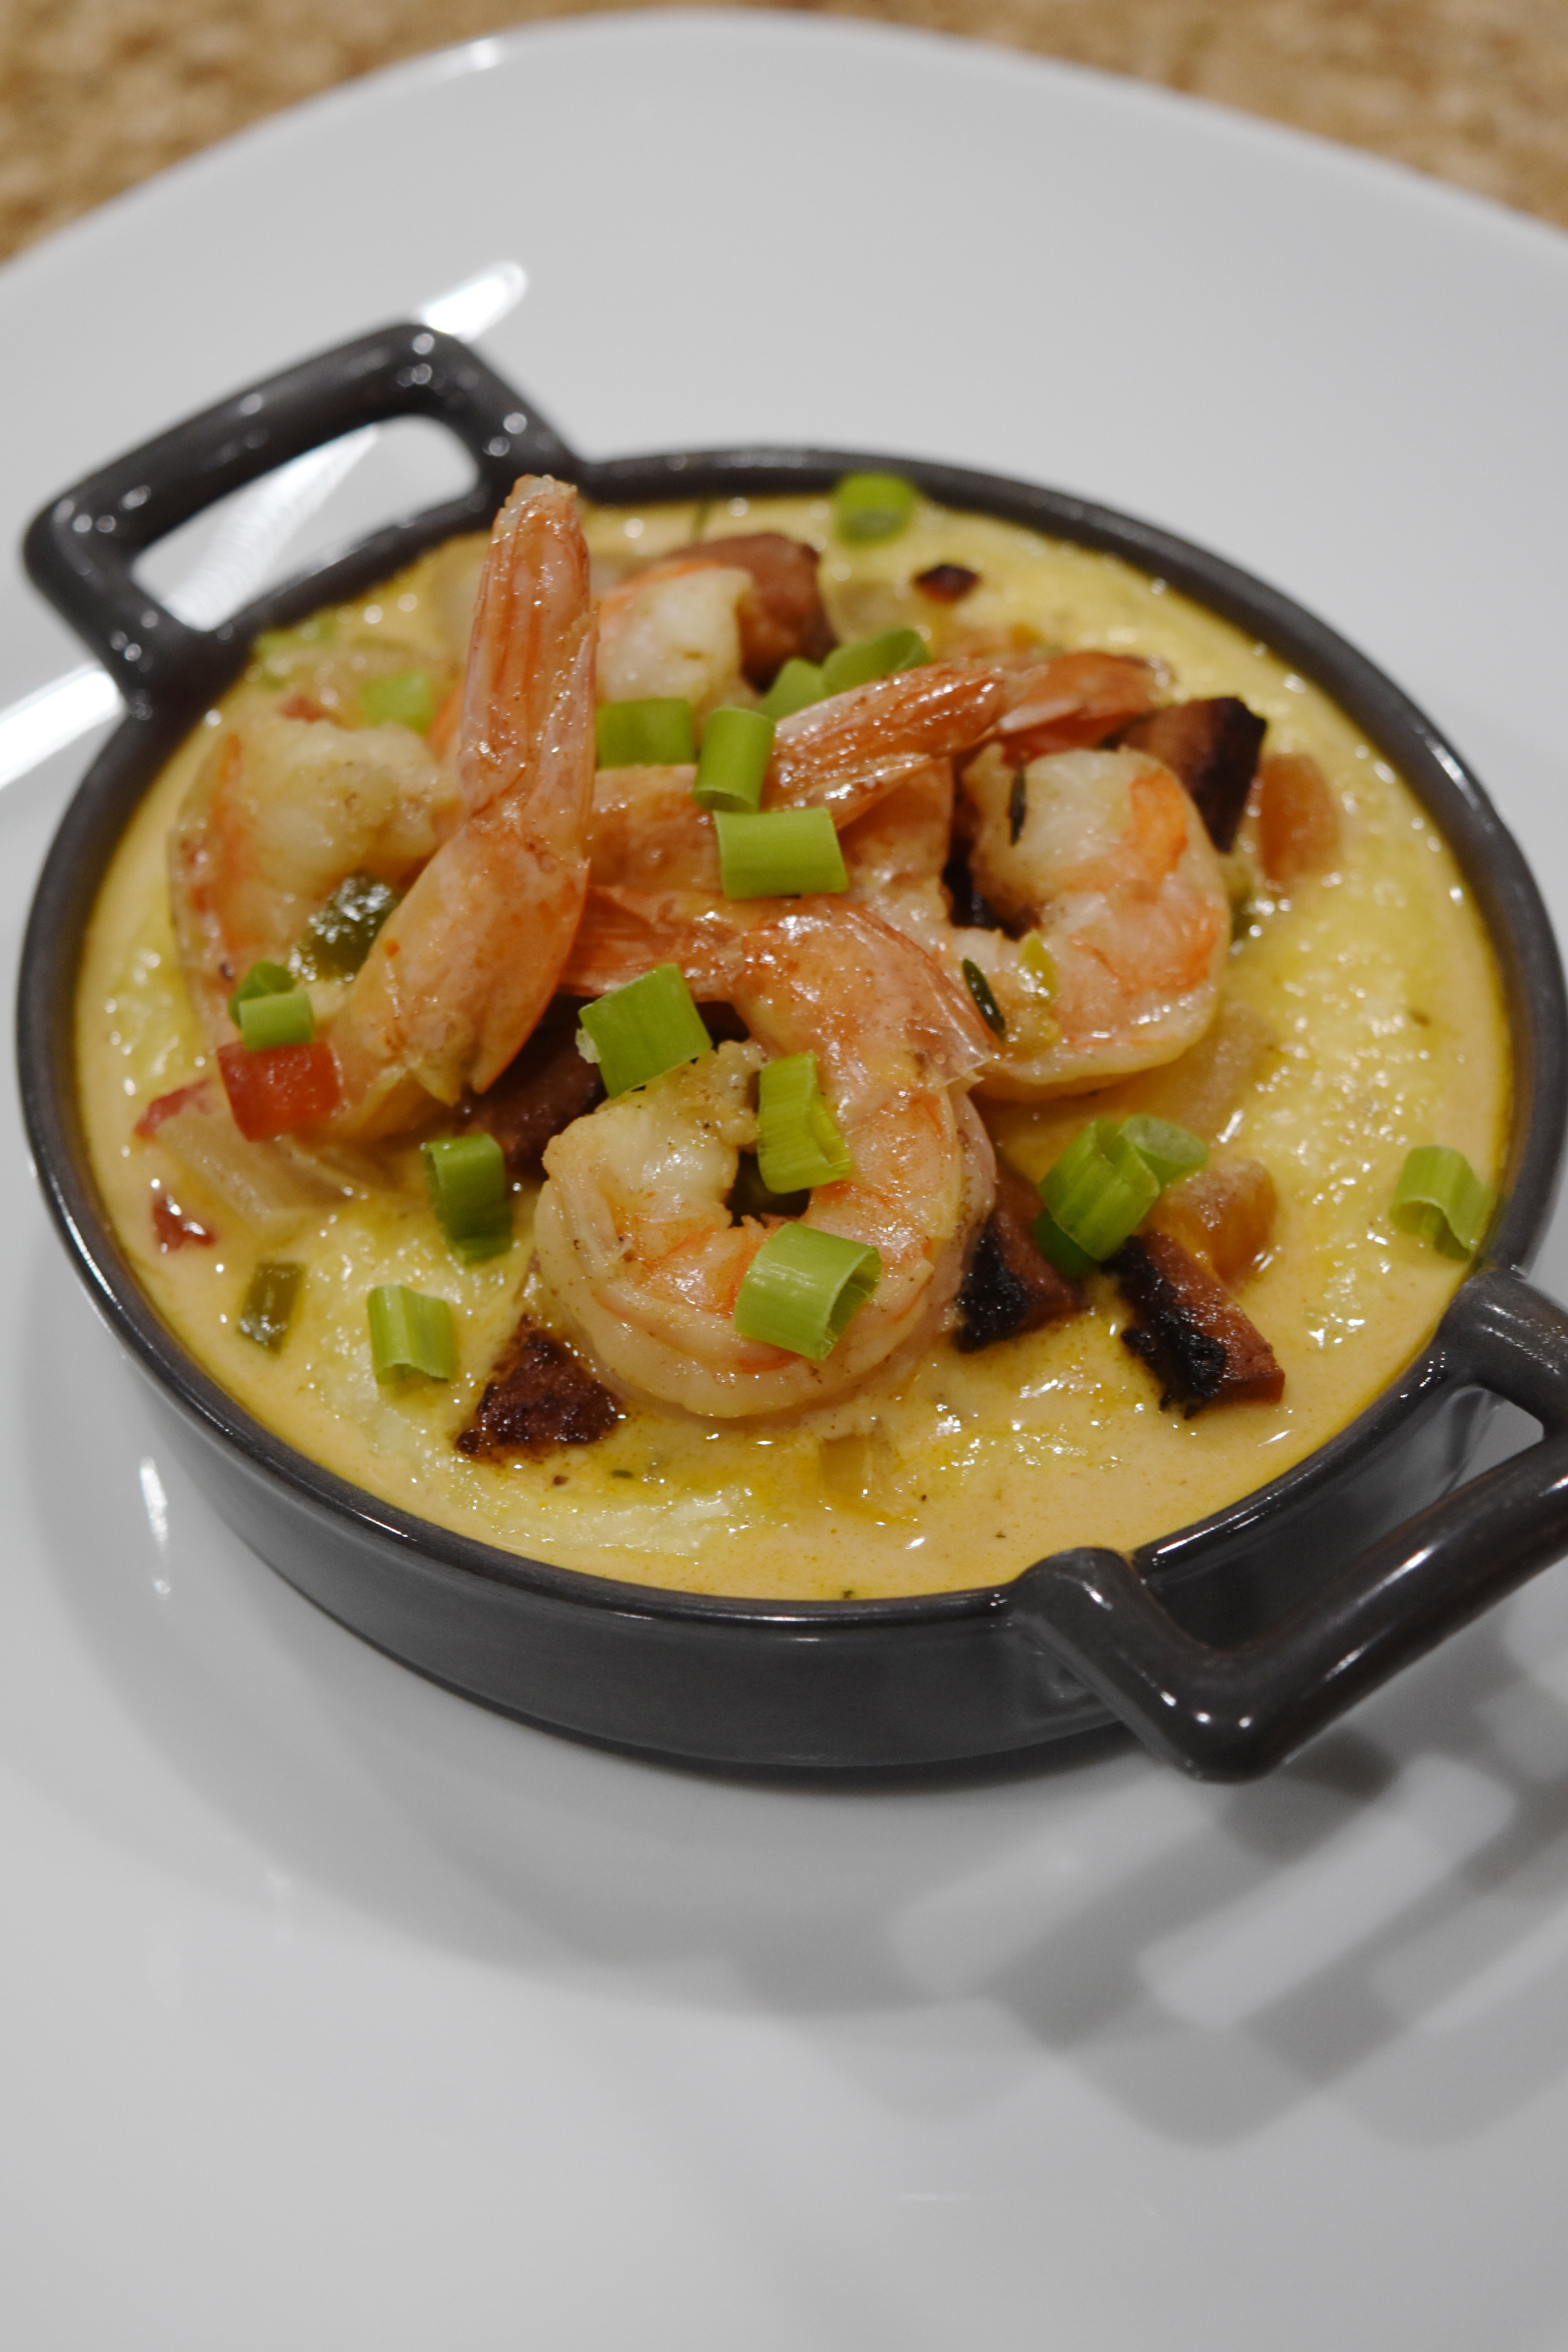
Add the butter and the cheese to the grits and stir.
Plate the grits.
Cheesy grits
Then ladle the shrimp and andouille sausage over the grits, making sure to get everything on top of the dish. Do not leave anything out. Sprinkle with green onions. Serve immediately.
I hope you enjoyed the dish as much as we did. We have family dinners with my mom and dad every Sunday. I am not sure how many we have left with my fathers ailing health but we all still get to laugh and enjoy eachothers company. One thing is for sure, when my dad gets up there to heaven there is gonna be a little conversation with grandma on who made the best grits. I guess I will find out when I get there.
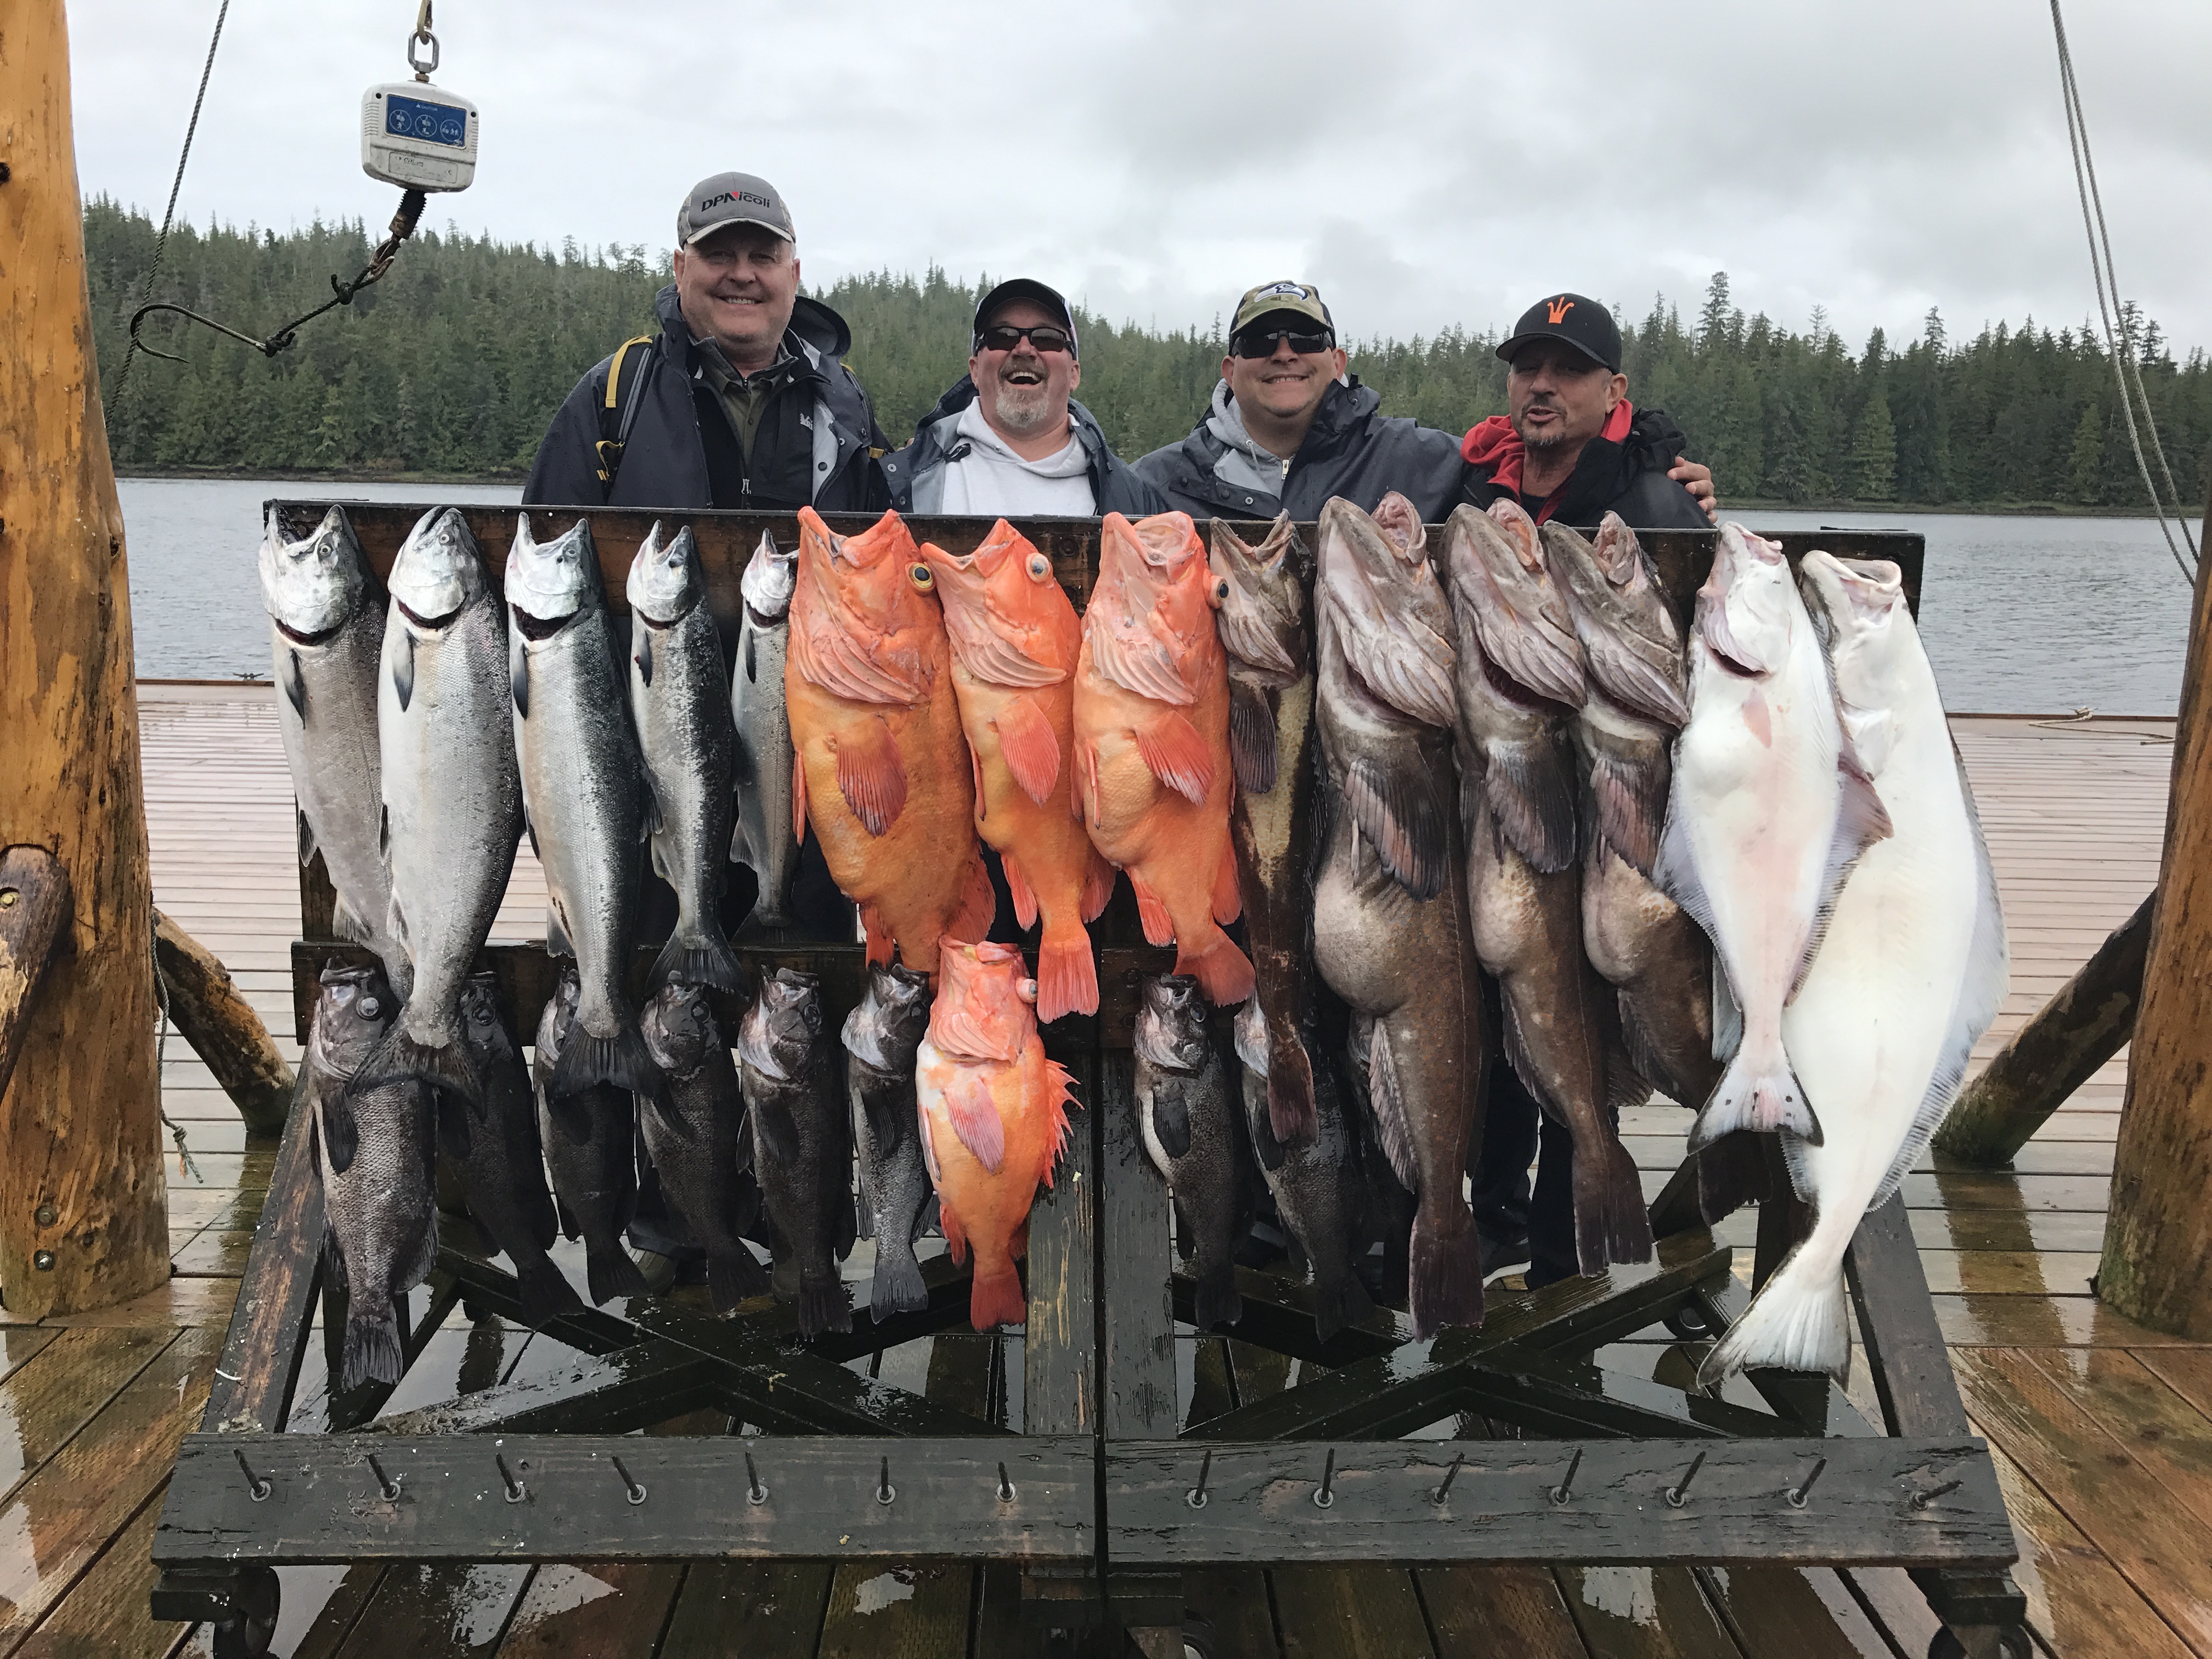
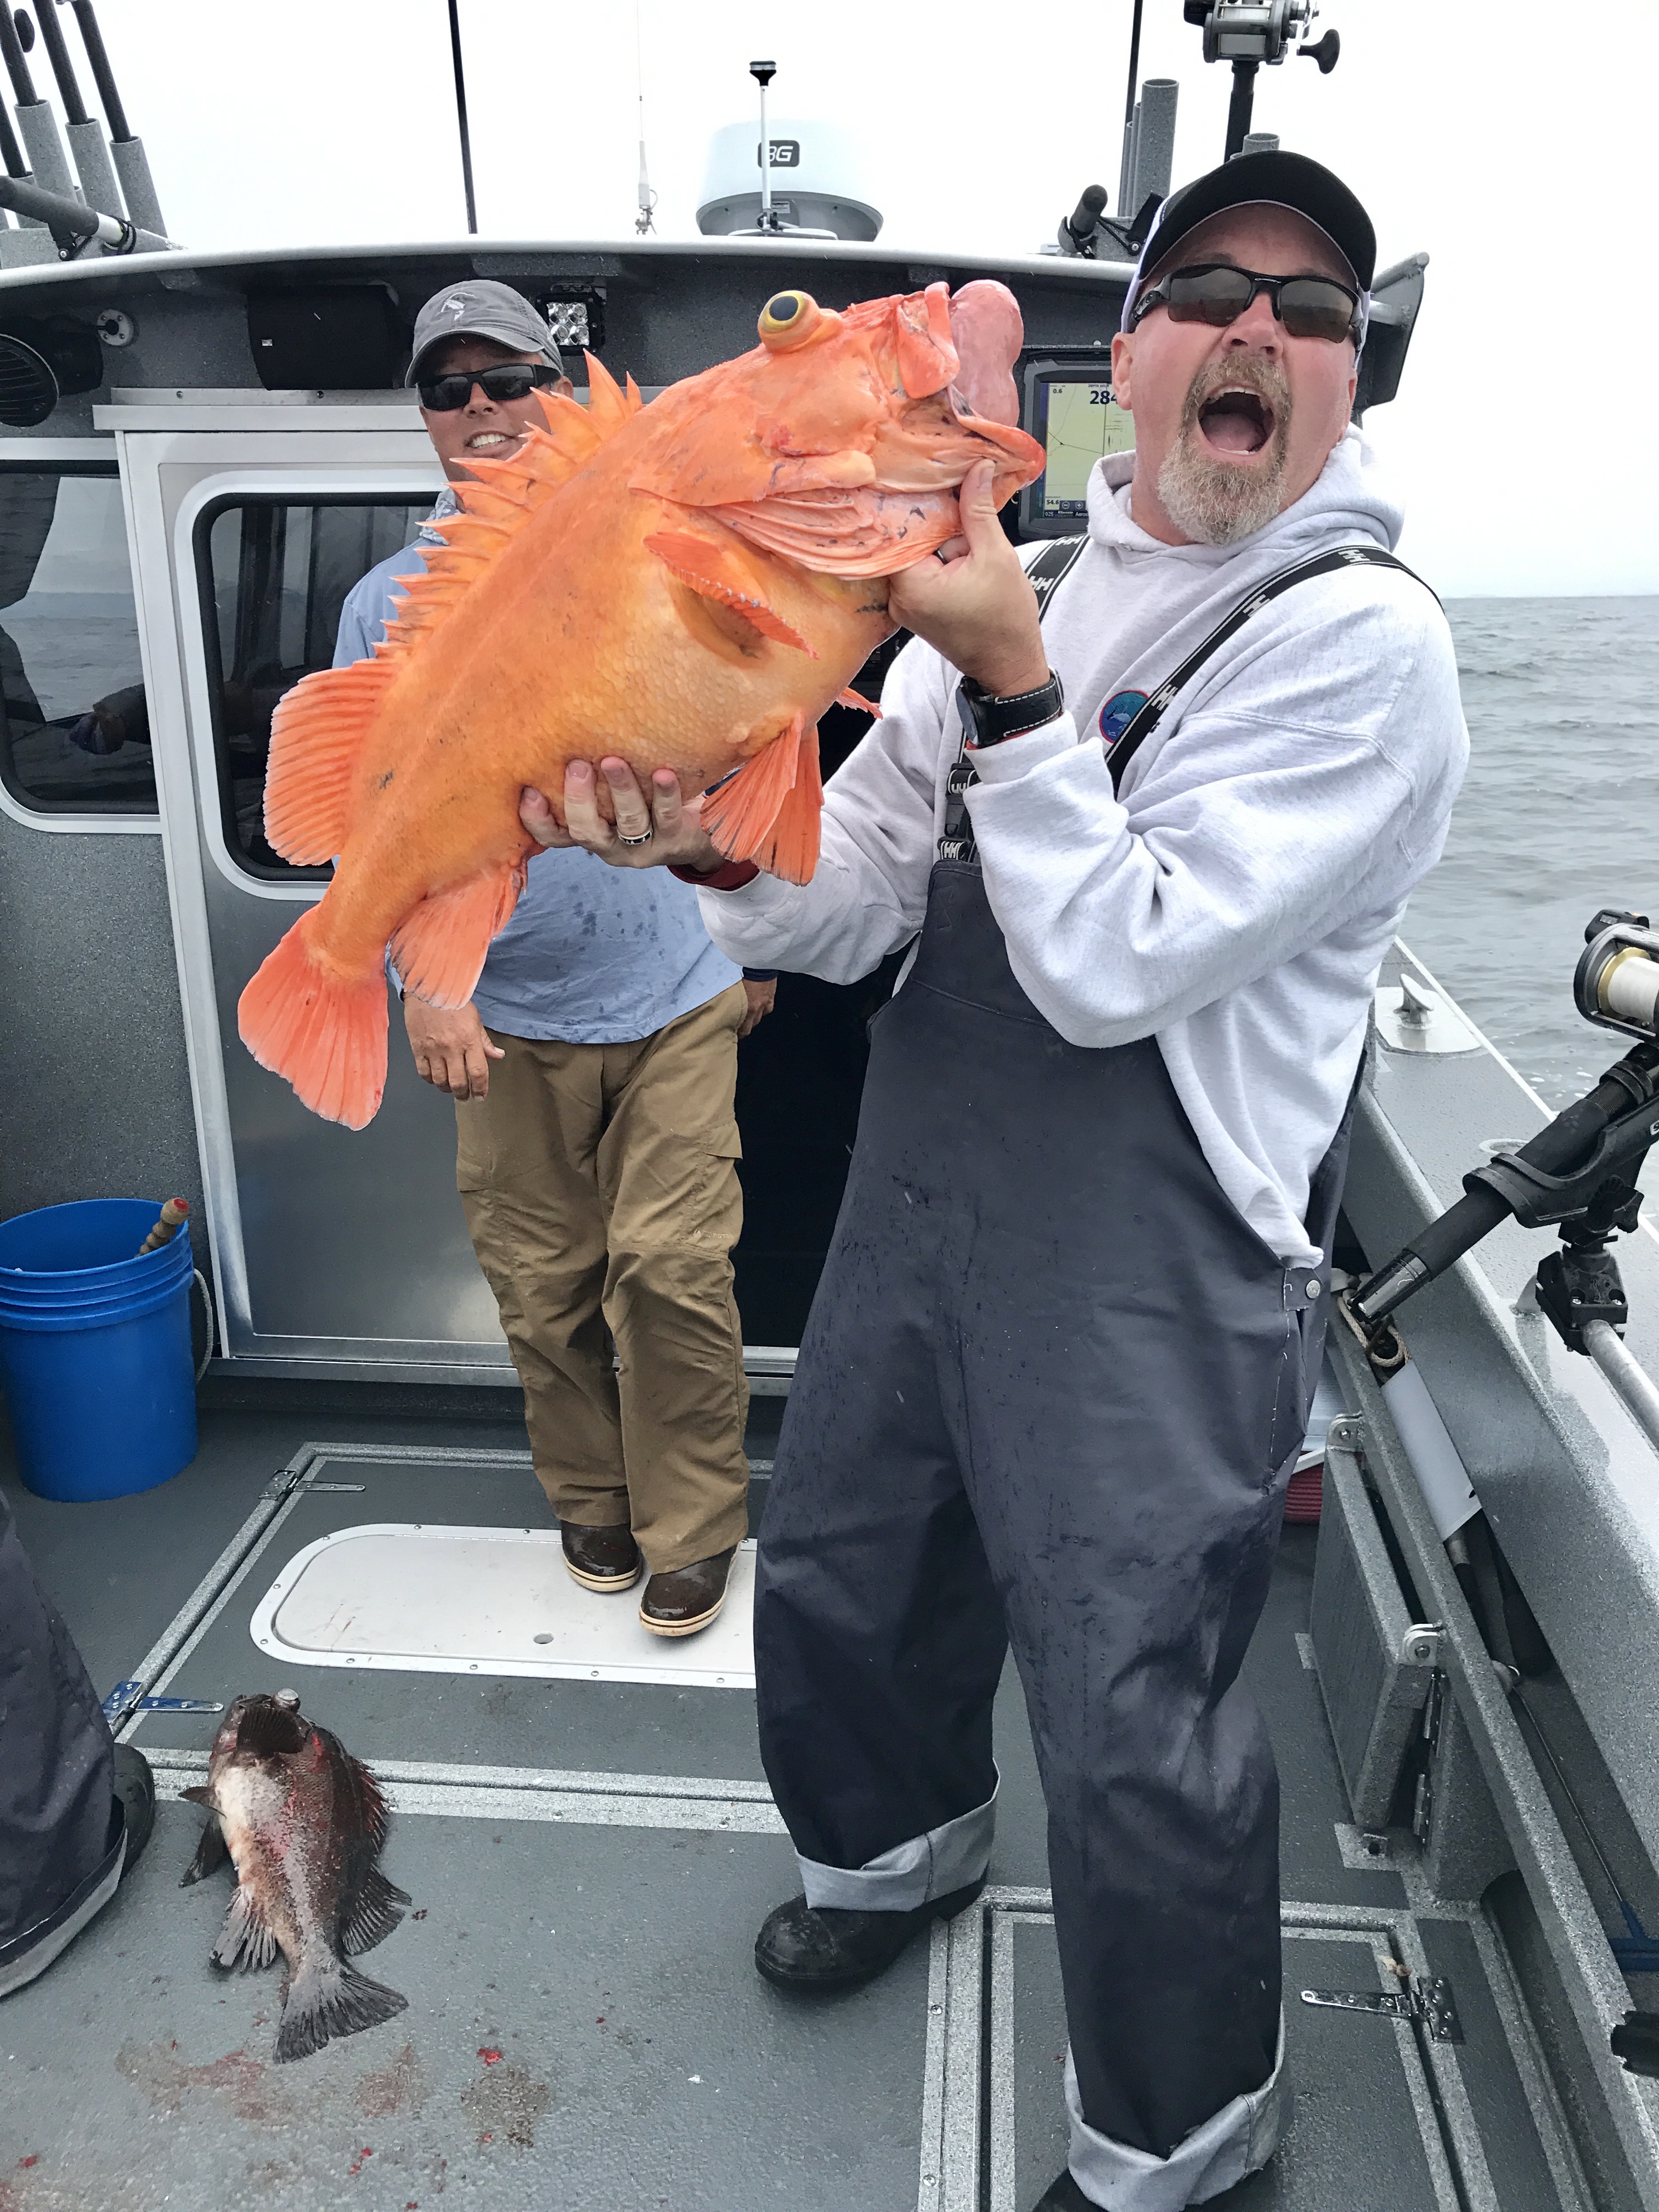
This summer a groupl of friends went up to Alaska on a fishing trip. In the midst of targeting King Salmon, we would get hammered by black rock fish. One of the guys on the trip told us it was his favorite fish so we kept them. I asked the guide if it was true and he replied “Yes, they are quite good.” We could keep five a day a piece, so we had them processed with the rest of our fish. We caught Lings, Halibut, Yellow eye, and two species of salmon.
The Blackie rock fish, also known as sea bass are at the bottom.
We caught some good size fish on this trip. I was already thinking about how I wanted to prepare them in my mind on the boat. I love the flavor of lemon picatta, so that is one of the dishes I prepared.
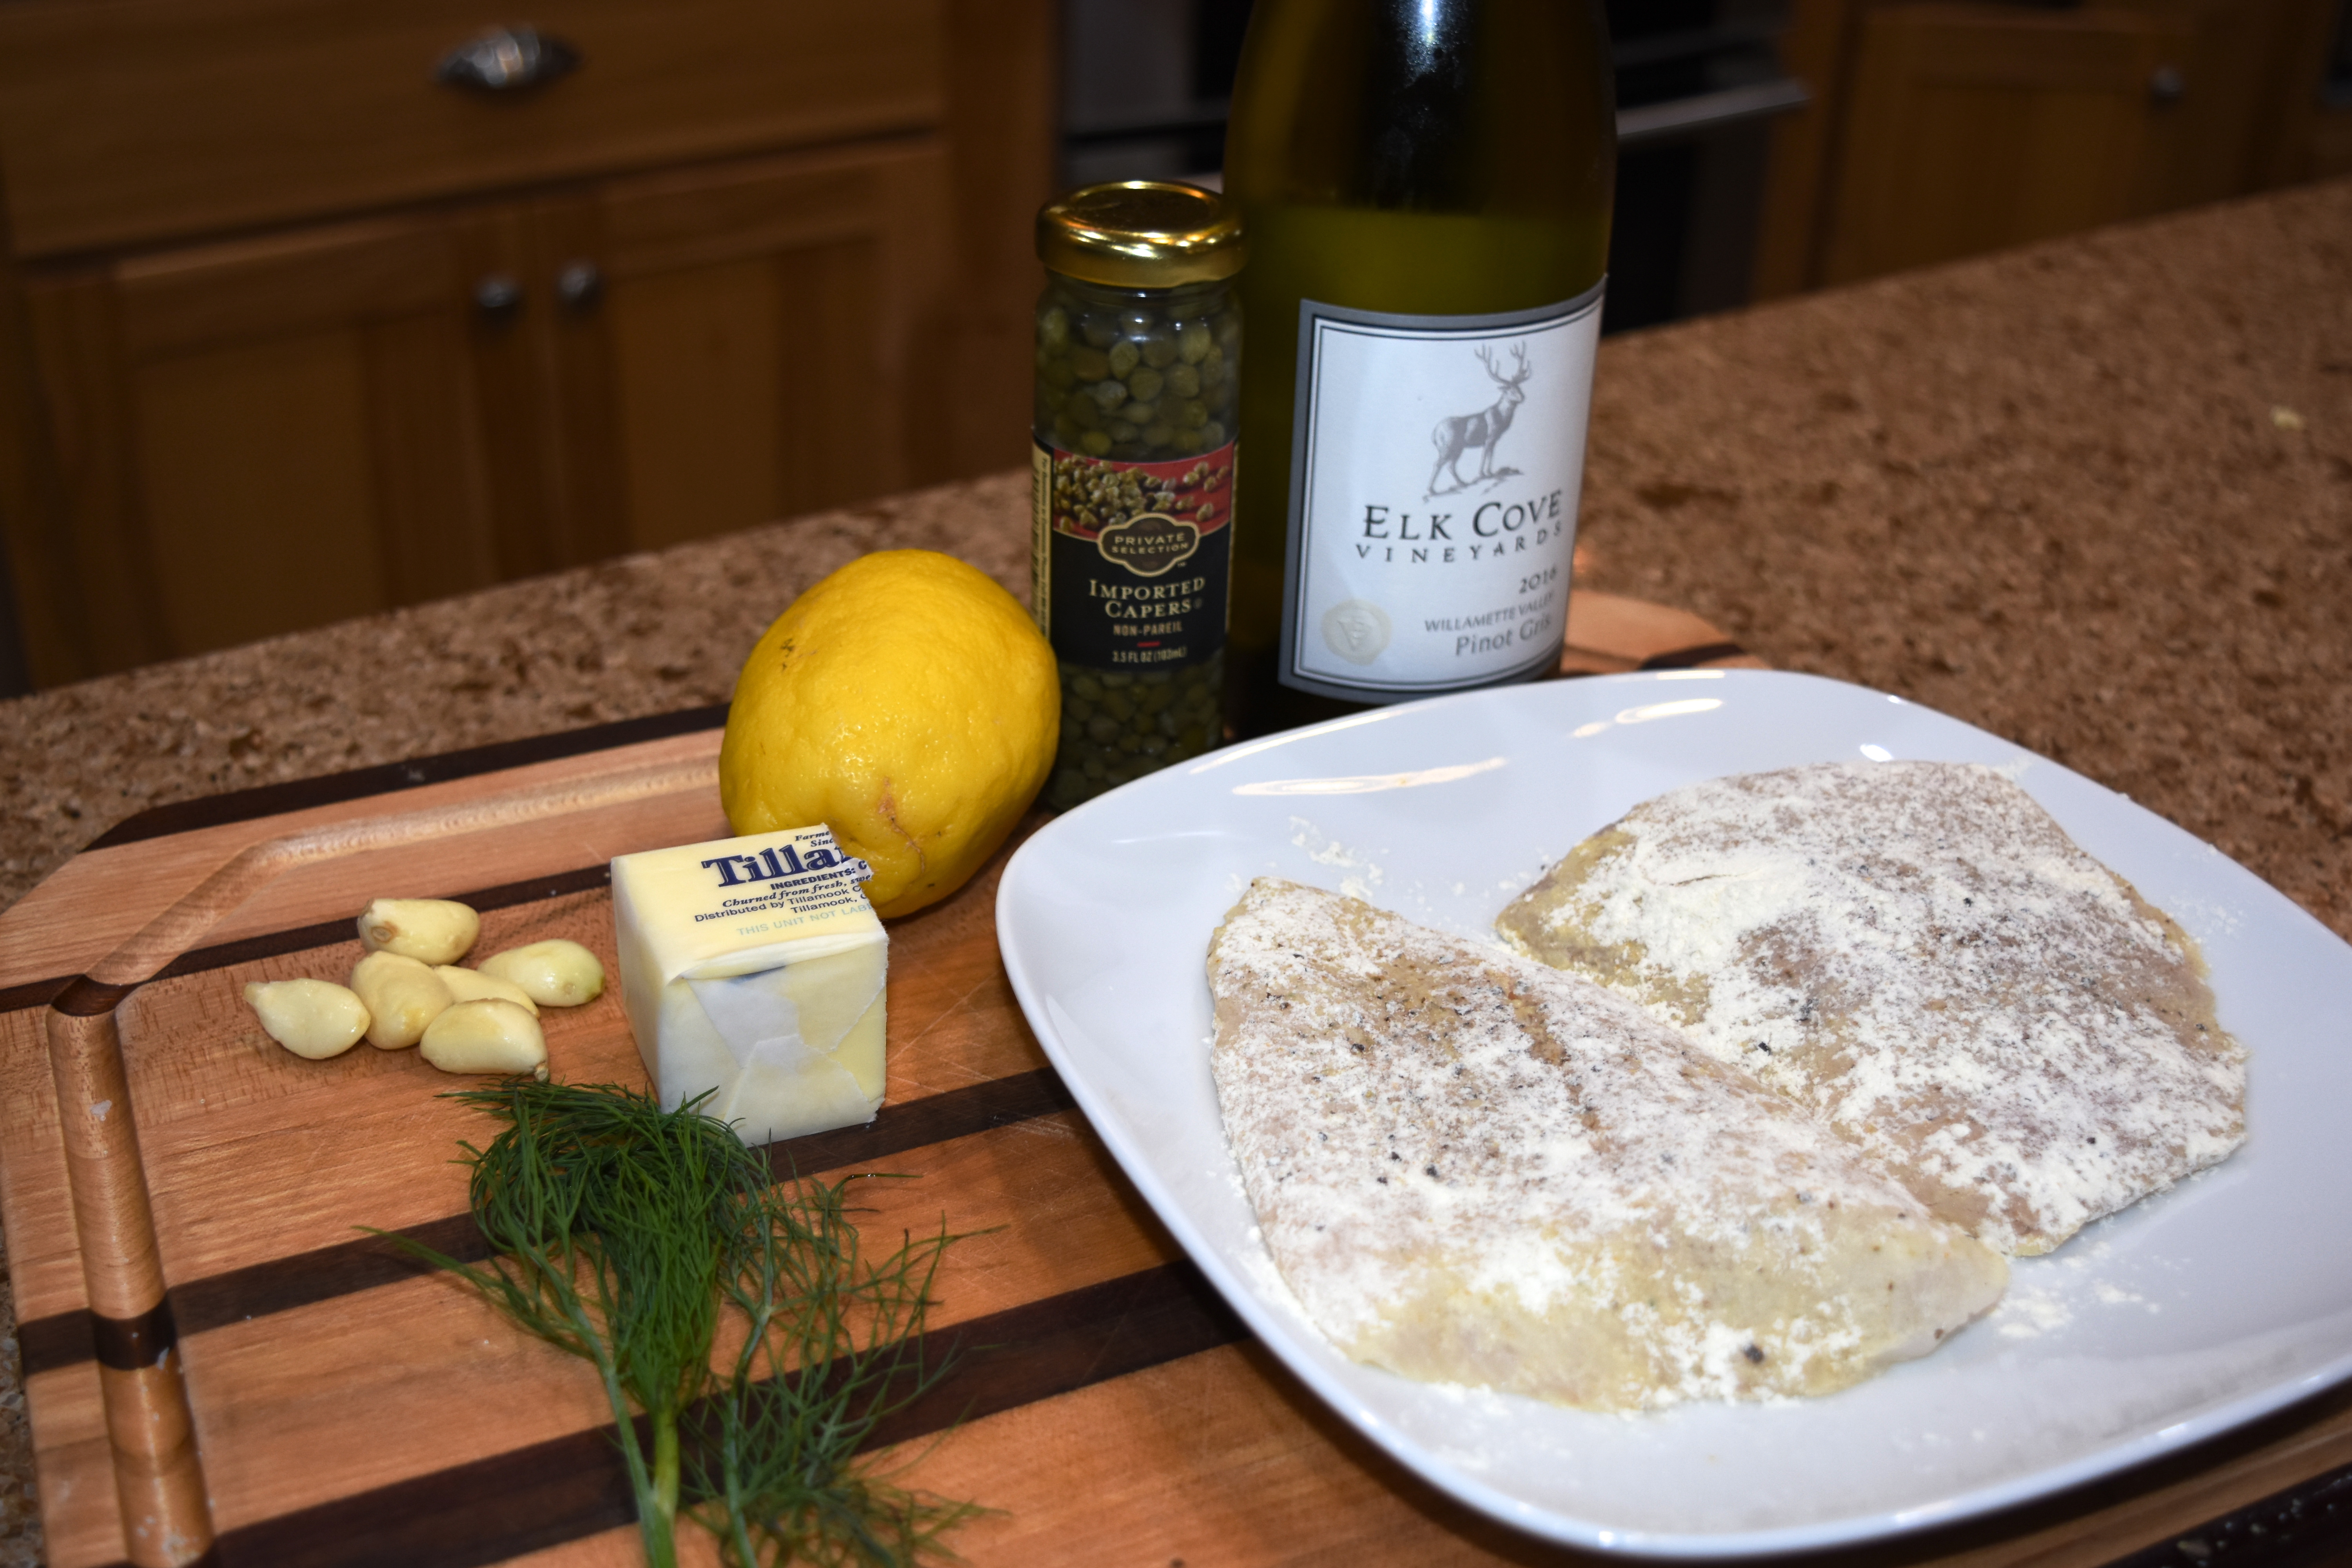
Lemon Dill Piccata Rockfish (Sea bass)
4 filets of Rockfish or Sea bass (you can use any white fish)
1 lemon
1 cup of flour or Pride of the West flour
1 cup of white wine
4 tablespoons of butter
2 tablespoons of olive oil
1 tablespoon of chopped dill
2 cloves of garlic chopped
3 tablespoons of capers
1 cup of chicken stock
sea salt and pepper to taste
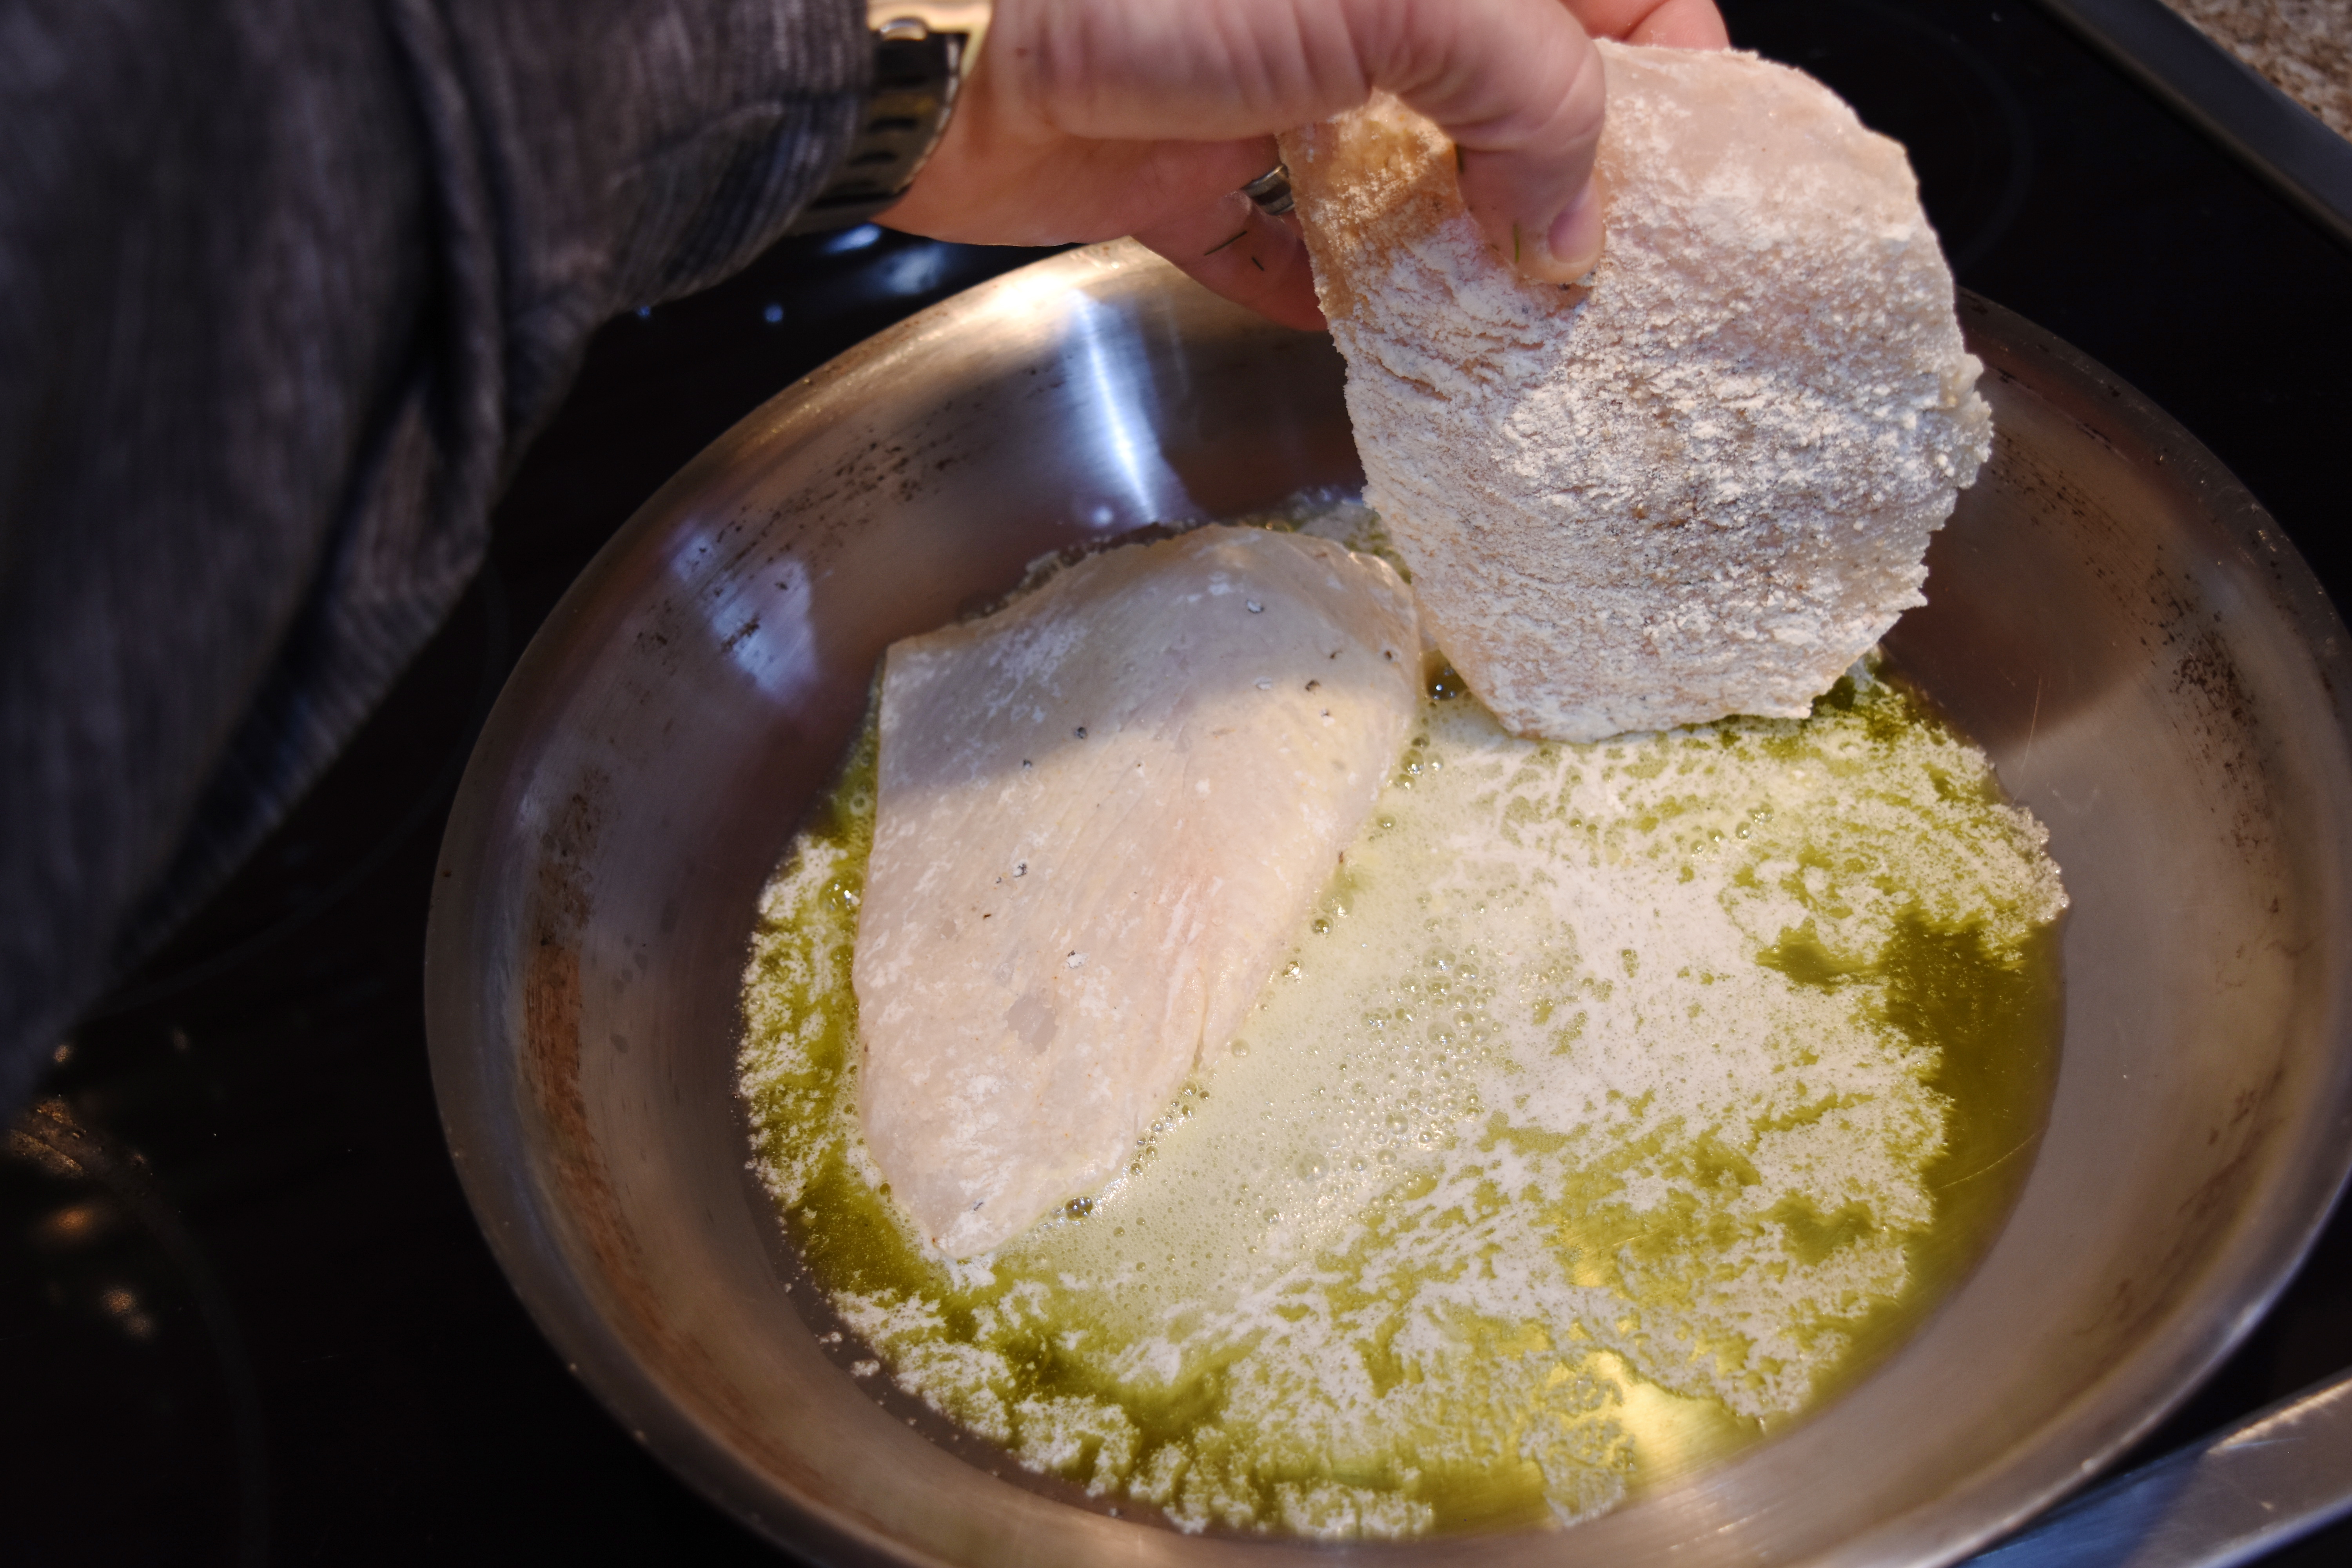
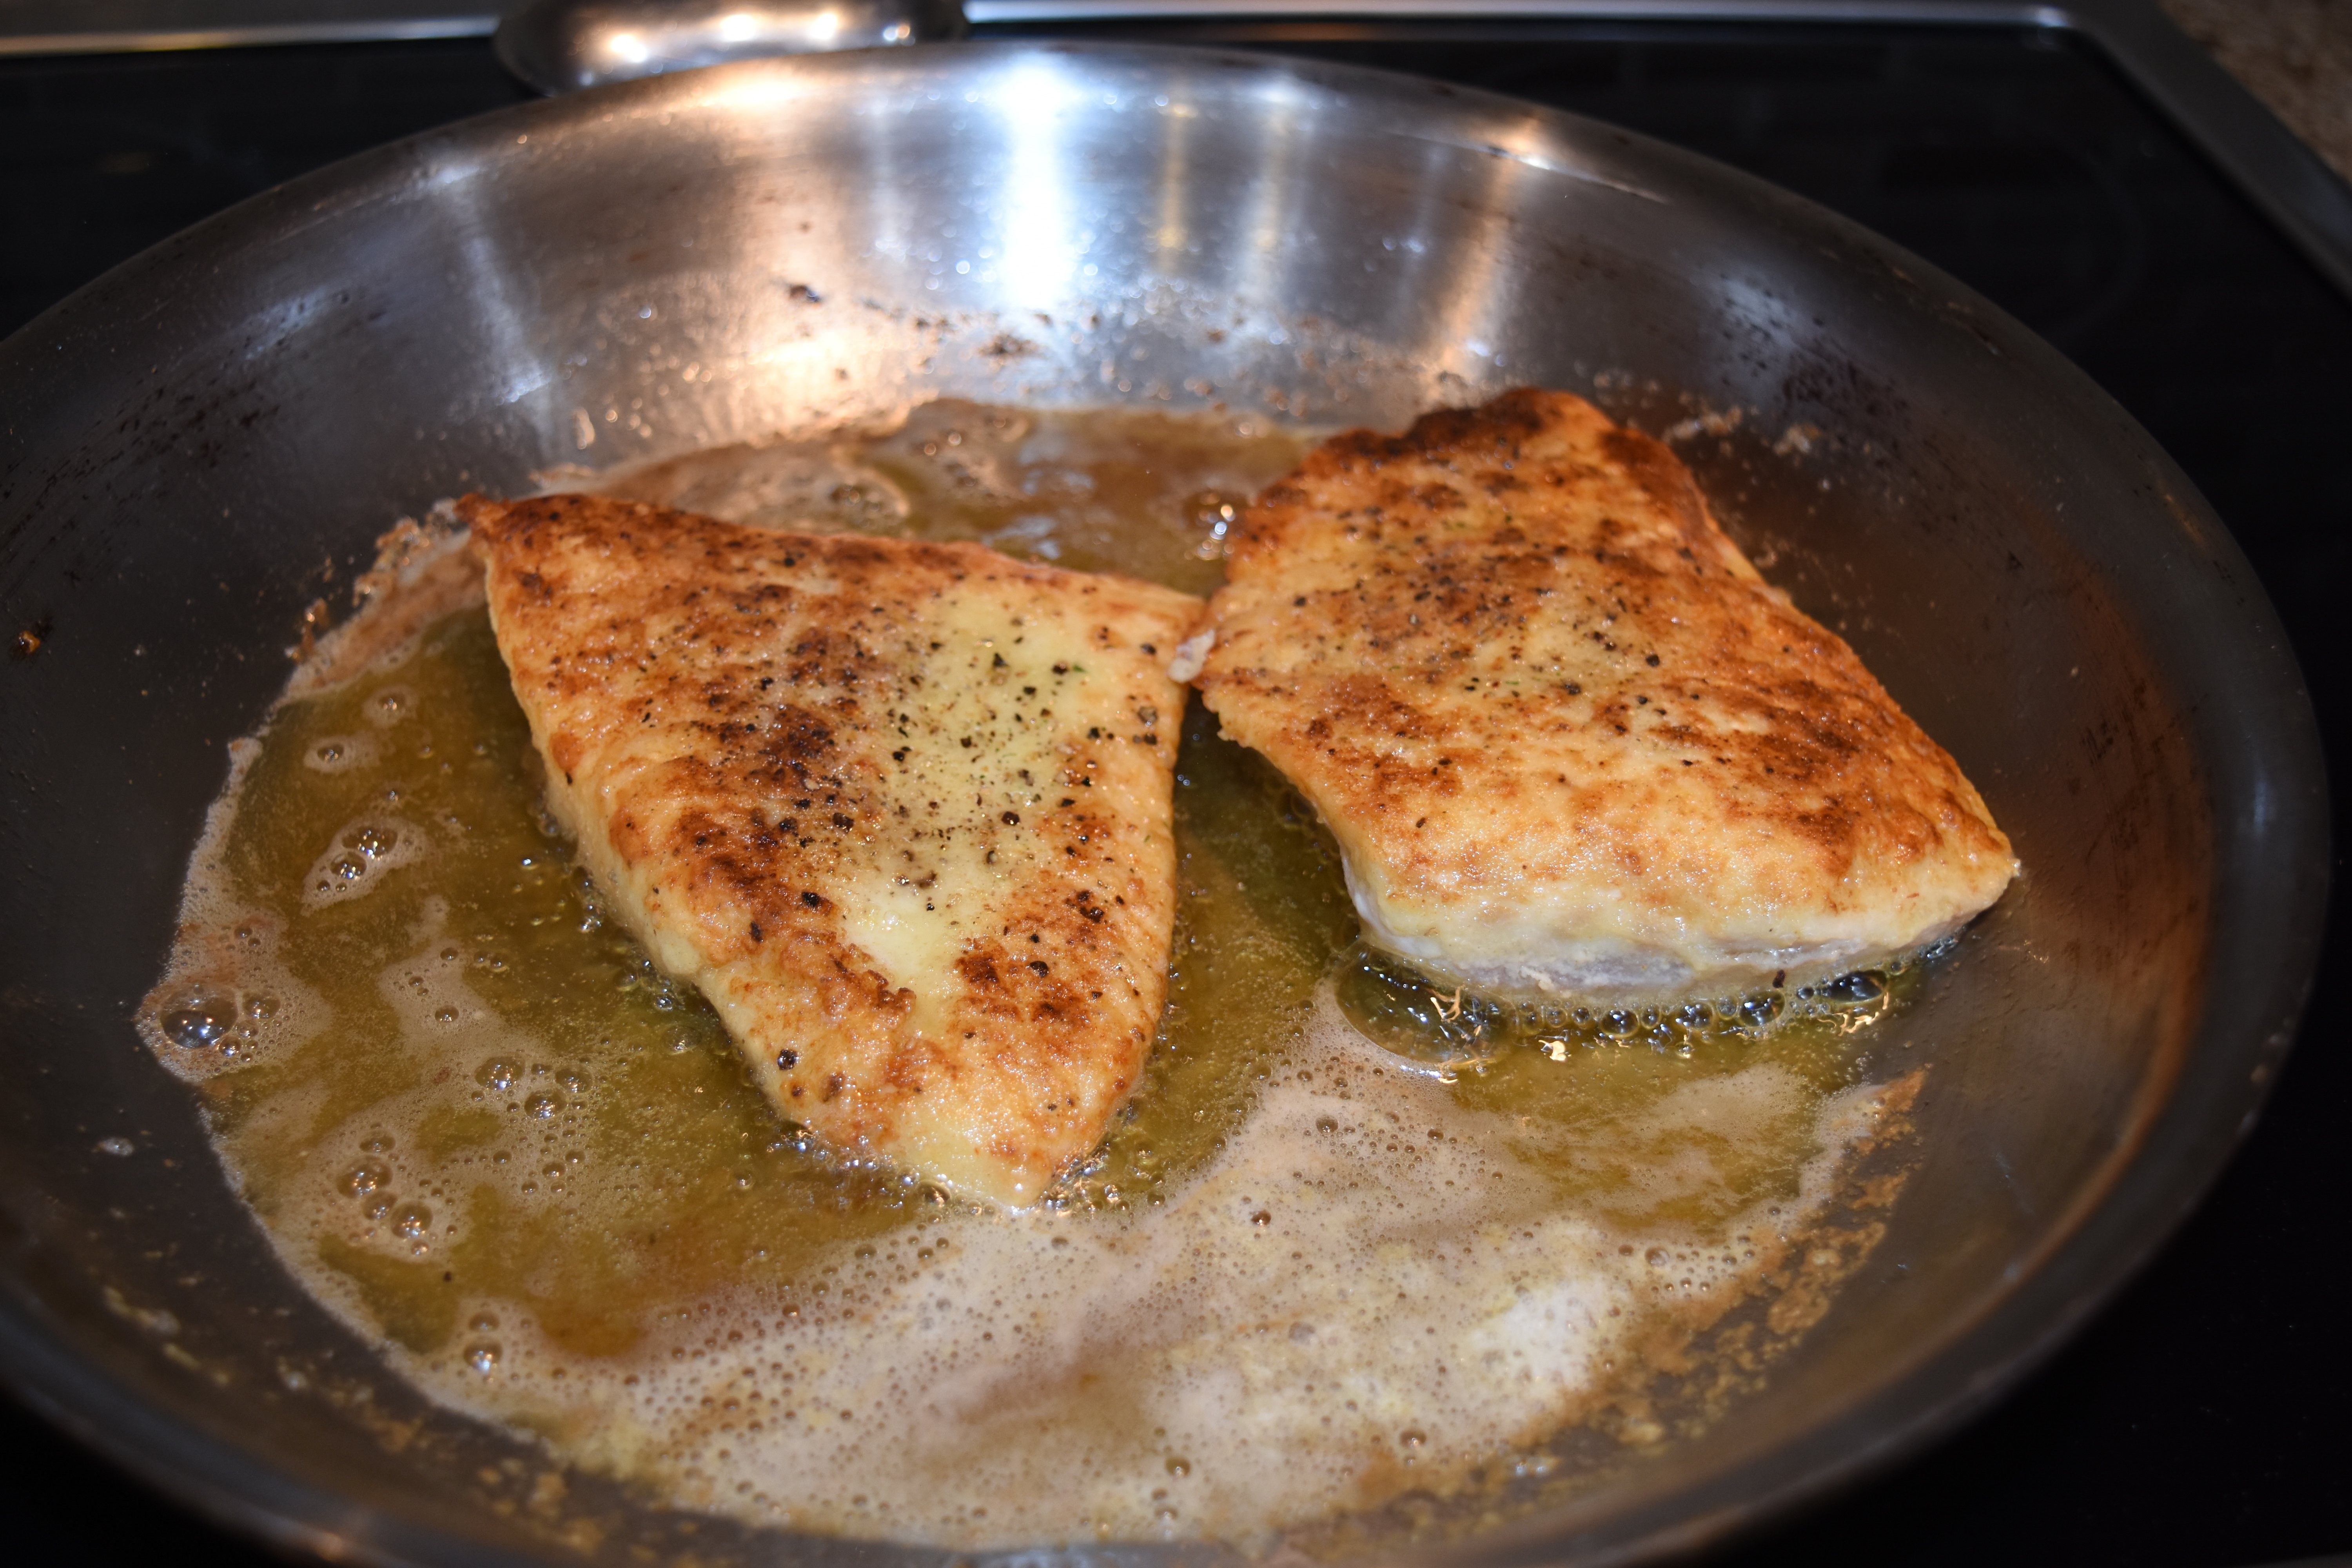
Take the filets out, dry off with paper towel, sprinkle with salt and pepper then dredge in flour.
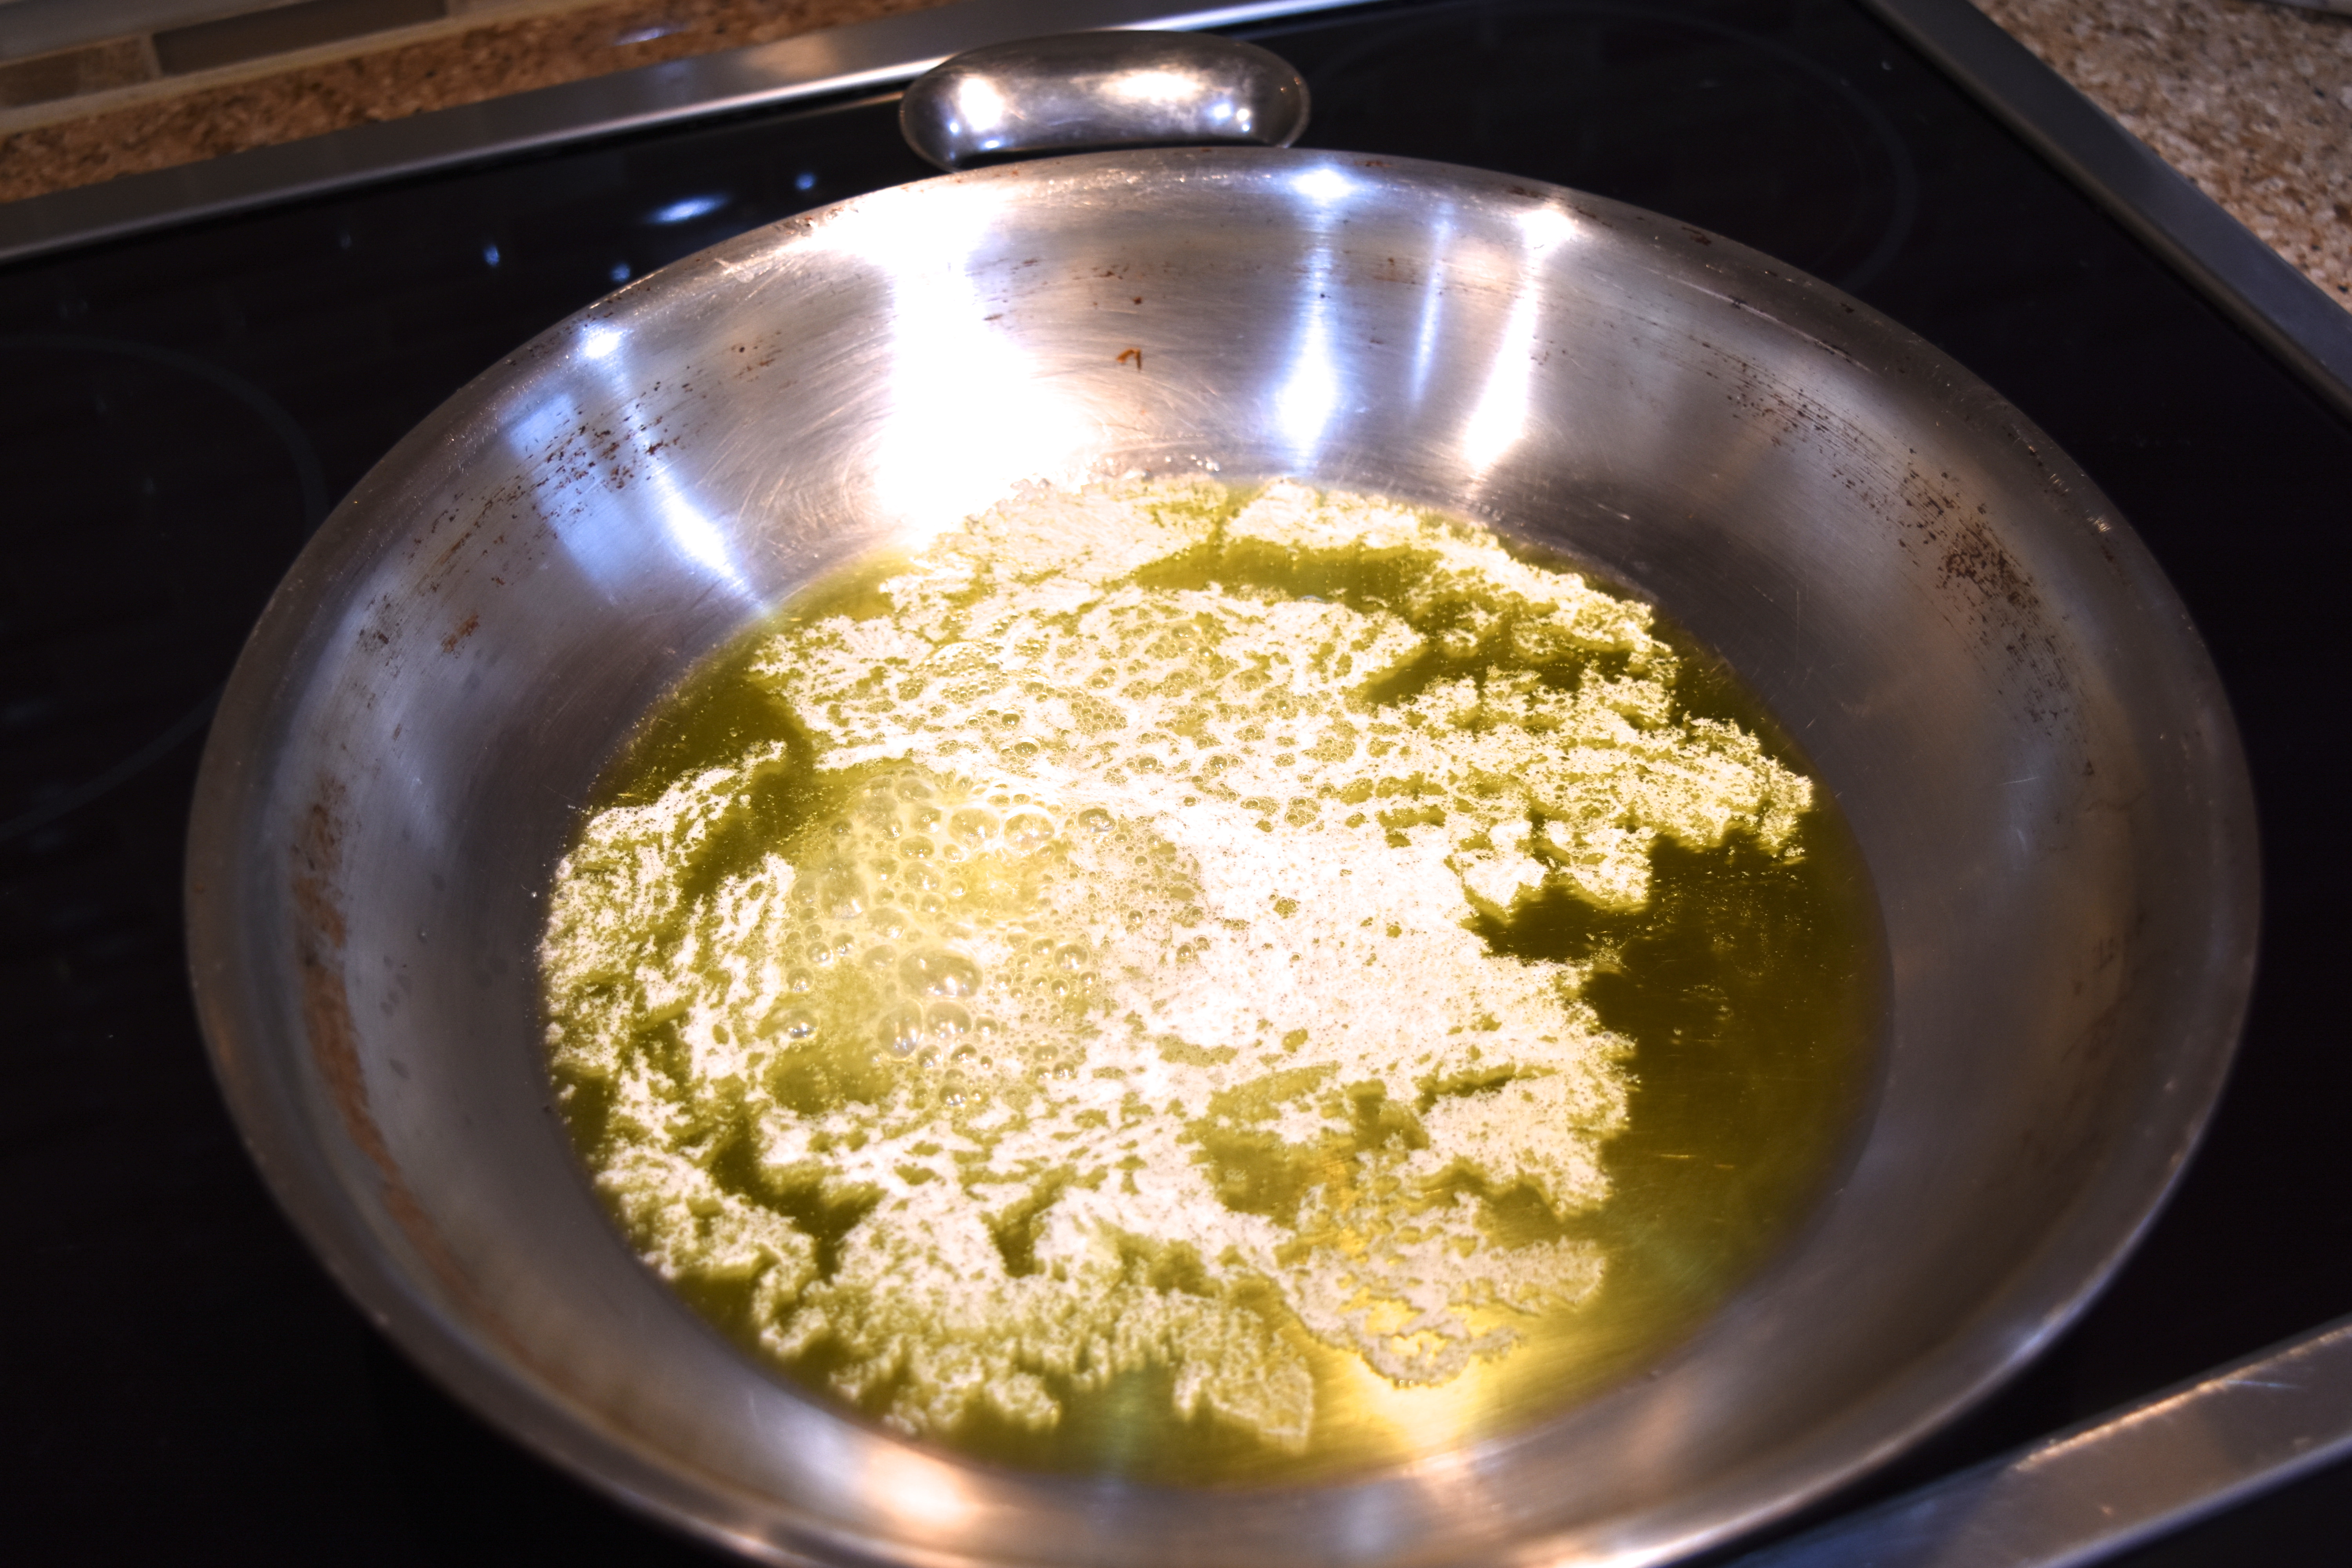
Heat 2 tablespoons of oil in medium high pan, then 2 tablespoons add butter.
When oil is nice and hot, lay the fish in the pan.
Sear fish until nice and brown, on both sides.
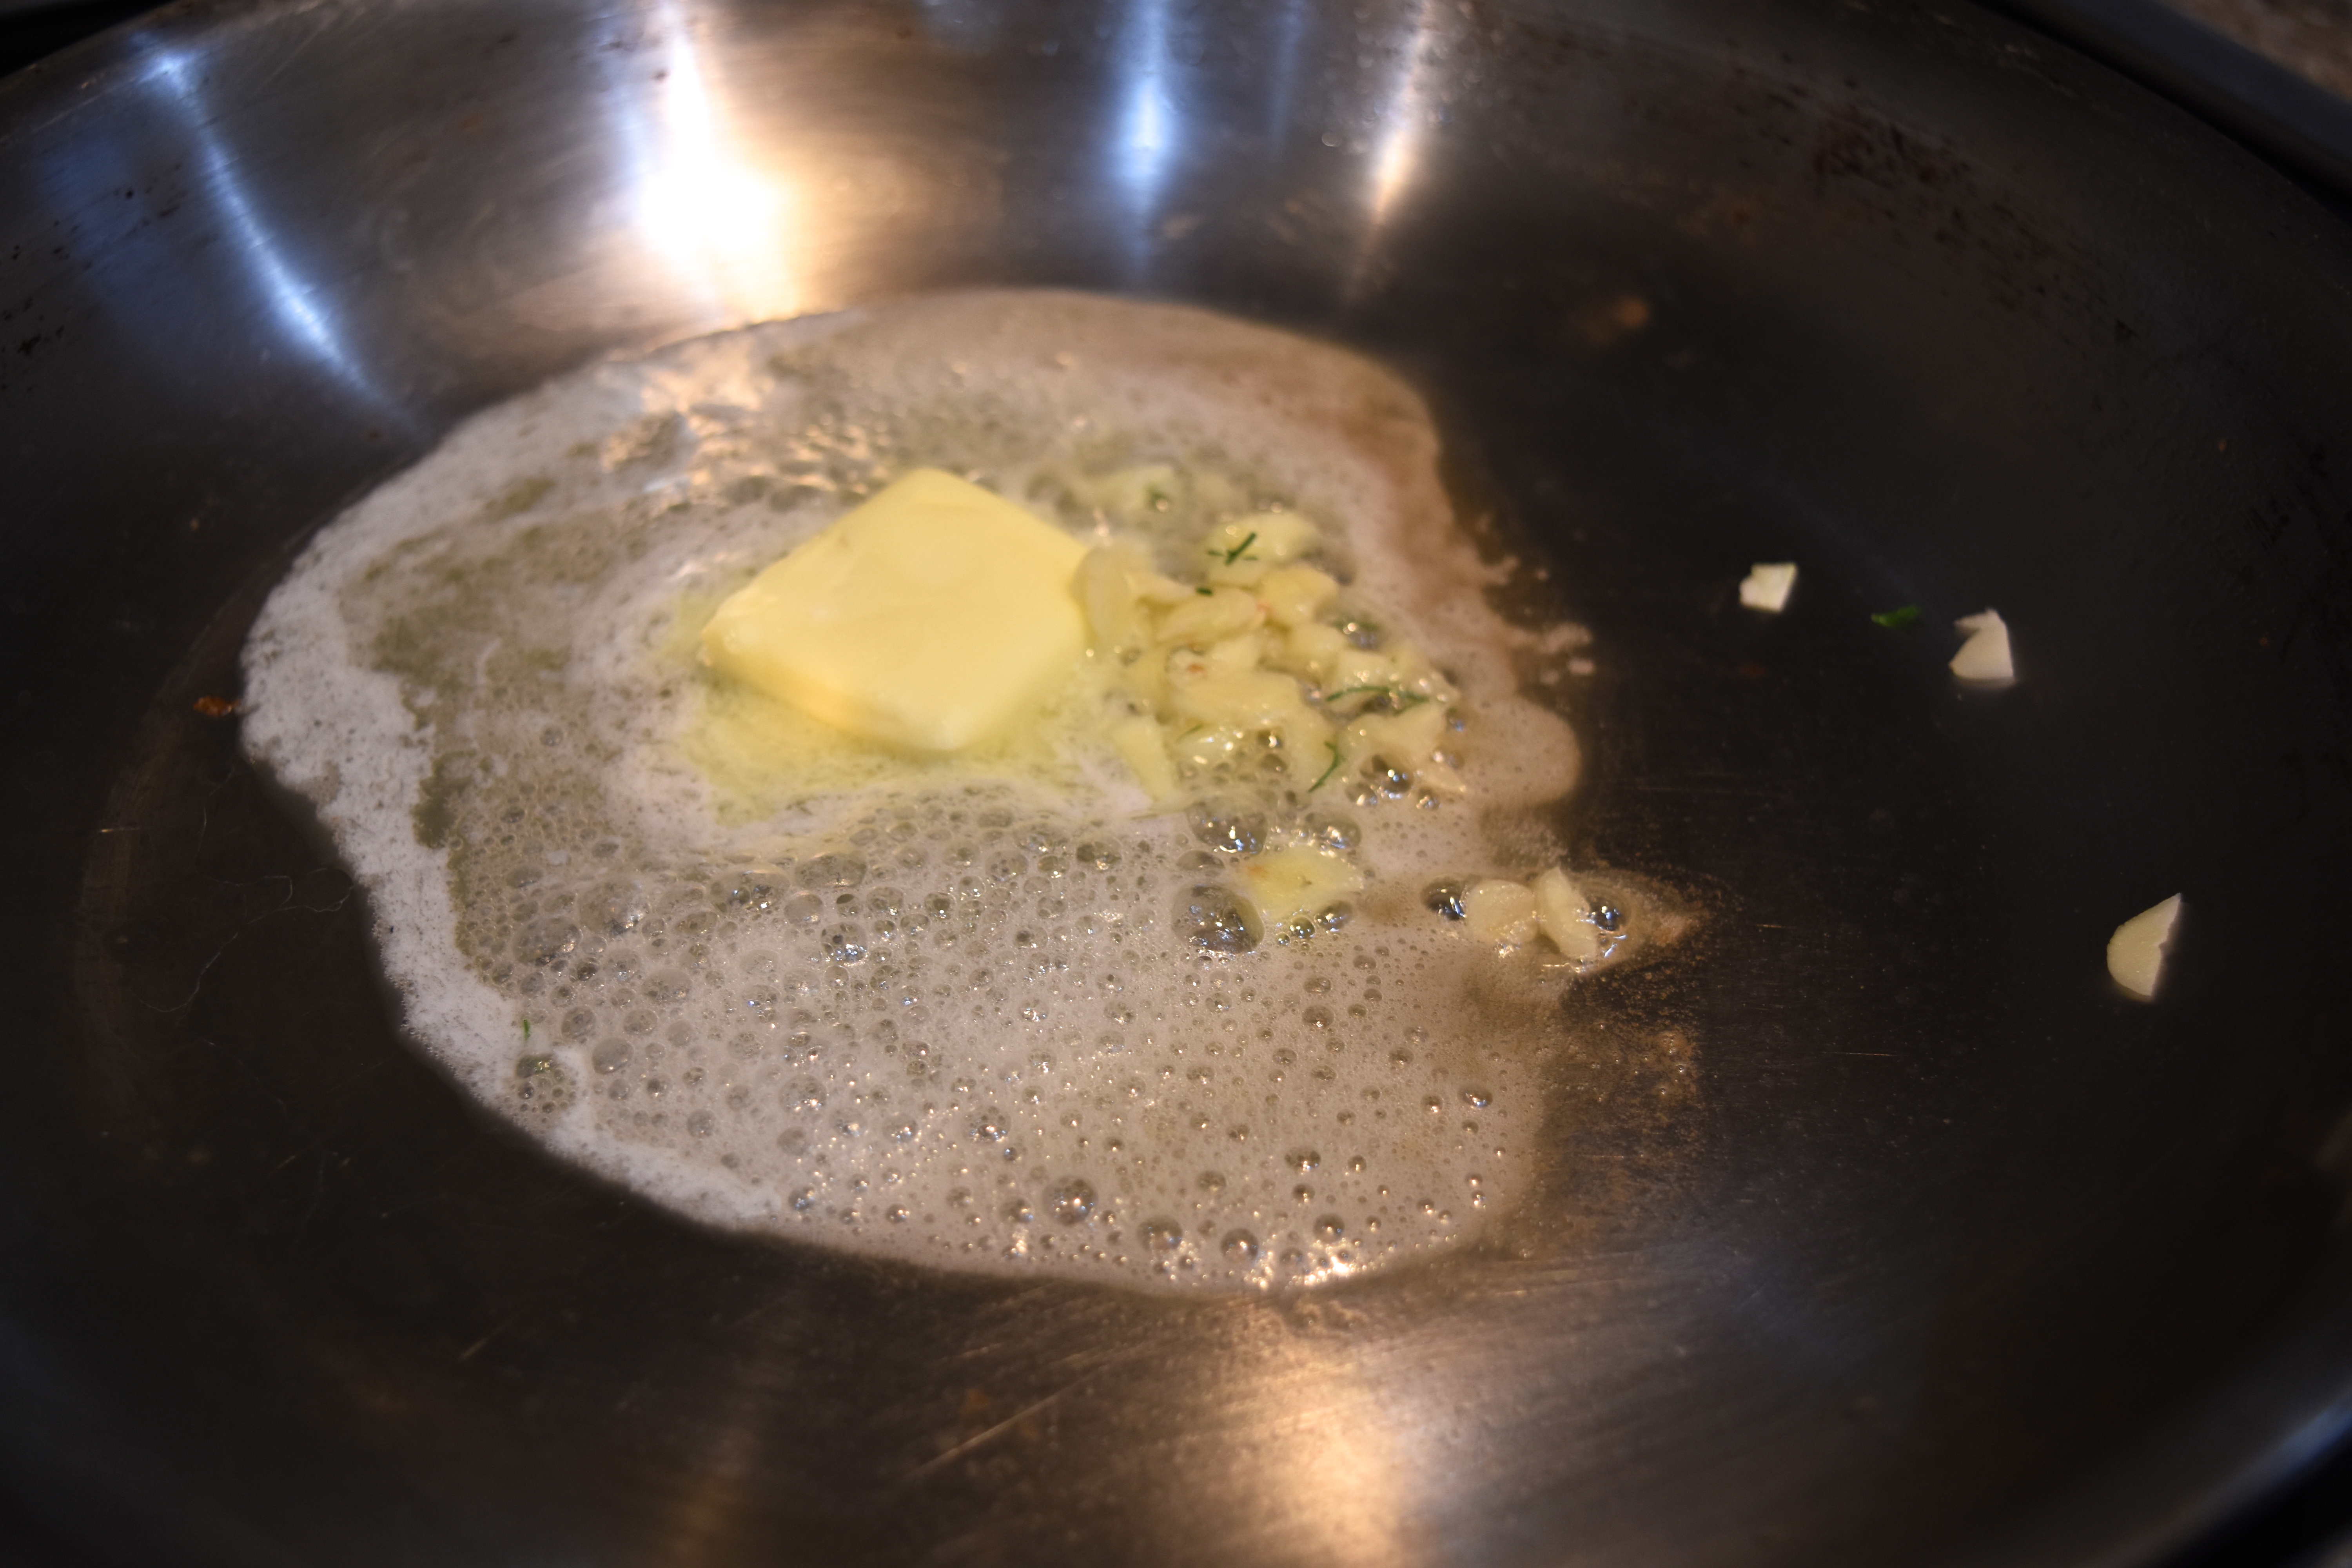
Should take about 3-4 minutes per side. Remove fish from pan, set aside. Add remaining two tablespoons of butter to the pan, and add garlic and cook for about 30 seconds over medium high heat. Add the wine, and cook until reduced by half.
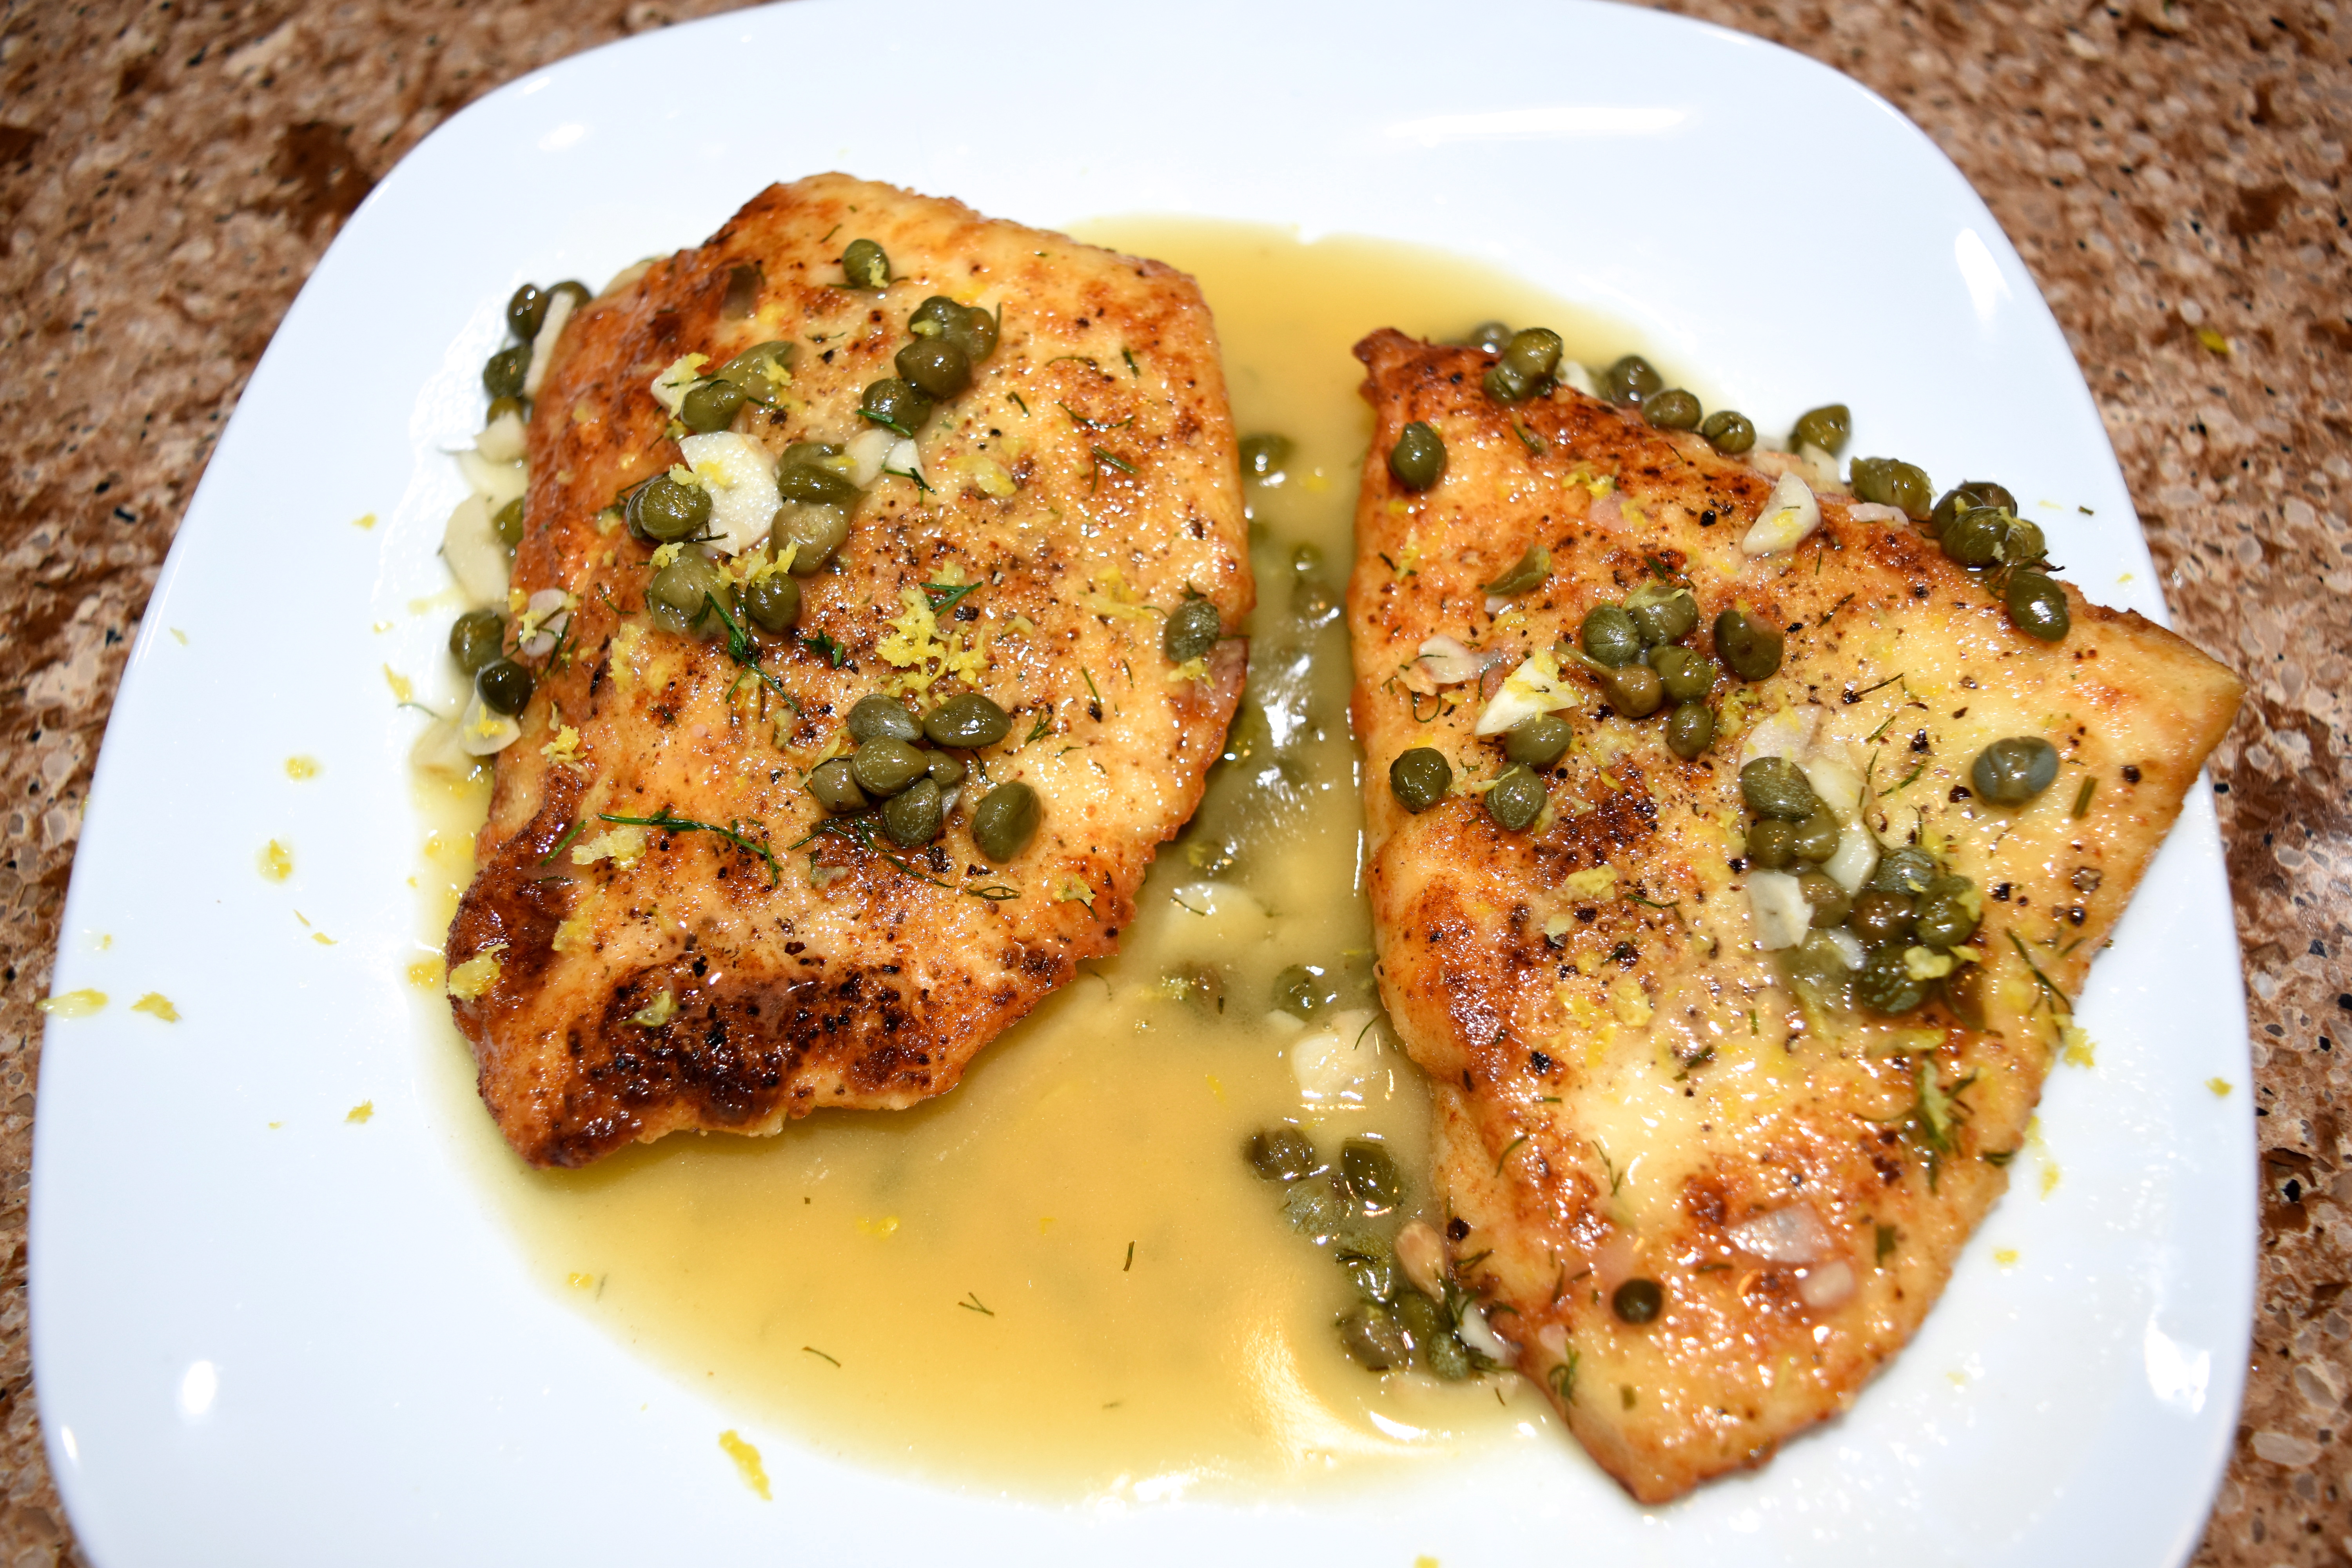
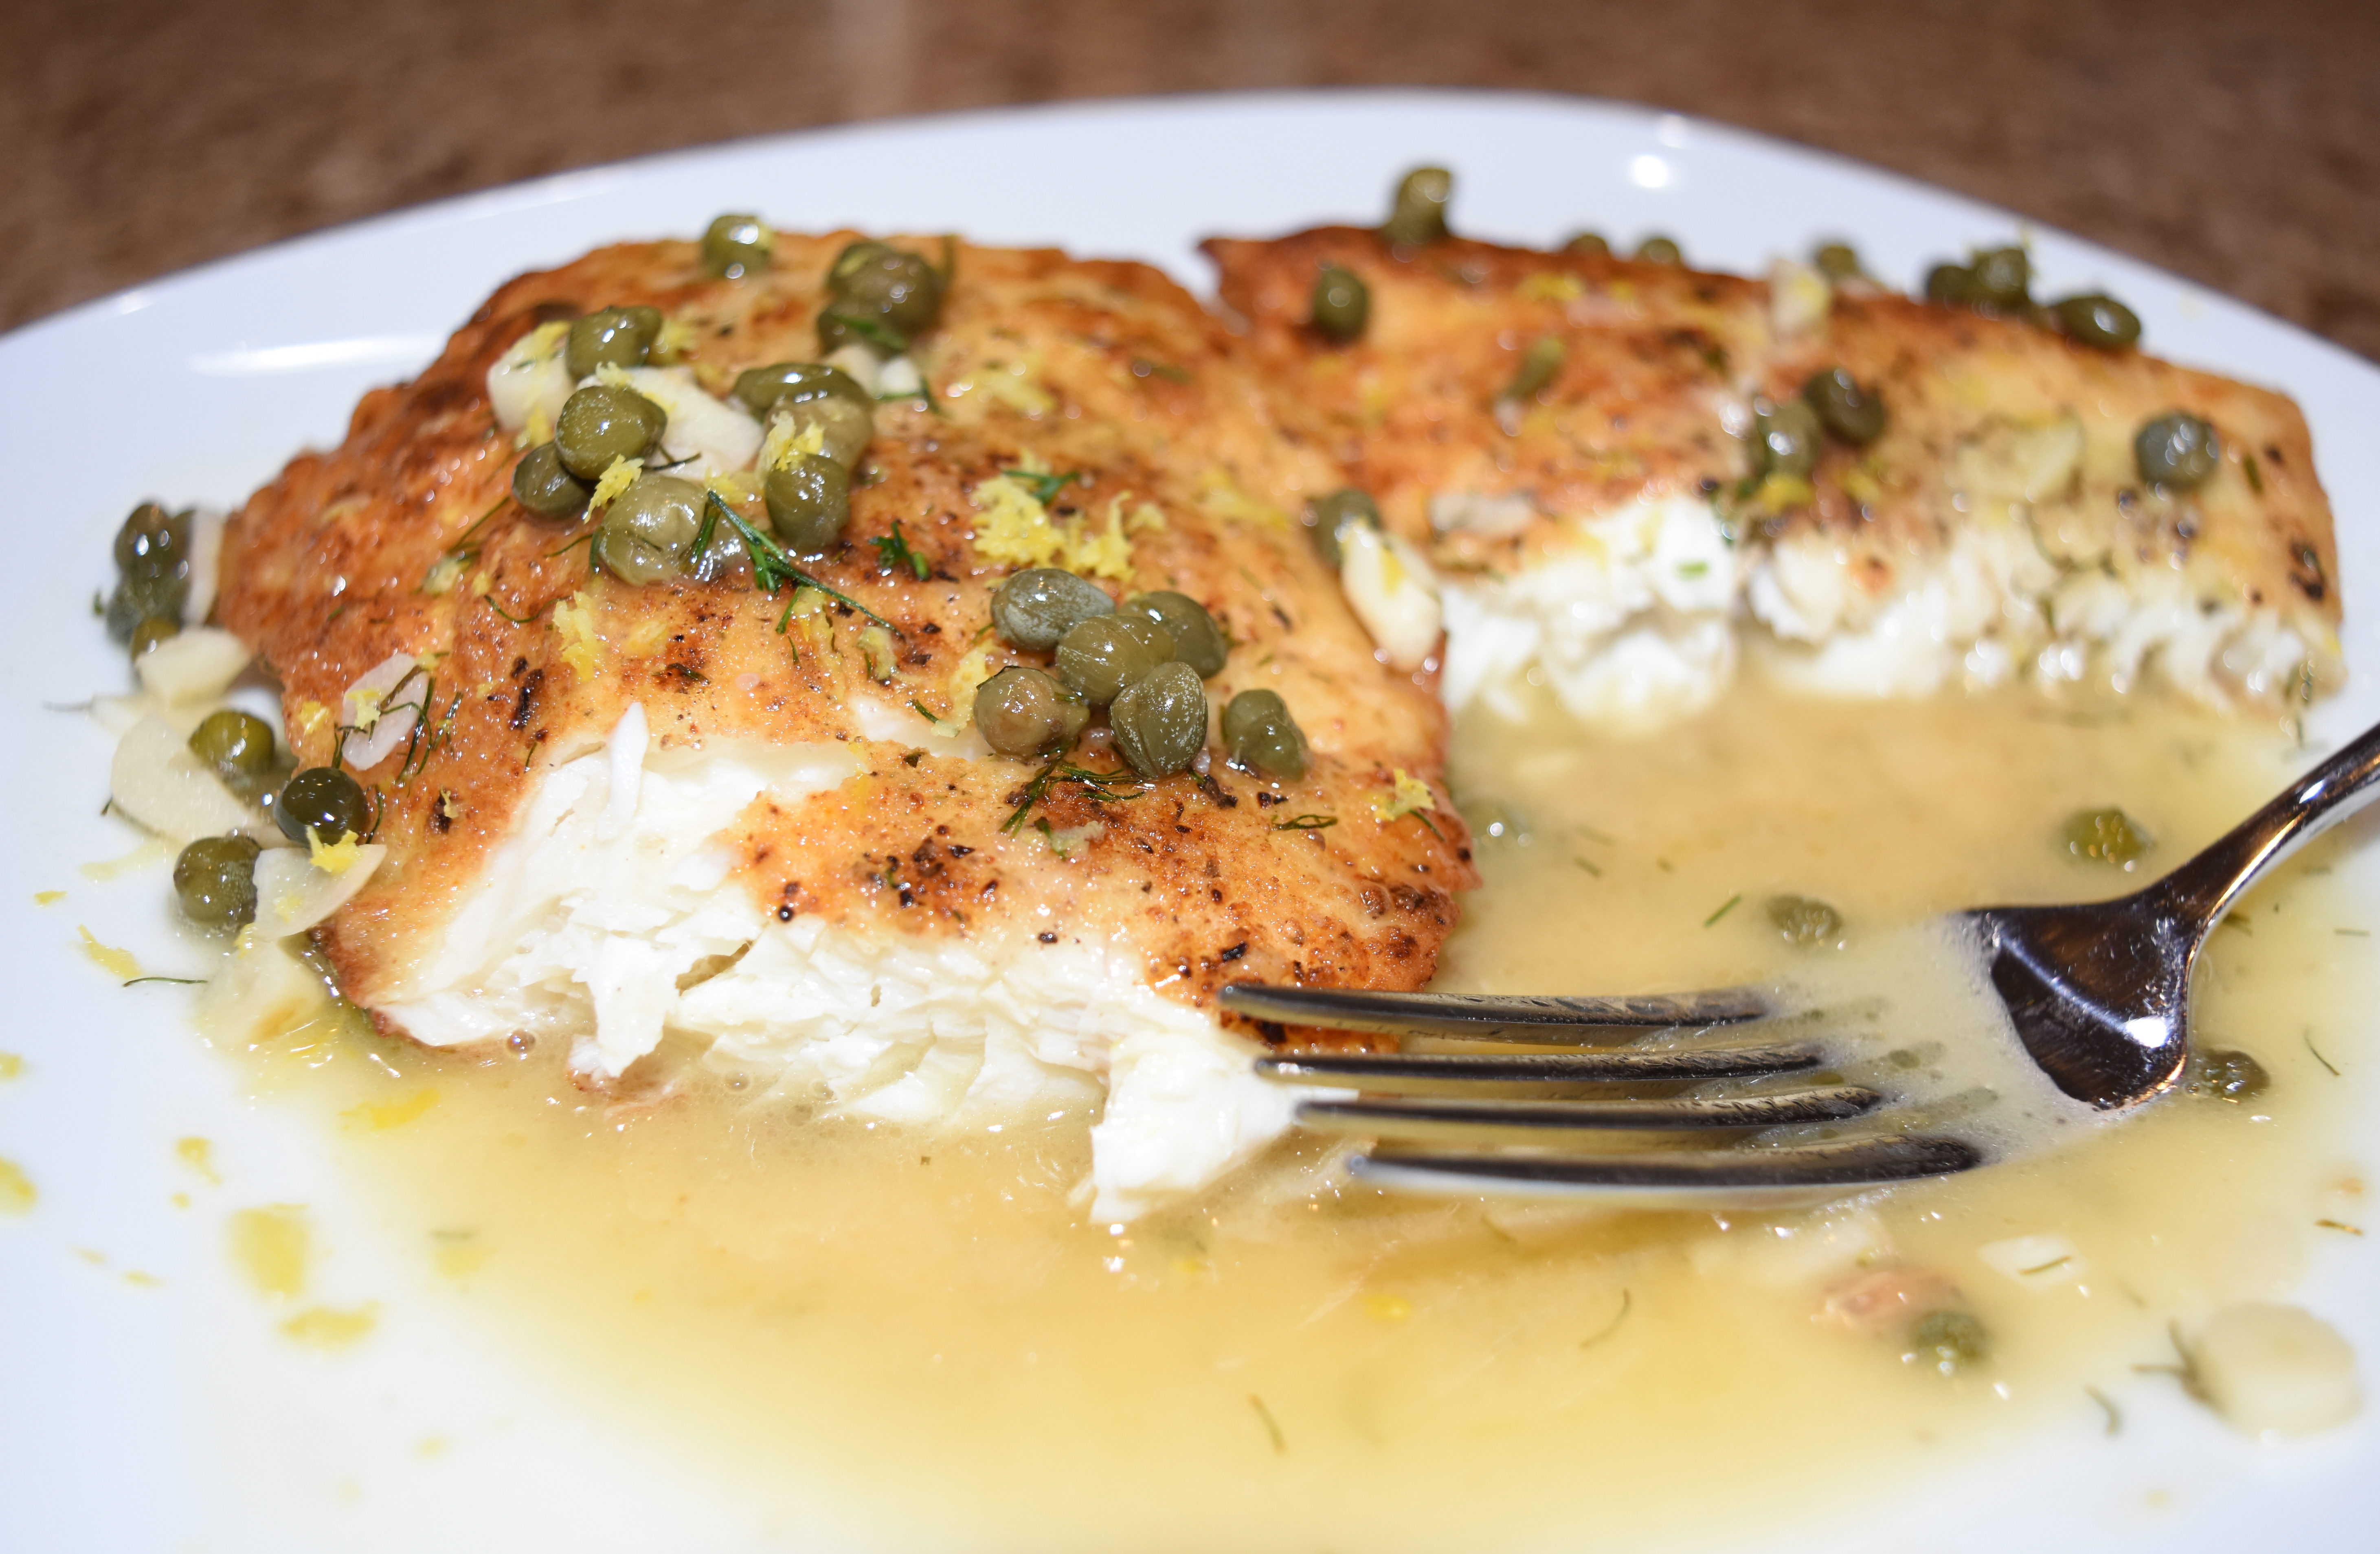
Once the wine is reduced by half, add the chicken stock, chopped dill, capers and two teaspoons of flour to the pan and mix. Take one half of the lemon and squeeze juice into pan. Taste it. If you need the remaining half of the lemon juice add it. This comes down to personal taste. Some like a hint, some like the full Monty. Lower the heat down. Set the fish back into the pan and spoon sauce over filets, and cook for about two minutes warming the fish up. Plate the fish and pour the sauce over the filets and serve immediately.
I only wish I kept more rockfish. You can use this recipe on basically any white fish.
Sit down and get ready to watch your served table explode with “I love its”. It is simple, and will not disappoint.
Get out there into the wilderness, or to the sea my friends. It will set you free.


 Then get some of that burger mix and put it in your hand, you want enough to make meatballs about the size of of a golf ball. They always end up better. First, lay down some parchment paper on a cookie sheet. If you do not have any spray some non stick on it.
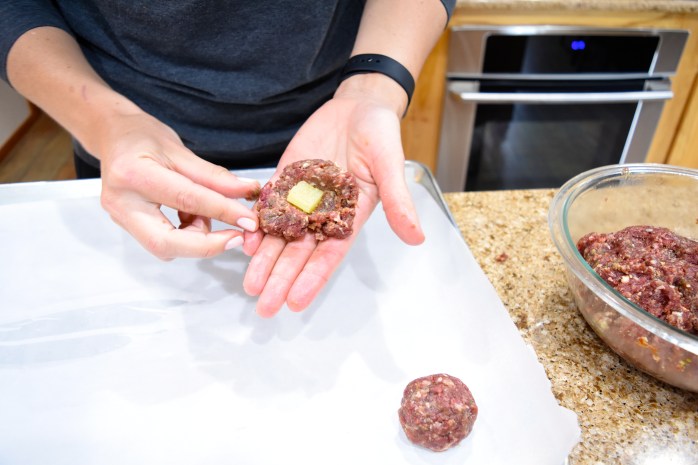 Flatten out a ball and add the pineapple. Then roll it to make sure the ball has sealed the pineapple inside nicely.
 Let meatballs cool for about 4 minutes then plate. Drizzle some Teriyaki sauce then sprinkle green onions and sesame seeds. I take wooden skewers and insert them but it is not mandatory.
 Look at that little meatball party. Get a good mental picture of them because they are going to go quick. I love to stand in the kitchen about 10 feet away to watch my family members take a bite then look in the middle to find a pineapple chunk. That made me smile.


 Please notice that I pour my homemade chicken broth out of a wine glass like it is the holy grail. That is how much I believe a great chicken broth can change the outcome of the dish. I also make the sound “ta-daaaaaa” when I pour it in.


Recent Comments