Welcome to the HUNTING CHEF

Welcome to the Hunting Chef. I started this blog over two years ago in efforts to give my hunting/fishing clients an outlet to a blog that had my recipes, along with easy pictures that show them how to make it. It also gave me an avenue for them to access these recipes, instead of writing it down on a napkin or emailing it to their wives. My thought was that it would save me time in the long run once I completed the project. However, like most works in projects, they never end.

I do all of the guiding, and all of the cooking. One of my major complaints in life is bad food, therefore my expectations for myself has always been provide great food. Most of my hunters are not chefs, but do ask me a lot of “How do I?” questions with regards to taking wild game and making it edible.

My claim to fame, is taking an individual that hates wild game because they had an bad experience with grandpa, because he drove around in 80 degree heat with his buck strapped down on the hood of his car for three days. Then frying it up in a pan until it was over done and hard as a rubber tire and making the grand kids eat his harvest. There is ways to making it into a masterpiece that melts in your mouth as well as give you the satisfaction of working hard to literally putting meat on the table.
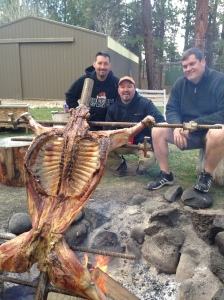
Guiding hunters is a major portion of my responsibility. Making sure they have a successful hunt is one thing, but also having a wonderful time is another. Sometimes having both is impossible due to climate, animals, shooting, injury, sand storms, and trophy hunting. That is why they call it hunting and not harvesting, but the client always goes home happy with food in his belly.
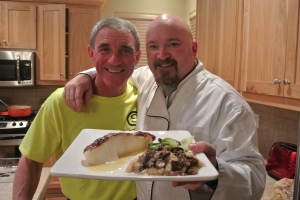
I have made wonderful friends thru guiding, and have enjoyed watching my girls grow up in the field, and my wife making roll cast on the rivers. I hope you enjoy the recipes and stories I post about my life because it has been a great ride and incredible journey. All the recipes that are posted have been tested several times before being what we call “blog worthy”. I really like feedback and questions so if you have any please let me know via the site.Hunting Chef









Letter about the Hunting Chef
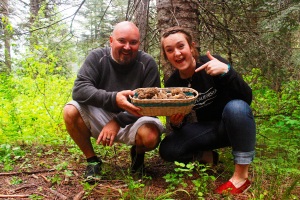
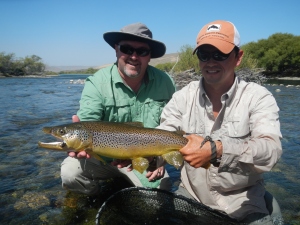
This is Megan Nanna, the Hunting Chef’s oldest daughter. I thought I would spice up his blog a bit, and also give his readers some more insight about my dad. This is in hopes that you will find him even more interesting, and follow his blog! (Oh, not to mention that this is a way of me earning some money so that I can travel next year. So let’s help out my travel fund everyone 😉
First and foremost, my dad is the best dad you can ask for. He’s one hell of a role model, as well as one hell of a go-getter.

Second fact, he is one of the funniest guys you’ll ever meet. Any person that knows his can attest to that. I don’t know what it is….actually, maybe I do, since I also inherited that gene/skill. We both have a knack for making the room light up, although he has mastered the skill, while I am still building on it.


Third fact, my dad seems to surround himself with giants. This is not because he’s short and they look tall, it’s because all of his friends are huge. I’ve always found that funny.
Fact four, we always have a lot of fun together. I’m sure everyone has fun when they’re with him. No matter what the situation is, something funny happening is inevitable.
Cabo (click for video)


Fifth fact, I love my pops. And I hope you all love his recipes as much as I do. Follow his blog, you won’t regret it! Your belly might though. 🙂

Fresh Hand Cut Pasta

If I had a son, I would say “Son, if you are going to get the hot girls, you need to know how to make fresh pasta”. I do not have a son, I have two daughters that LOVE PASTA. They are spread out in age, but both of them can put a couple of pounds of it down in a week. This is a Thomas Keller’s recipe from The French Laundry in Napa. This is not as hard as you think it is to make. Just takes a little practice and a little feel of how much flour to use. You want the dough to be dry, but not so dry that the dough has cracks. The noodles will be yellow and silky smooth. I must forewarn you, once you make them, you will never eat the dried noodles from the grocery store.
- 6 egg yolks (farm raised eggs are the best)
- 1/2 cup of whole milk
- 1 1/2 teaspoon of salt
- 1 1/2 teaspoon of olive oil
- 1 teaspoon of white vinegar
- 2 cups of all-purpose flour, plus 1 cup of flour
In a blender, blend all ingredients, except the flour. Do this for about 10 seconds, until combined
Pour the this into a mixer with a dough hook attachment and add flour 1/2 cup at a time. Mix for 5-8 minutes, and scape the dough down off the sides of the bowl every so often. You want the dough to be pretty tight and not all that sticky. Add a little flour if it is sticky and wet. Tightly wrap the dough and let it rest in the refrigerator for 30 minutes to an hour. You can leave the dough up to two days in the refrigerator or freeze it for up to a month well wrapped.
Roll the rested dough out to the width that will fit in whatever pasta roller you are using. I am using my grandmothers hand me down Kitchenaid and the pasta attachment. The dough should be dry and dense and take 5 to 10 minutes to roll out. Flour your dough and machine whenever necessary so it doesn’t stick while you are passing the folded pasta through the machine.

I start out at the widest roller adjustment and each time lower it and eventually you will be at the #4 setting, or even #3.

Then I make the switch to the actual pasta cutter, some people use the old fashion knife method, but I save a lot of time with my pasta maker.

I fold the pasta in my hand, then lay it on a sheet and sprinkle a little flour on top.

Once you have the pasta on a plate, make sure to pull apart so it does not clump together when you are boiling it.

Then his wife Karen wants to share the blog spot light.

Boil the pasta in a large pout of sea-salty water (1/4 cup of salt to 1 gallon of water) for about 2 minutes. Fresh pasta cooks fast! Strain and serve.
I added some Silver Fox red meat sauce (check the blog for that meat sauce,https://huntingchef.com/tag/silver-fox/) add a little fresh parmesan and stand back and watch people’s faces.
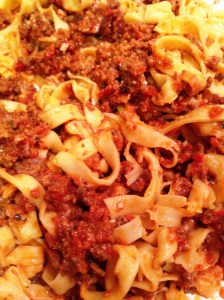
You can do anything with fresh pasta, one of my favorites is just pure and simple from Southern Italy.
Add 1 tablespoon of butter, 1 cup of good parmesan (I like Manchego better) add a little bit of the water you cooked your noodles in. Simple and Great! I make fresh pasta with Lasagna as well.
I will tell you, that making fresh pasta brings up your game in the kitchen.
Give it a try.
The Hunting Chef
Pretzel Rolls stuffed with Cheese, Jalapeno, and bacon.

My friend Jason sent this recipe to me for the Super Bowl via Facebook, my wife saw it and said I had to make them or sleep on the couch. Thank you Jason, I really do not appreciate the art of baking. I also do not appreciate sleeping on the couch either.


I am not sure where the recipe came from but it was pretty good, it just needed some more photos and descriptions on how to do it. I think this is a great recipe for pretzels, and you can make just pretzels or stuff them like this recipe the possibilities on what to stuff them with is endless. Here is what you are going to need:
- One Packet of active dry yeast
- 12 ounces of warm beer. Blue Moon is the beer of choice here. Mild, sort of yeasty beer.
- 2 tablespoons of granulated sugar
- 3 1/2 cups of all-purpose flour, plus additional small bowl for dusting your work station.
- 1 teaspoon of Kosher salt
- 2 teaspoons of good sea salt for dusting top of pretzels.
- 2 tablespoons of baking soda
- 2 cups of water
- 8 ounces of cream cheese
- 12 ounces of Tillamook cheddar cheese, shredded.
- 1 can of 4 oz. diced jalapeno
- 5 slices of bacon, cooked and chopped.
Preheat oven to 450 degrees.
Pour warm beer into the bowl of a stand mixer fitted with a dough hook, sprinkle yeast over top, then add sugar. Turn on mixer to slow and mix for about a minute, then let stand for 5-10 minutes. Once it is nice and foamy, it is ready.
While you are waiting for the yeast to bloom. In a medium mixing bowl combine both cheeses, bacon, and jalapeno. Mix together.
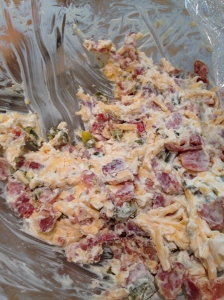
In a small bowl beat egg, set aside. Sprinkle clean counter top or cutting board with about 1/4 cup of flour. Line baking sheet with parchment paper or spray with cooking spray and set aside. I like the parchment paper better, it gave me a better looking product.
Add flour and salt to the yeast mixture in the stand mixer. Turn on slow medium and for 3-4 minutes, until the dough comes together in one ball. Remove from mixer. Add more flour a tablespoon at a time as needed if the bread is too sticky to come together. Dough should be tacky when you remove it from the mixer, not sticky.
Place dough on floured counter top and knead in flour until it is no longer tacky, for about two minutes. Form dough into a ball. This isn’t as hard as it looks but basically we are going to make an attempt to get 36 dough balls. So here is how we do it. Roll the large ball into one log, then cut that log evenly into three pieces. Then take those three pieces, and repeat the process and cut into additional three pieces.
Fill a medium bowl with two cups of hot water and add baking soda. Place baking sheet, baking soda water and cheese mixture on the counter you are working. Take each ball and flatten it and add one tablespoon into the middle of the ball.
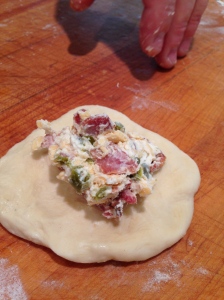
Then pinch together like a taco, then roll into a ball again.
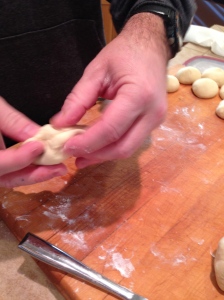
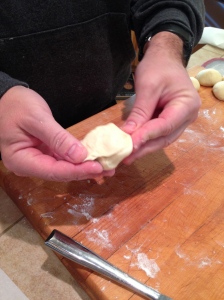
Make three at a time, then add the three into the warm water bath.
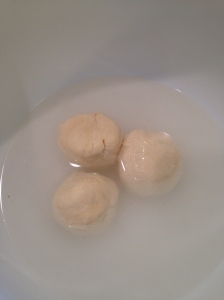
Make three more balls, then remove the ones in the warm water and let strain thru a slotted spoon, then put on parchment paper. Add more balls to the soaking warm water and repeat the process until you are done.
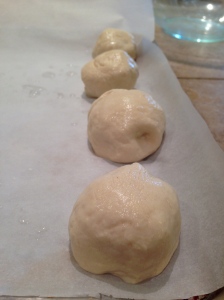
Once they are all put on the parchment paper, have your monkey wearing a pink Seahawk Jersey, Wilson#3 paint each ball with the egg wash. Do not over egg wash them. Just a little color then add your good sea salt to the top of each roll.
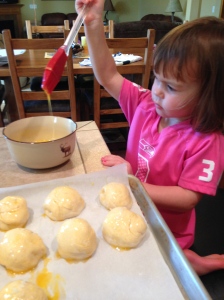
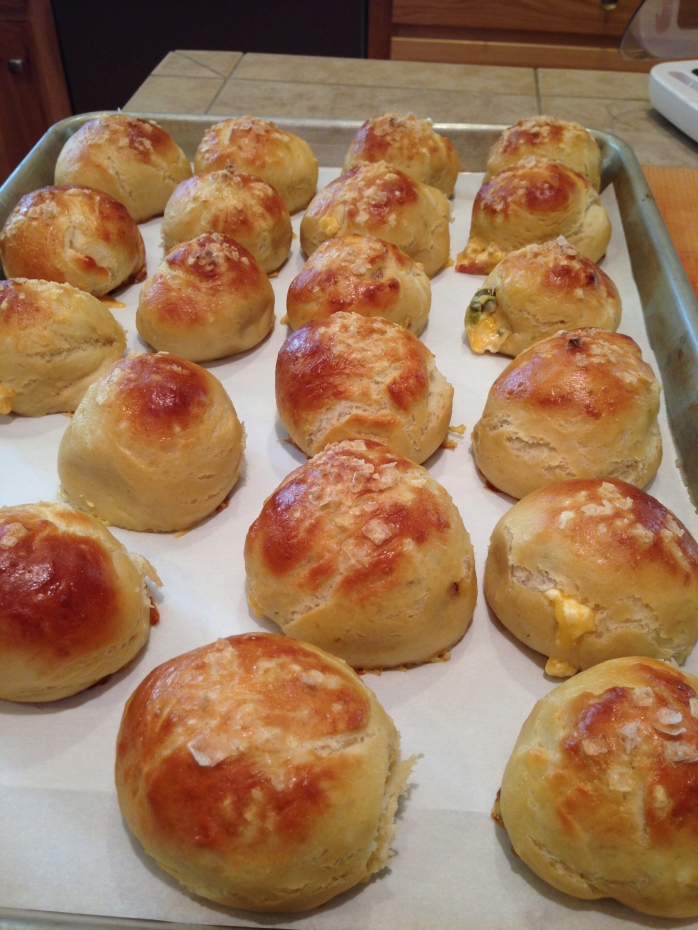
They should look a little like this.
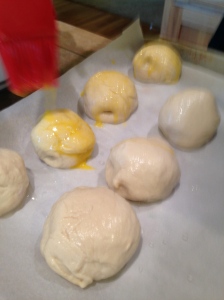
Bake for 8-10 minutes until the tops are brown.
At this point, your mouth will be drooling a little. Wait about 5 minutes or you will burn your mouth like I did.

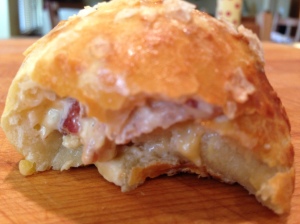
They were a big hit at the party. The pretzel bread was excellent and you can stuff these bad boys with a rock and they would taste good. I really liked the canned jalapeno, it made them warm, but not hot like fresh ones would be. This way everyone could enjoy them.
We are big Seahawk fans, so we enjoyed these with our friends and family. We got our first Super Bowl trophy and defeated the Bronco’s by a big margin. The next day I went on a diet.
Hope you try these bad boys.
Hunting Chef
Bok Choy with Garlic Soy Sauce

I told you all that I was going to make some more Bok Choy and true to my word made it the other night as a side dish. My youngest daughter who is three loves to run around the kitchen yelling BOK CHOY. She really gets me laughing. This is the easiest dish to prepare and it is loaded with flavor.
Ingredients
serves 4
- 3 baby bok choy cleaned and the 1/2″ of the end or root removed
- 4 garlic chopped
- 1 tablespoon of soy sauce
- 1 teaspoon of sugar
- 1/2 teaspoon of starch
- 2 tablespoon of water
- 1 tablespoon or splash of veggie oil
Steam the bok choy for five minutes or until done. While steaming the vegetable get a saute pan and add oil and garlic. Get a nice brown on the garlic and add soy, sugar, starch and water.
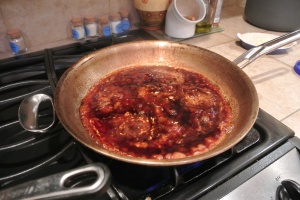
Stir and bring to a boil then turn off your heat.
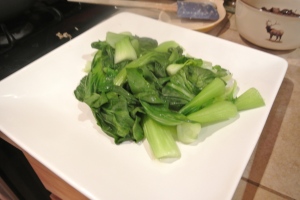
Pour your sauce over the Bok Choy, and serve.
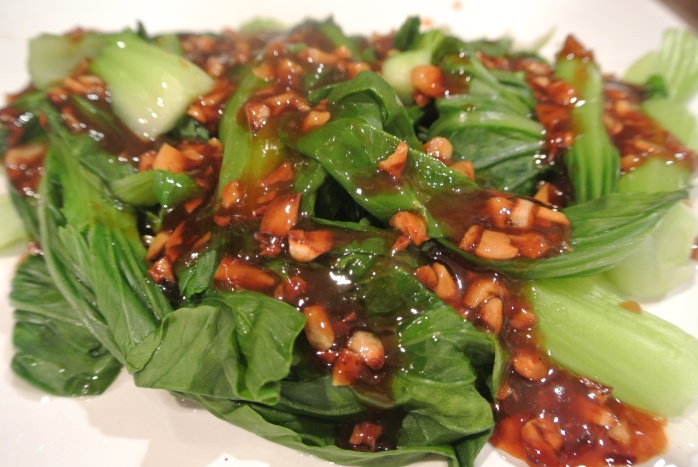
This is an easy dish, a has lots of flavor. I love garlic, so I think I put an extra clove into play here. This was an excellent side to any fish dish.
Eat your Veggies.
Hunting Chef
Venison Steak and Bok Choy Stir Fry

I went to the Asian grocery market to get some fresh sushi grade tuna, and some quail eggs for my tuna tartare recipe. I see this bok choy all over the place, and I saw it in Chinatown San Francisco last weekend and it got me wondering why the Chinese culture loves bok choy. So I grabbed some baby bok choy, and my friend Todd says to me “what are you going to do with that?” I replied “I don’t know yet, but it has to be good.” I got home, and hit my library of cooking books to try to find something interesting that I could play off of. I couldn’t find anything with venison and bok choy, but here is my rendition of a Chinese stir fry recipe.
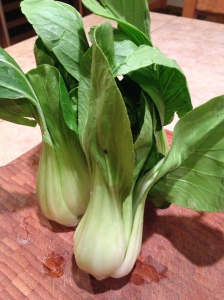
Ingredients
- 2 tablespoons soy sauce
- 2 tablespoons of rice vinegar
- 1 tablespoon of peanut butter
- 1 tablespoon of honey
- 2 garlic cloves, minced
- Course sea salt and ground pepper.
- 1-1.5 pounds of venison back strap (I soak it in buttermilk the night before)
- 1 tablespoon of cornstarch
- 1 teaspoon vegetable oil
- 3 baby bok choy, cut 1 inch thick crosswise
- 4 medium carrots, halved lengthwise, thinly sliced
- Cooking rice for serving
- 1/4 cup of peanuts chopped
Directions:
In a small bowl, mix soy sauce, vinegar, peanut butter, honey, and garlic; season with pepper.
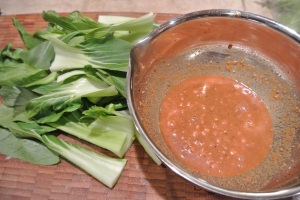
Cut your bok choy in 1/4’s lengthwise, as well as the carrots. Be very careful at this point, I had no ideas that bok choy brings the monkeys running to the kitchen.

Cut venison into 1/2 thick and 3 inch long pieces. In a bowl toss venison with cornstarch then season with salt and pepper.
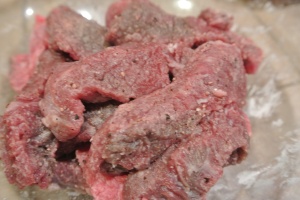
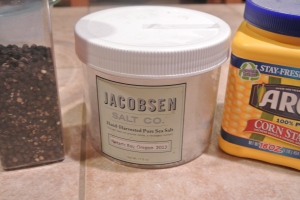
I am going to throw a shout out to one of the best salt companies in the world. It is made in Netarts, Oregon and is a fast growing tool for chefs throughout the world. It is a natural sea salt, but has great flavor. You can order it on-line.
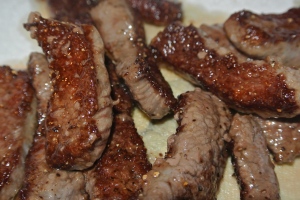
In a large non-stick skillet , heat oil over medium high heat. Add 1/2 of venison, cook, tossing until browned, 2 minutes. Do not over cook, just a quick sear. Transfer to plate, and repeat the process on remainder of venison.
Add the soy mixture, bok choy, and carrots to the same skillet. Fight the monkey for the bok choy.
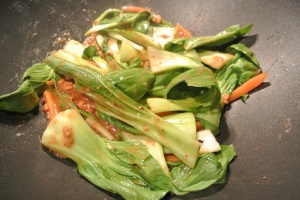
Cover the skillet, cook, tossing, until tender, around 4-5 minutes. Return the venison and cook for another 3 minutes.
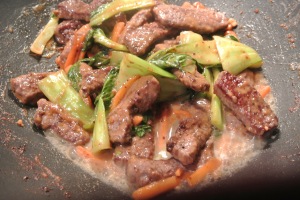
Serve to a serving dish, and sprinkle with nuts. Serve with rice.
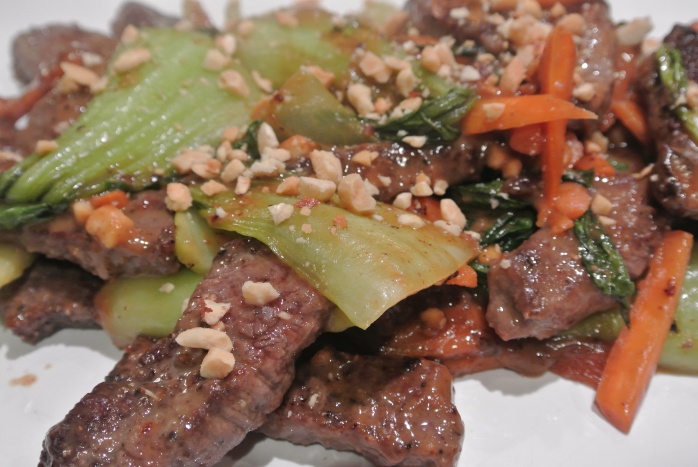
I hope you enjoy it, just another way to serve venison. Just make sure to do a quick sear, and not to over cook the venison. I am going to tell you something, bok choy rocks!! It renders down and takes on the flavors of the dish beautifully. I am going to serve some tonight for a dinner as well.
Hunting Chef
Pheasant Appetizer for Tanner

I have not blogged about Tanner, because quite frankly I tear up to much to see the computer. She passed away last fall, she was 17 years old and amazingly she died in her sleep which she probably did in efforts to keep me from having a broken heart. I do not know how many birds she pointed and retrieved in her life, but I am positive it is a big number. She had over a thousand birds shot over her at two years old. I think every hunter, if he is really lucky, gets one hunting dog that is good. If you are really super lucky, you get that once in a life time dog, and that was Tanner. I have had hundreds of hunters shoot over her, and she aways was the best dog of many on the field. She had a great nose, soft mouth, solid point, but what separated her from the rest was the long retrieves she could make. I would have clients wound pheasants that flew over the hill and out of site. She would go over the hill, and I would just say “Lets take a break and get some water, she will be back in five minutes.” The guys would always say “No way, that dog is returning with that bird, I dont even think I hit it.” Sometimes it would come down to a $20.00 bet and I must have won hundreds in the field over the years. I will tell some stories about her soon enough, I had my favorite artist, Val Warner do an art piece of Tanner and I when we were both young and it turned out excellent, I stare at it every day and miss my old friend.

This was one of my favorite appetizers, and easy to make. The curry sauce really carries the flavor of this simple dish. I do serve it with a couple of sauces, usually bbq sauce and the curry sauce. Nobody dips the pheasant into the bbq sauce twice.
- 1/2 cup of flour
- 2 teaspoon of salt
- 2 teaspoon of pepper
- 1 lb of boneless skinless pheasant breast cut into 3 x 1 inch strips, remove all lead!!!
- 3 eggs
- 1 cup of Italian seasoned bread crumbs
- 1/3 cup of chopped nuts, I like pecan or peanut.
- 1/2 cup vegetable oil
Curry Dip:
- 1/4 cup mayonnaise
- 1/4 cup sour cream
- 1/2 cup sliced green onions
- 2 teaspoons of curry powder
- 1 teaspoon of Worcestershire sauce
- 1/2 teaspoon of soy sauce
In a small mixing bowl, combine dip ingredients, cover with plastic wrap and chill.
In a large plastic food storage bag combine flour, salt and pepper. Add pheasant strips and shake to coat. In a shallow dish, lightly beat eggs. On a sheet of wax paper, combine bread crumbs and chopped nuts. Dip pheasant strips in egg mix, then dredge in bread crumbs to coat. In a skilled, heat oil over medium heat. Add coated pheasant strips and cook for 4-5 minutes until the meat is golden brown and turn over once. Drain on paper towels and serve with dip.
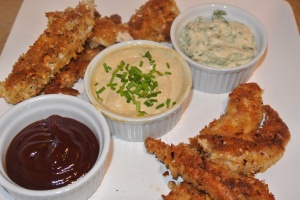
This is an appetizer that does not last long. I have a lot of hunters take this recipe home with them to show off. It is easy and the kids love them. I have clients that say this is the only way they cook pheasants and the kids cannot wait to go with dad into the field for pheasant hunting. The nuts and curry really carry this dish, but if you are allergic to nuts it is still a good way to go.
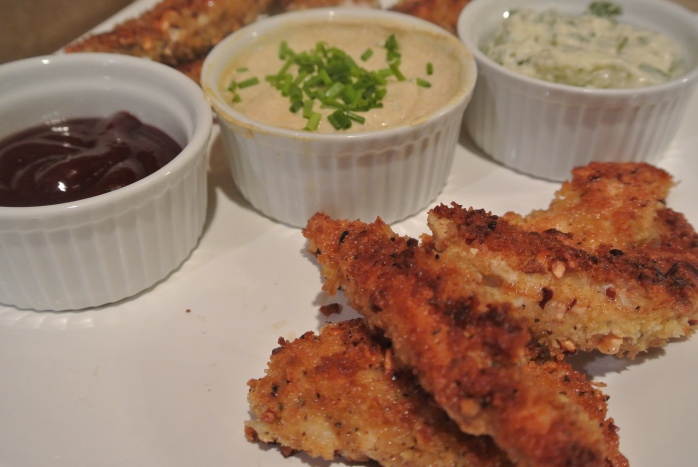
I hope you give it a try, get your shotgun and go get some upland game for supper.
Hunting Chef

by Val Warner. One of my favorite treasures that I own.
Venison Stroganoff

If you asked my oldest daughter Megan what one of my favorite dishes I love to eat about twice a year, without a doubt it would be the German Stroganoff. I just texted her at college and she nailed it. If it is made correctly, it is one of my good ole comfort food go to dishes.
I am going to give you a few tricks of the trade on this one, especially for those of you that do not like the taste of venison. I take back strap and soak it in buttermilk over night. It takes the gamey taste out, but more importantly it makes the meat a little more moist. Soak over night, then gently wash off under water and let your meat come to room temperature.
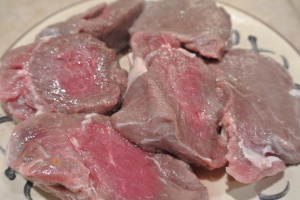
Cut all the fat off the venison, then add a dash of salt and pepper and dash of Worcestershire sauce on each venison medallion and let sit at room temperature. While you get your materials below in order.
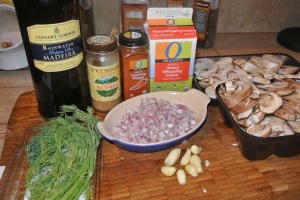
- 1.5 pounds of venison steaks, I prefer backstrap, cut into 1/4 inch strips.
- 4 tablespoons of butter
- 2 large shallots chopped
- 5 garlic chopped (you can reduce this if you are not a garlic fan, I love garlic in this dish)
- 1/2 lb of sliced cremini mushrooms
- 1/2 lb of sliced of white, or shitake, or my favorite morels. If you are not a mushroom fan, you can reduce to 1/4 of each.
- 1/4 teaspoon of nutmeg
- 2 tablespoon of fresh chopped dill
- 1/4 teaspoon of cayenne
- 1/2 cup of Madera cooking wine
- 1 cup of sour cream, keep at room temperature
- 1 pound of wide egg noodles.
- heavy cream (I use this for the left overs, or to touch up the sauce at the end)
Venison, cooks very fast, so begin with getting your water ready for the noodles, bring to a boil and add salt and noodles, takes about 8 minutes. Bring another pan to high heat and add the butter, when it begins frothing. Add the venison, do not over crowd the pan. Sear both sides until brown.
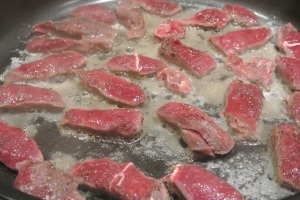
This only takes about 2 minutes on each side, remove venison so it does not over cook and keep on plate.
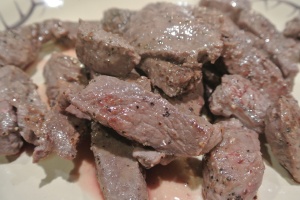
Once all the venison is cooked and removed, add the shallots, chopped garlic, and mushrooms to the same dish without removing any of the juices from the meat. Add one more tablespoon of butter to the pan as well.
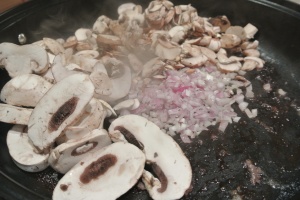
This takes about 4 minutes, but cook until the mushrooms are brown on high heat. Add Cayenne and Nutmeg and a couple of dashes of sea salt.
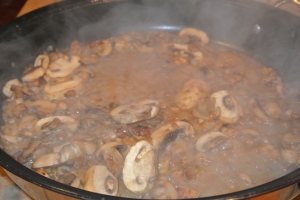
Add the Madera and watch the flame and eyebrows. Let it boil and once the Madera is mostly gone reduce heat to low. Add the venison you put aside to the dish with all the juices, and the fresh dill. Then turn the heat off. This is important because too much heat makes the sour cream curdle. slowly add the sour cream into the dish, and stir. You can add a little heavy cream to the dish if you think you need it, I rarely do though. I drain the noodles, add a little butter and parmesan cheese and stir. Plate the noodles, then spoon stroganoff over the noodles, sprinkle dill over the dish and serve.
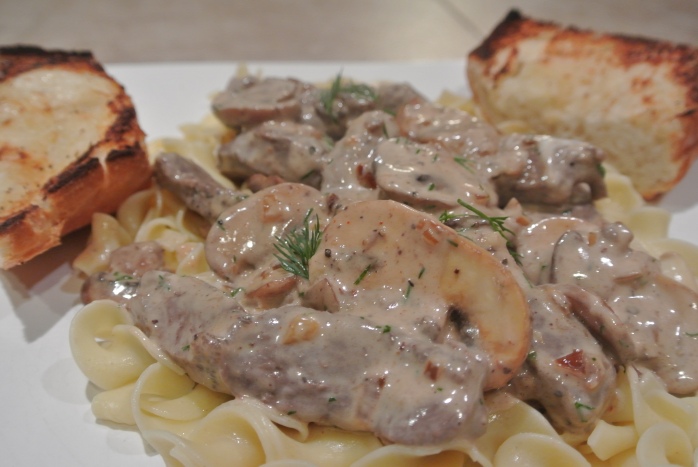
Now here is the pointer from the Hunting Chef. Left overs of this dish are even better the next day. So add noodles to Tupperware, then the remaining meat sauce. Stir with noodles, then add a little cream to bind the noodles. Like a tablespoon for two cups of leftovers. Amazing the next day as well.
I hope you try this one, you can use beef if you prefer. However, elk and deer are my “Go too” meats with this dish.
You make this dish, your wife will never ask why you go hunting. Trust me.
Hunting Chef


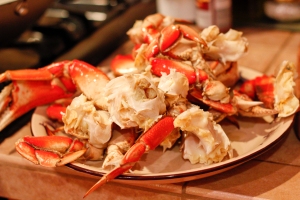
Dungeness Crab with Black Bean Sauce

Here we go folks…another great recipe from the “Silver Fox” Ken Silva. He has been after me for two years to make this recipe. Ken is a San Jose, California local. His grandparents lived in San Jose when farming was the main resource, not technology. He is one of the last true gentlemen in this world, a lot like my Uncle Julian who just recently passed away. They are both the rare breed that would lay down a jacket over a mud puddle for their wives if it was needed. That being said, Ken also has a passion for food and was born with good taste buds. We are always talking about food. Some people eat to live, Ken and I believe in the opposite.. we live to eat.

Oregon is famous for its crab resources. It is very easy to go out and toss crab pots and getting your limit in one run, or 50 crabs in one pot. The problem that we have is that how many crabs do you truly need? Cracking crabs can be torture after cracking your first five, also in my opinion you cannot freeze crab. If you do you will have to do a “crab bender” for five days eating it. My point is… find great recipes and great ways to cook crab so it is not rich, or dipped in butter. The Silver Fox, thru perseverance and patience, made me a believer to an entirely different world.
It is an easy recipe for two cooked crab, cannot grow wrong by doubling sauce size below:
- 1 Tablespoon of black bean sauce (found in the Asian department of grocery store).
- 1 Tablespoon of sugar
- 2 Tablespoon of soy sauce
- 3 Tablespoon of white wine
- 1 1/2 cups of chicken stock
- 1/3 cup of thin sliced ginger (make sure to use fresh and peel it before slicing) then smash each piece.
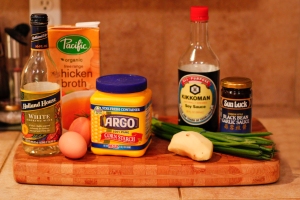
- Egg white, beaten with a teaspoon of water.
- 1 Table 1 spoon of corn starch thinned with one teaspoon of water.
- 3 Green onions sliced
- Before starting the dish pre heat oven to 350 degrees. Put cooked crab on cookie sheet and heat for 10 minutes while you prepare the sauce.
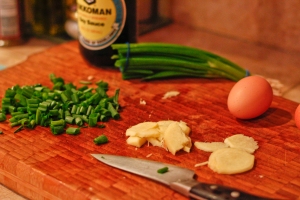
Add corn starch to wok with the other previous ingredients, remove the crab from oven and add to wok and stir. Add green onions. Toss the dish for 3 minutes.
Remove the crab dish from the wok by pouring it onto serving platter. Pour remainder sauce over the crab.
Plate and serve.
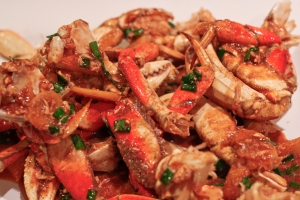
We devoured the crab like hungry otters. Ken was correct, this was amazing. Crack the crab and dip it in the sauce, refreshing and full of flavor. I am already craving it again, perhaps I do need to harvest about 30 crab this weekend.
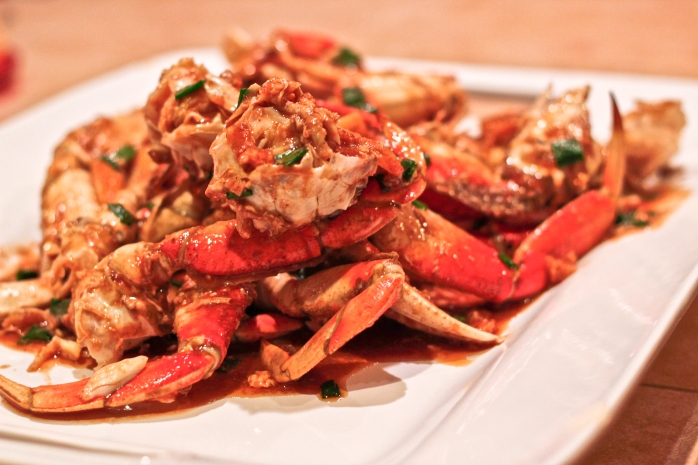
Thank you Silver Fox for being apart of my blog and sharing your old recipes from your family and friends. They are very good (I make Silver Fox meat sauce twice a month).
I hope you all try this one, it is a winner.
Hunting Chef


Recent Comments